The Pond Sizing tool is used to size the rating curve for the selected reservoir. This tool aims to get a rating curve table that can match the peak flow under different runs between the existing scenario (target scenario) and the current scenario (active scenario).
Please note that the sizing results will replace the current properties of the selected reservoir. In other words, the sizing result of the Rating Curve will be used, the Shape of the reservoir will be set as Unknown and the Discharge of the reservoir will be set as Manual Input. Therefore, it is suggested to save the current properties of the selected reservoir in another place before running the tool.
To open the tool, click the Pond Sizing button ![]() in the Simulation ribbon. The Pond Sizing window will pop up.
in the Simulation ribbon. The Pond Sizing window will pop up.
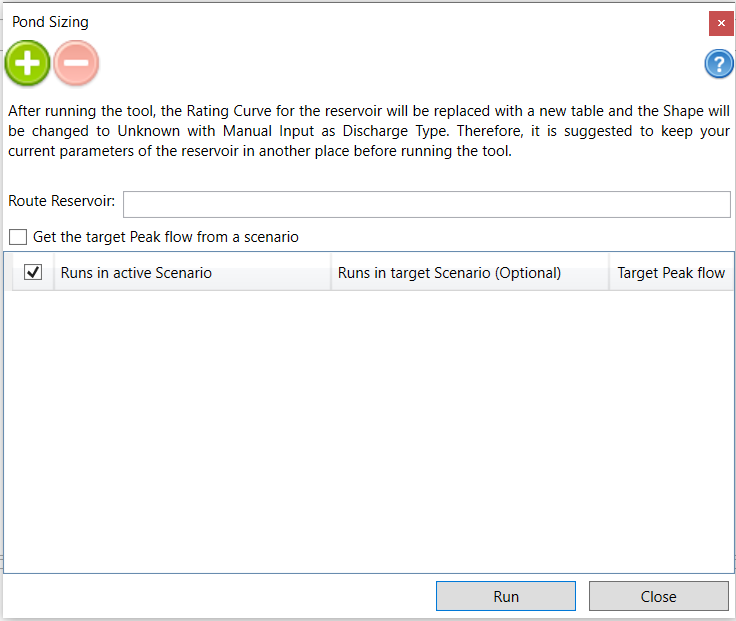
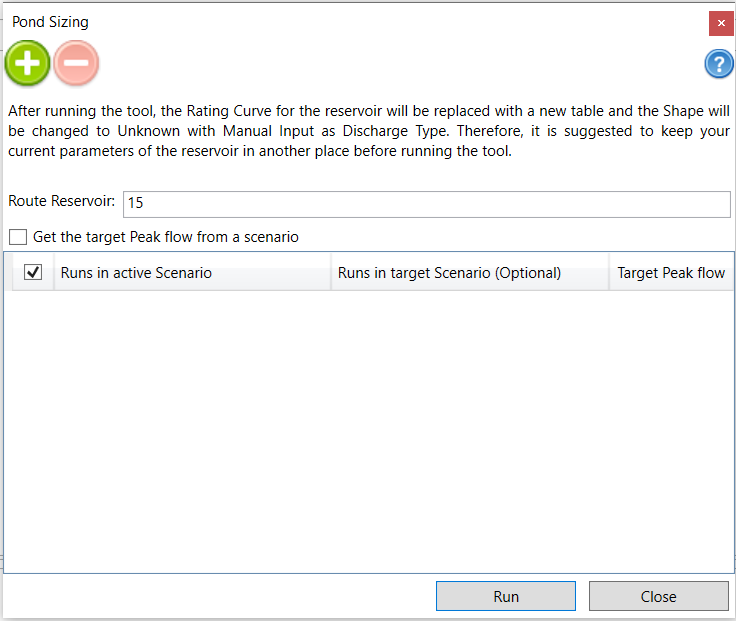
The field Route Reservoir is the NHYD of the pond to be sized. Keeping the tool window open, users can select the desired reservoir on the map and its NHYD will be read and written into this field. Users can also directly type or edit the NHYD in the field. If a reservoir is selected before opening the Pond Sizing tool, the NHYD of the selected reservoir will be populated in this field after opening the Pond Sizing tool.
Before running the tool, users should set up the tool that tells the target peak flow for the selected reservoir under desired runs. To add a row, click the  button. To delete a row, select the row to be deleted and click the
  button.
When the checkbox Get the target peak flow from a scenario is on, users will see Target Scenario and Target Command. Users can choose which scenario and which command from that target scenario to be used for populating Target Peak Flow. Click the Add button next to the Target Command. The tool will try to match the runs in the active scenario and target scenario based on the run names and get peak flow of the Target Command for matched runs.
Runs in active scenario are the runs of the current scenario where the reservoir to be sized. Users can select the runs from the drop-down list.
Runs in target scenario (optional) are the runs of the target scenario where users can use it to get the Target Peak Flow. Users can select the runs from the drop-down list, when the target scenario and target command are selected and added to the tool. When it is empty or user deletes the field content, user can manually type values in Target Peak Flow.
Please follow the instruction below for a general procedure of how to use the tool:
1. Create a project that has at least two scenario. One is used for existing conditions (target scenario). The other has reservoirs whose rating curve is to be sized.
2. Go to the scenario that has reservoirs to be sized. This scenario is also called active scenario.
3. Select the reservoir to be sized on the active scenario and click the Pond Sizing tool. The NHYD of the reservoir will be written to the Route Reservoir field. Please note when there are multiple reservoirs to be sized, start from the most upstream reservoir. When its rating curve is sized and tested, continue to size the other reservoirs along the downstream.
4. Check on the box Get the target peak flow from a scenario. Select the scenario for existing conditions in the Target Scenario and select the desired command in the Target Command. The drop-down list of the Target Command has all the available commands in the Target Scenario. Usually, the target command is the one that is the corresponsive command on the active scenario that will receive the outflow from the reservoir. The purpose of the sizing tool is to size the pond in the active scenario, so the peak flow of its outflow will be similar to the peak flow of the target command in the target scenario.
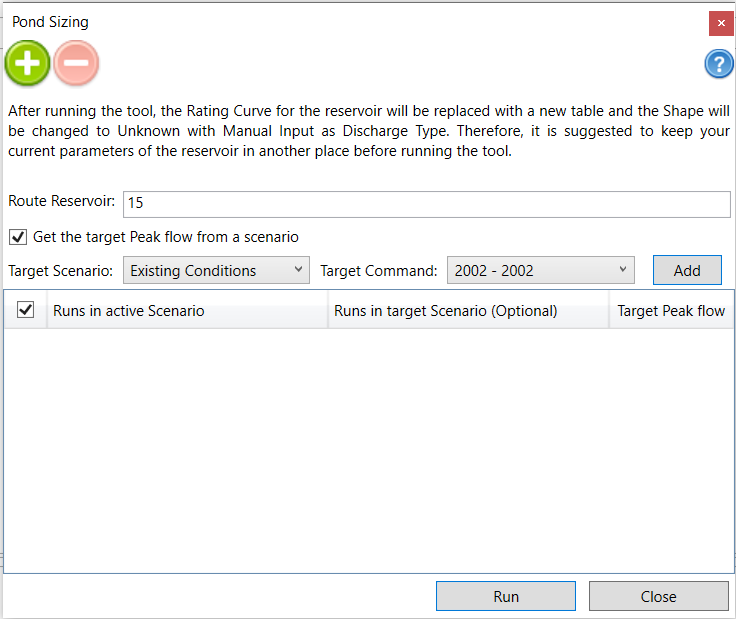
5. Click the Add button next to the Target Command. The tool will try to match the runs in the active scenario and target scenario based on the run names and will get the target peak flow of the target commands of matched runs.
- User can change the run by selecting different runs in the drop-down list
- User can delete the field of the Runs in target scenario (optional) and type manually a value in the Target Peak Flow
- User can check or uncheck the box in front of each row to indicate whether this run and the target peak flow will be used for sizing or not.
![]()
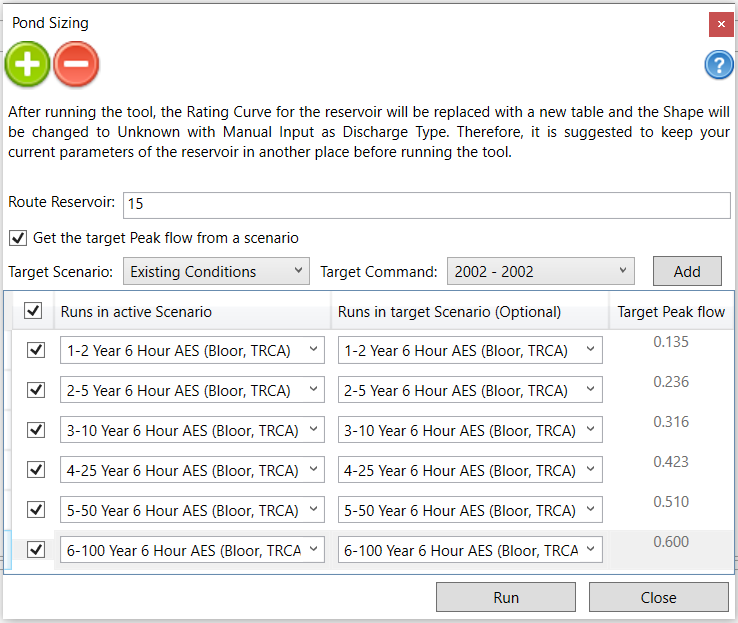
6. Click the Run button. The tool will run and size the pond for each selected run and target peak flow. When the sizing is finished, the sizing result of the Rating Curve will be used for the reservoir, the Shape of the reservoir will be set as Unknown and the Discharge of the reservoir will be set as Manual Input. Therefore, it is suggested to save the current properties of the selected reservoir in another place before running the tool.
7. Re-run the model with the sized pond and make adjustments if needed. Please note that the sizing result is only for reference purposes. It is the user’s responsibility to check and verify the results.
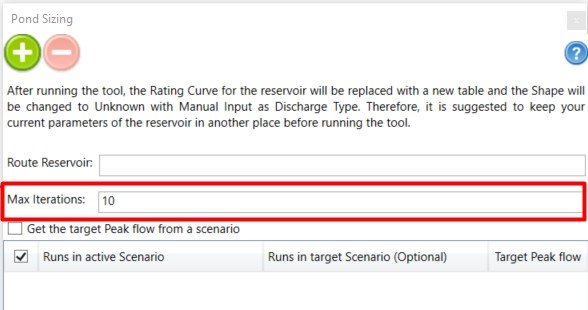
it’s worth noting that the “Maximum Number of Iterations” feature is a new addition to the Pond Sizing tool, and it has been implemented in newer versions to enhance user control and performance. This option allows users to specify the maximum number of iterations the tool should perform to achieve the desired results. By default, this value is set to 10, but users now have the ability to adjust it according to their specific project requirements and computational constraints. This new functionality offers greater flexibility and control in optimizing the Pond Sizing process and aligning it with individual project needs, making it a valuable addition to the tool’s capabilities in newer versions.