
Links between hydrologic objects can also be created in Map View. To create a link:
- Click the Add Link button in
![]() GIS tab or choose the Add -> Link menu from the map context menu. Notice the cursor changes to cross hair shape.
GIS tab or choose the Add -> Link menu from the map context menu. Notice the cursor changes to cross hair shape. - Move the cursor to the hydrologic object that will be the source of the link. Notice the hydrologic object will flash in red, which indicates the hydrologic object is eligible for the link source. If the hydrologic object is not eligible, the hydrologic object won’t flash. For example, a NasHyd which already has been linked to an AddHyd is not eligible as the link source as it can only have one output link. The connection rules are given Table 6-3.
- Click the desired hydrologic object to set it as the source of the link and move the cursor to the hydrologic object it will be connected to. Notice that a red line will appear to connect from the hydrologic object to the location of the cursor as shown below. This line represents the link that will be added.
![]()
 GIS tab or choose the Add -> Link menu from the map context menu. Notice the cursor changes to cross hair shape.
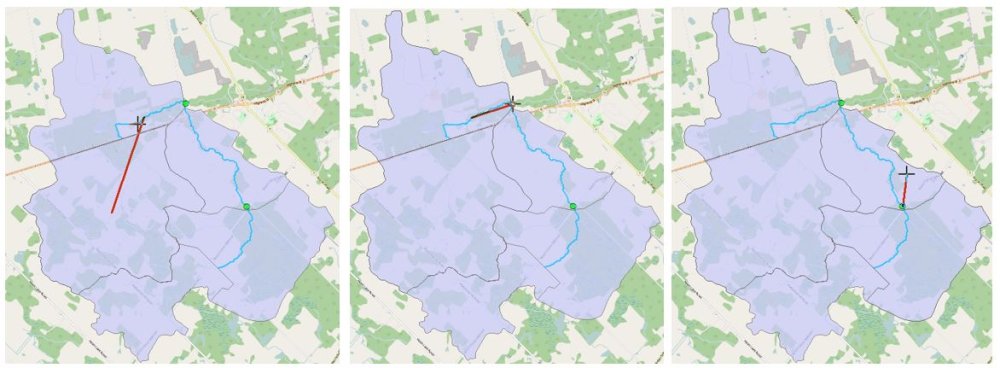
The starting point of the line is determined based on the shape of the hydrologic object. For polygon-hydrologic object, the starting point will be the centroid of the polygon. For polyline-hydrologic object, the starting point will be the middle point of the polyline. The starting point of a point-hydrologic object will be where the point is located. In TatukGIS, the connecting line appears only after the source and destination points are selected.
- To select the destination object feature, move the cursor on top of that feature. If that feature flashes, click it to add the link. If the number of the input link of that hydrologic object reaches the limitation, that hydrologic object won’t flash, and the link can’t be added.
Same as the starting point, the ending point of the link is also determined by the shape of that hydrologic object. The Middle point is used for polylines.

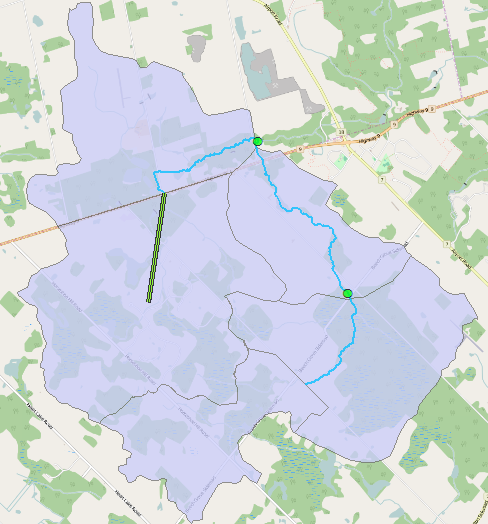
A new feature is added to CatchmentLine layer for the new link as shown below. The symbol may be different based on your settings.
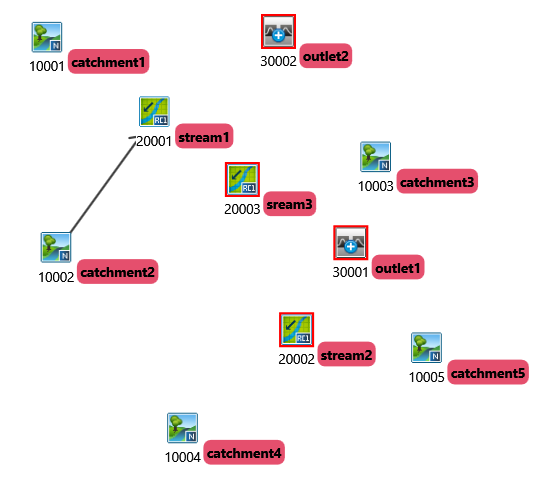
Once the link is added, the output property of the starting hydrologic object is updated automatically to the output hydrologic object and a link is also added in the schematic view as shown below.
- To restart the process in the middle, press the ESC key and the starting point will be cleared.
- To remove the link, click the edit tool, select the link on map, and press the DELETE key. A confirmation window would appear as shown below. Click Yes to confirm the deletion. The link in the schematic view will also be removed and the outlet property will be set to empty.