In the General tab, users can define the basic properties of the task.
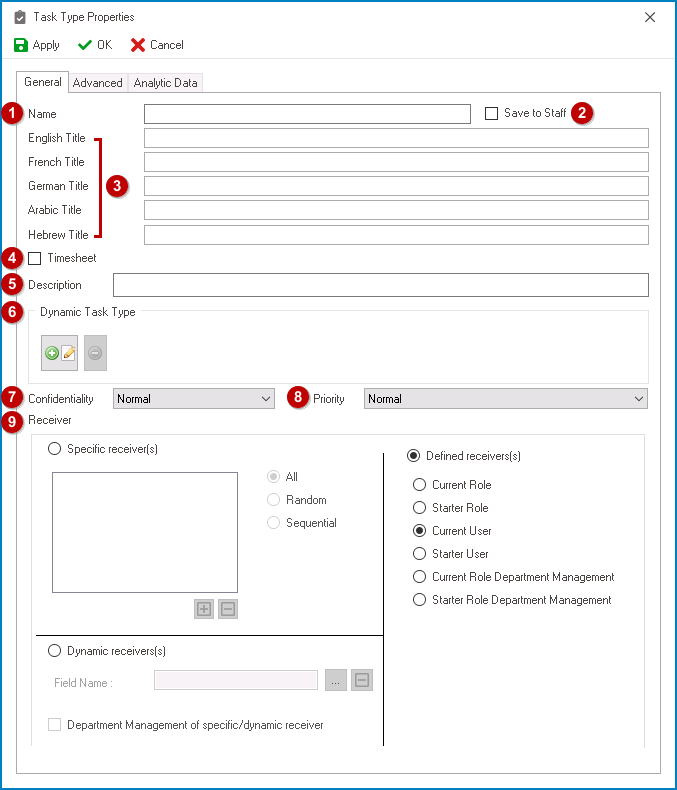
- Name: This is a text field that allows users to input the name of the task. It is a mandatory field.
- There are the following rules determining the validity of names:
- A valid name can contain letters, numbers, and the underscore symbol. It cannot, however, contain spaces or other special characters. It also cannot begin with a number.
- A task type must have a unique name. It cannot have the same name as another task type in the application.
- There are the following rules determining the validity of names:
- Save to Staff: This is a checkbox which, if selected, allows users to change the defined receiver of the task to the current role.
- Title: This is a text field that allows users to input the title of the task.
- The title inputted in this field will be used to identify the task in the DBP web application.
![]()
- Users, however, can also change this displayed title using the Subject Info Template field in the Advanced tab.
- Unlike with names, there are no rules determining the validity of titles.
- The title inputted in this field will be used to identify the task in the DBP web application.

- Timesheet: This is a checkbox which, if selected, allows users to enable a timesheet for the task.
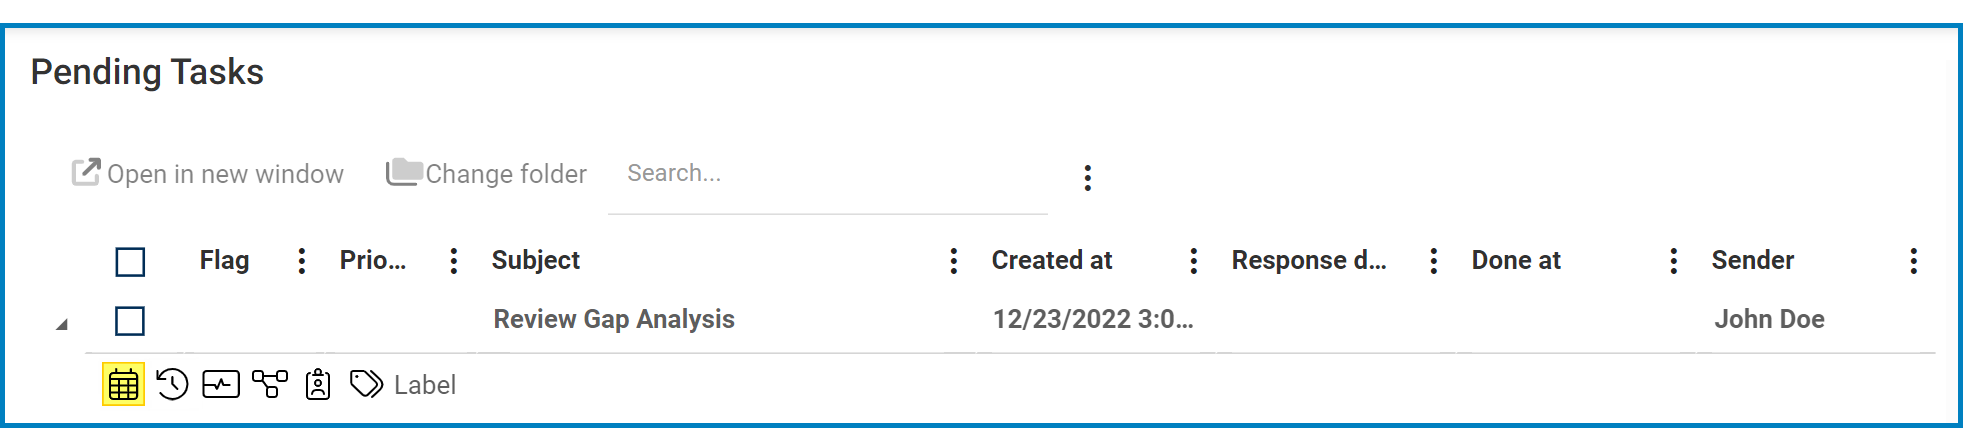
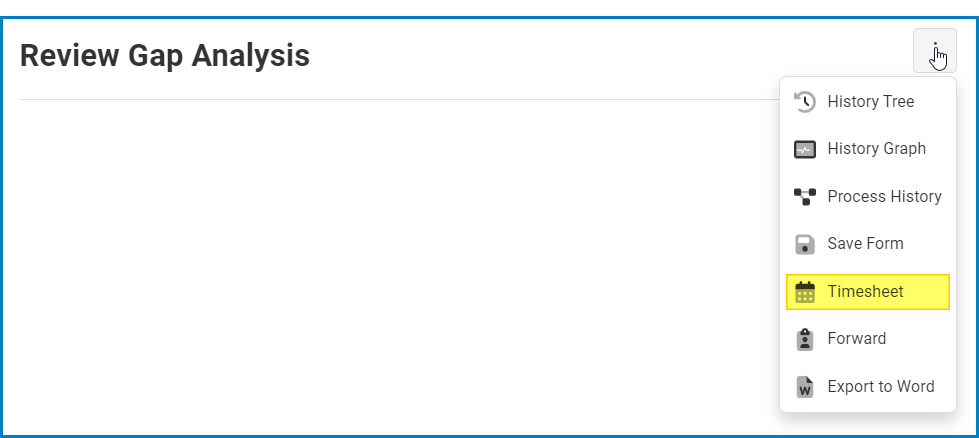
- In the web application, there are two ways to access the timesheet for a given task:
- From the task context menu:
![]()
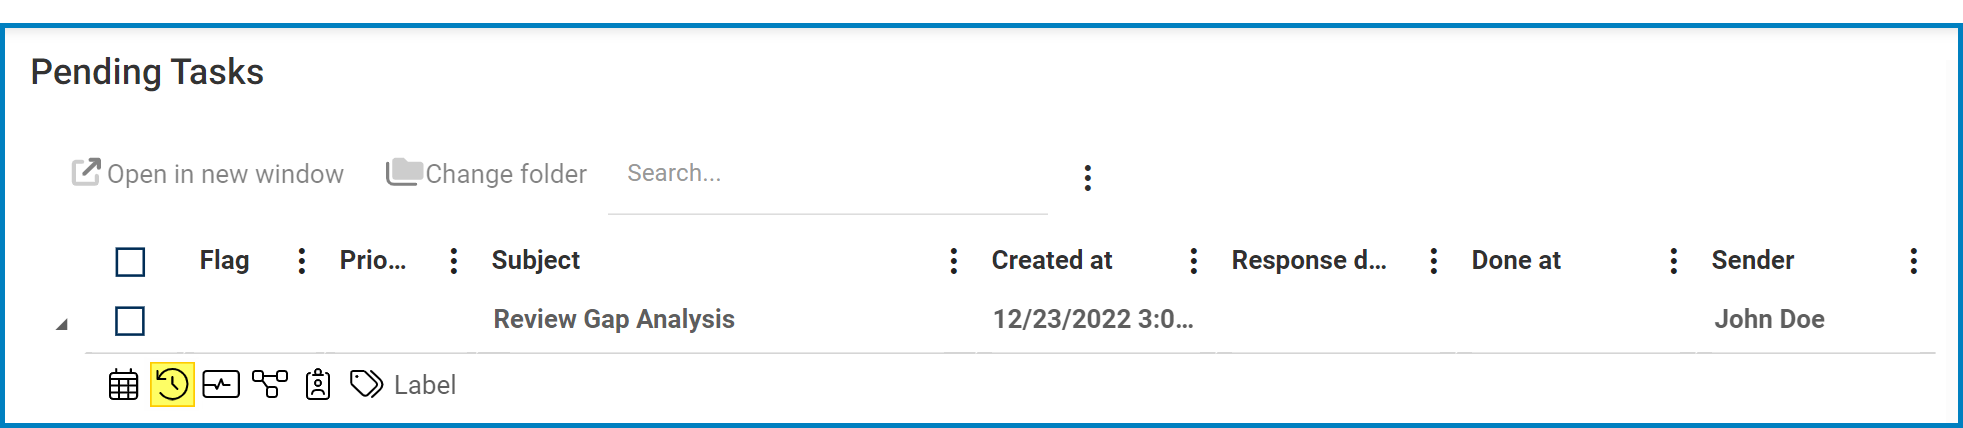
- From the task form:
![]()
- From the task context menu:
- For more information on the features of the Timesheet, click here.
- In the web application, there are two ways to access the timesheet for a given task:
- Description: This is a text field that allows users to input a description for the task.
- In the web application, the task description can be accessed via the History Tree tool.
![]()
- In the web application, the task description can be accessed via the History Tree tool.
- Dynamic Task Type: In this section, users can manage the dynamic task types linked to the task.
- To create a dynamic task type, select the
![]() button.
button.
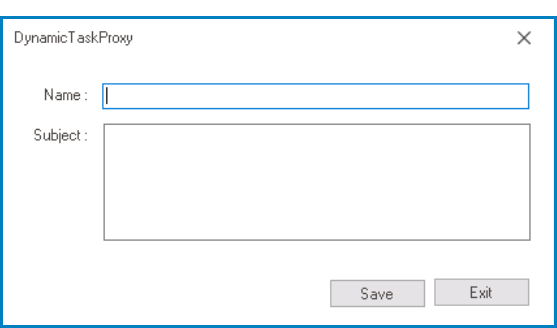
- It will display the Dynamic Task Proxy window, in which users can define the name and subject of the dynamic task type.
![]()
- Save or Exit: To save the dynamic task type, click on the Save button. To exit the window, click on the Exit button.
- To further define the dynamic task type, users can then switch to the Advanced tab. Users, however, must first apply their changes and close the Task Type Properties window.
- It will display the Dynamic Task Proxy window, in which users can define the name and subject of the dynamic task type.
- To delete a dynamic task type, select the
![]() button.
button.
- To create a dynamic task type, select the
- Confidentiality: This is a single-select dropdown field that allows users to select the confidentiality level of the task.
- Confidentiality Levels: Normal or Confidential.
- If a task is set as normal, it will be shown in the web application as a standard task without any marker or indication of its confidentiality level.
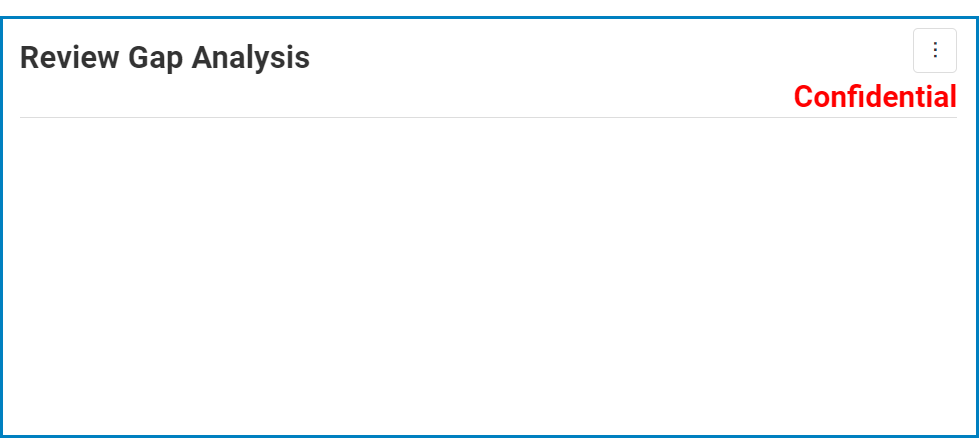
- If a task is set as confidential, there will be a marker at the top of the form.
![]()
- Confidentiality Levels: Normal or Confidential.
- Priority: This is a single-select dropdown field that allows users to select the priority level of the task.
- Priority Levels: Normal, Low, Medium, High, or Urgent.
- If a task is set as normal, it will be shown in the web application as a standard task without any marker or indication of its priority level.
- If a task is not set as normal, its priority level will be indicated in the task list.
![]()
- Priority Levels: Normal, Low, Medium, High, or Urgent.

- Receiver: In this section, users can define the receiver(s) of the task. Users can choose to set either specific receivers, defined receivers, or dynamic receivers.
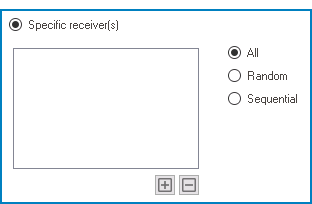
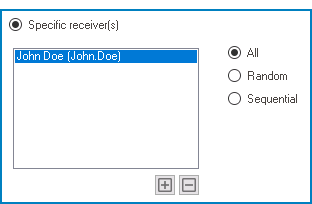
- Specific Receiver(s): These receivers are individual users, roles, or groups that are explicitly identified by the user.
![]()
![]() : This button allows users to add a new receiver.
: This button allows users to add a new receiver.
- It will display the Receivers window, from which users can select the specific receiver.
- For more details on the Receivers window, see previous instance.
- Once a receiver has been added, it will populate the Specific Receiver(s) field.
![]()
- It will display the Receivers window, from which users can select the specific receiver.
![]() : This button allows users to remove a receiver.
: This button allows users to remove a receiver.- All: This option allows for the task to be sent to all selected recipients.
- Random: This option allows for the task to be sent randomly to one of the selected recipients.
- Sequential: This option allows for the task to be sent to sequentially to the selected recipients.
- For example, there is a process with four tasks. For each task, the same four receivers are selected. If users opt for these task to be sent sequentially, the tasks will be divided as follows.
- Task A will be sent to the first receiver in the list.
- Task B will be sent to the second receiver in the list.
- Task C will be sent to the third receiver in the list.
- Task D will be sent to the fourth receiver in the list.
- Essentially, this option acts as way for work to be distributed equally among receivers.
- For example, there is a process with four tasks. For each task, the same four receivers are selected. If users opt for these task to be sent sequentially, the tasks will be divided as follows.
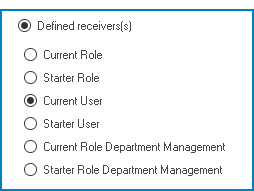
- Defined Receiver(s): These receivers are not explicitly identified by the user. Instead, they are defined by the system based on certain criteria or conditions.
![]()
- Users can choose one of the following criteria:
- Current Role: This option allows for the task to be sent to the current role.
- Starter Role: This option allows for the task to be sent to the starter role.
- Current User: This option allows for the task to be sent to the current user.
- Starter User: This option allows for the task to be sent to the starter user.
- Current Role Department Management: This option allows for the task to be sent to the current department manager.
- A task can only be assigned to the current department manager if the previous step in the workflow was assigned to a role.
- Starter Role Department Management: This option allows for the task to be sent to the starter department manager.
- Depending on the criteria selected, the system will automatically assign the task to the appropriate receiver(s).
- For general reference:
- A starter user or role refers to the person or role responsible for initiating a workflow or process.
- A current user or role refers to the person or role currently working on or interacting with the workflow or process.
- Users can choose one of the following criteria:
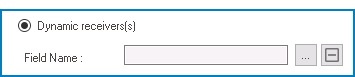
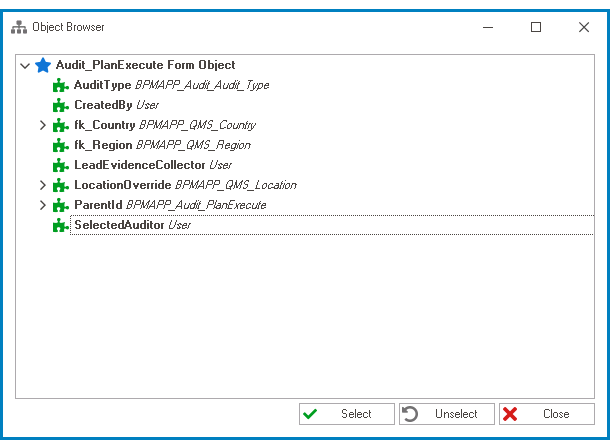
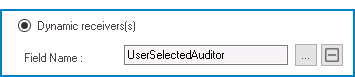
- Dynamic Receiver(s): These receivers are explicitly identified by the user in the web application. From a field in the form, the user can select the receiver to whom they want the task to be sent. The user must select a receiver before they can submit the form.
![]()
![]() : This button allows users to select the field or attribute in which the receiver(s) will be identified.
: This button allows users to select the field or attribute in which the receiver(s) will be identified.
- It will display the Object Browser window. In this window, users can access a list of the associated entity’s attributes.
![]()
- It will display the Object Browser window. In this window, users can access a list of the associated entity’s attributes.
- Once an attribute has been selected, it will populate the Field Name box.
![]()
![]() : This button allows users to remove the field.
: This button allows users to remove the field.
- Department Management of Specific/Dynamic Receiver: This is a checkbox which, if selected, allows for the department manager of the receiving unit to be included in the task assignment.
- Specific Receiver(s): These receivers are individual users, roles, or groups that are explicitly identified by the user.