
In this section, we will provide comprehensive step-by-step instructions to guide users through the process of configuring and implementing digital signatures for specific events within their workflow.
Step 1 – Configure Designer Settings
- Launch the Designer program and log in.
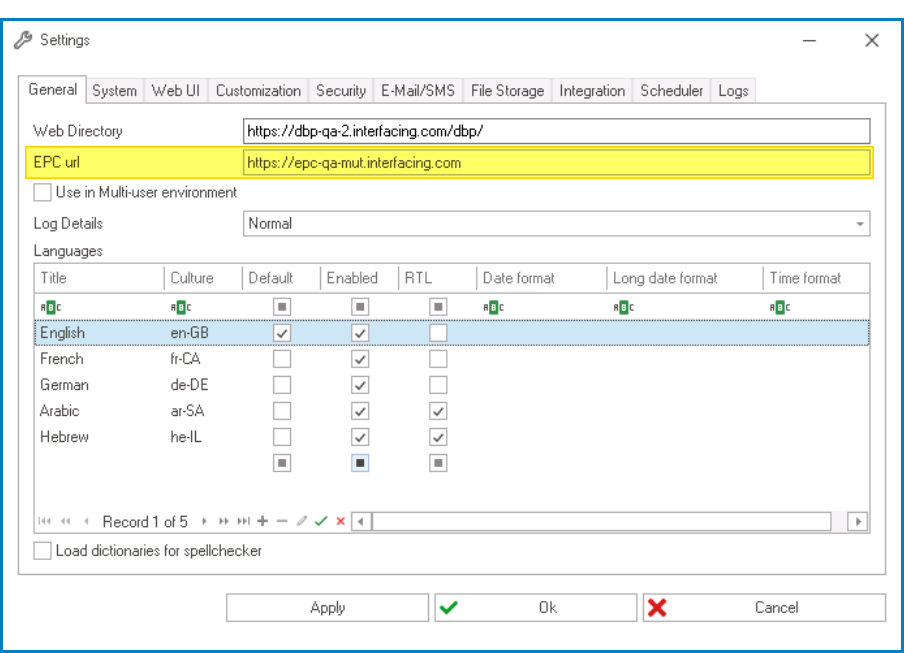
- In the menu bar, click on the Settings button. This will open the Settings window.
- In the General tab of the Settings window:
- Enter the URL of the EPC server associated with the DBP web application.
- For example: https://epc-qa-mut.interfacing.com
![]()
- For example: https://epc-qa-mut.interfacing.com
- Enter the URL of the EPC server associated with the DBP web application.
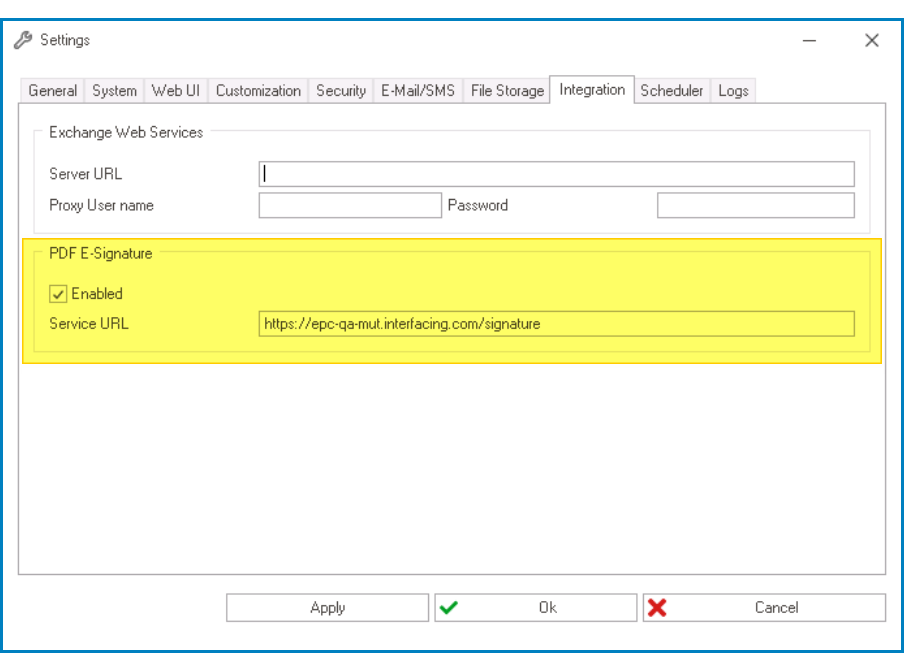
- In the Integration tab of the Settings window:
- Select the Enabled checkbox to activate the PDF E-Signature functionality.
- Enter the EPC server URL with ‘/signature’ appended to it to call the service.
- For example: https://epc-qa-mut.interfacing.com/signature
![]()
- For example: https://epc-qa-mut.interfacing.com/signature
- Finally, click the OK button to save your changes and close the window.
Step 2 – Configure DBP Settings
- Open the DBP web application and log in.
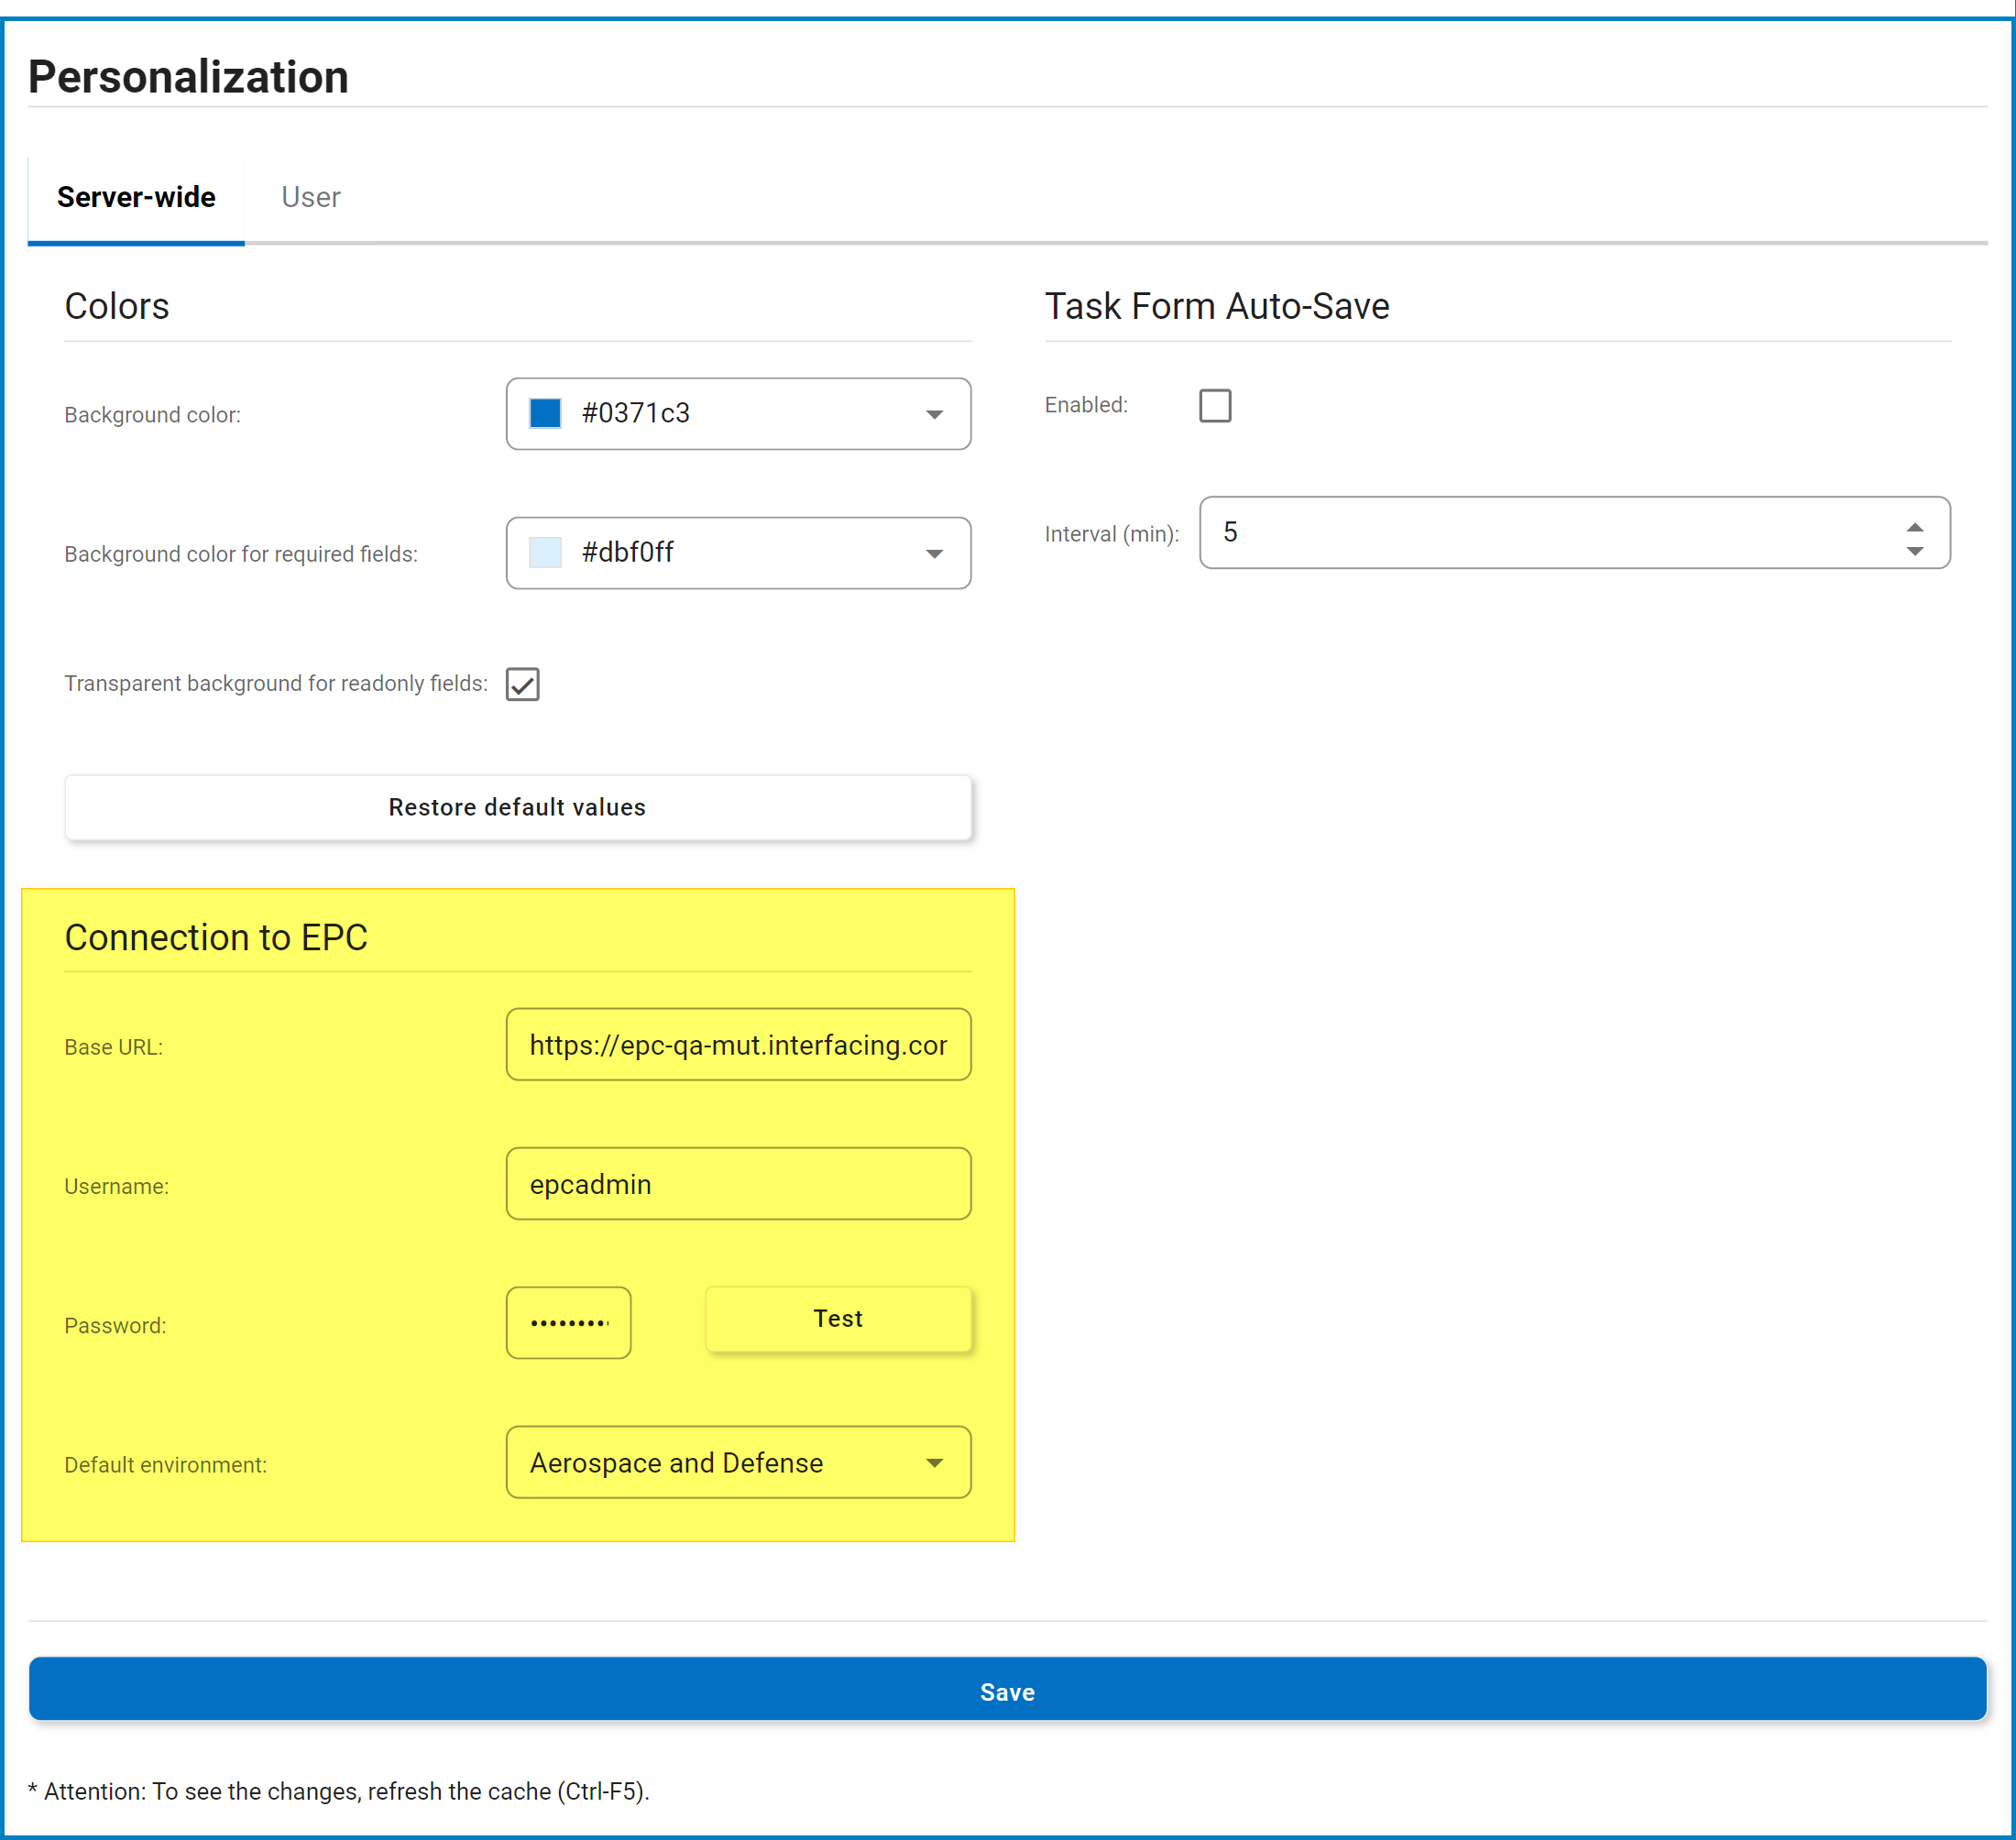
- In the menu bar, click on Facilities, then select Settings from the dropdown. This will open the Personalization form.
- In the Personalization form, under the Connection to EPC category, set up a connection to the specified EPC server.
- Provide the base EPC server URL (the same URL used in Designer).
- Enter the username and password of an EPC administrator.
- Click the Test button to verify the provided credentials.
- Select an environment from which data will be pulled.
![]()
- Finally, click the Save button to save your settings and establish the EPC connection.
Step 3 – Upload User Signatures
- From the DBP web application’s Home Page, navigate to the Admin application.
- Access the Organization Management module.
- In the Users tab, ensure that for the users requiring a signature, an image file (PNG format) of their signature has been uploaded.
![]()
- These uploaded images will be used to display the users’ signatures in the generated PDF files.

Step 4 – Configure Human Event Signature Requirement
- Return to the Designer program, and once there:
- Navigate to Processes > Process Design (double-click to open). This will open the Process Edit tab.
- In the Process Edit tab, double-click on the latest version of your process. This will open the Process Designer in a new tab.
- In the Process Designer, select the human event (transition arrow) for which you want to require a signature.
- The associated properties will be displayed in the Properties panel.
- The associated properties will be displayed in the Properties panel.
- Next to the Event field in the panel, click on the
![]() button. This will open the Event Properties window.
button. This will open the Event Properties window. - In the General tab of the Event Properties window, select the Signature Required checkbox.
![]()
- Click the OK button to save your changes and close the window.
- A message will remind you to assign a template to the appropriate form behavior.
- Click the Save button to save the process.
- Finally, click the Publish button to publish the process.

Step 5 – Assign Template to Form Behavior
- While still in the Designer program:
- Navigate to Forms > Form Behavior (double-click to open). This will display the Form Behavior tab.
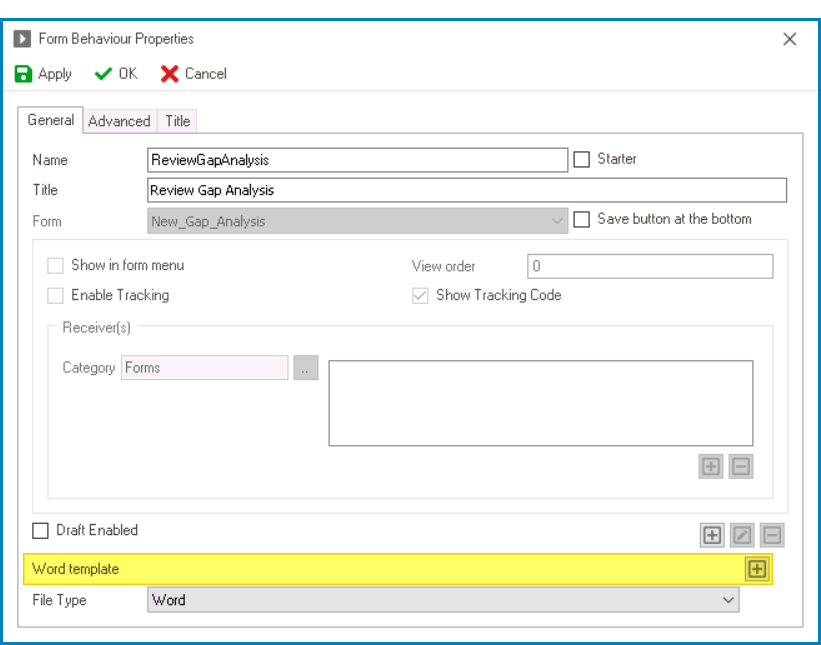
- Inside the Form Behavior tab, double-click on the form behavior for the first task in the workflow with a signature requirement. This will open the Form Behavior Properties window.
- In the General tab of the Form Behavior Properties window, click on the
![]() button next to the Word Template field. This will open the Word Template Editor window.
button next to the Word Template field. This will open the Word Template Editor window.
![]()
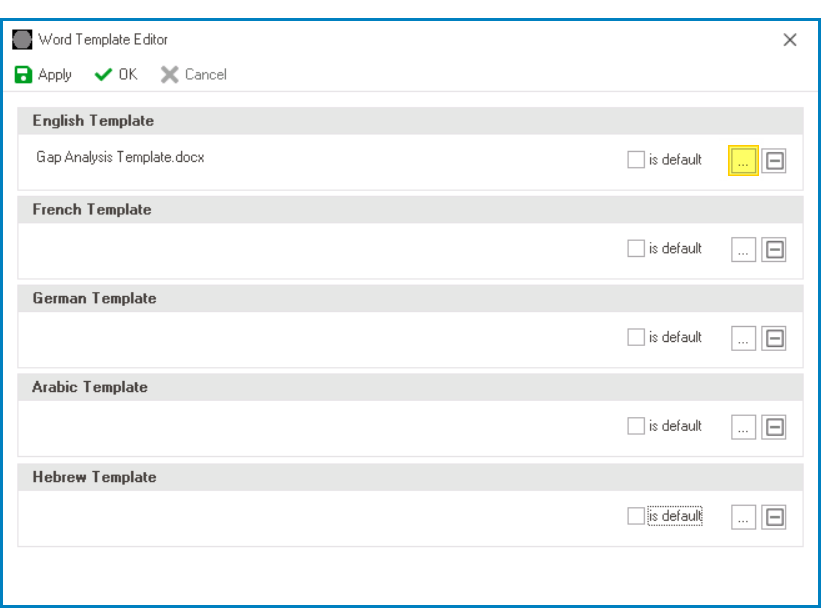
- In the Word Template Editor window:
- Upload the template file you intend to use.
- Click on the OK button to save your changes and close the window.
![]()
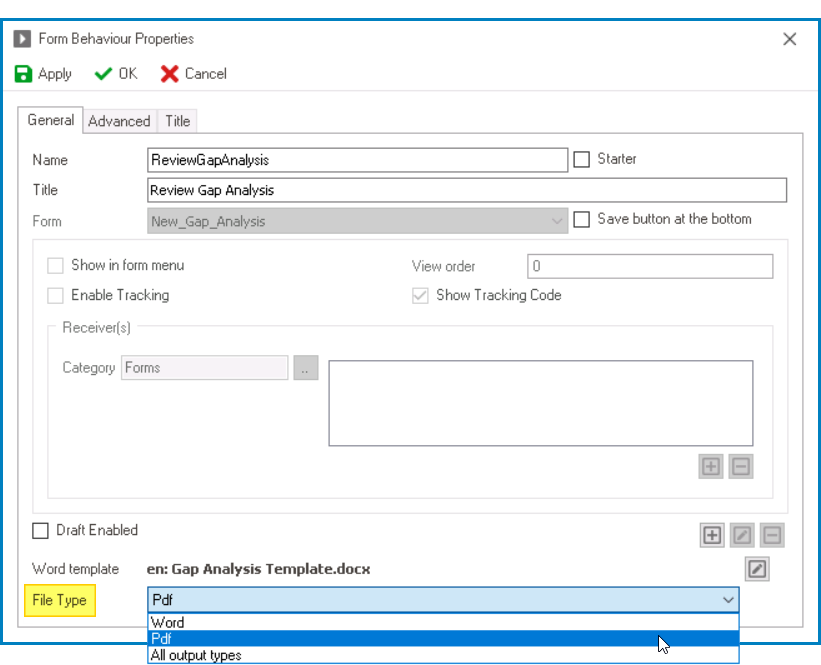
- In the General tab of the Form Behavior Properties window:
- Select PDF from the File Type dropdown.
- Click on the OK button to save your changes and close the window.
![]()
Step 6 – Deploy Application to Web
- In the menu bar of the Designer program, click on the Deploy button to deploy the application. This action ensures that the latest changes, including the configured digital signature(s), are accessible on the web.