
To create tree controls and their associated attributes, follow these steps:
- Create Tree Entity
- Access Entity Properties
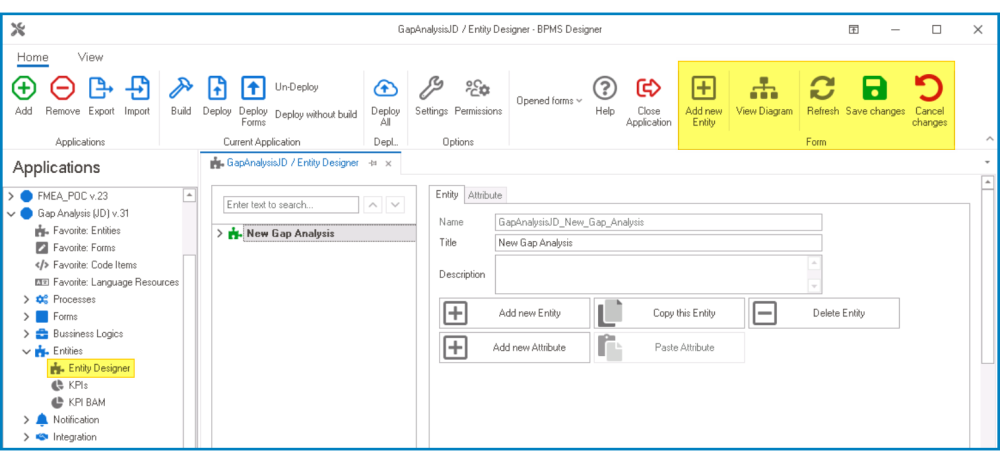
- From the Application Tree, navigate to Entities > Entity Designer (double-click to open). It will display the Entity Designer tab and expand the menu bar to show additional options.
![]()
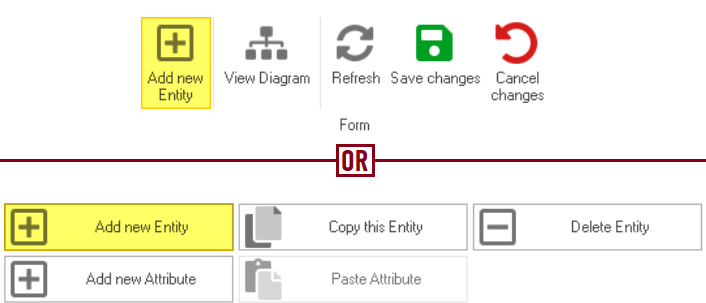
- From either the Entity tab or the menu bar, select the Add New Entity option. It will display a set of fields in which you can define the properties of the new entity.
![]()
- From the Application Tree, navigate to Entities > Entity Designer (double-click to open). It will display the Entity Designer tab and expand the menu bar to show additional options.
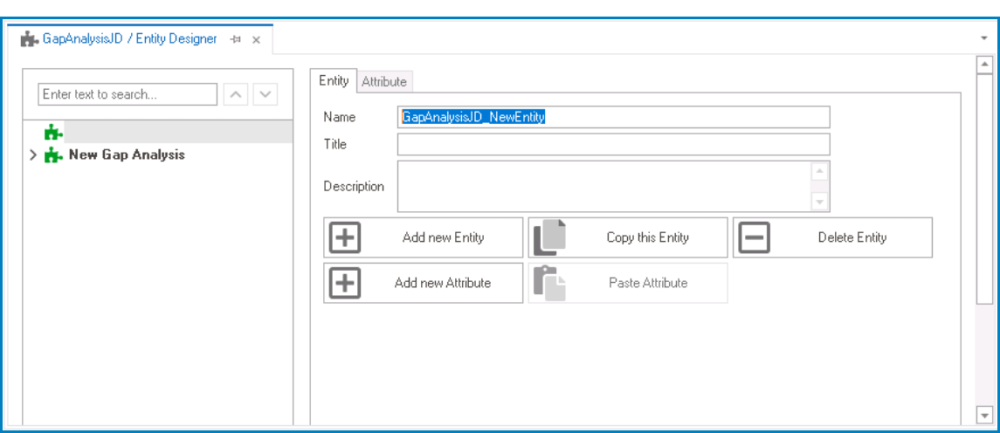
- In the fields of the Entity tab, users can define the properties of the newly created entity.
![]()
- In the Name field, provide a name for the entity.
- In the Title field, either specify a custom title for the entity or let the system automatically generate it based on the provided name.
- In the Description field, provide a description for the entity, if needed.
- Create Attributes
- Access Attribute Properties
- Once you have created the entity, select the Add New Attribute option from the Entity tab. It will direct you to the Attribute tab where you can define the properties of the new attribute.
![]()
- Once you have created the entity, select the Add New Attribute option from the Entity tab. It will direct you to the Attribute tab where you can define the properties of the new attribute.
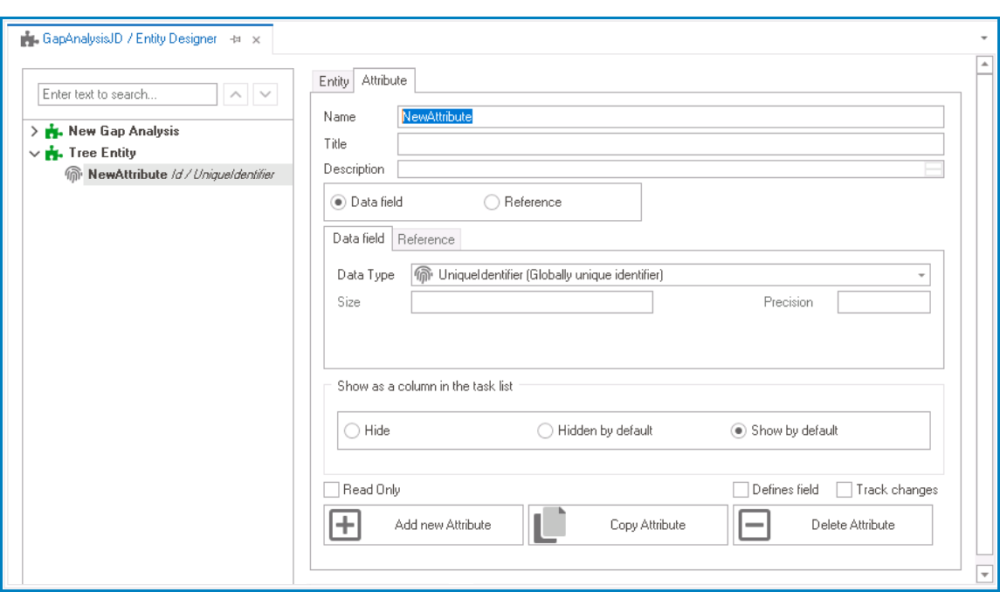
- In the fields of the Attribute tab, users can define the properties of the newly created attribute.
![]()
- Create Data & Reference Attributes
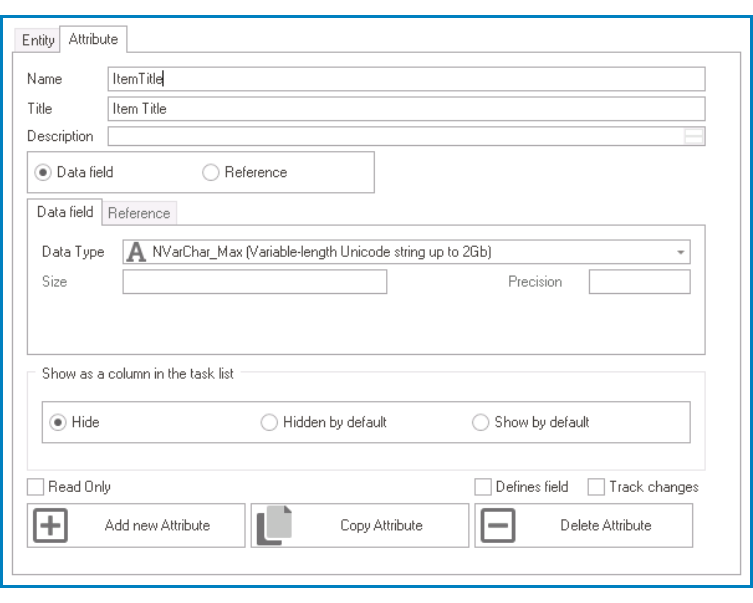
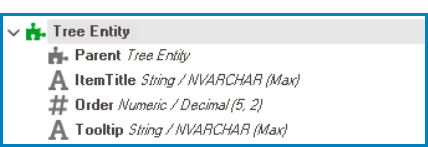
- Item Title: This attribute is used to capture the title or label assigned to an item in the tree.
- In the Name field, provide a name for the attribute.
- In the Title field, either specify a custom title for the attribute or let the system automatically generate it based on the provided name.
- Choose the Date Field option.
- From the Data Type dropdown, select NVarChar_Max.
![]()
-
Order: This attribute is used to capture the order or position of the item within the tree.
- In the Name field, provide a name for the attribute.
- In the Title field, either specify a custom title for the attribute or let the system automatically generate it based on the provided name.
- Choose the Data Field option.
- From the Data Type dropdown, select an appropriate numeric data type, such as an integer or decimal, based on the ordering format needed.
![]()
-
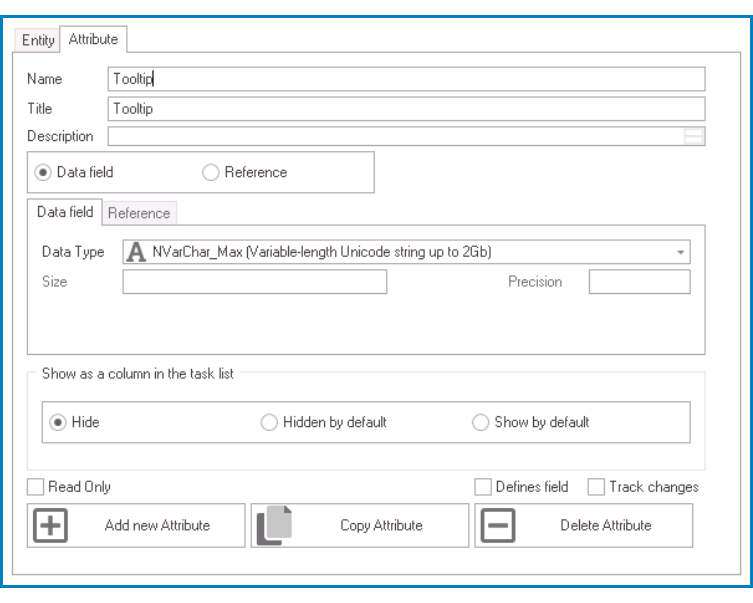
Tooltip: This attribute is used to capture additional contextual information about the item in the tree.
- In the Name field, provide a name for the attribute.
- In the Title field, either specify a custom title for the attribute or let the system automatically generate it based on the provided name.
- Choose the Data Field option.
- From the Data Type dropdown, select NVarChar_Max.
![]()
-
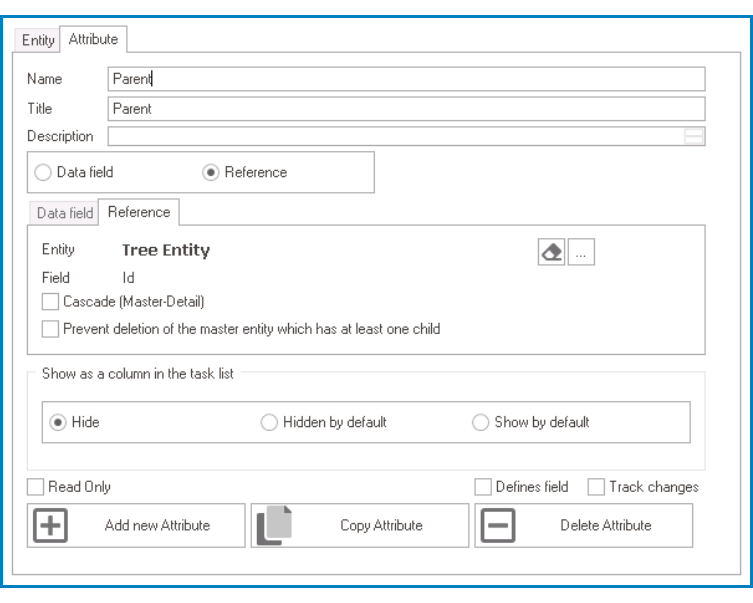
Parent: This attribute is used to reference the tree entity.
- In the Name field, provide a name for the attribute.
- In the Title field, either specify a custom title for the attribute or let the system automatically generate it based on the provided name.
- Choose the Reference option.
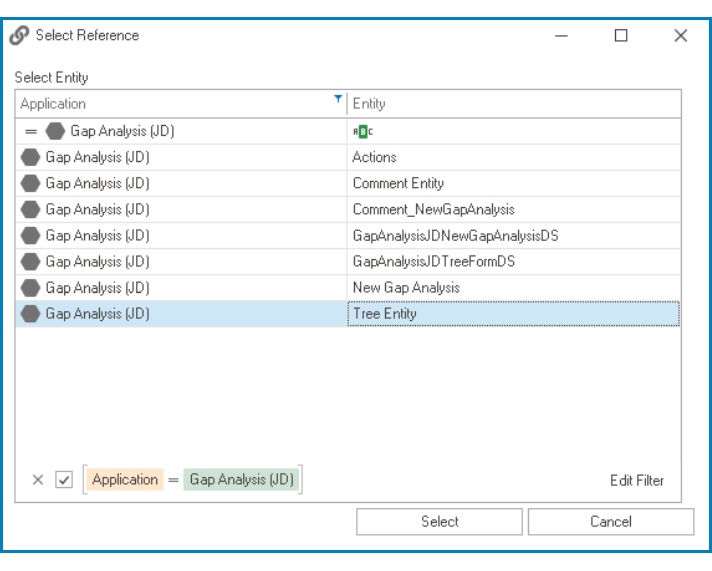
- Click on the
![]() button. It will display the Select Reference window. From the entity section, select [AppName] – [TreeEntity]. From the field section, select ID.
button. It will display the Select Reference window. From the entity section, select [AppName] – [TreeEntity]. From the field section, select ID.
![]()
- Selecting the reference will redirect to the Attribute tab, where the entity section will display [TreeEntity] and the field section will display ID.
![]()
- Item Title: This attribute is used to capture the title or label assigned to an item in the tree.
- Once users have created the necessary attributes for the tree control, the end-result should be the following list:
![]()


- Create Tree Form
- Access Form Properties
- From the Application Tree, navigate to Forms > List of Forms (double-click to open). It will display the List of Forms tab and expand the menu bar to show additional options.

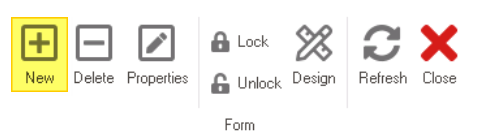
- From the menu bar, select the New option. It will display the Form Properties window.
![]()
- From the Application Tree, navigate to Forms > List of Forms (double-click to open). It will display the List of Forms tab and expand the menu bar to show additional options.
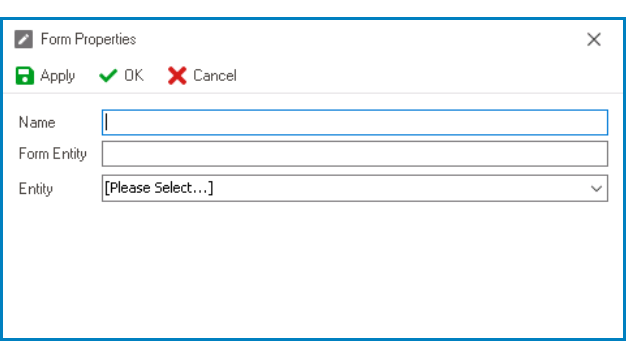
- In the Form Properties window, users can create a new form for the application.
![]()
- In the Name field, provide a name for the form.
- In the Form Entity field, either specify a custom name for the form entity or let the system automatically generate it based on the provided form name.
- From the Entity dropdown, select the tree entity.
- Click OK and confirm both the prompt to start designing the form and the prompt to create a draft.

- Configure & Design Tree Form
- Once the tree form has been created and the Form Designer has been launched, users can proceed to finalize the form’s configuration. There are two key steps to consider:
- Change Parent Field from Grid to Dropdown
By default, foreign keys are linked to grid controls. To enable connections within the tree entity, however, users must replace the grid representation of the Parent field with a single-select dropdown. This can be achieved by removing the grid control, dragging and dropping a single-select dropdown control, and linking it to the Parent foreign key.
![]()
- Configure Parent Dropdown Properties
To ensure that the Parent dropdown accurately retrieves the required information, users must select and configure its data source. Follow these steps to accomplish this:
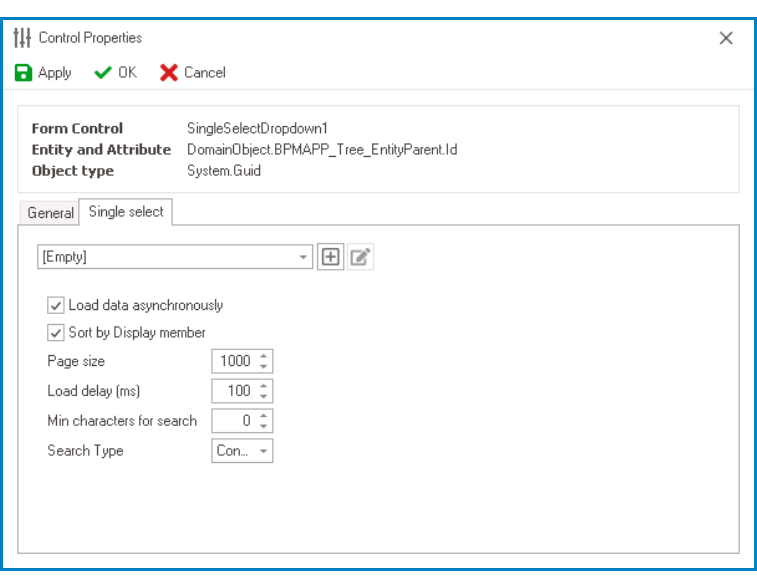
- Select the single-select dropdown control from the design environment. This will display its associated properties in the Control Properties panel.
![]()
- Click on the ellipses inside the Control Properties field, and then navigate to the Single-Select tab in the displayed window.
![]()
- Click on the
![]() button to access the Query Editor, which allows users to define a new dropdown data source.
button to access the Query Editor, which allows users to define a new dropdown data source.
![]()
- In the Title field, provide a title for the dropdown data source.
- From the Connection dropdown, select BPMS.
- From the Select Table dropdown, select the tree entity.
- Once the tree entity is selected, the SQL Table field will automatically populate with a sample SQL query that specifies the desired table name and includes any necessary SQL syntax to retrieve the data for the dropdown.
- Copy the query from the SQL Table field and paste it into the command box.
- Click on the Execute button to verify and execute the SQL query.
- From the Value Member field, select ID.
- From the Display Member field, select Item Title.
- Click on the OK button in both the Query Editor and Control Properties windows to save the changes made.
- Select the single-select dropdown control from the design environment. This will display its associated properties in the Control Properties panel.
- After completing the form configuration, users can then proceed to design the form’s layout.
![]()
- Click Save Form and confirm the prompt to generate a link in the main menu.
- Once the tree form has been created and the Form Designer has been launched, users can proceed to finalize the form’s configuration. There are two key steps to consider:


- Create & Design Main Form
- Access Form Properties
- From the Application Tree, navigate to Forms > List of Forms (double-click to open). It will display the List of Forms tab and expand the menu bar to show additional options.

- From the menu bar, select the New option. It will display the Form Properties window.
![]()
- From the Application Tree, navigate to Forms > List of Forms (double-click to open). It will display the List of Forms tab and expand the menu bar to show additional options.
- In the Form Properties window, users can create a new form for the application.
![]()
- In the Name field, provide a name for the form.
- In the Form Entity field, either specify a custom name for the form entity or let the system automatically generate it based on the provided form name.
- Leave the Entity field empty.
- Click OK and confirm the prompt to start designing the form.
- Create Local Attributes
- Access Attribute Properties
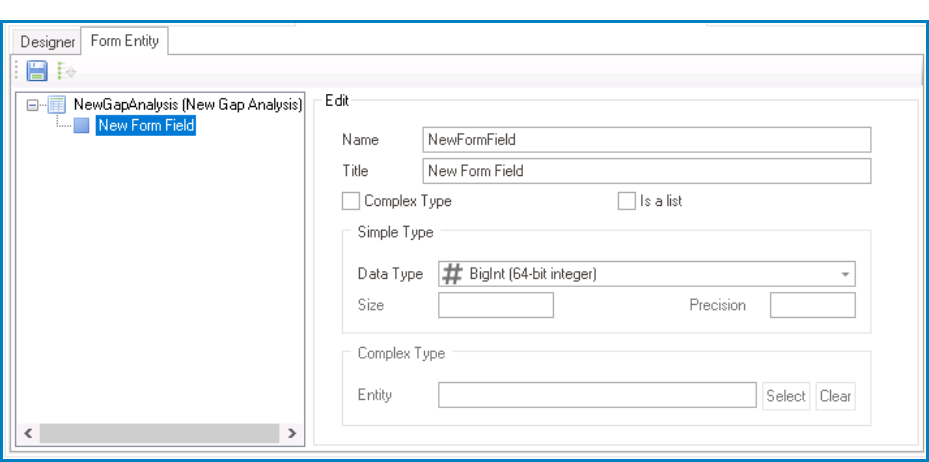
- From the Form Designer, navigate to the Form Entity tab.
![]()
- Right-click on the form entity and select New Field from the context menu. It will generate a new field below the form entity, which can then be customized and defined to suit the needs of the form.
![]()
- From the Form Designer, navigate to the Form Entity tab.
- In the Edit Properties pane, users can define the properties of the newly created attribute.
![]()
- Create Local Attributes
- List: This attribute is used to bind the tree control to the form.
- In the Name field, provide a name for the attribute.
- In the Title field, either specify a custom title for the attribute or let the system automatically generate it based on the provided name.
- Select the Complex Type checkbox (because the control will reference data from another form).
- Select the Is a List checkbox (because the control will hold multiple instances of the attribute’s value).
- In the Complex Type section, select the tree entity from which the attribute will reference data.
![]()
- Click on the
![]() button to save your changes.
button to save your changes.
![]()
-
Selected: This attribute is used to capture and store the currently selected item within the tree.
- In the Name field, provide a name for the attribute.
- In the Title field, either specify a custom title for the attribute or let the system automatically generate it based on the provided name.
- Select the Complex Type checkbox (because the control will reference data from another form).
- In the Complex Type section, select the tree entity from which the attribute will reference data.
![]()
- Click on the
![]() button to save your changes.
button to save your changes.
![]()
- List: This attribute is used to bind the tree control to the form.
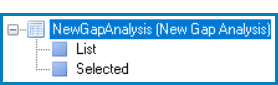
- Once users have created the necessary local attributes for the tree control, the end-result should be the following:
![]()


- Configure Tree Control Binding Properties
- After creating the appropriate attribute, users can return to the Designer tab and define the binding properties for the tree control.