In the Rule Designer, users can define rules that specify the conditions and actions for a given rule, action, or guard. The Rule Designer essentially allows users to define a script without writing code.
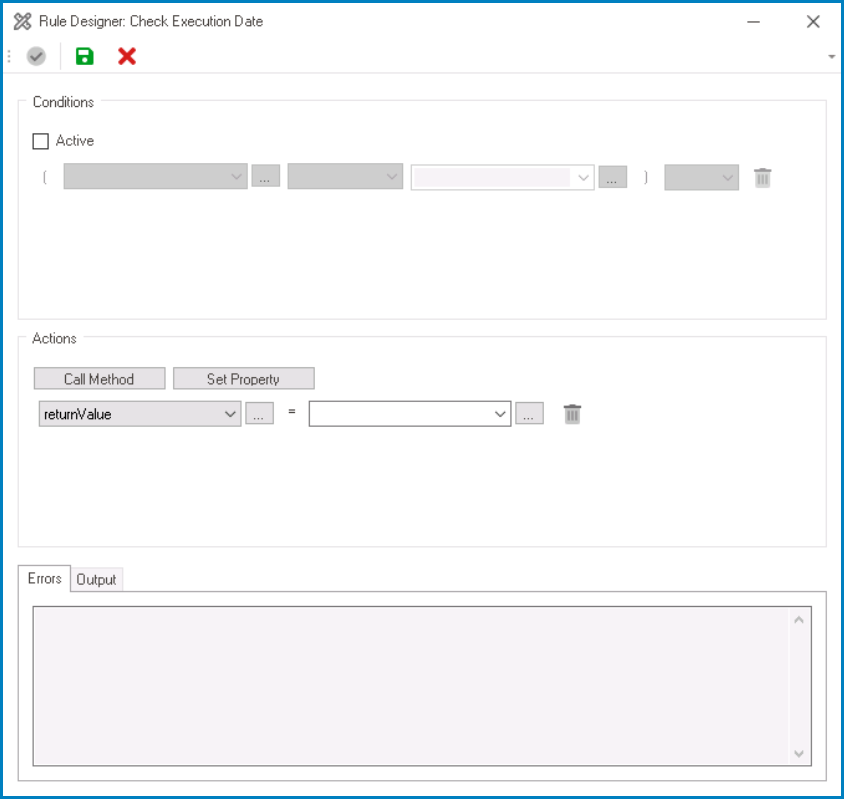
- Conditions: In this section, users can specify the conditions for the rule, action, or guard.
- Active: This is a checkbox which, if selected, allows users to enable the application of conditions for the rule, action, or guard.
- If this checkbox is selected, it will enable the following fields:
![]()
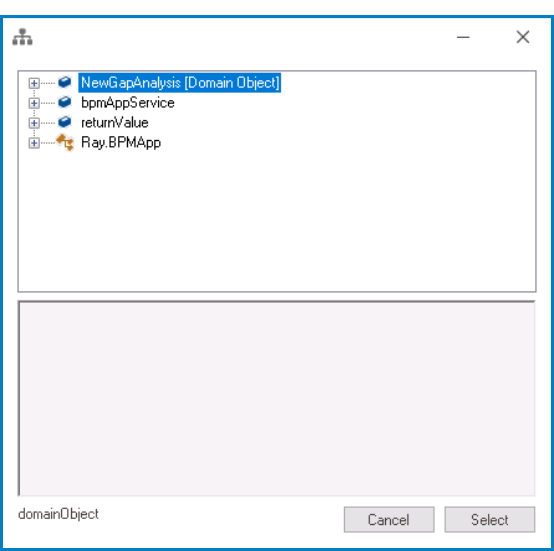
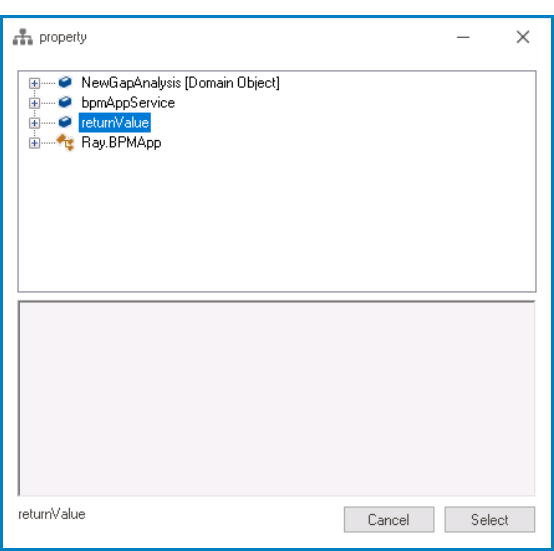
- To add a new value, click on the
![]() button. It will display the following window, in which users can select from a list of available values to use in the condition.
button. It will display the following window, in which users can select from a list of available values to use in the condition.
![]()
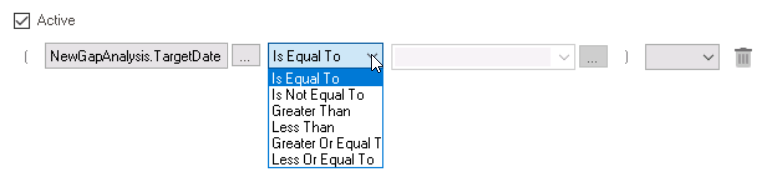
- Between two values in a condition, users must select a comparison operator (such as “Is Equal To”, “Is Not Equal To”, “Contains”, or other available operators) to specify the relationship between the values.
![]()
- Once a condition is defined, users can add another condition and specify the relationship between them using logical operators such as “AND” or “OR”.
![]()
- To delete a condition, click on the
![]() button.
button.
- To add a new value, click on the
- If this checkbox is selected, it will enable the following fields:
- Active: This is a checkbox which, if selected, allows users to enable the application of conditions for the rule, action, or guard.
- Actions: In this section, users can specify the actions for the rule, action, or guard.
- To add a new property, click on the
![]() button. It will display the following window, in which users can select from a list of available values to use in the action.
button. It will display the following window, in which users can select from a list of available values to use in the action.
![]()
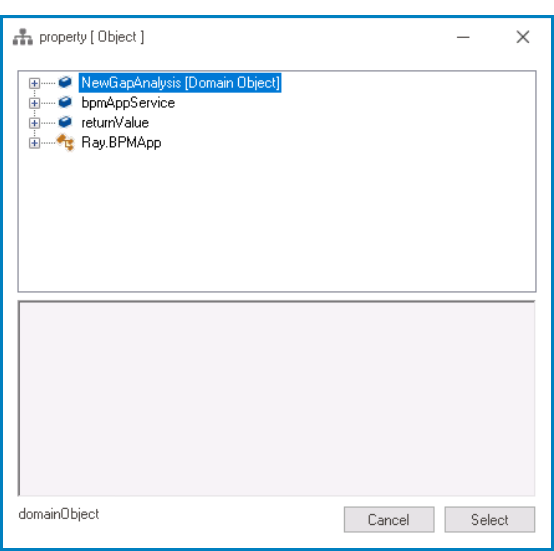
- For each property value, users must select a corresponding property object. To select a property object, click on the second
![]() button. It will display the following window, in which users can select from a list of available values to use in the action.
button. It will display the following window, in which users can select from a list of available values to use in the action.
![]()
- To set a new action, click on the Set Property button.
- It will display a new set of fields for specifying a property value and its corresponding object.
- To execute a method on an action, click on the Call Method button.
- It will display the following set of fields:
![]()
- To select a method, click on the
![]() button. It will display the following window, in which users can select from a list of available methods.
button. It will display the following window, in which users can select from a list of available methods.
![]()
- To select a method, click on the
- It will display the following set of fields:
- To add a new property, click on the
- Errors: When users validate their design, any errors or issues will be displayed in this tab.
- To check for errors in their design, users must first select the Validate button.
- Output: When users validate their design and it is successful, the output of the design will be displayed in this tab.
- To review the output of their design, users must first select the Validate button.
- Validate: This button allows users to validate their design.
- Icon:
![]()
- If selected, the system will automatically perform a validity check on the design, and any errors or issues are displayed in the Errors tab. If the design is valid, the Output tab will display the set conditions and actions.
- Icon:
- Save: This button allows users to save their design.
- Icon:
![]()
- Icon:
- Close: This button allows users to close the Rule Designer.
- Icon:
![]()
- Icon: