In the Scheduler window, users can set up and configure the event schedule.
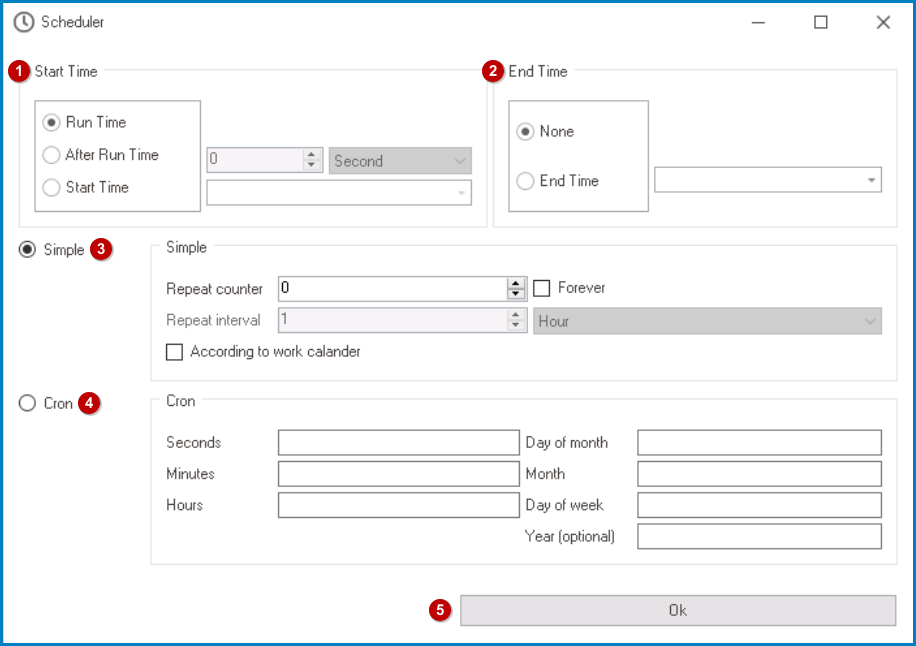
- Start Time: In this section, users can configure the start time of the event. Users can choose whether they want the event to be triggered at run time, after run time, or at a specific start time.
- Run Time: This option allows for the event to be triggered at run time.
- If selected, the scheduler’s start time for deploying scheduled events will be independent of the process—that is, if the scheduled event can occur independently of the process.
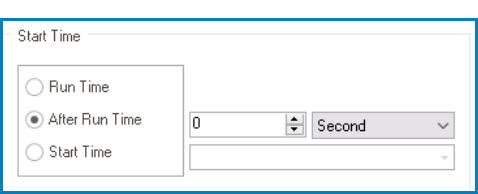
- After Run Time: This option allows for the event to be triggered after a specified amount of time.
- If selected, it will enable the two following fields:
![]()
- Amount: This is a numeric updown field that allows users to specify the amount of time that must pass before the event can be triggered.
- Users can enter this number either manually or by clicking the increment/decrement arrows.
- Unit: This is a single-select dropdown field that displays the list of time units. It allows users to select the unit of time for the amount specified.
- Units: Second, Minute, Hour, or Day.
- Amount: This is a numeric updown field that allows users to specify the amount of time that must pass before the event can be triggered.
- If selected, it will enable the two following fields:
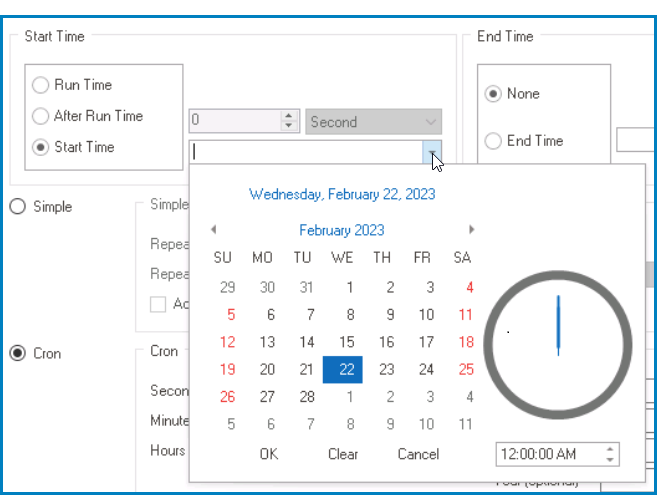
- Start Time: This option allows for the event to be triggered at a specific start time.
- If selected, it will enable the following field, from which users can access a date picker.
![]()
- If selected, it will enable the following field, from which users can access a date picker.
- Run Time: This option allows for the event to be triggered at run time.
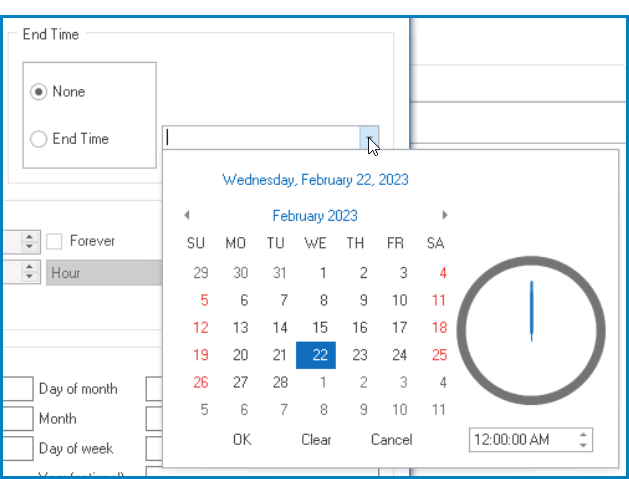
- End Time: In this section, users can configure the end time of the event. Users can choose whether they want the event to continue indefinitely or conclude at a specific end time.
- None: This option allows for the event to continue indefinitely without an end time.
- End Time: This option allows for the event to conclude at a specific end time.
- If selected, it will enable the following field, from which users can access a date picker.
![]()
- If selected, it will enable the following field, from which users can access a date picker.
- Simple: This option, if selected, allows users to set up the simple scheduler. In this form of scheduling, users can specify the number and spacing of repetitions.
- Repeat Counter: This is a numeric updown field that allows users to specify the number of repetitions.
- Forever: This is a checkbox which, if selected, allows for the scheduled event to repeat indefinitely.
- Repeat Interval: This is a numeric updown field that allows users to specify the time interval between scheduled repetitions.
- Unit: This is a single-select dropdown field that displays the list of time units. It allows users to select the unit of time for the interval specified.
- Units: Second, Minute, Hour, or Day.
- According to Work Calendar: This is a checkbox which, if selected, allows for the repetitions to be arranged according to the work calendar.
- Cron: This option, if selected, allows users to set up the cron scheduler. In this form of scheduling, users can define a pattern of when the event should occur.
- By inputting values in the corresponding fields, users can specify the second, minute, hour, day of week, day of month, month, and year (optional).
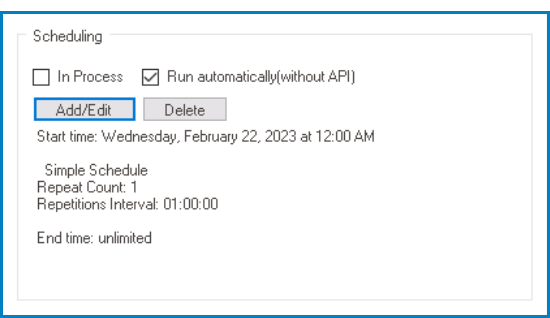
- OK: This button allows users to save the schedule and return to the Event Properties window, whether they will find the event schedule populating the Scheduling section.
![]()