
Once users have identified and defined the process, they can launch the Process Designer. The Process Designer is a tool which enables users to design and implement processes.
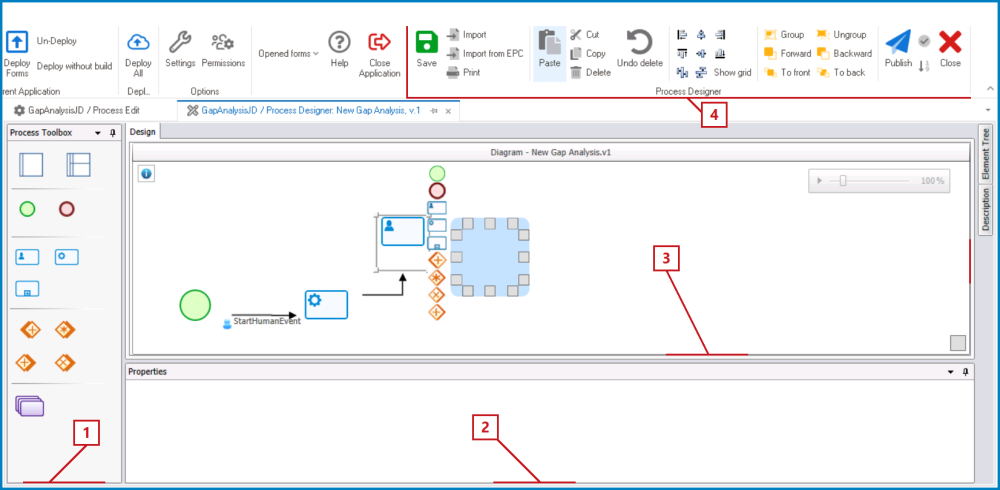
It consists of the following elements:
- Process Toolbox
In the process toolbox, users can access the elements or flow objects needed to design a process.
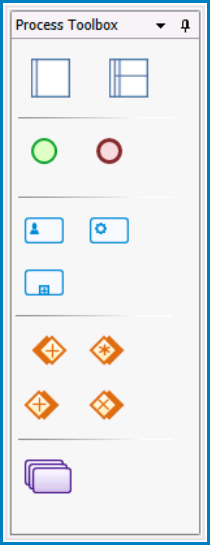
To insert flow objects into the diagram, take the following steps:
- First, drag and drop an object (start event, state, gateway, etc.) from the toolbox onto the design canvas.
- If you have opted for a swimlane diagram, you will first need to drag and drop a pool, then a lane, then a flow object before proceeding to the next step.
![]()
- If you have opted for a swimlane diagram, you will first need to drag and drop a pool, then a lane, then a flow object before proceeding to the next step.
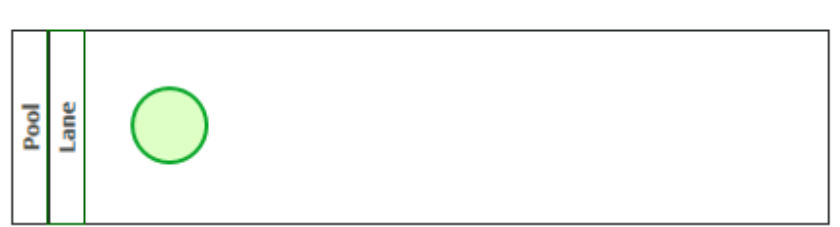
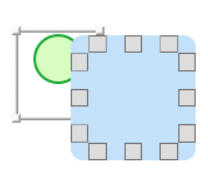
- Next, select the object now situated on the canvas. It will display to its right a list of thumbnails, each representing a different element that the object can be linked to.
![]()
- Select the appropriate thumbnail—that is, the one representing the next object needed for your process—and from the resulting blue field, click on the grey box that most closely aligns with your desired location for the second object.
![]()
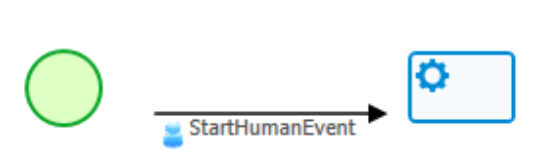
- Once you have determined its location, the second object will appear in the diagram with an arrow linking it to the first object. This arrow is known as an event.
![]()
- To modify the position of any object in the diagram, simply select it and move as needed.
![]()
- To resize the object, select it and drag its corners.
![]()
- To modify the position of any object in the diagram, simply select it and move as needed.


- Properties
In the Properties panel, users can access the properties of the flow object selected on the canvas.
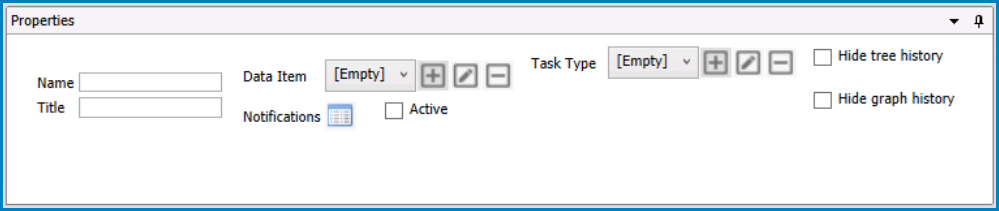
- For each object, users can either define new information or modify existing information.
- Design Canvas:
On the design canvas, users can map out their processes.
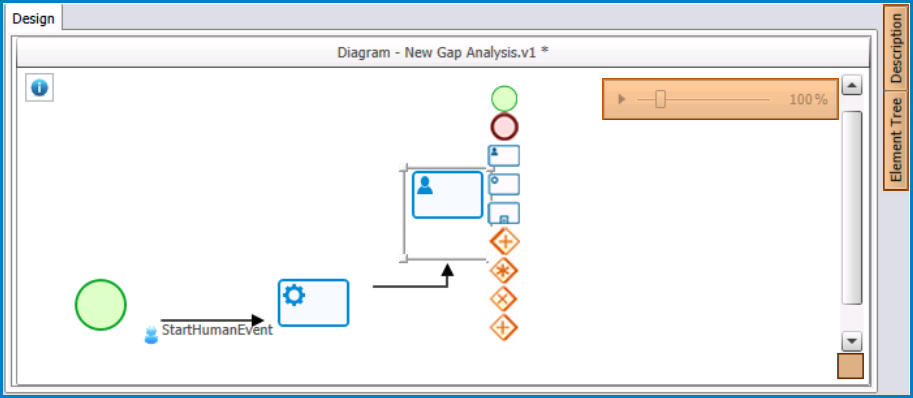
- There are four primary components to this canvas:
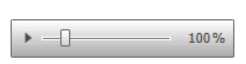
- Zoom Slider
- Users can zoom in or out of the map using the zoom slider.
- By default, the magnification level is set to 100%. To modify this setting, simply slide to the zoom percentage that you want.
![]()
- Minimum Magnification Level: 25%
- Maximum Magnification Level: 500%
- By default, the magnification level is set to 100%. To modify this setting, simply slide to the zoom percentage that you want.
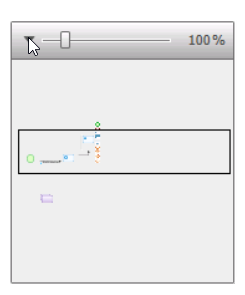
- To expand the slider, click on the
![]() button. It will display a comprehensive view of the map, including any sections that are not immediately visible in the window.
button. It will display a comprehensive view of the map, including any sections that are not immediately visible in the window.
- In other words, it displays sections of the map that you would otherwise need to scroll down to see.
![]()
- In other words, it displays sections of the map that you would otherwise need to scroll down to see.
- Users can zoom in or out of the map using the zoom slider.
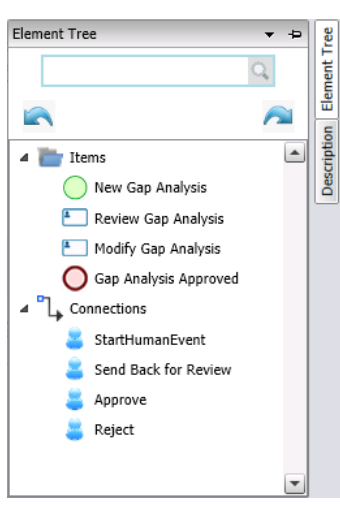
- Element Tree
- To display the Element Tree panel, hover your cursor over the docked element.
- In the panel, users can access the list of elements currently being used in the Process Designer. These elements are listed as “Items” (Flow Objects) and “Connections” (Data Flows).
![]()
- In the panel, users can access the list of elements currently being used in the Process Designer. These elements are listed as “Items” (Flow Objects) and “Connections” (Data Flows).
- To display the Element Tree panel, hover your cursor over the docked element.
- Description
- To display the Description panel, hover your cursor over the docked element.
- In the panel, users can provide a description of the process.
![]()
- In the panel, users can provide a description of the process.
- To display the Description panel, hover your cursor over the docked element.
- Validate
- Users can check the validity of the process design by clicking on the Validate button in the canvas.
- Icon:
![]()
- If the process design is valid, a message will appear in the lower left corner of the diagram stating “Process Validated Successfully.”
- If the process design is invalid, a pop-up window will appear identifying the errors for the user.
- An X will also appear adjacent to the Validate button.
![]()
- An X will also appear adjacent to the Validate button.
- Icon:
- For more details on this function, see the corresponding button in the menu bar.
- Users can check the validity of the process design by clicking on the Validate button in the canvas.
- Zoom Slider

- Menu Bar:
In the menu bar, users can access other features related to the process design.
