
Tested on Windows 8.1, Windows Server 2019, Windows 10, Windows 11.
Step 1 – Install Prerequisites
- Prerequisite Files
Users must download and install the following prerequisites:
- DBPSetupDev.exe *
- Features.datx *
* To access the latest setup files, navigate to Research & Development – DBP – Platform – Setup Install – All Documents.
- AdminApp.rba **
** To access the latest setup files, navigate to Research & Development – DBP – Platform – RBA Storage – Common Apps to Install on All Servers.
- Optional Tools
Users have the option of downloading and installing the following tools:
- Windows Terminal (Latest Release)
- PowerShell (Latest Release – 7.3)
- In the PowerShell Console, run:
Set-ExecutionPolicy -ExecutionPolicy RemoteSigned
- In the PowerShell Console, run:
Step 2 – Install BPMS Platform
- Install Local SQL Server
Users must install and set up a local SQL Server.
- SQL Server Installation
- During the installation process, select:
Installation Type = Custom
Installation \ New SQL Server Stand-Alone \ Edition = Developer
Instance Features = Database Engine Services, Client Tools Connectivity, Client Tools SDK
Authentication Mode = Mixed, Set sa-password, Add current user as admin
- During the installation process, select:
- Install SQL Server Management Studio (SSMS)
Users must install the latest release (19.0.2) of the SQL Server Management Studio (SSMS).
Run SSMS and connect to local SQL Server as SA user (server=.)
- Install Internet Information Services (IIS)
Users must install Internet Information Services (IIS).
- To install IIS, follow these steps:
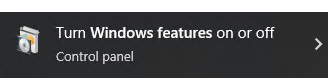
- Open the Windows Start menu and search for “Turn Windows features on or off”. Click on the corresponding option to open the Windows Features window.
![]()
- In the Internet Information Services (IIS) branch, select the following options:
Web Management Tools \ (select all except Management Service)
World Wide Web Services \ Application Development Features = .NET Extensibility 4.7 (4.8), ASP.NET 4.7, ISAPI Extensions, ISAPI Filters
World Wide Web Services \ Common HTTP features \ (select all)
- Open the Windows Start menu and search for “Turn Windows features on or off”. Click on the corresponding option to open the Windows Features window.
After the installation is complete, open a browser and navigate to http://localhost/. If the installation was successful, you should see the IIS welcome page.
- Add SSL
Users must add a Secure Sockets Layer (SSL) to their IIS setup.
- Run IIS Manager:
Default Web Site \ context menu \ Edit Bindings \ Add \ Type = https, SSL certificate = IIS Express Development Certificate
Default Web Site \ context menu \ Manage Website \ Restart
Open a browser and navigate to https://localhost/. If the installation was successful, you should see the IIS welcome page. Note that the site certificate will initially be invalid. To fix this, import the certificate to the “Trusted root certification authorities” store and then restart the browser. Once you have done this, the certificate will become valid.
- Install Latest BPMS Platform
Users must install the latest release of the BPMS platform.
- Install all modules (select all options in Features installer).
- For the Database module: create a new database, server = localhost, DB username = ray, DB password = 12345, admin user = sa, admin password =
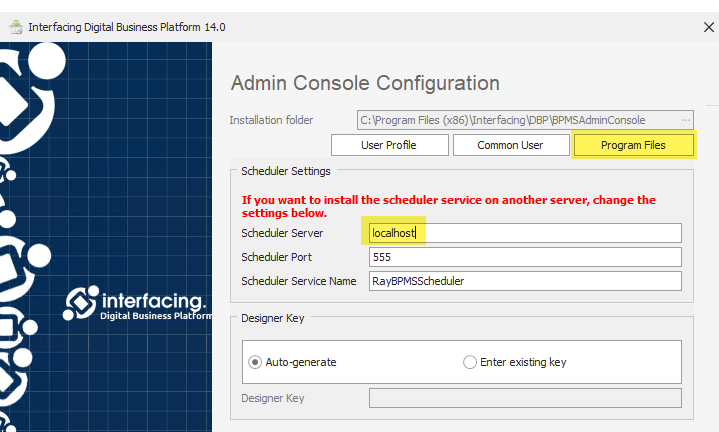
- For the Admin Console (Designer) module: if possible, install into the Program Files folder.
![]()
- For the Web Application module: create a new web application, local website = default web site, enable SSL, do not enable SSO (Single Sign-On).
- For the Tools module: select all options
- Open a browser and navigate to https://localhost/dbp. You should see a page without errors in the DevTools console. You should also see a top menu with a Sign-in button.
Sign-in \ Username = admin, Password = admin
- Once you have logged in, navigate to https://localhost/dbp/DeployWebService/DeployServiceWS.asmx. You should see a page without errors in the DevTools console, XML Web service UI.
- Configure BPMS Designer
Users must configure the BPMS Designer.
- Run BPMS Designer:
Username = admin, Password = admin
Invalid Web Address = Ok
Settings \ General \ Web Directory = https://localhost/dbp
- Install AdminApp.rba
Users must install the latest release of the Admin application.
- In BPMS Designer:
Import AdminApp.rba
Application Tree \ Admin Application \ Forms \ Form Behavior \ select all \ context menu \ Show in Web for All Users
Deploy
- Open a browser and navigate to https://localhost/dbp.
Sign-in \ Username = admin, Password = admin
Organization Management (Admin) \ Users \ double-click on admin user \ Select All Permissions, Save
Step 3 – Building BPMS from Sources
- Install Visual Studio (VS) 2022 Preview Enterprise Edition
Users must install the 2022 Preview Enterprise edition of Visual Studio (VS).
- VS Preview Enterprise Edition Installation
- During the installation process, select:
Workload = ASP.NET, .Net desktop - Sign in to VS with the company account to activate the Enterprise license.
- During the installation process, select:
- Install DevExpress Components
Users must install the required DevExpress components.
- DevExpress Installation
Sign-in \ Email = John.Doe@thecompany.com, Password = DBXPFORE My Downloads \ DXperience Subscription \ select version needed to build BPMS \ Unified Component Installer (.exe)- Download and run the program (DevExpressComponentsBundleSetup-21.2.8.exe):
Registered install \ Email=John.Doe@thecompany.com, Password = DBXPFORE
- Download and run the program (DevExpressComponentsBundleSetup-21.2.8.exe):
- Checkout Sources from GitHub
Users can checkout sources from GitHub.
- Run VS:
Clone a repository \ GitHub \ https://github.com/the company/BPMS
- Switch Branch to the companyDev
Users must switch their branch in VS to the companyDev.
- In VS:
View \ Git Changes \ Branch \ Remotes \ the companyDev
- Install NodeJS LTS 16 and Latest Yarn
Users must install NodeJS LTS 16 and the latest release of Yarn.
- NodeJS Installation
- During the installation process, select:
Automatically Install Tools (C++, Python, VS Build Tools, Chocolatey) = Off
- During the installation process, select:
- Run CMD (Command Prompt or PowerShell):
npm install -global npm
npm install -global node
npm install -global yarn
- Install Dependencies
Users must install the required dependencies.
- In CMD:
cd /d %USERPROFILE% \ source \ repos \ the company \ BPMS \ Source \ Rayvarz.Bpms.Web.App
yarn install
- Build JS and CSS bundles
Users must build the JS and CSS bundles.
- In CMD:
cd /d %USERPROFILE% \ source \ repos \ the company \ BPMS \ Source \ Rayvarz.Bpms.Web.App
yarn run webpack-dev
- Open Source Folder as a VS Solution
Users must open the source folder as a VS solution.
- In VS:
View \ Solution Explorer \ Source \ double-click at Ray.BPMS.sln
- Build WebApp
Users must build the web application.
- In VS:
View \ Solution Explorer \ Solution Ray.BPMS\ context menu\ Restore NuGet Packages
Build\ Clean Solution
Build\ Rebuild Solution
- Add WebApp to IIS
Users must add the web application to IIS.
- In IIS Manager:
Default Web Site \ context menu \ Add Application \ Alias = dbp-dev, AppPool = BPMS, Path = %USERPROFILE% \ source \ repos \ the company \ BPMS \ Source \ Rayvarz.Bpms.Web.App \
Default Web Site \ Folder "dbp-dev\DeployWebService" \ context menu \ Convert to Application
- In Windows File Explorer:
%USERPROFILE% \ source \ repos \ the company \ BPMS \ Source \ Rayvarz.Bpms.Web.App \ context menu \ Properties \ Security \ Grant Modify permissions to user NetworkService
- Copy:
"C:\inetpub\wwwroot\dbp\Connection\Connections.xml" to "%USERPROFILE%\source\repos\the company\BPMS\Source\Rayvarz.Bpms.Web.App\Connection\"
"C:\inetpub\wwwroot\dbp\Bin\Features.datx" to "%USERPROFILE%\source\repos\the company\BPMS\Source\Rayvarz.Bpms.Web.App\bin\"
"C:\inetpub\wwwroot\dbp\Bin\Features.datx" to "%USERPROFILE%\source\repos\the company\BPMS\Bin\"
"%USERPROFILE%\source\repos\the company\BPMS\Source\Rayvarz.Bpms.Web.App\bin\Roslyn" to "%USERPROFILE%\source\repos\the company\BPMS\Source\Rayvarz.Bpms.Web.App\DeployWebService\bin\"
- Open a browser and navigate to https://localhost/dbp-dev. You should see a page without errors in the DevTools console. You should also see a top menu with a Sign-in button.
Sign-in \ Username = admin, Password = admin
- Once you have logged in, navigate to https://localhost/dbp/DeployWebService/DeployServiceWS.asmx. You should see a page without errors in the DevTools console, XML Web service UI.
- Build Designer
Users must build the Designer.
- In VS:
View \ Solution Explorer \ Designer \ BPMS.Designer \ context menu \ Set as Startup Project
Debug \ Run Without Debugging
- If the versions of the Designer and the database do not match, you will need to manually apply migration scripts:
- Connect SSMS to DBP database
- Choose appropriate scripts from
%USERPROFILE%\source\repos\the company\BPMS\Source\Rayvarz.BPMS.Setup\Source\Scripts\and run it as queries in ascending version order. - Reopen Designer
- Configure Designer
Users must configure the Designer.
- In BPMS Designer:
Settings \ General \ Web Directory = https://localhost/dbp-dev
Application Tree \ OrgManagement
Deploy
- Open a browser and navigate to https://localhost/dbp.
Sign-in \ Username = admin, Password = admin
Organization Management (Admin) \ Users \ double-click on admin user \ Select All Permissions, Save
- Troubleshooting
To effectively troubleshoot issues, various troubleshooting steps can be taken in different components of the development environment
- In VS:
Close and reopen VS, Clean Solution, Rebuild Solution
- In IIS Manager:
Default Web Site \ context menu \ Manage Website \ Restart
- In BPMS Designer:
Settings \ System \ Debug Mode = On