For those unfamiliar with using the tree control in the DBP web application, the following instructions will guide you through the process:

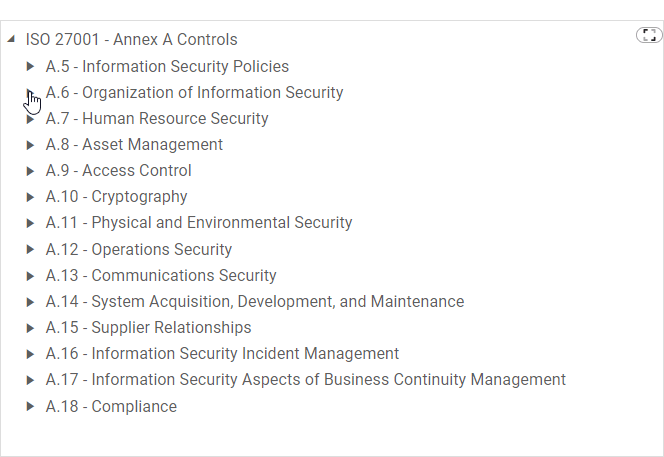
- Expanding and Collapsing Individual Nodes
- To expand a node and reveal its child nodes, click on the arrow icon located to the left of the node. To collapse a node and hide its child nodes, click on the arrow icon again.
![]()
- To expand a node and reveal its child nodes, click on the arrow icon located to the left of the node. To collapse a node and hide its child nodes, click on the arrow icon again.
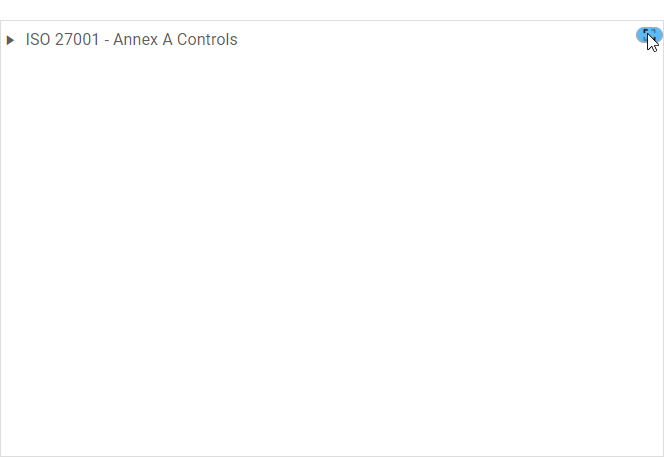
- Expand/Collapse All Nodes
- To expand or collapse all nodes within the tree, click on the
![]() button located to the right of the control.
button located to the right of the control.
![]()
- To expand or collapse all nodes within the tree, click on the
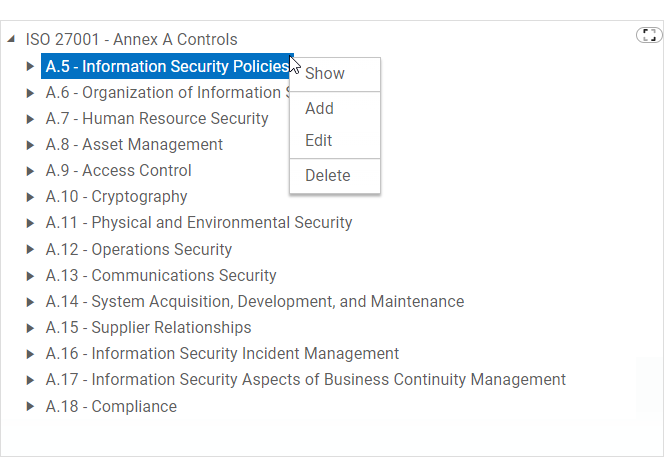
- Access Tree Context Menu
- To access the context menu, right-click on a specific node within the tree control.
![]()
- Show: This option allows users to view the information associated with the selected node.
- If selected, it will open a pop-up window with the ‘View Form’.
- In viewing mode, users typically cannot make any modifications.
- In viewing mode, users typically cannot make any modifications.
- If selected, it will open a pop-up window with the ‘View Form’.
- Add: This option allows users to add a new node as a child of the selected node.
- If selected, it will open a pop-up window with the ‘New Form’.
- In this form, users can provide the required information for the node.
- At the bottom of the form, there is the following button:
![]()
- Save and Return: This button allows users to save the node and return to the main form.
- Once they have saved their work and returned to the main form, users will find the new node they have created now added to the tree.
- If selected, it will open a pop-up window with the ‘New Form’.
- Edit: This option allows users to edit the information of the selected node.
- If selected, it will open a pop-up window with the ‘Edit Form’.
- This form is typically a duplicate of the ‘New Form’, with the exception being that the fields are all populated with previously inputted information.
- After saving their changes and returning to the form, users will find the node in the tree updated with the latest modifications.
- If selected, it will open a pop-up window with the ‘Edit Form’.
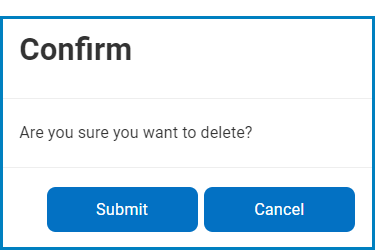
- Delete: This option allows users to remove the selected node from the tree control, along with its associated child nodes.
- If this button is selected, users will be alerted of the action with the following confirmation message:
![]()
- Click on either the Submit button to confirm the deletion or the Cancel button to cancel it.
- If this button is selected, users will be alerted of the action with the following confirmation message:
- Show: This option allows users to view the information associated with the selected node.
- To access the context menu, right-click on a specific node within the tree control.