
For those unfamiliar with using the grids in the DBP web application, the following instructions will guide you through the process:
Users can create grids with various functions that can be combined in any arrangement. There are, however, two commonly used types of grids: a grid with Add, Edit, and View functions, and a grid with Inline Add and Inline Edit functions.
1. Grid with Add / Edit / View Functions
This type of grid enables users to create, modify, and view data by way of the modal forms linked to the Add, Edit, and View buttons.

- Add: This button allows users to add a new item to the grid.
- If selected, it will open a pop-up window with the ‘New Form’.
- In this form, users can define the required details for the item.
- At the bottom of the form, users will be given the following options:
![]()
- Save and New: This button allows users to save the item and open a new form to create another item.
- Save and Return: This button allows users to save the item and return to the main form.
- Once they have saved their work and returned to the main form, users will find any new items they have created now added to the grid.
- Once they have saved their work and returned to the main form, users will find any new items they have created now added to the grid.
- If selected, it will open a pop-up window with the ‘New Form’.
- Edit: This button allows users to edit an existing item in the grid.
- To edit, select the item that you want to edit from the grid and click on the Edit button. (Users can also just double-click on the desired item).
- It will open a pop-up window with the ‘Edit Form’. This form is typically a duplicate of the ‘New Form’, with the exception being that the fields are all populated with previously inputted information.
- To save your changes, click on the Apply button at the bottom of the form.
- Users will find the item in the grid now updated with the latest modifications.
- Users will find the item in the grid now updated with the latest modifications.
- To edit, select the item that you want to edit from the grid and click on the Edit button. (Users can also just double-click on the desired item).
- View: This button allows users to view an item in the grid.
- To edit, select the item that you want to edit from the grid and click on the View button. It will open a pop-up window with the ‘View Form’.
- In viewing mode, users cannot make any modifications.
- In viewing mode, users cannot make any modifications.
- To edit, select the item that you want to edit from the grid and click on the View button. It will open a pop-up window with the ‘View Form’.

2. Grid with Inline Add / Inline Edit Functions
This type of grid enables users to add and edit data directly in the grid, without opening a modal form.
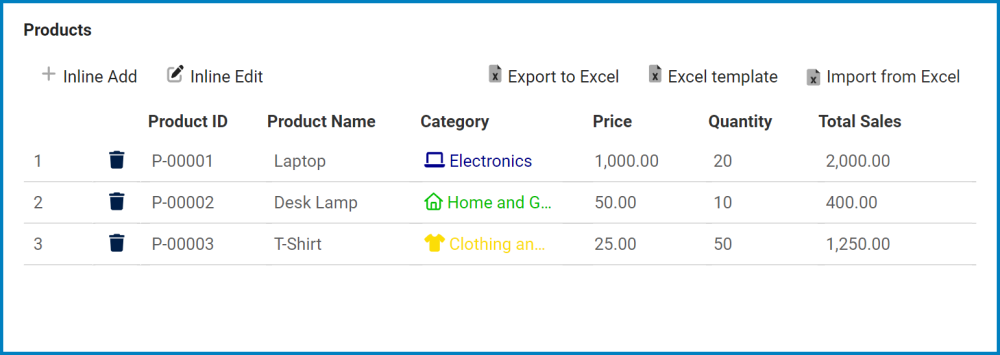
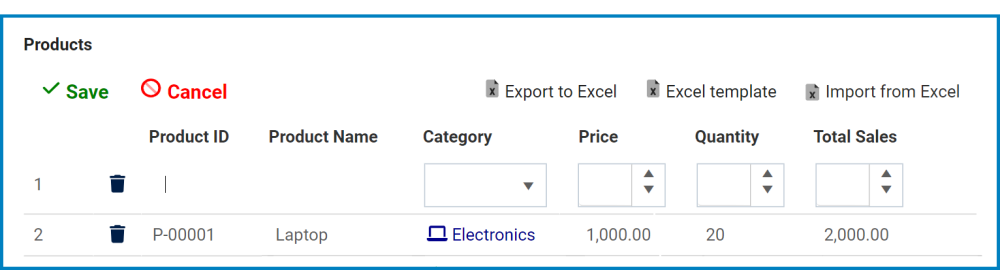
- Inline Add: This button allows users to add a new item into the grid.
- If selected, it will create a new row in the grid into which users can input data.
![]()
- To save the item, either click on the Save button or click anywhere outside the grid.
- To cancel the item, click on the Cancel button.
- If selected, it will create a new row in the grid into which users can input data.
- Inline Edit: This button allows users to edit an existing item in the grid.
- To edit inline, select the item that you want to edit from the grid and click on the Inline Edit button. (Users can also just double-click on the desired item).
- All the editable fields for that item will then reappear and users can make, save, or cancel changes as desired.
Additional Grid Functions
Users can choose to enable Delete, Import from Excel, Excel Template, and Export from Excel functions for either of the two grids.
- Delete: This option is represented in the grid by the
![]() button.
button.
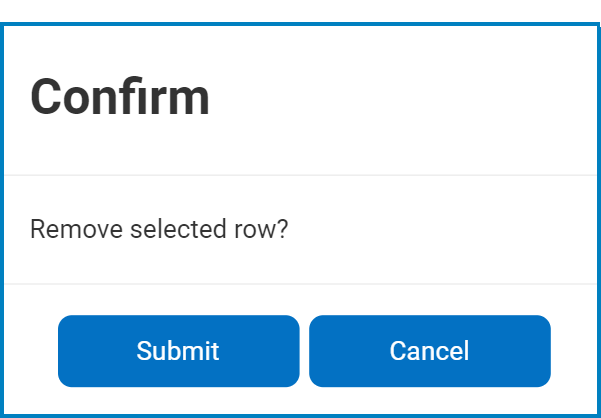
- If this button is selected, users will be alerted of the action with the following confirmation message:
![]()
- Click on either the Submit button to confirm the deletion or the Cancel button to cancel it.
- If this button is selected, users will be alerted of the action with the following confirmation message:
- Data Extraction / Integration: These options are represented in the grid by the following buttons:
![]()
- Export to Excel: This button allows users to export the grid data to Excel.
- If selected, an Excel file containing the grid’s contents will be automatically downloaded to the user’s device.
- Excel Template: This button allows users to generate an Excel template of the grid—that is, an Excel sheet with the grid’s column headers.
- Import from Excel: This button allows users to import data from an Excel sheet into the grid.
- If selected, a file dialog will appear, enabling users to select the appropriate file from their local system.
- If selected, a file dialog will appear, enabling users to select the appropriate file from their local system.
- Export to Excel: This button allows users to export the grid data to Excel.
