
The shape of the hydrologic object features can be edited and deleted on the map. To do this:
- Select Edit Tool
![]() in GIS tab or map context menu.
in GIS tab or map context menu. - Select the hydrologic object feature on map.
- To move a feature, move the cursor on top of the selected feature and then hold the left button to drag it to the new location. When the moving is underway, a new shape is shown to represent what it will look like after the move. Release the left button to confirm the move. Note that moving is not allowed when more than one hydrologic object is selected. The moving option is available only on ArcGIS.
 in
in 
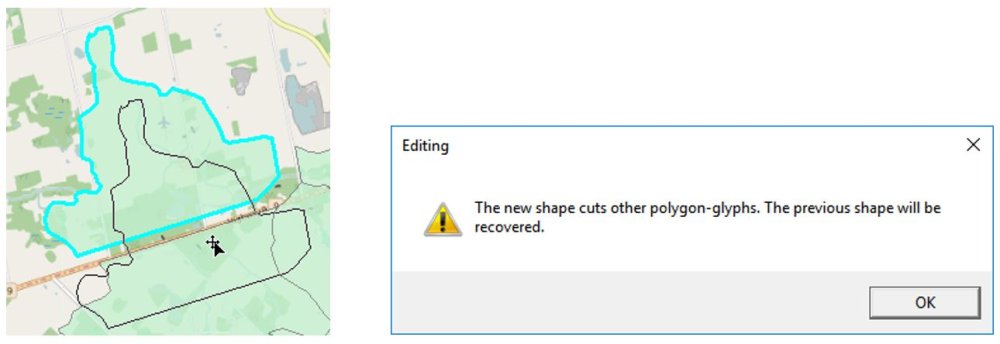
For polygon-hydrologic objects, the new shape may cover, cut or clip other hydrologic objects. This is not allowed. If that happens, a warning message shows up and the new shape will be rejected.
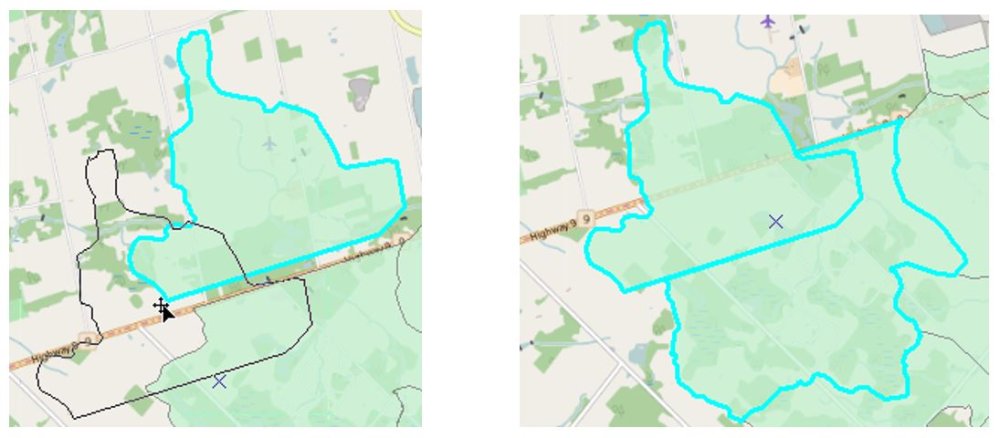
If the new shape clips other hydrologic objects like the one shown below, the behaviour is defined in the Options window. The default behaviour is Reject, which would reject the change. If it is set to Clip, the affected hydrologic objects would be clipped and the area is updated. This setting also applies when a new polygon hydrologic object feature is created and when an existing polygon hydrologic object feature is changed by moving, adding or removing a vertex.

Due to the possible changes to other hydrologic objects when moving polygon-hydrologic objects, it is not generally recommended to do so.
- To change the shape of the hydrologic object, double-click it on the map to show all the vertices. Move the cursor on top of one of them and drag it to the new desired location.

- Vertices can be added or removed by using Add Vertex
![]() and Remove Vertex
and Remove Vertex ![]() in GIS tab. For Add Vertex, set the snapping properly to make the new vertex more accurate. Click on the map, a new vertex is added at that location and the shape is changed accordingly. For Remove Vertex, the vertex will be removed by clicking on it. Note that these two tools are only available when a polygon or a polyline is selected using the Edit tool.
in GIS tab. For Add Vertex, set the snapping properly to make the new vertex more accurate. Click on the map, a new vertex is added at that location and the shape is changed accordingly. For Remove Vertex, the vertex will be removed by clicking on it. Note that these two tools are only available when a polygon or a polyline is selected using the Edit tool.
 and Remove Vertex
  in
in 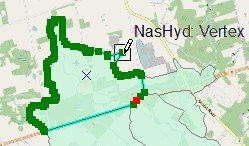
- To delete selected hydrologic object(s), press the DELETE key or choose Delete on map context menu. A warning window appears to provide the opportunity to confirm the deletion. Click Yes to confirm the deletion.