
Click the Import Layers button from the Micro-Drainage tab.

In the Import Required Layer window, select Conduit in the Layer drop-down list. In the Input Source field, choose the shapefile “…\Data\Sewers.shp”. Click Yes on the warning message to clear the current mapping.

Click the Load button on the Import Required Layer window. Choose and Open the mapping file “…\Data\conduit.mapconduit”. The Import Required Layer window will be updated as below:

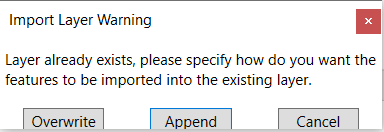
Click the Import button on the Import Required Layer window. Choose Overwrite in the pop-up warning message.
In the Enumeration Mapping window, map the category property as below and click OK. Then, the sewer Conduit will be imported.

The map will show as below. If the location of the pipes is not the same as the in the figure below, please check and change the coordinate system using Layer Properties.

Please note that the default color of symbology for nodes and links are set by their system types.
 Overland: Brown
 Storm: Green
 Sanitary: Red
 Combined: Orange
 Other: Dark Green