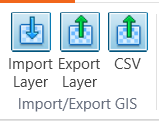
This section includes the following tools.
Import Layer
This tool will import GIS shape files and match the attributes of the GIS shape files to the properties used in the VOSWMM model.
Click the Import Layer button. In the pop-up window, the Layer field from the drop-down list chooses the object type to the imported.

Click the button next to the Input Source field to open the import window. Select and add the data source.
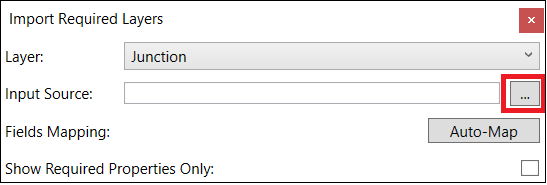
The matching between the attributes of the GIS shape files and the properties used in the VOSWMM model can be done either manually selecting in the drop-down list of Mapped Property or loading the mapping file by click the Load button. User can Save the mapping to a mapping file.
The Auto Mapping button will try to match the properties based on the name, but it is at user’s responsibility to check whether the matching is correct or not.
Check the box Show Required Properties Only to show a short list of properties that must be used for the simulation.
For Boolean parameters or variables, use “true” for true/yes and “false” for false/no.
In the mapping, the Enumeration Mapping window may also pop up, which asks users to match the categories in a property with the VOSWMM model.

Export Layers
Use Export Layer to export a layer as shapefile together with a CSV file. To use this tool:
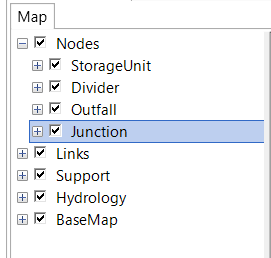
- Expand the layer table of the Map and click on the layer that is to be exported. For example, in the figure below, the layer Junction is selected.
![]()
- Use either of the following two ways to open the Export Layer tool
- Click the Export Layer button
![]() from the Micro-Drainage ribbon
from the Micro-Drainage ribbon - Right click on the selected layer and in the opened context menu select Layer Export Shapefile
![]()
- Click the Export Layer button
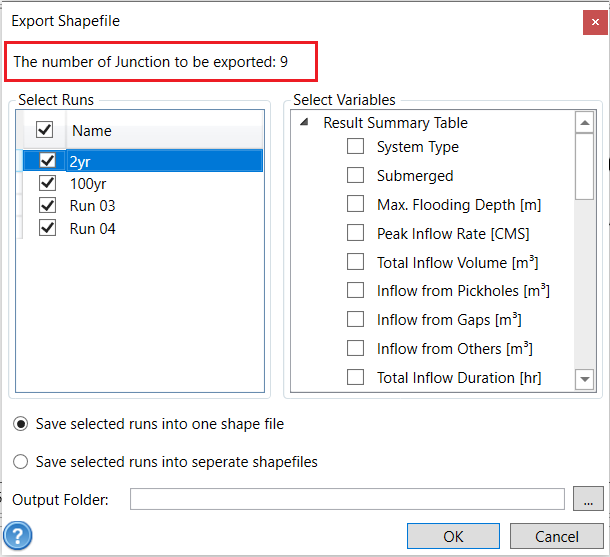
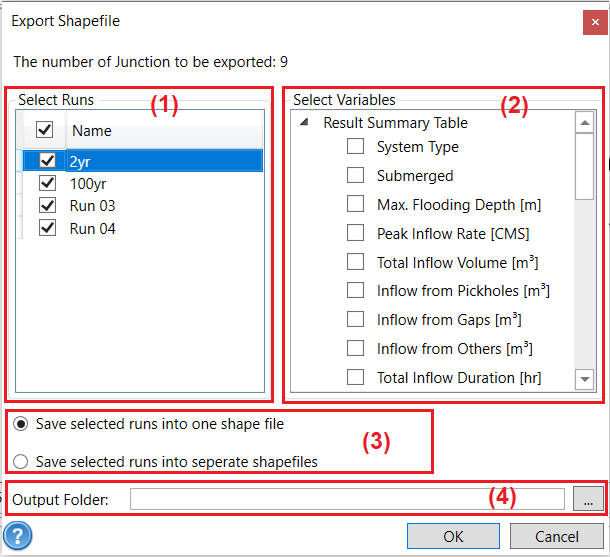
- In the opened tool window, (1) select which runs to be exported, (2) select which variables to be included, (3) choose whether to export all selected runs into one file or separate files, and (4) select the folder where to store the export file in Output Folder. If there is no run, skip (1) and (2).
![]()
 from the Micro-Drainage ribbon
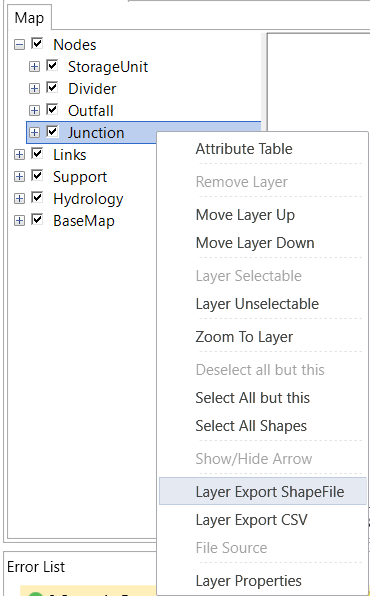
The Export Layers tool exports layers following the rules as below:
- The number of objects to be exported will be displayed at the top of the tool window. If the selected layer does not have any object selected, the tool will export all the objects of that selected layer. Otherwise, the tool will only export the selected objects. Therefore, this tool can be used with selection tools. For example, users can select upstream/downstream objects and then export those selected objects. For more information about selection, please refer to GIS – Select.
![]()
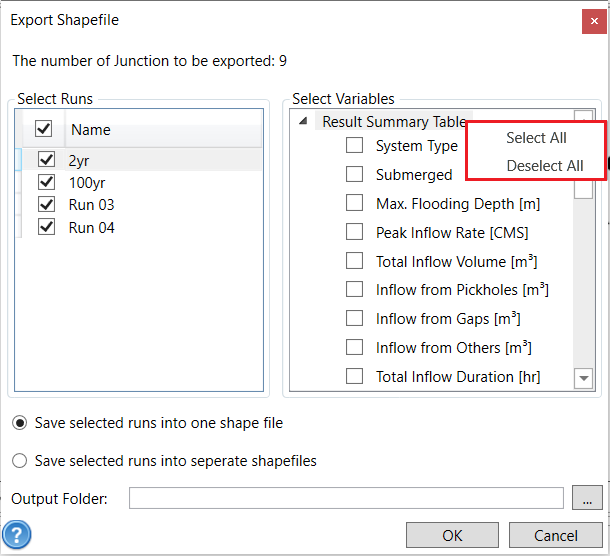
- The parameters will be automatically included in exported files. Users need to select from Result Summary Table which result variables to be included.
To select or deselect all the variables, right click on the variable group, for example, Hydrograph Results in a single-event OTTHYMO project, and in the opened context menu choose to Select All or Deselect All.
![]()
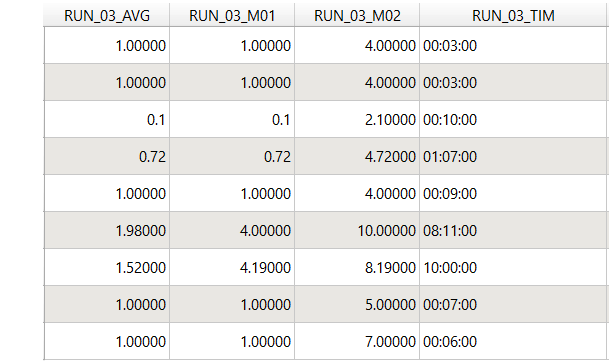
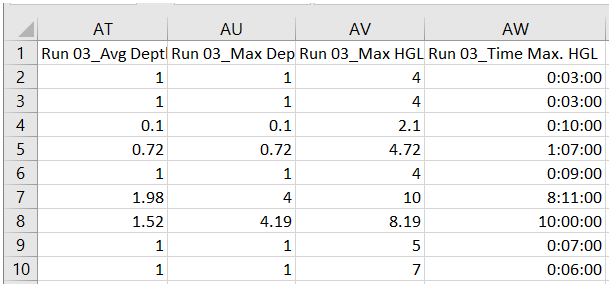
- Due to the limitation of shapefile, the attribute names in the shapefile cannot exceed 10 characters. Therefore, the column names displayed in the shapefile will be truncated. In order to help users see the full names of the exported columns, a CSV file delimited by semi-colon is exported along with the shapefile. The CSV file will show the full name of each column. The CSV file also has a WKT column. Therefore, users can also import the CSV file into other GIS applications to view the shape and the full name.
Screenshot example of column names saved in shapefile
![]()
Screenshot example of column names saved in csv file
![]()
- The name of the files depends on the run name and the layer name.
If users choose to save all the selected runs into one file, the file name is the same as the exported layer, for example, “Junction.shp” and “Junction.csv”.
If users choose to save selected runs into separate file, the file name is in a format of “layer name”_“run name”, for example, “Junction_Run 03.shp” and “Junction_Run 03.csv”