
Resource Library acts as the sole source of climate data for model. The climate data can be added to the working model by 1) using the Add to model button/menu, 2) using Add All Design Storms to Project menu or 3) drag-and-drop.
To use the Add to model button/menu
- Select the climate data in the Library Explorer;
- Click the Add to Model button
![]() in the toolbar or choose the Add to model … menu in the context menu;
in the toolbar or choose the Add to model … menu in the context menu;
![]()
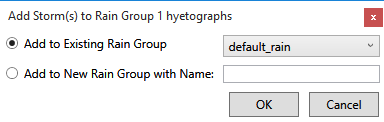
- The Add Storm(s) to Rain Group window will appear. The first one allows to choose one of the existing rain groups to add the design storm. The second one would create a new rain group with the given name.
![]()
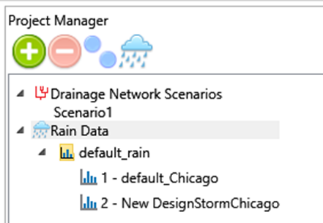
- Click OK to add the design storm to the model. The new rain group will appear in Project Manager.
![]()
 in the toolbar or choose the Add to model … menu in the context menu;
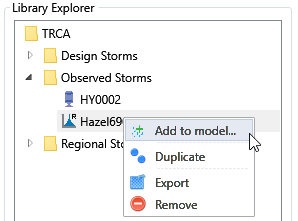
To use Add All Design Storms to Project Menu
Design storms in a group can be added to a model at once. To do this, select the group in the Library Explorer and choose the Add All Design Storm to Project from the context menu as shown below. All the design storms will be added to the model and the run group is also created for each design storm.

To use the drag-and-drop
- Make sure the Project Manager is visible and not covered by Resource Library window.
- Select the desired climate data in the Library Explorer
- To create a new climate data group, drag it to the corresponding section in Project Manager:
![]() for design storm and long-term precipitation
for design storm and long-term precipitation- To add the climate data to an existing climate data group, drag it to existing rain group
![]() in Project Manager;
in Project Manager; - The cursor would change to indicate climate data can be added to current location.
- Release mouse to finish the operation. The climate data will be added to the current location and appears in Project Manager.
![]()
 for design storm and long-term precipitation
 in Project Manager;
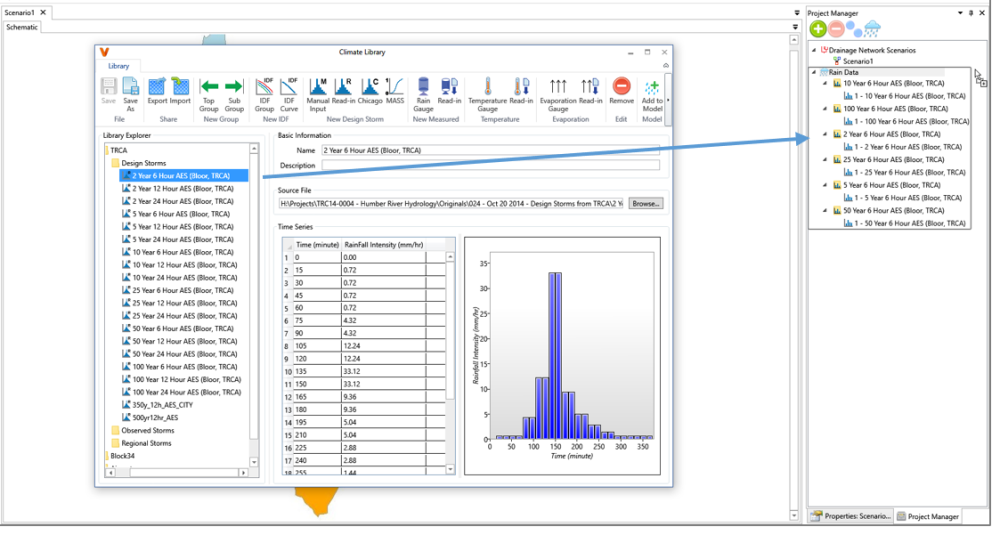
Copyright © 2025 Smart City Water
—
Powered by 