For continuous simulation, the time series data usually comes from monitoring gauges. It is necessary to have the gauge information (e.g. ID and location) included in the Resource Library to enable connect to monitoring database and apply distributed rainfall models. Each gauge may have more than one time-series data which may have different time step or cover different time range.
There are two main steps to add new measurement data: first add a Rain Gauge, and then add Read-In data file to the rain gauge.
To add a new Rain Gauge, first select the parent group in the Library Explorer and then click the Rain Gauge button in the Toolbar.

After the rain gauge is added, add the monitoring precipitation to corresponding gauges from a data file. To do this:
- Select the gauge first and then click the Read-in button in New Measured section in the Toolbar.
- In the New Monitored Storm – From File window, click the Browse … button in the window to browse the data file to display it in the Data Preview area at the bottom. If Use File Name is checked, the file name will be set as the name of the data item.
The data file should be in a simple CSV file with first column as the time and the second column as the data value. The first row is treated as the column name and will be ignored. The dataset can have any time step, but the time step should be consistent for the entire dataset.

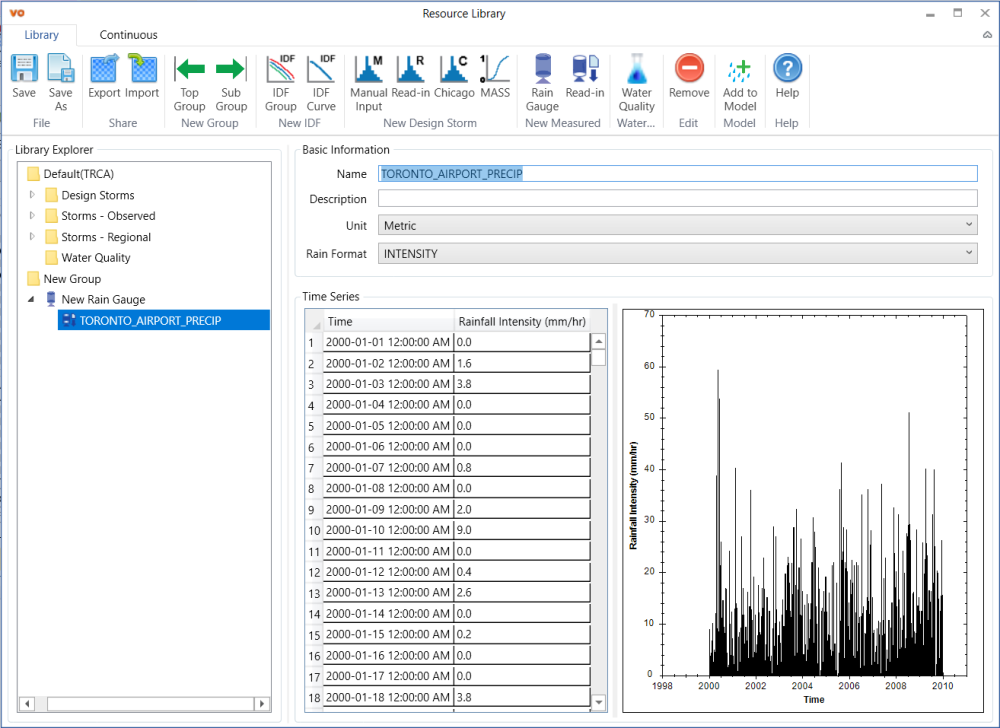
Click OK button on the New Monitored Storm – From File window to add the data to the library. Choose proper Unit and Rain Format for the added rainfall data. The Unit has two options: Metric and Imperial. For VO-SWMM project, all the three types of Rain Format from EPA SWMM5 are supported: INTENSITY, VOLUME and CUMULATIVE, but for OTTHYMO project, only VOLUME is supported.