
Select the Layer Properties menu from layer context menu or click Layer Properties button from GIS toolbar. The Layer Properties window will appear. Users can define symbols, add labels or change coordinate system of the layer.
Change Symbols of Layers
The appearance of features on the map are defined using symbols. For an empty project, a default symbol is generated for each layer. To change the symbol:
- Click on Symbology tab. Depending on type of data and existing symbol, the look of the window may be different. Two types of symbols can be defined for a vector layer:
- Simple Single Symbol – Defines only one symbol for all features in the layers. With this symbol, all features in the layers would look the same. It is typically used to differentiate the layers with other.
- Categories symbol – Defines multiple symbols with different shapes, colours, or sizes for features with different attribute values. This can effectively describe the spatial distribution of features against selected attribute.
- For Simple Single Symbol, select Features in the list on the left and click the button in Symbol group to change the symbol type, color, and size.

- For Categories Symbol, select Categories in the list on the left. There are two options for Categories: Unique Values and Continuous Values. In the Unique Value tab, the tool will search all values for the selected field and use unique symbology for each value. However, Continuous Values allow use to define how many classes and which mode used to group the values. In either of those two options. The right side of the Layer Properties window will be in the categories symbol view. In this view, select the field name from the Field List and click the Add Values button to generate the symbol for each unique value of the selected field.
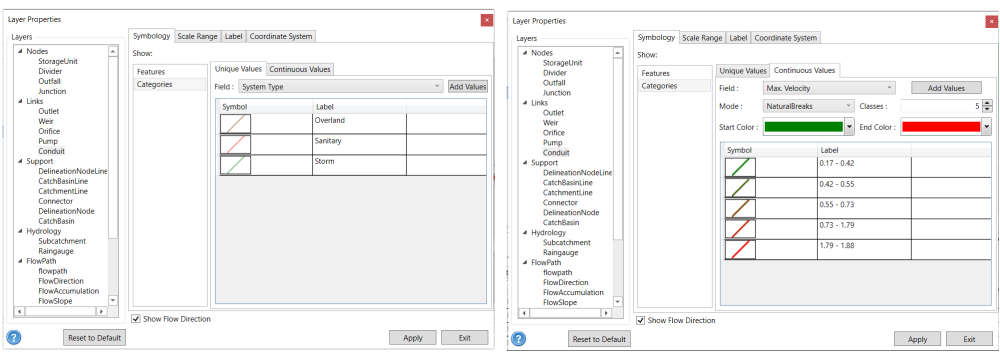
- For Raster data, select classification Mode from the list, define the number of classes and select the Start Color and End Color from the list.

- Click Apply button to save the changes and click Exit to close the Layer Properties window.
The symbols will be saved in project file. It will be restored when the project is opened.
Add Labels to Layers
Users can click Show NHYD to add label for all the layers on the Map.

To create the label for each layer:
- Uncheck the Show NHYD
- Click on the Label tab
- Check on the box Display Label
- In the drop-down mean of Attribute, select the Attribute to used as the label for the selected layer.
- Click Apply button to save the changes and click Exit to close the Layer Properties window.
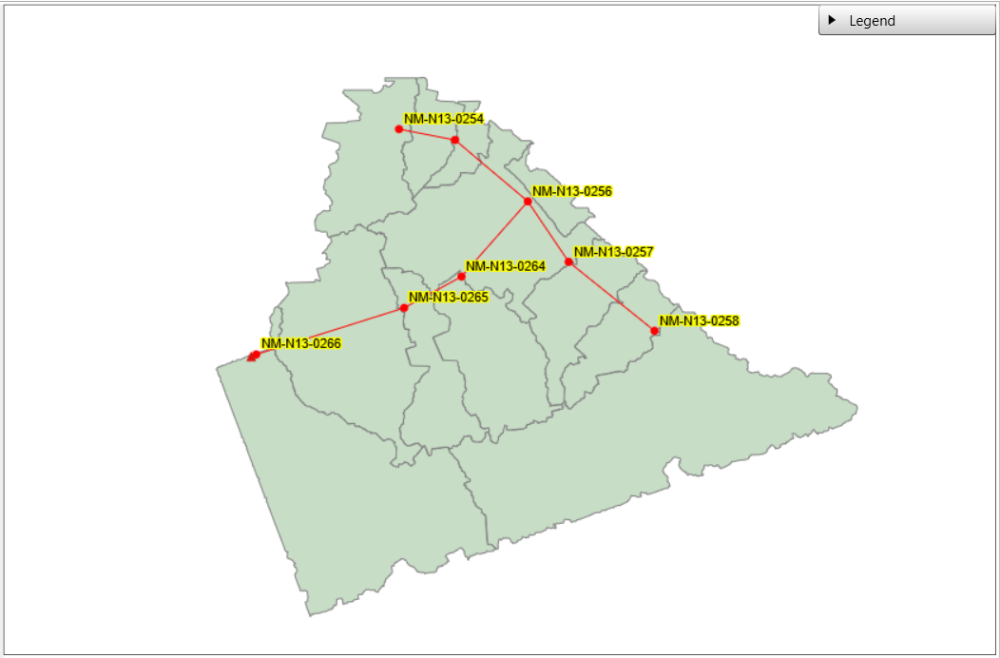
![]()
- The label will be displayed as yellow highlights
![]()

Change Coordinate System
- Click on the Coordinate System tab. It displays the current coordinate system.
- There are two ways to change the coordinate system
- Use the .prj file: check on *Preset… and then in the pop-up window navigate to the *.prj file and double click the file to use the *.prj file for coordinate system.
- Use the available coordinate systems or projections: on the Coordinate System tab click Edit button to choose the coordinate system from the available coordinate systems or projections.

Copyright © 2025 Smart City Water
—
Powered by 