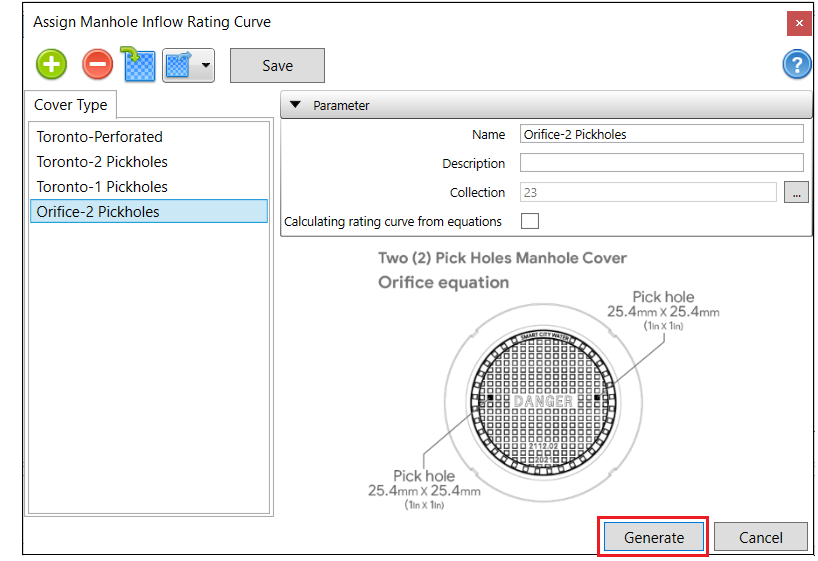
Navigate to Micro-Drainage toolbar and click the Assign Manhole Inflow Rating Curve button.

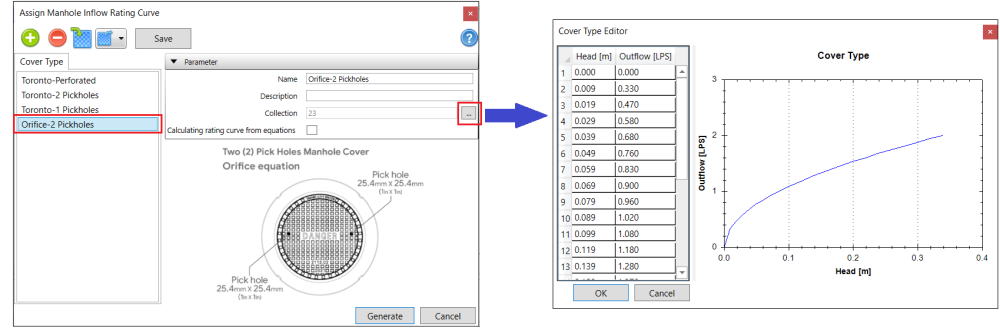
In the pop-up window Assign Manhole Inflow Rating Curve, click on Orifice-2 Pickholes to view the parameters of the manhole cover. Orifice-2 Pickholes is the manhole cover selected in the Step 2. Click the  button next to Collection to view the rating curve of this manhole cover.
Close the rating curve window and in the Assign Manhole Inflow Rating Curve, click the Generate button to generate the rating curves for the Outlet links that are are used for manhole inflow modeling (i.e. its Inflow Rating Curve box is checked on in the Properties tab). For more information about this tool and rating curve generation, please refer to Assign Manhole Inflow Rating Curve.
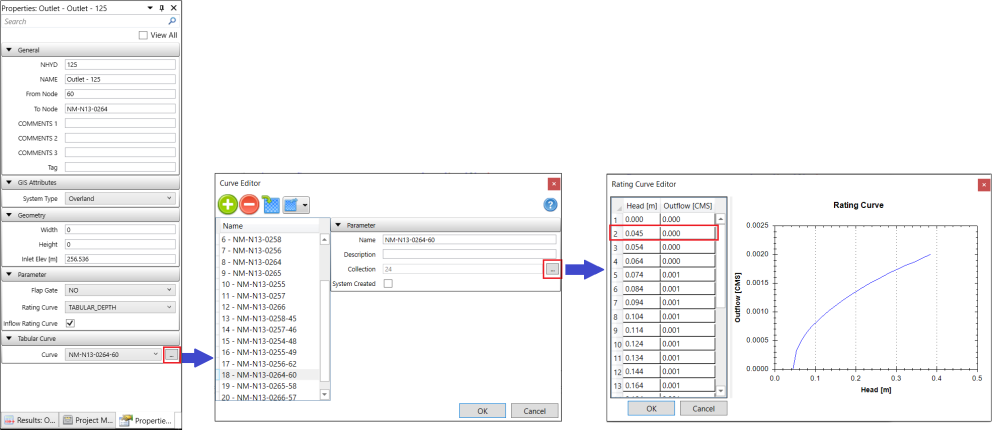
Select any one of the Outlet links that is connected with a Sanitary Manhole. In the Properties tab, click the button next to the Curve to open the Curve Editor and then click the button next to the Collection to open the Rating Curve Editor. Comparing the rating curve of this outlet link with the manhole rating curve above, we can see that the outlet rating curve includes an offset (i.e. Channel Depth before Inflow) for its depth and flow, which means that the overland water will flow into the sewer via this manhole when the overland channel flow depth is higher than this offset.
Please note that flow rate in the manhole cover rating curve is in the unit of LPS but in the outlet link’s rating curve it follows the unit of the scenario (i.e. CMS in this exercise). To view the full decimals of the outlet link’s rating curve, copy and paste the rating curve table into an Excel file.