
To use the DRMT tool, interpolate the rainfall for each catchment:
- Click the DRMT tool
![]() in GIS tab. The Generate DRMT window will appear. The number of selected catchments is given at top of the window. If no catchment is selected, it will apply to all catchments.
in GIS tab. The Generate DRMT window will appear. The number of selected catchments is given at top of the window. If no catchment is selected, it will apply to all catchments.
![]()
- DRMT tool uses a two-dimensional minimum curvature spline technique to generate the rainfall intensity surface. The parameters in Generate DRMT window are described in the following table. Most of the parameters have a default value.
 in GIS tab. The Generate DRMT window will appear. The number of selected catchments is given at top of the window. If no catchment is selected, it will apply to all catchments.
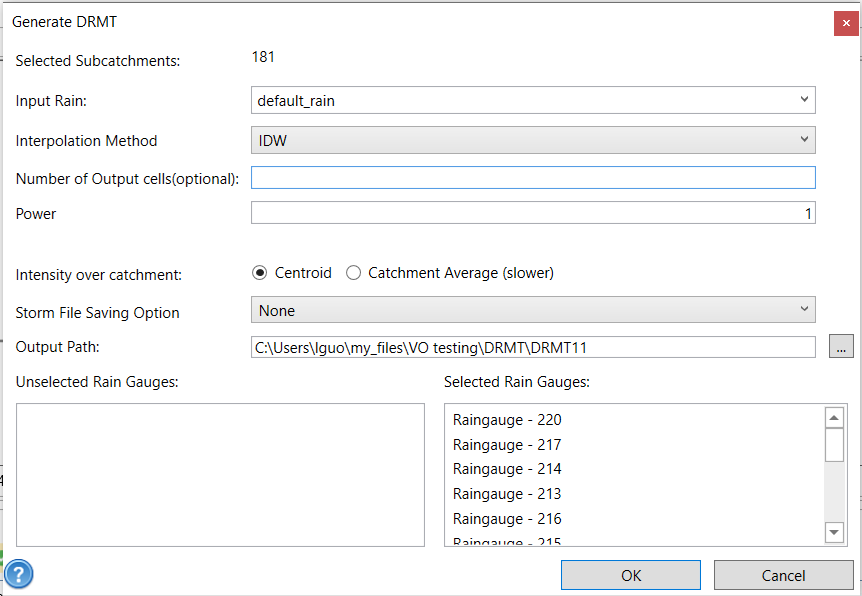
| Parameter | Description |
|---|---|
| Input Rain | Select the rain group as the hyetograph data source for rain gauges. |
| Output cell size | The cell size (m) at which the output raster will be created. By default, it is the shorter of the width or the height of the extent of the selected rain gauges, divided by 250. |
| Spline Type | The type of spline to be used. It can be REGULARIZED or TENSION. REGULARIZED yields a smooth surface and smooth first derivatives. TENSION tunes the stiffness of the interpolant according to the character of the modeled phenomenon. By default, REGULARIZED is used. |
| Weight | Parameter influencing the character of the surface interpolation. When the REGULARIZED option is used, it defines the weight of the third derivatives of the surface in the curvature minimization expression. If the TENSION option is used, it defines the weight of tension. The default value is 0.1. |
| Number of points | The number of points per region used for local approximation. The default value is 12. (Available only on ArcGIS) |
| Intensity over catchment | The method to calculate the rain fall intensity over catchment using the rainfall surface. It can be centroid or catchment average. Centroid uses the rainfall intensity at the catchment polygon centroid. Catchment Average calculates the average rainfall intensity over the catchment. The centroid is the default value. |
| Rainfall raster output path | Folder for generated rainfall surface raster data |
| Selected rain gauges | Rain gauges whose location will be used for the interpolation. All rain gauges are selected by default. |
- Choose the rain group from the Input Rain drop-down list and change other parameters if necessary. If there are more than three rain gauges, some rain gauges can be removed from the selected list by drag-and-drop.
![]()

- Click OK button at the bottom. The GeoProcessing window appears to show the progress and a message window appears once the process is done (GeoProcessing is available only on ArcGIS).
![]()

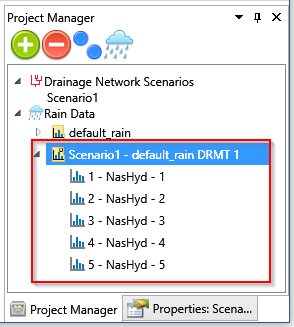
- After the process finishes, a new rain group is created. It has 5 hyetographs, which are corresponding to the 5 selected sub-catchments. As they are generated from the interpolated surface, each hyetograph is unique. Notice that the icon for DRMT-generated rain group is different with those created manually . A capital letter “D” appears on the top right corner to represent DRMT. These rain groups are not editable.
![]()
- The DRMT-generated rain groups can be used to run the simulation as other rain groups. In Batch Run window through the Run button in the Simulation tab, select the rain group from the Rain drop down list as shown below. The corresponding hyetographs will be automatically assigned to hydrograph commands.
![]()

Copyright © 2025 Smart City Water
—
Powered by 