
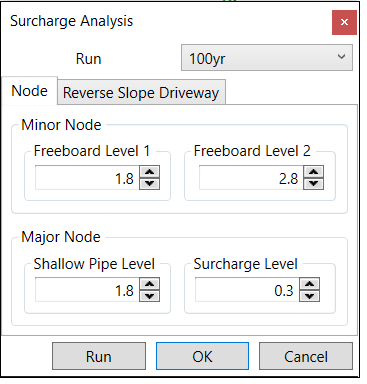
Click the Surcharge Analysis button. In the pop-up window, in the drop-down list of Run select the run whose simulation results are to be analysis, and type in critical depth for the surcharge analysis. Click Run button to run surcharge analysis. The field Freeboard Level 1 is the distance from the Freeboard 1 to the ground and the field Freeboard Level 2 is the distance from the Freeboard 2 to the ground. When users do not want to differentiate two levels of freeboards, type the same number in the two fields.
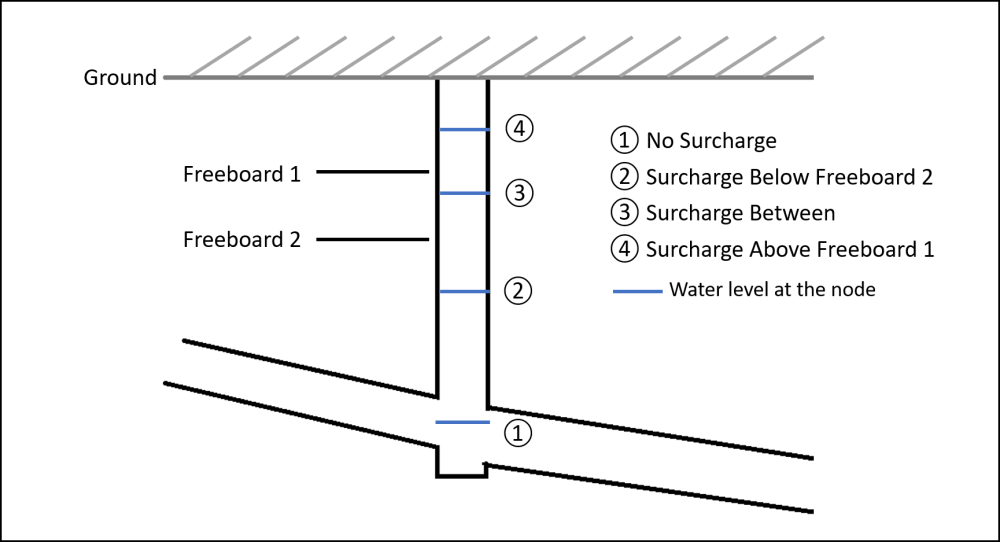
For the minor system, there are four levels from the surcharge analysis result:
- No surcharge: the node is not surcharged. By default, the symbol is green circle dot.
- Surcharge Below Freeboard 2: the node is surcharged, and the water level is below Freeboard 2. By default, the symbol is yellow circle dot.
- Surcharge Between: the node is surcharged, and the water level is between the Freeboard 2 and Freeboard 1. By default, the symbol is orange circle dot.
- Surcharge Above Freeboard 1: the node is surcharged, and the water level is above the Freeboard Level 1. By default, the symbol is red circle dot.
For the major system without reverse driveway, there are two levels from the surcharge analysis result:
- No surcharge: the node is not surcharged. By default, the symbol is green circle dot.
- Surcharge: the node is surcharge and the water depth is above the value given in the field Surcharge Level under the Major Node section. By default, the symbol is red circle dot.
Copyright © 2024 Smart City Water
—
Powered by 