
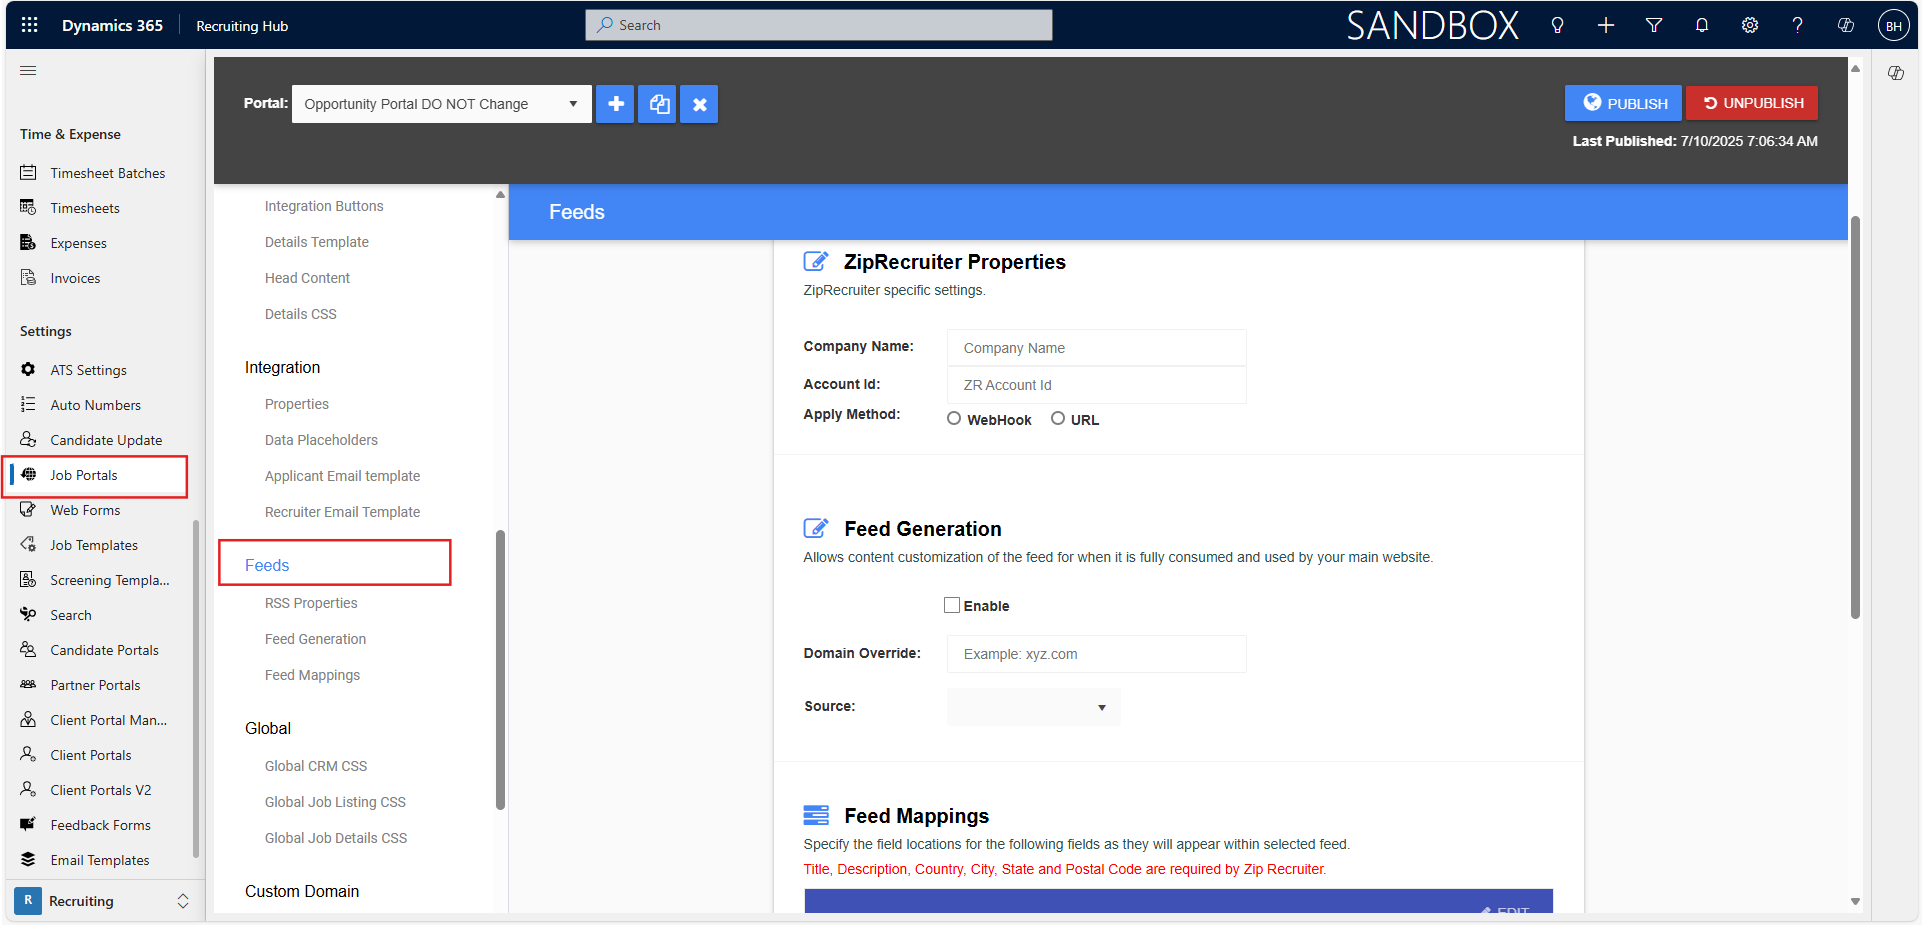
To enable ATS users to share the opportunities in ZipRecruiter directly from Dynamics ATS, go to Job Portal Setup in the sidebar and then select Feed
Then, select ZipRecruiter from the dropdown menu and click Enable Feed.
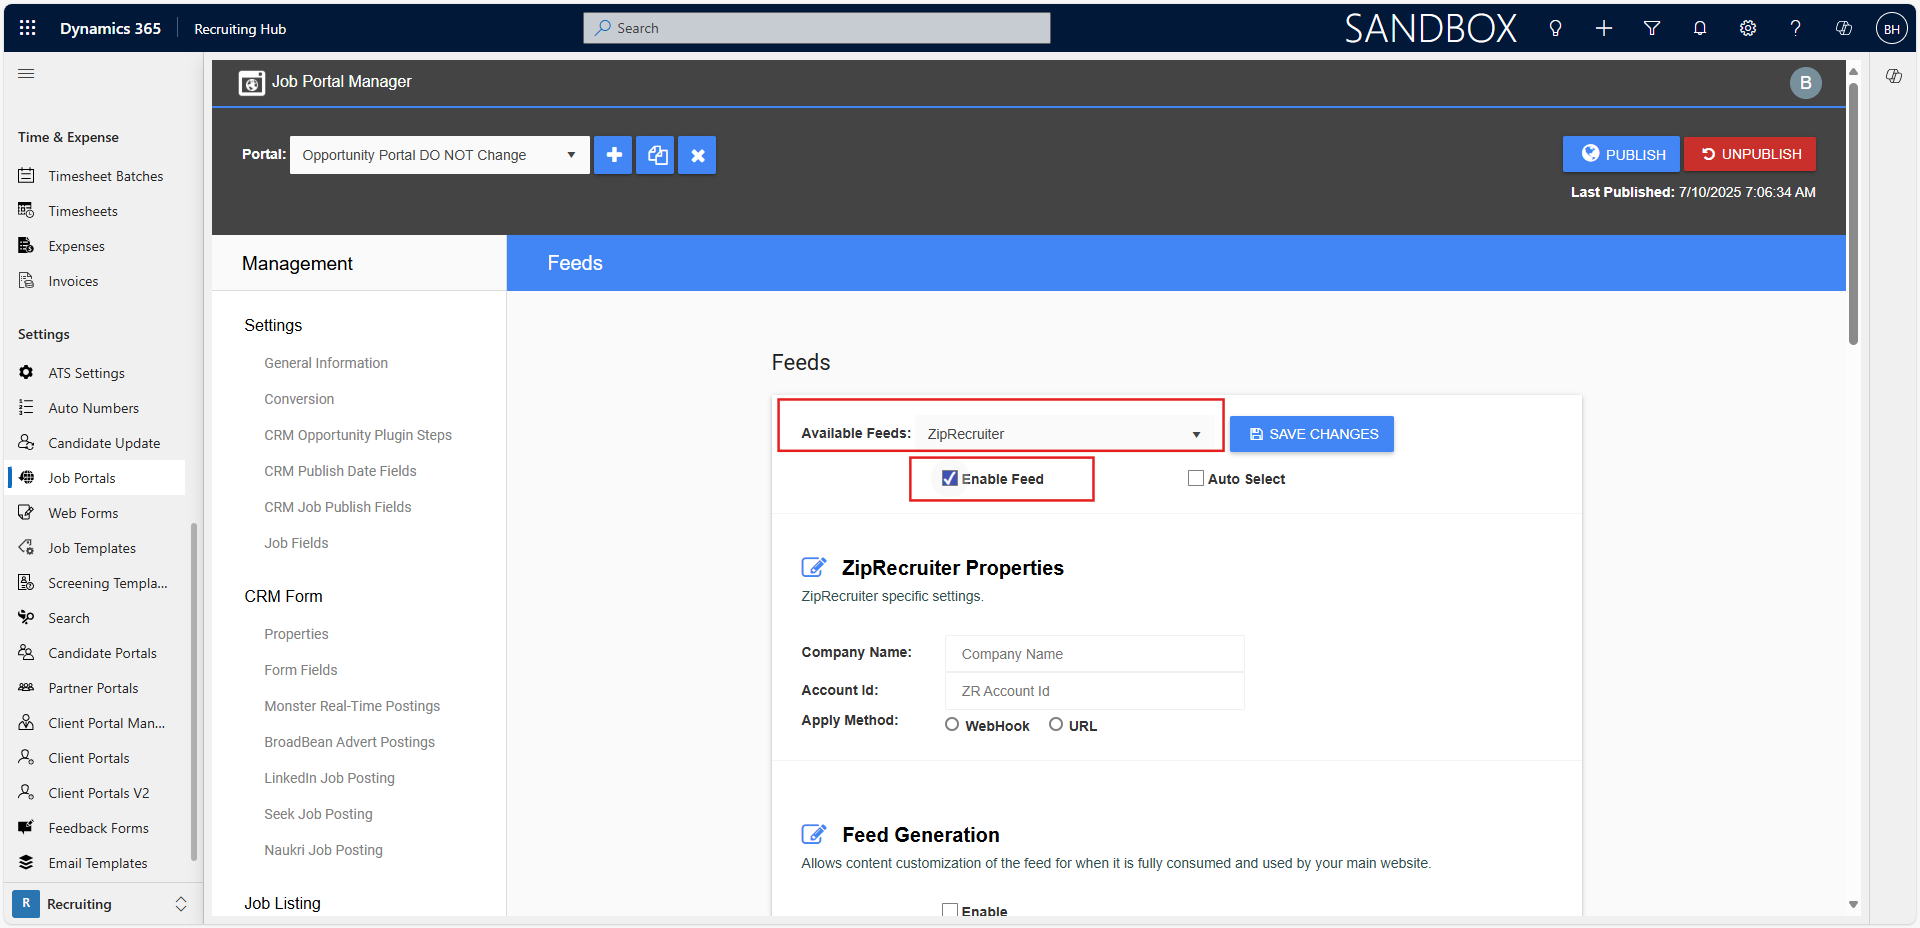
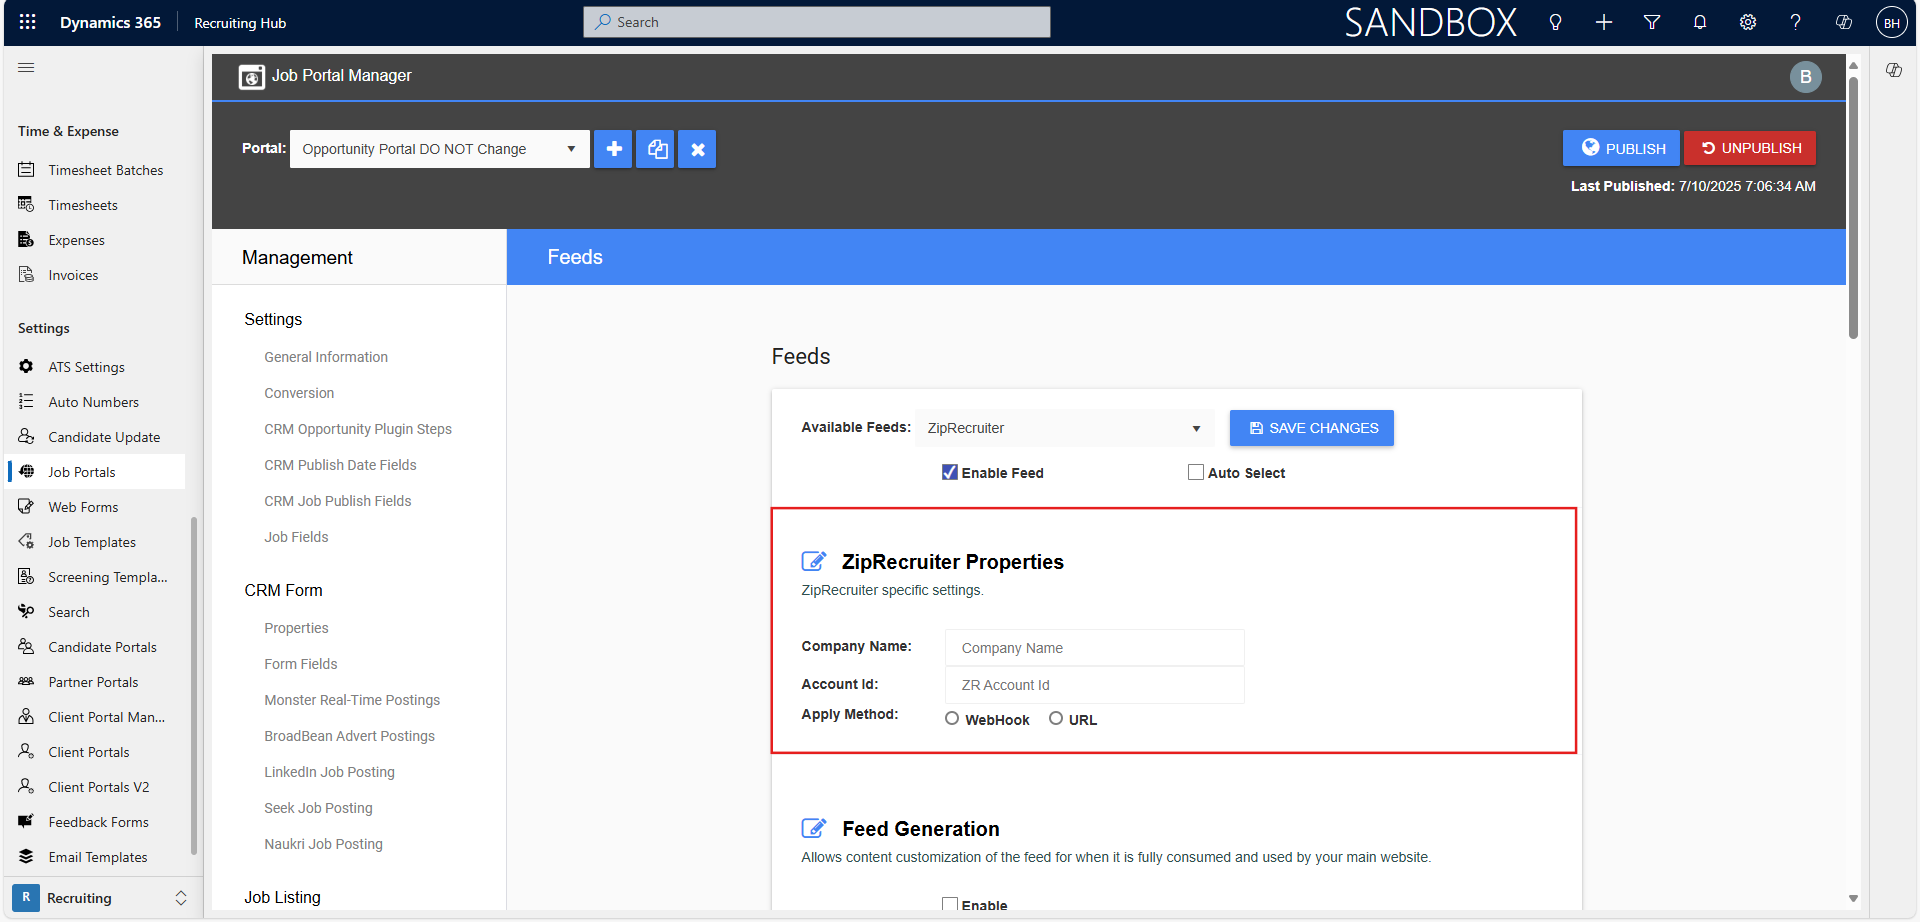
Then, add the ZipRecruiter-specific settings in the ZipRecruiter Properties section.
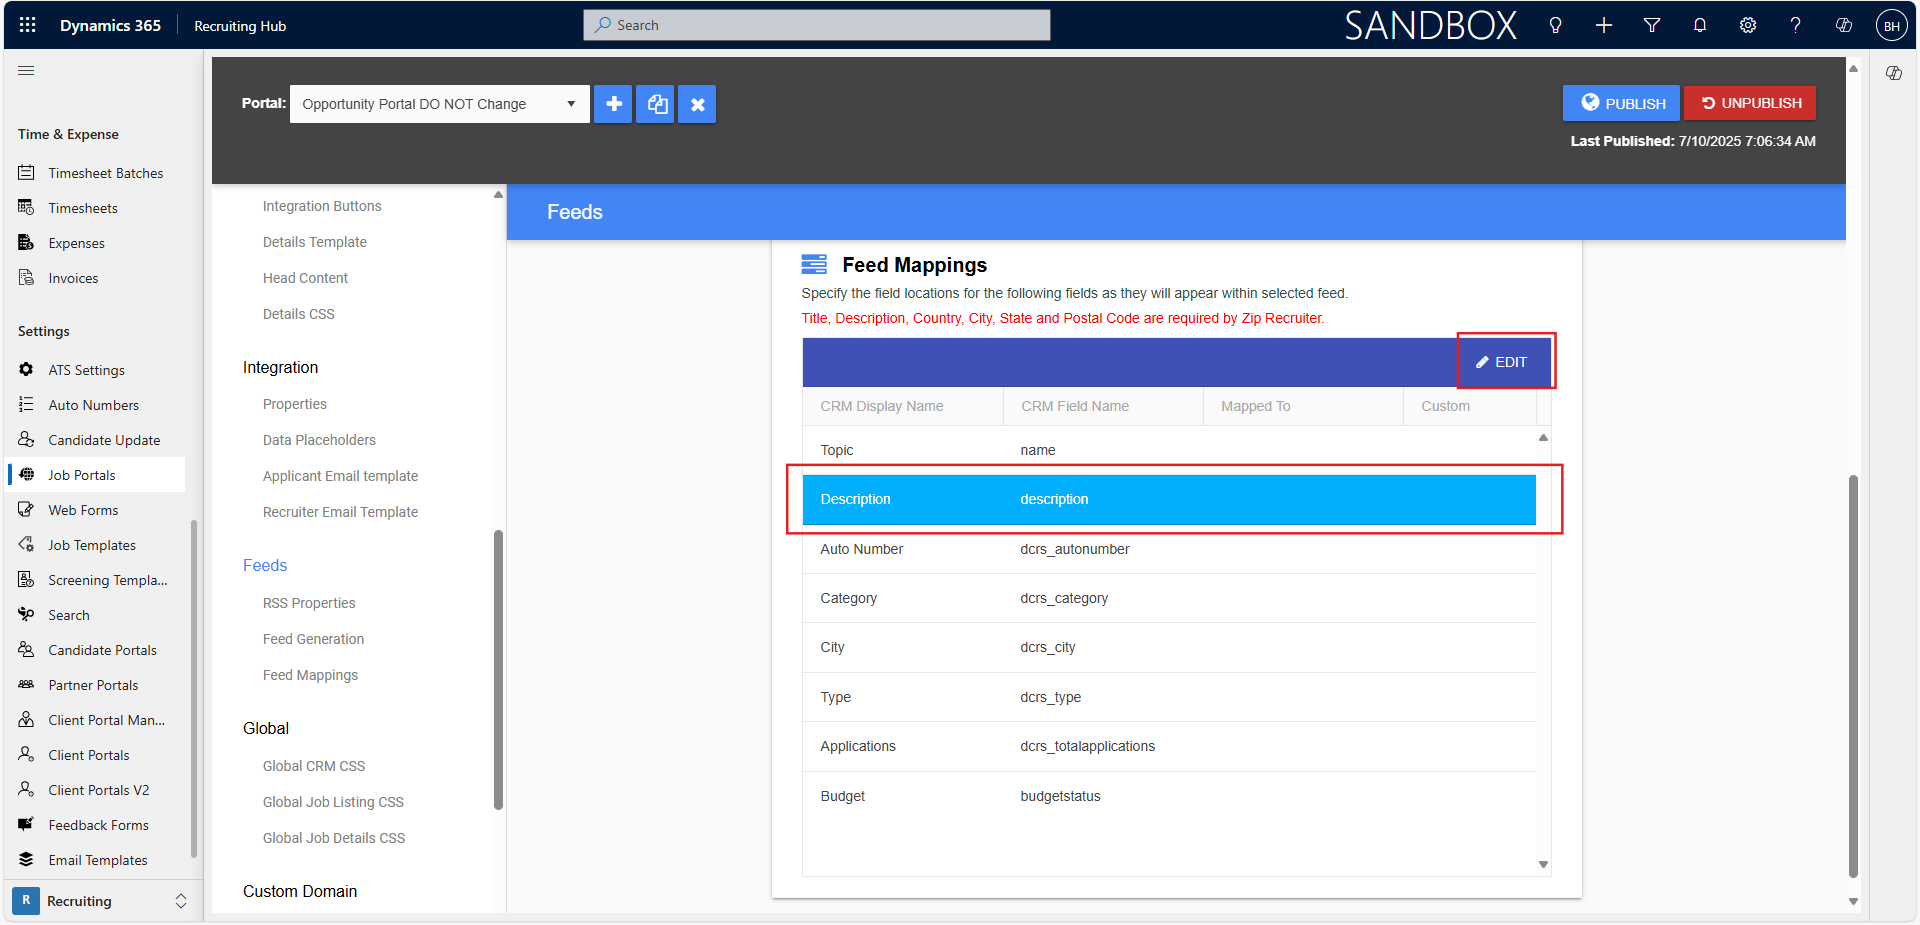
Then, scroll down to the Feed Mappings section.
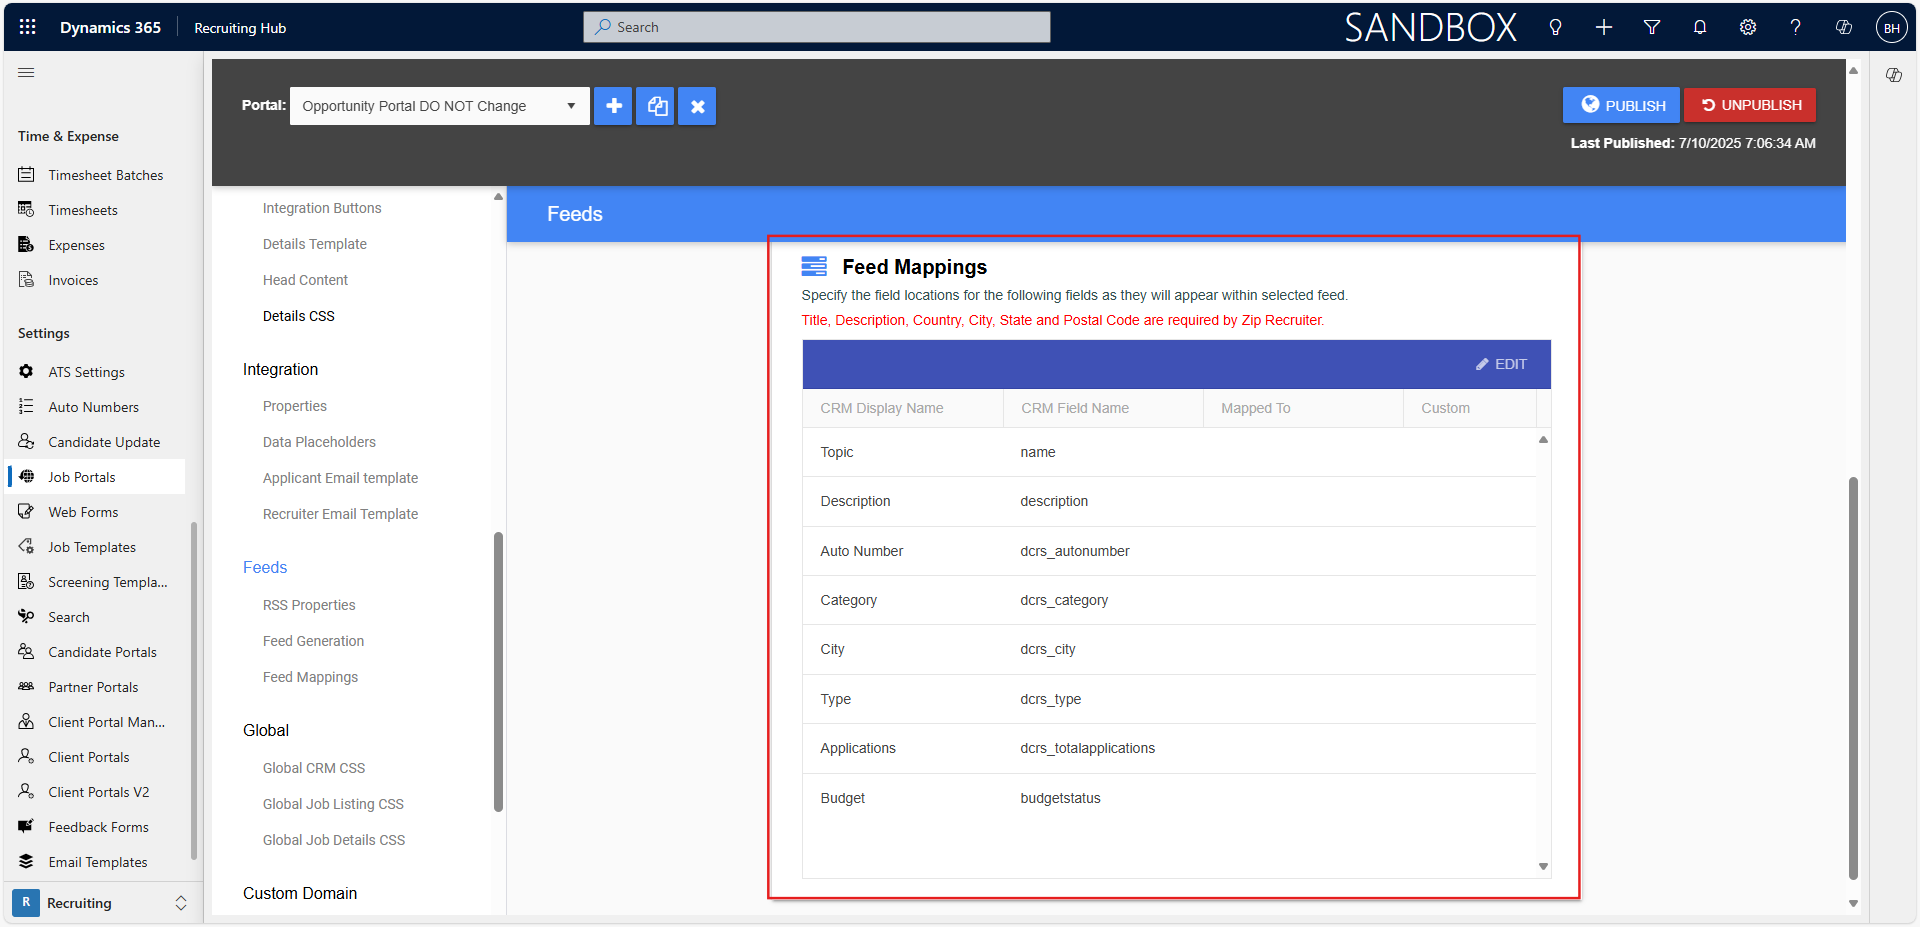
Scroll down to specify the required fields that will be tracked in your ZipRecruiter post. You will find all the fields that currently exist in Dynamics ATS on the contact entity. To map it, click on the field and press Edit.
In the field above, you*ll see how it appears in the CRM. Use the dropdown menu to select the corresponding ZipRecruiter field to match it. Then, press Save.
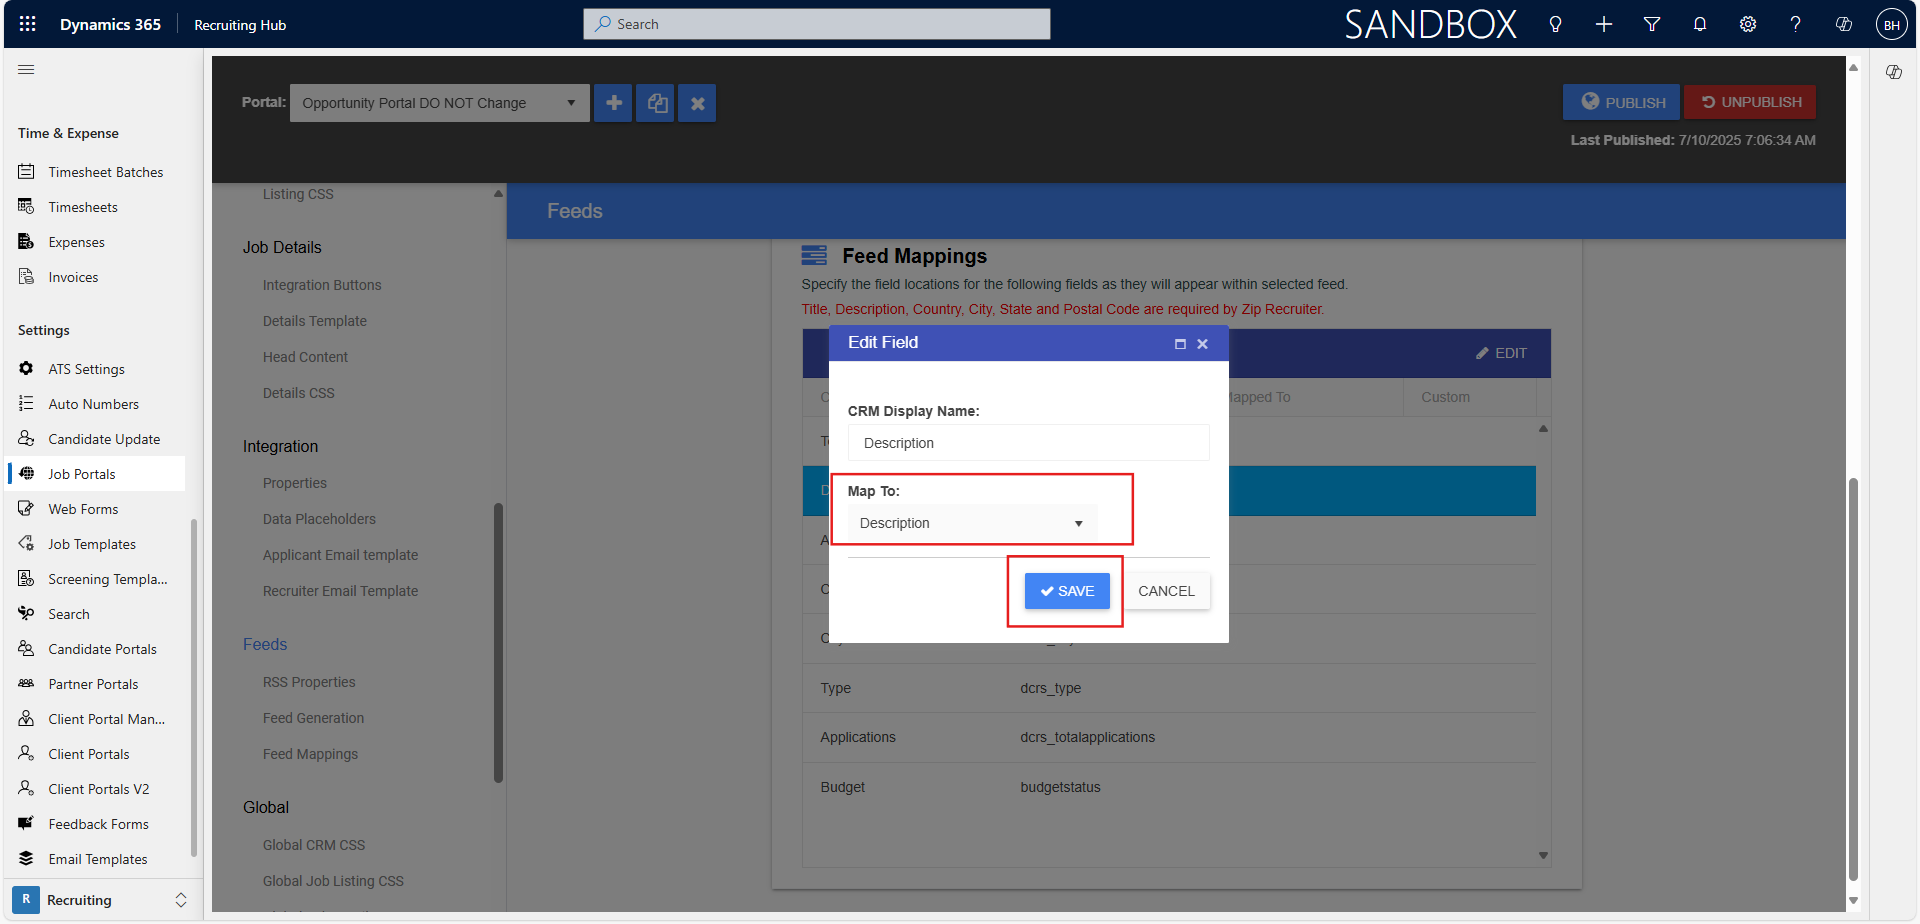
Repeat the process with all the fields you want to map.
Press Save and Publish.
Post your comment on this topic.