
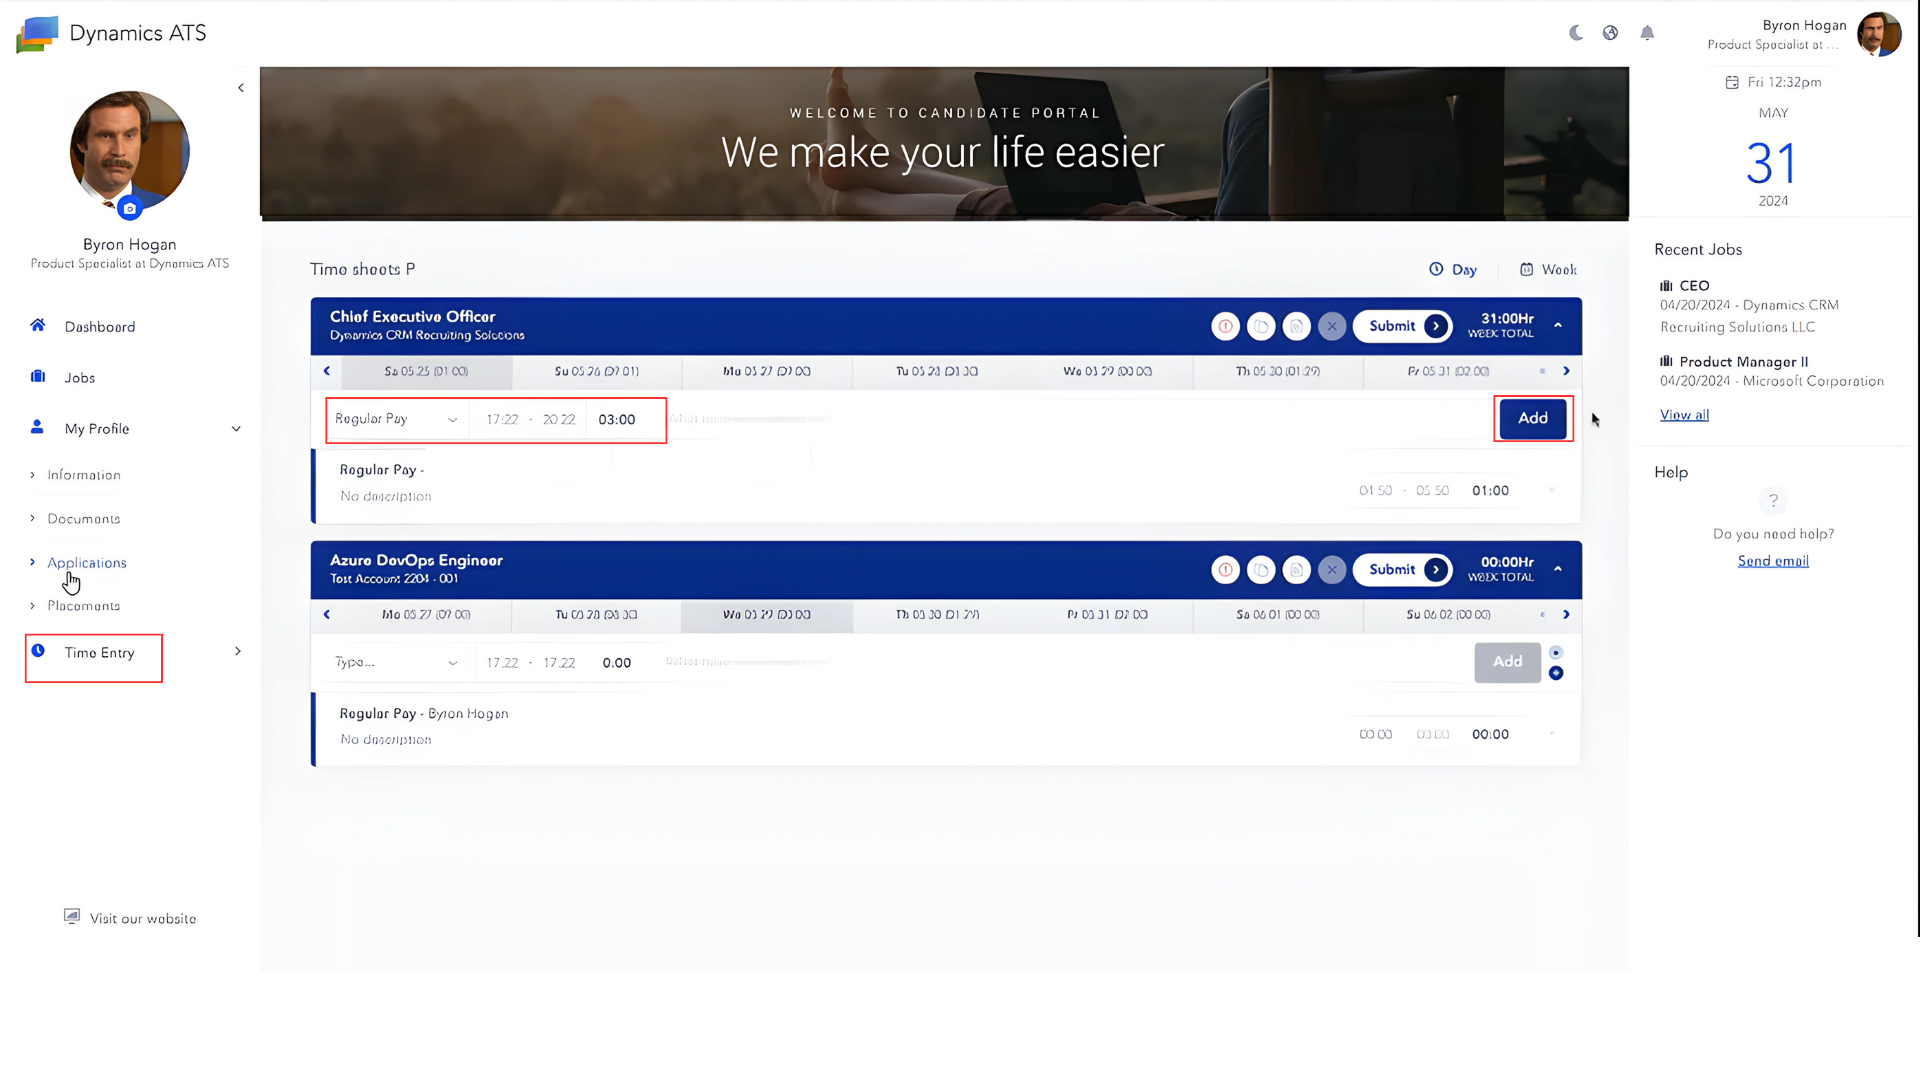
Through the Candidate Portal, users can send their working hours and request a payment. To do this, they need to go to Time Entry in the sidebar. Depending on the company’s configuration, they can enter the hours individually or by day.
If users need to specify detailed hours of the day, they must select Day.

There, users can input the total number of working hours. Then, they must press Add.
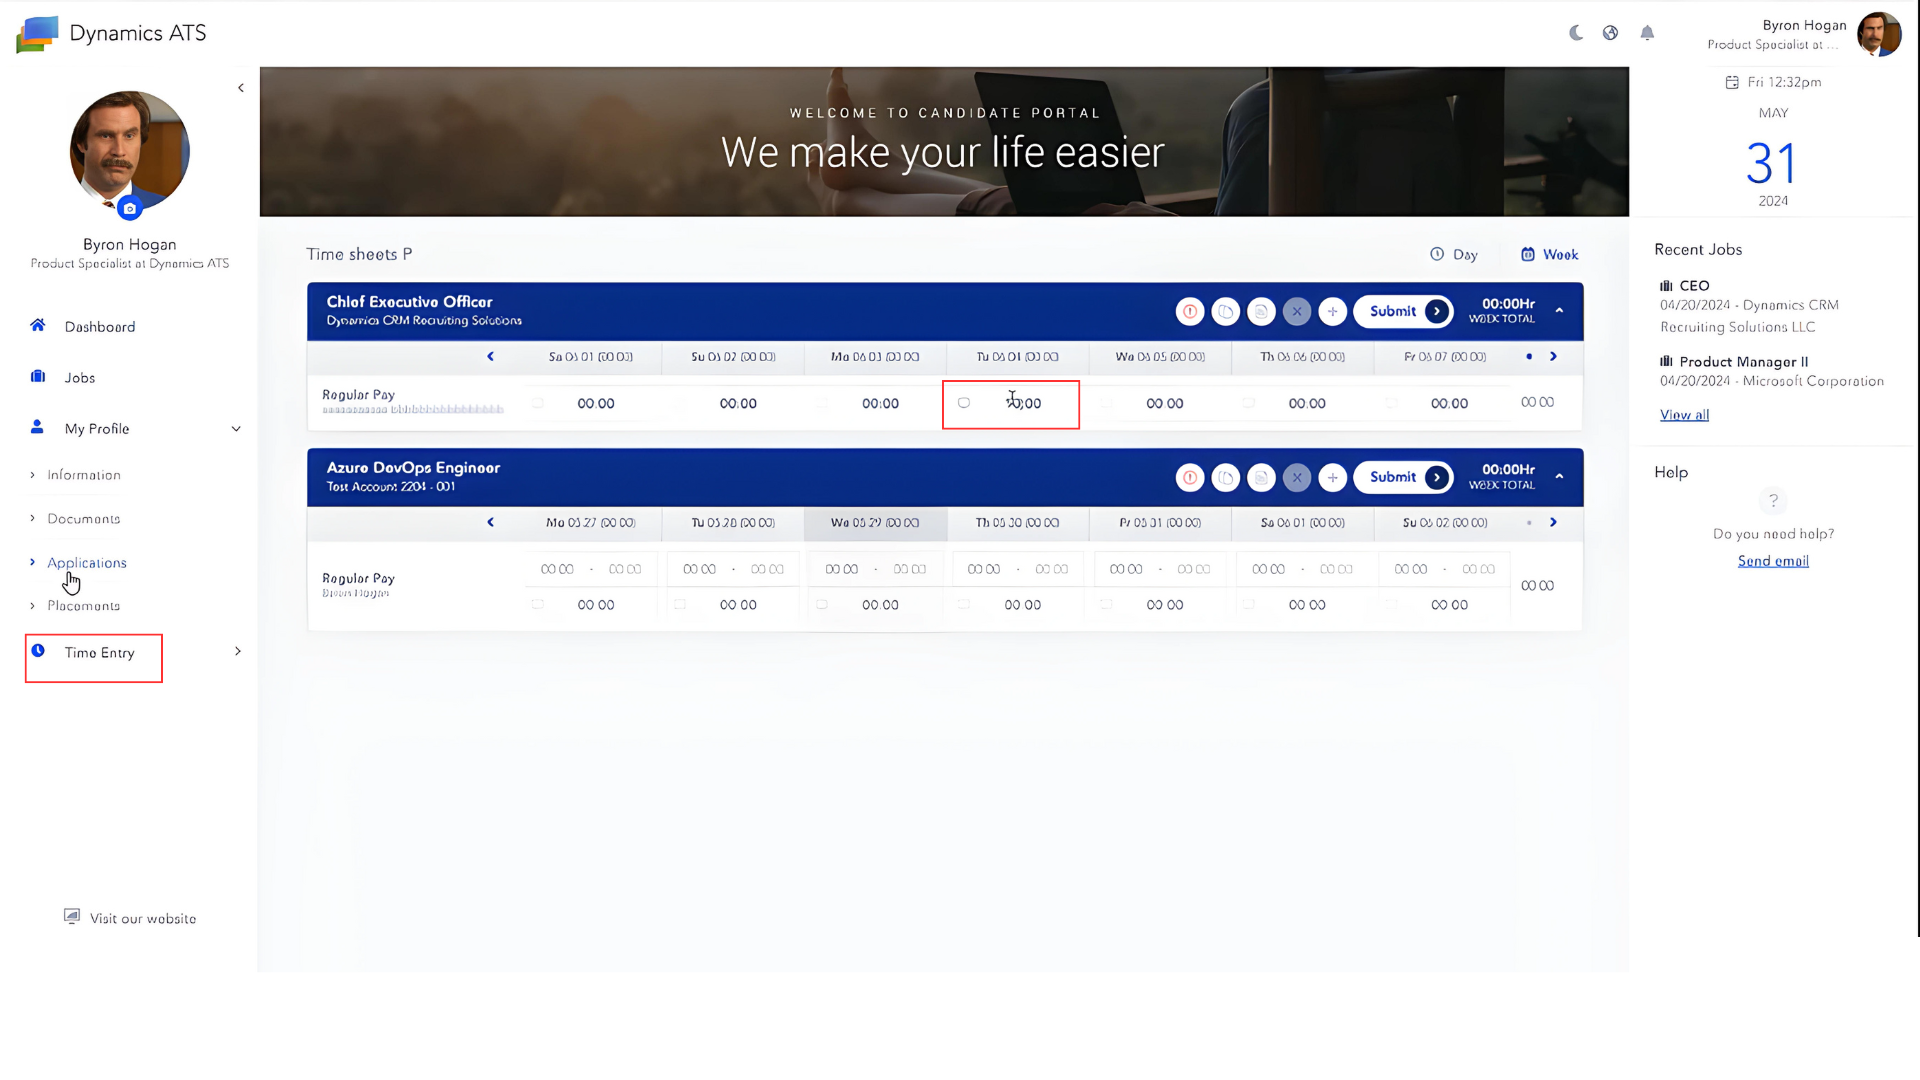
If users need to specify the working hours for the entire week, they can do so directly from the weekly view. They simply add the start and finish working hours, and the system will automatically calculate the total working hours.
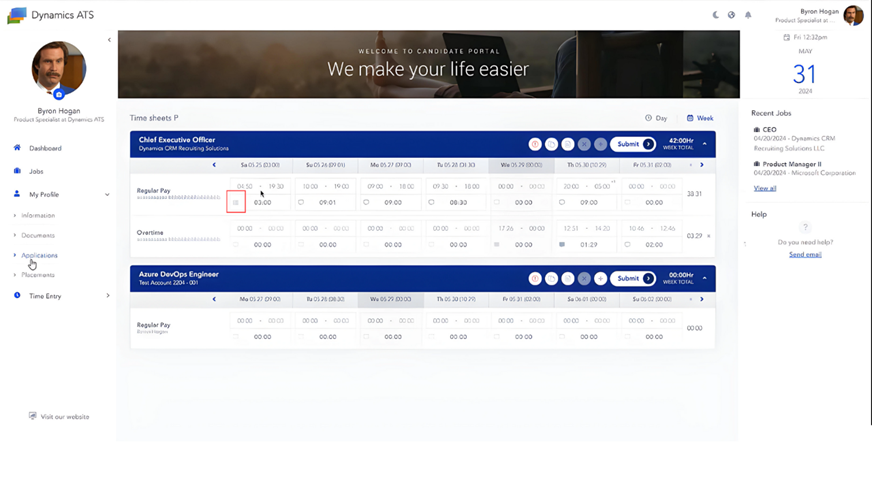
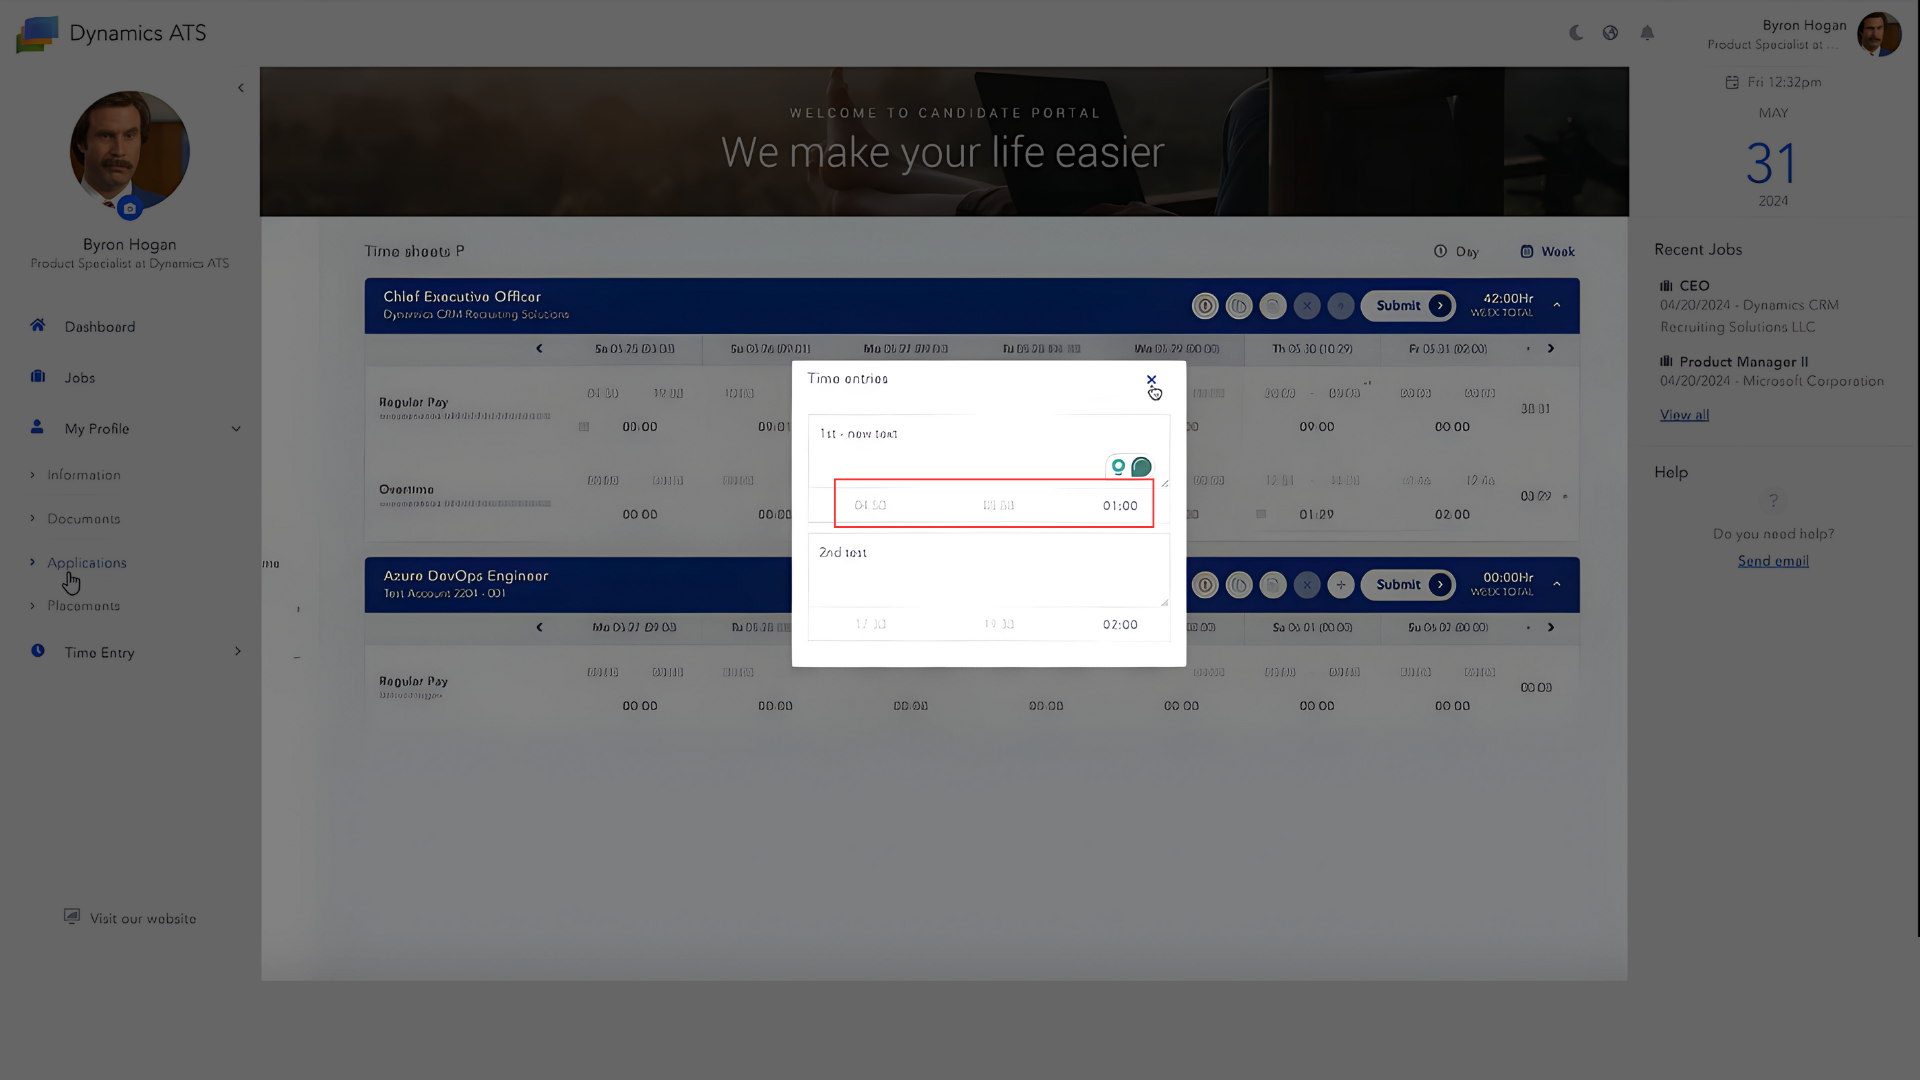
If users need to edit previously entered hours, they cannot do it directly from the weekly view. Instead, they need to click on the edit icon.
A pop-up will appear. From there, users can change the working hours and the title. The changes will be saved automatically.
The company may also allow users to register their working hours in real time. To do this, they need to click on Day, select the current day, and choose the type of hours. Then, they press the play icon and hit Start.
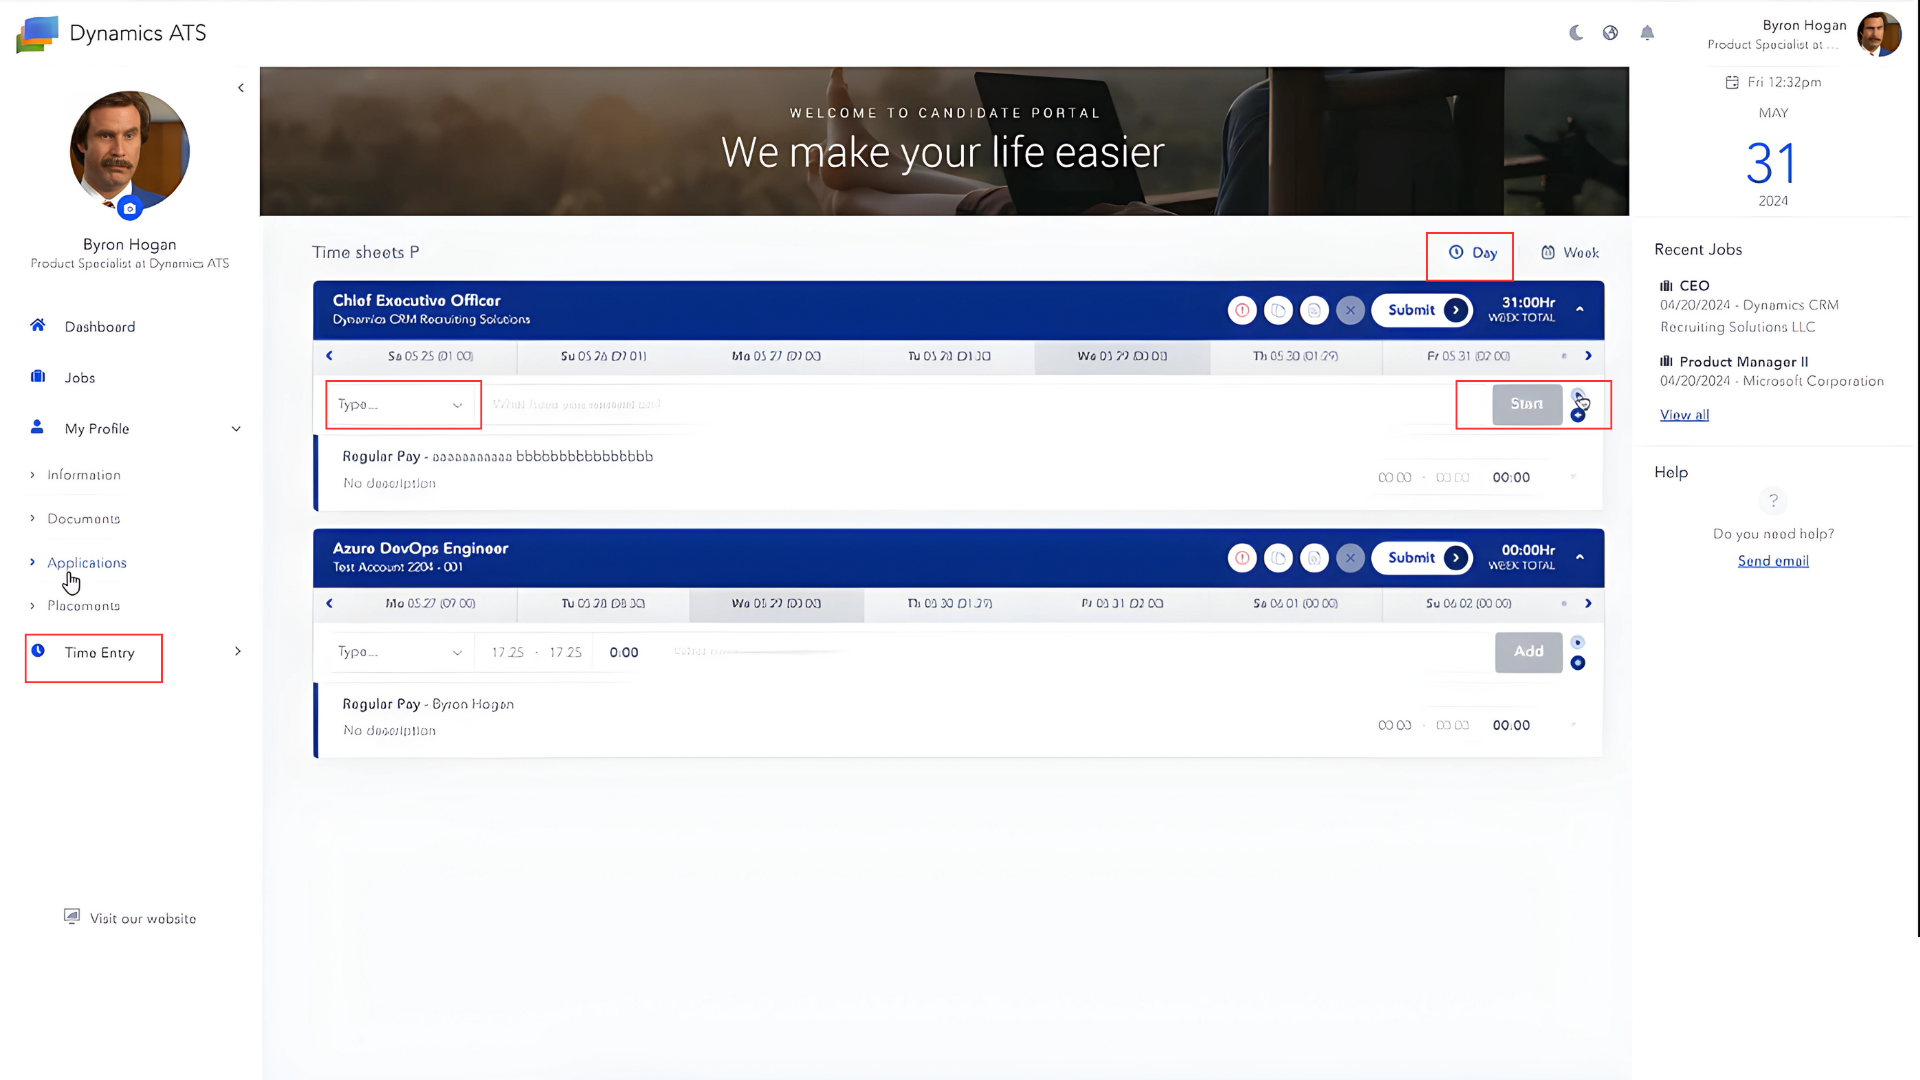
When finished, users need to stop the timer manually by pressing the End button.
Whether hours are entered from the week view, the day view, or by tracking in real time, users must press Submit to send them for approval.
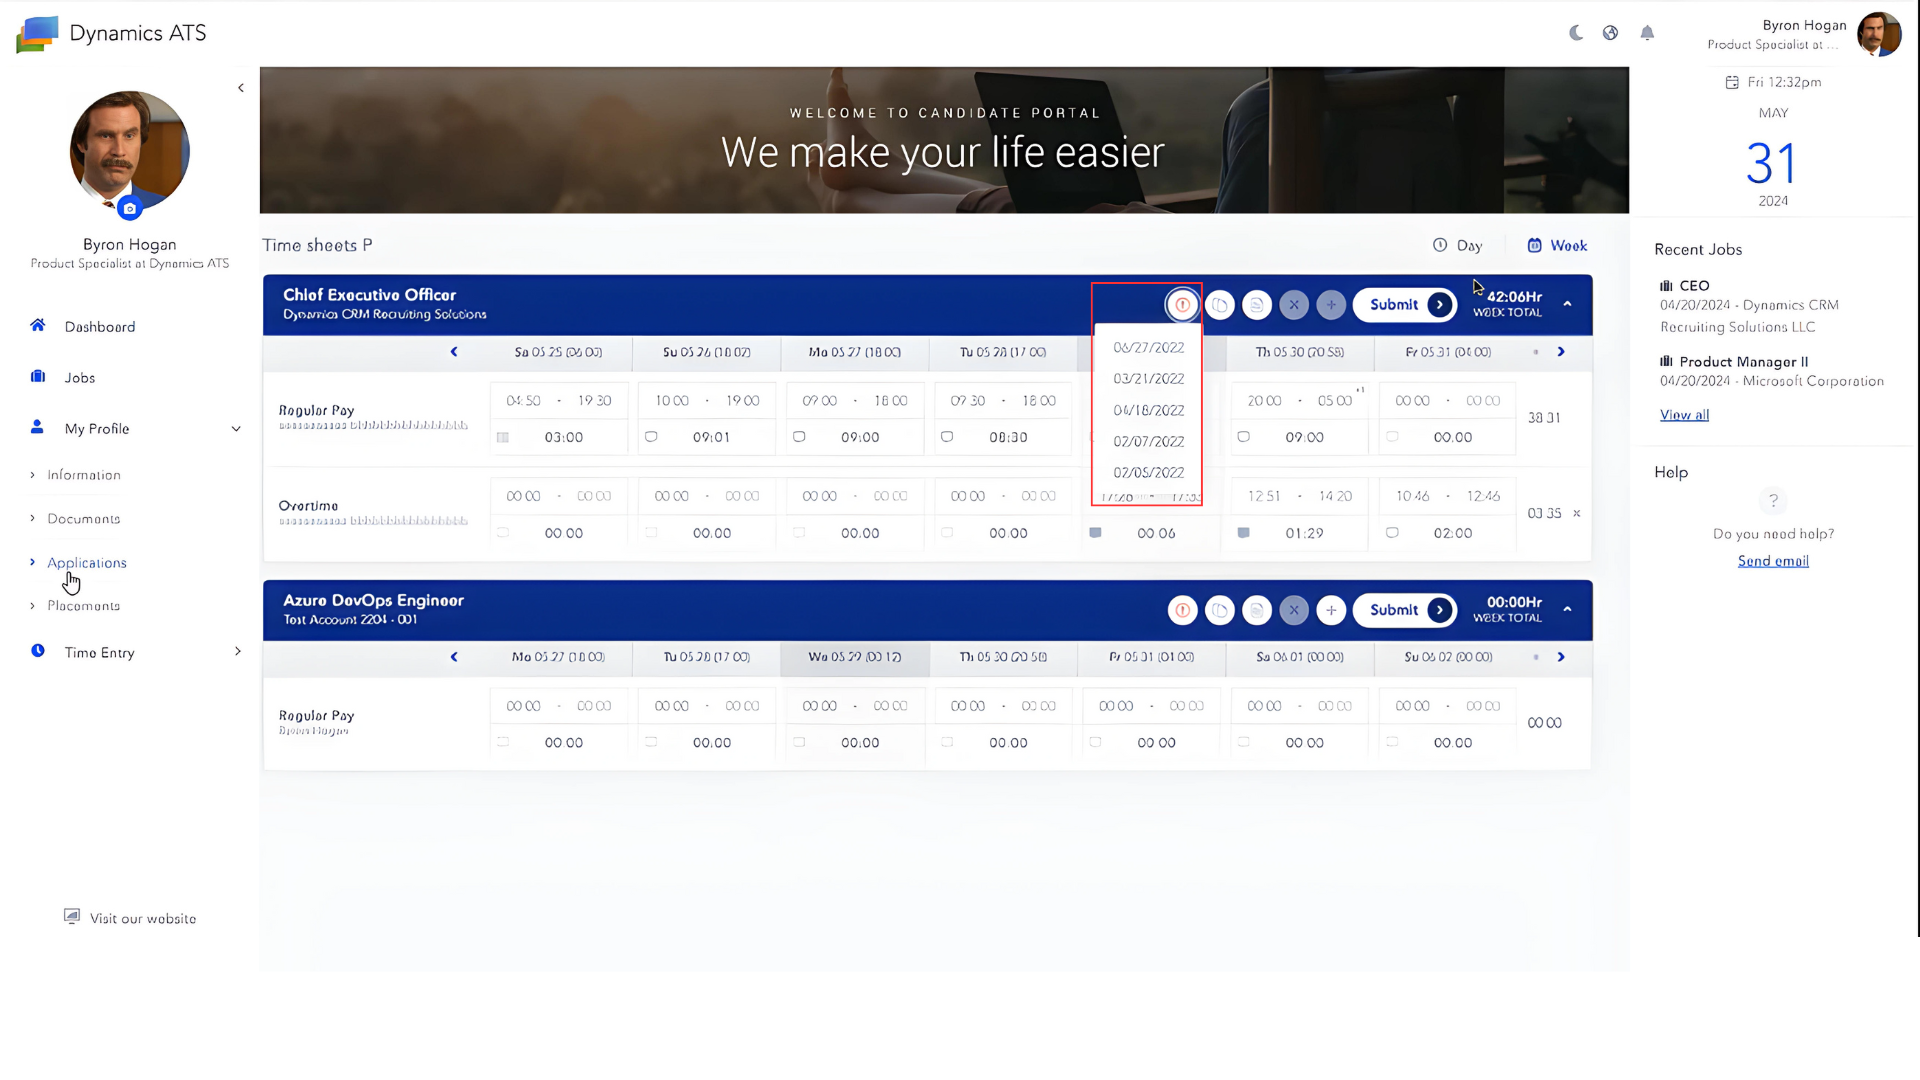
Users can check the dates of the timesheets without submitting them by clicking on the information icon Pending to Submit.
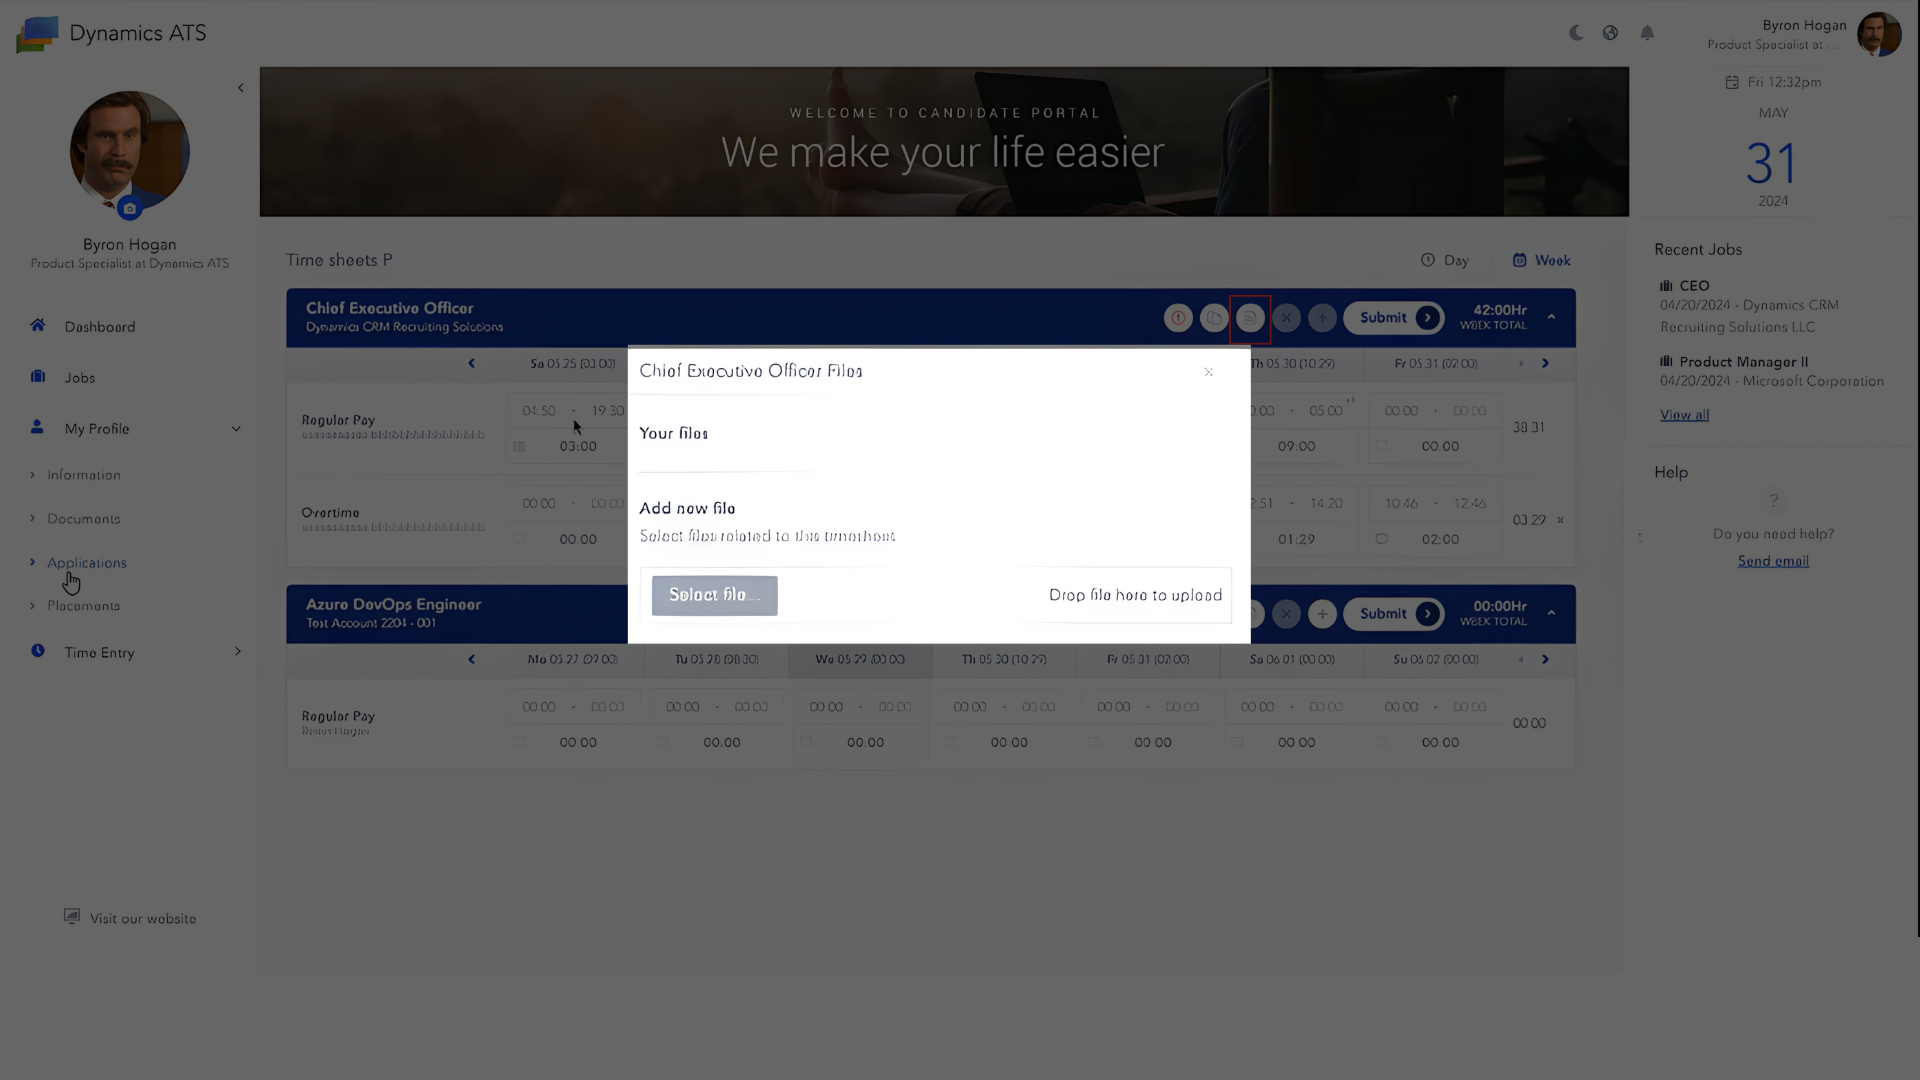
Users can also attach files to their Timesheet. To do this, they need to press the Add Files icon.

A pop-up will appear. From there, users can add their files.
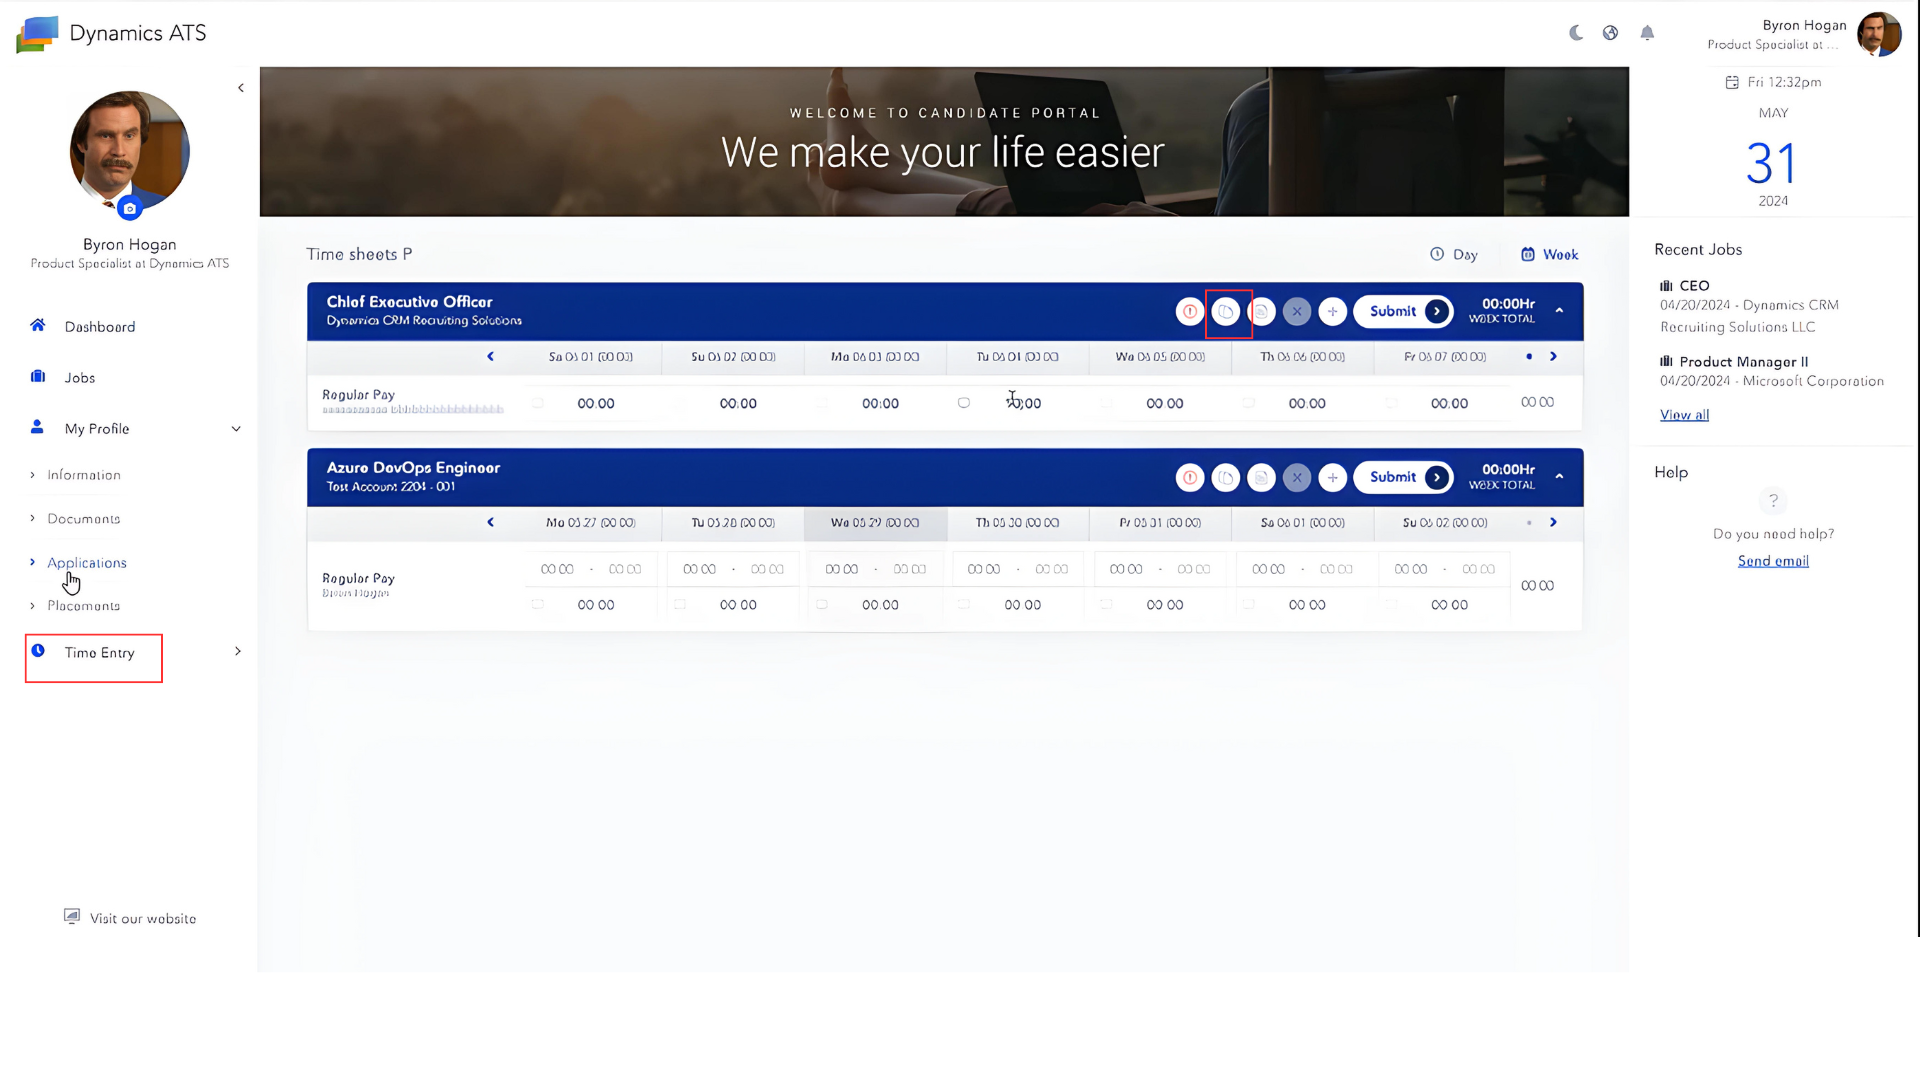
Additionally, users can copy the same hours from the previous week by pressing this icon. To do this, it is necessary to go to a week without previous entries.
Post your comment on this topic.