
To create or edit system views, head to PowerApps.
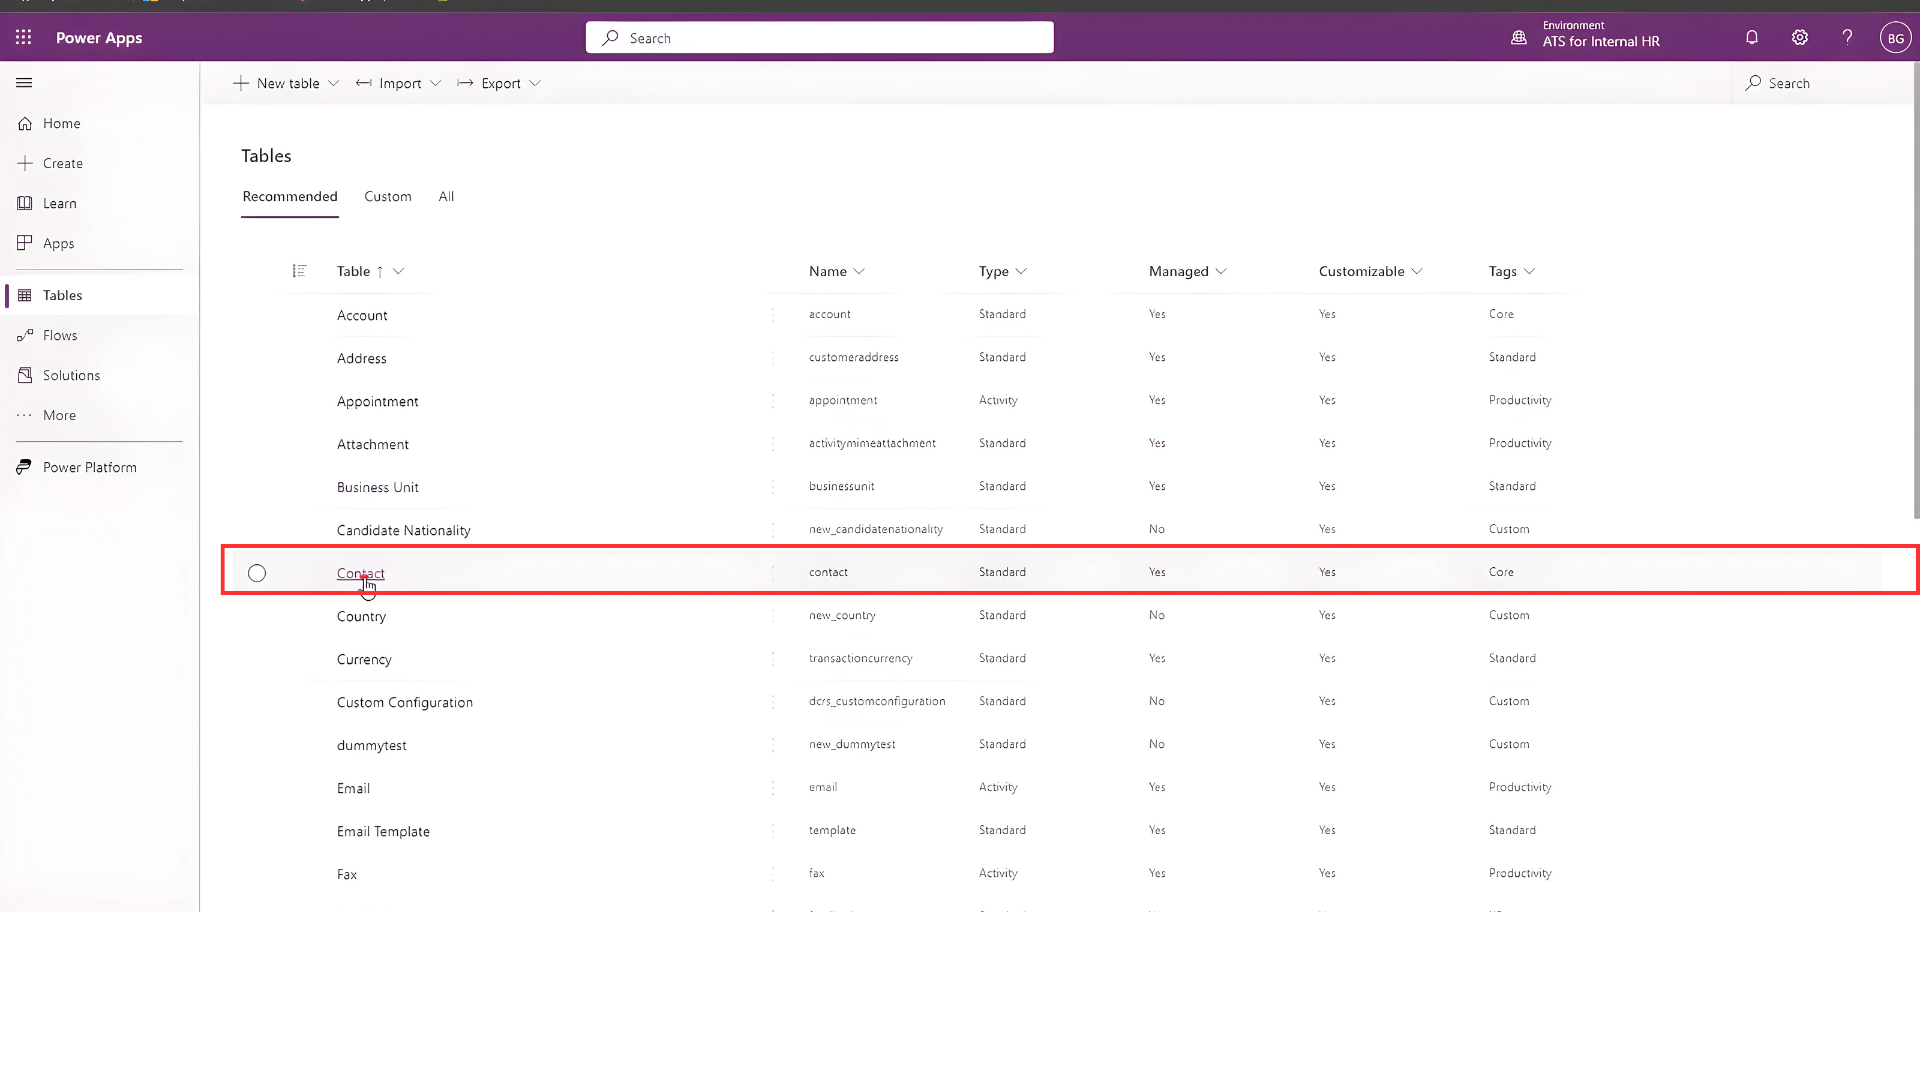
Check to make sure you are in the correct environment by clicking on Environment. Then go to Tables to select the entity you want to create or edit the view, which could be Contact/candidate, Application, Placement, etc.

In this example, we choose Contact.
In Data Experience, select Views.
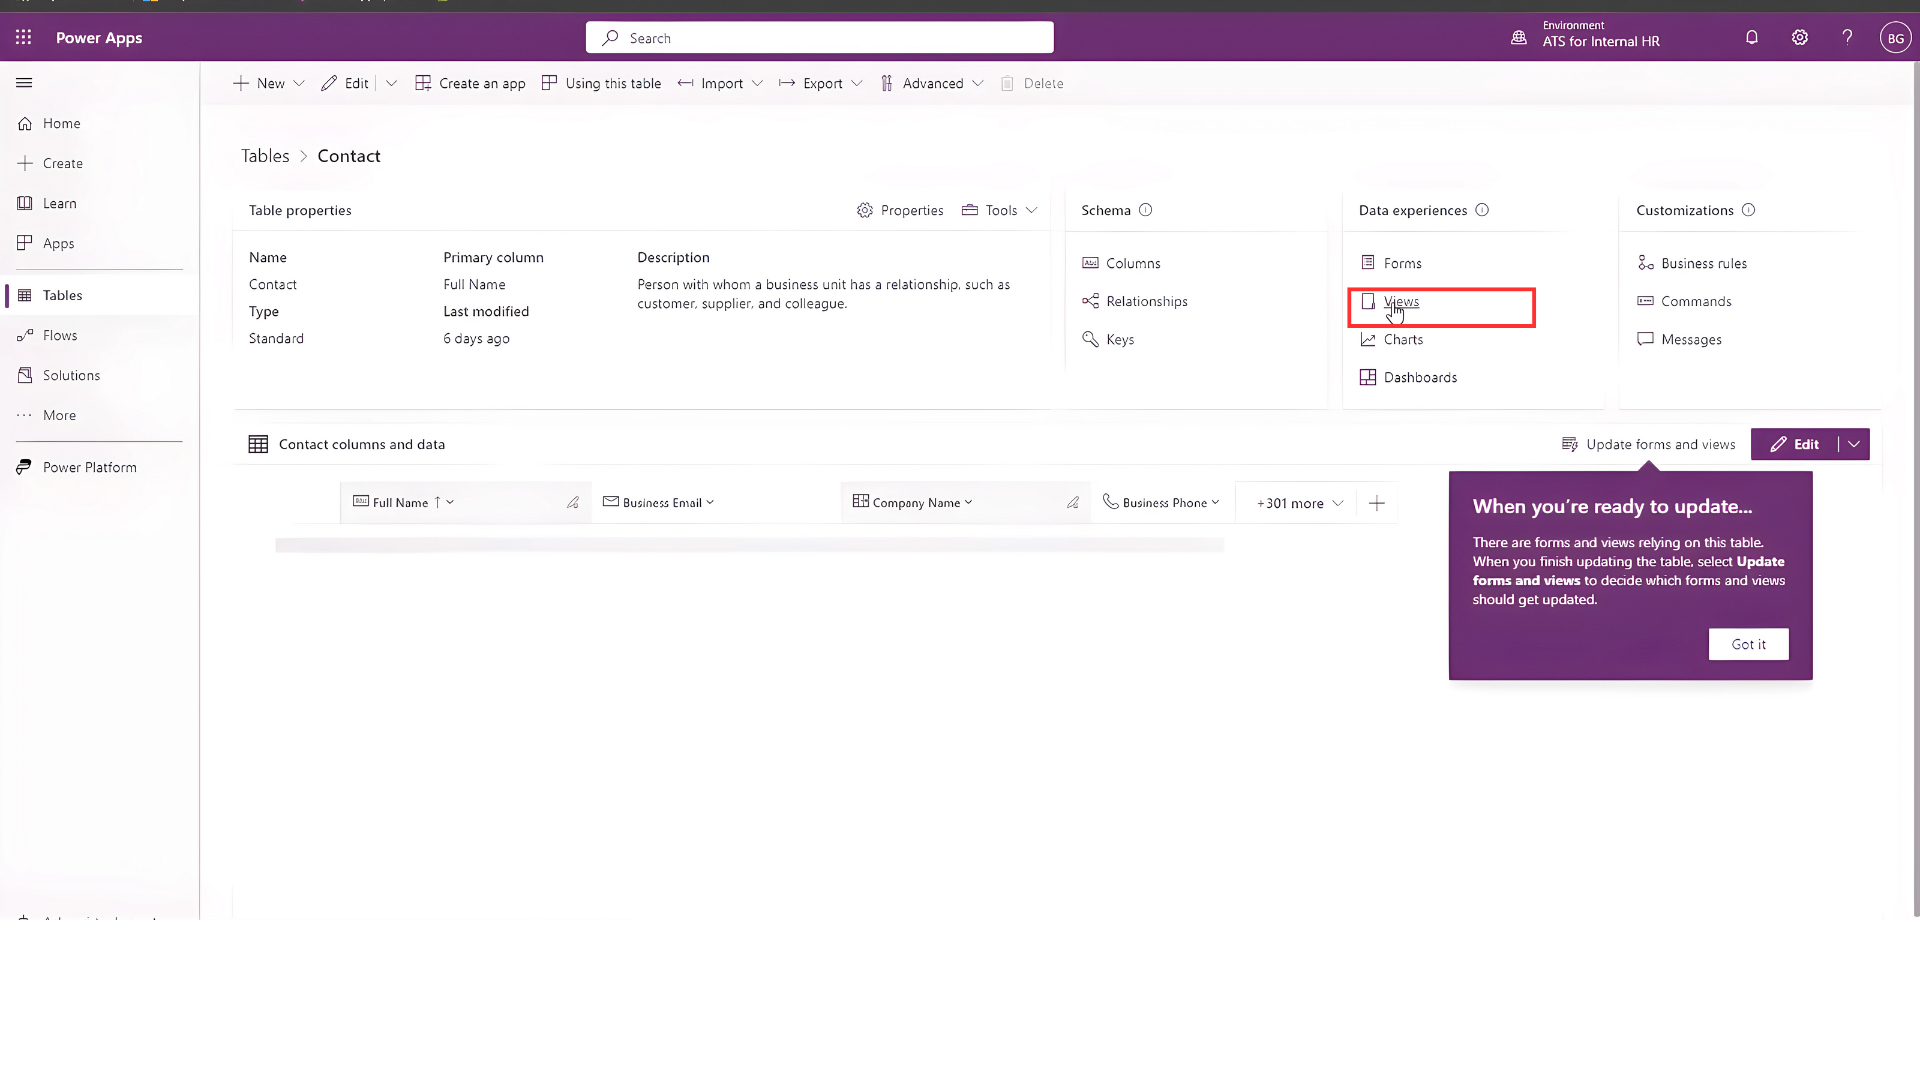
Then click All Candidates.
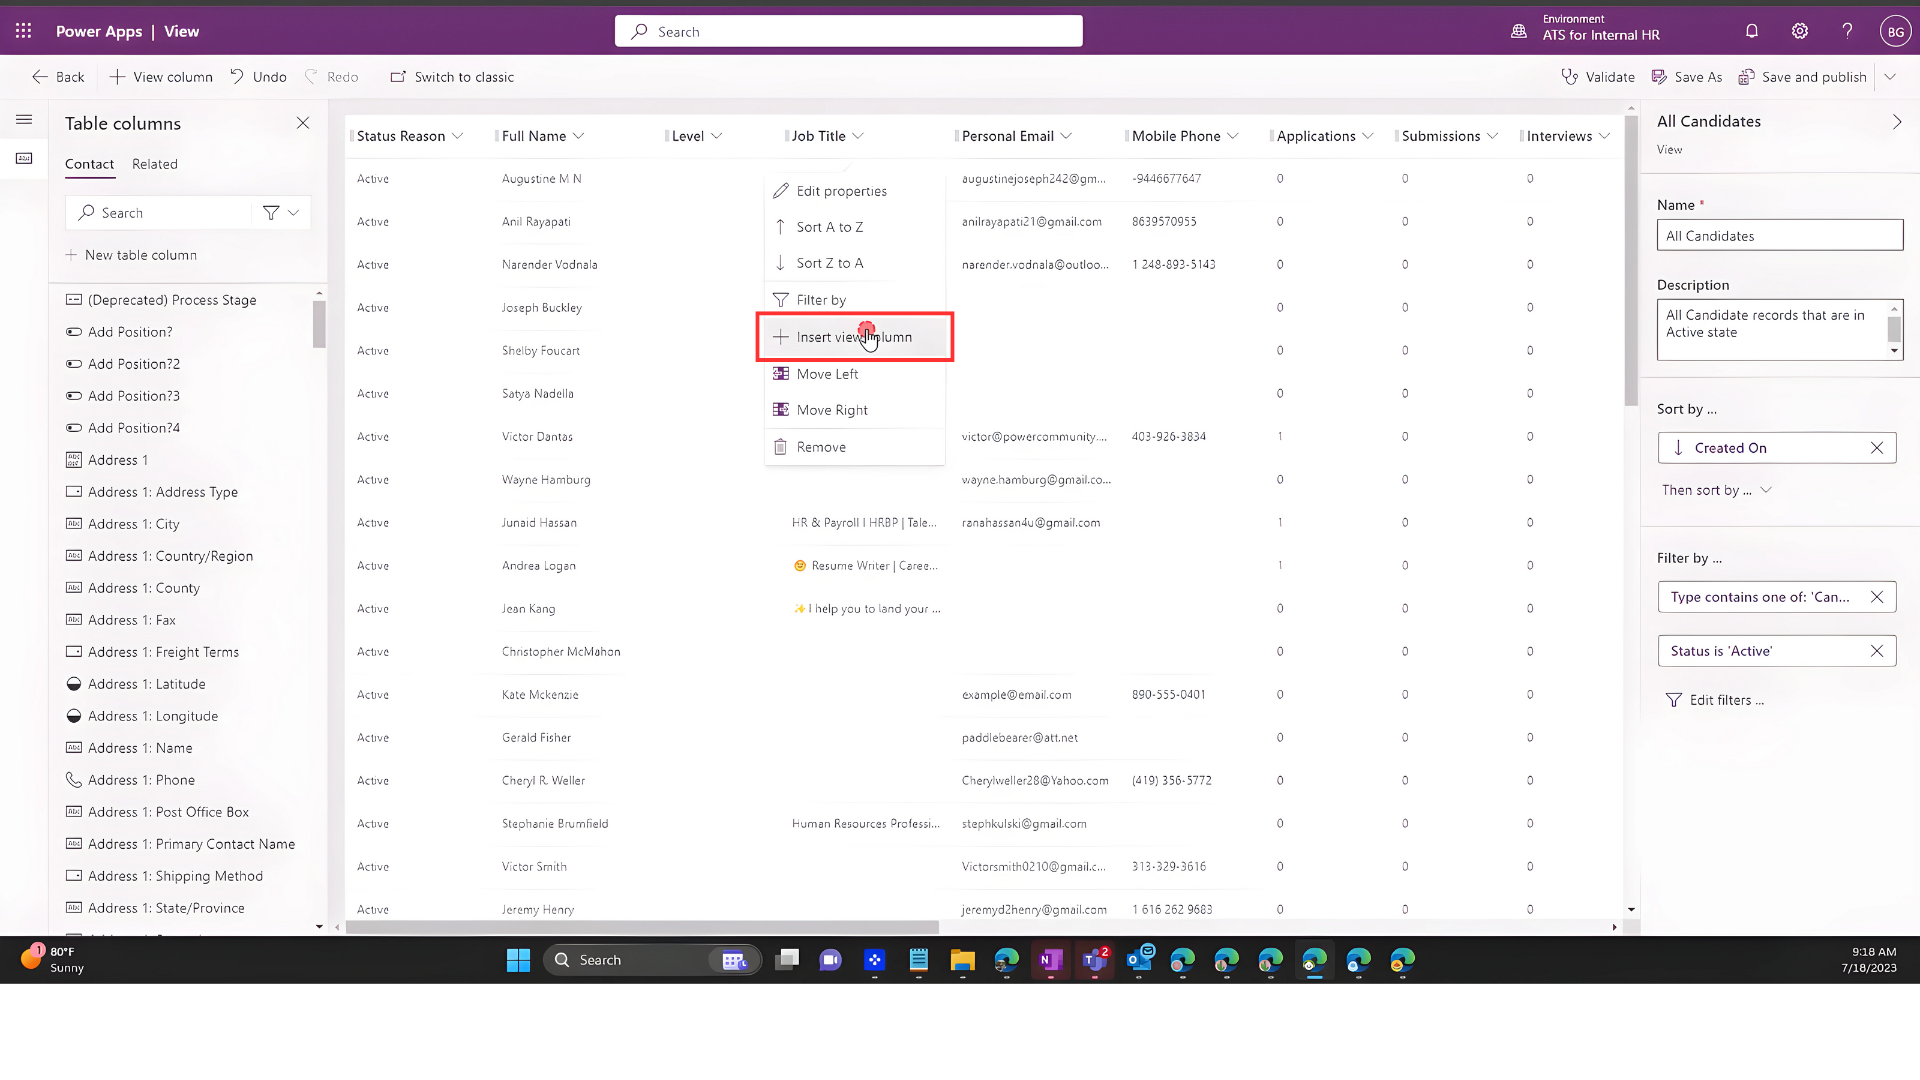
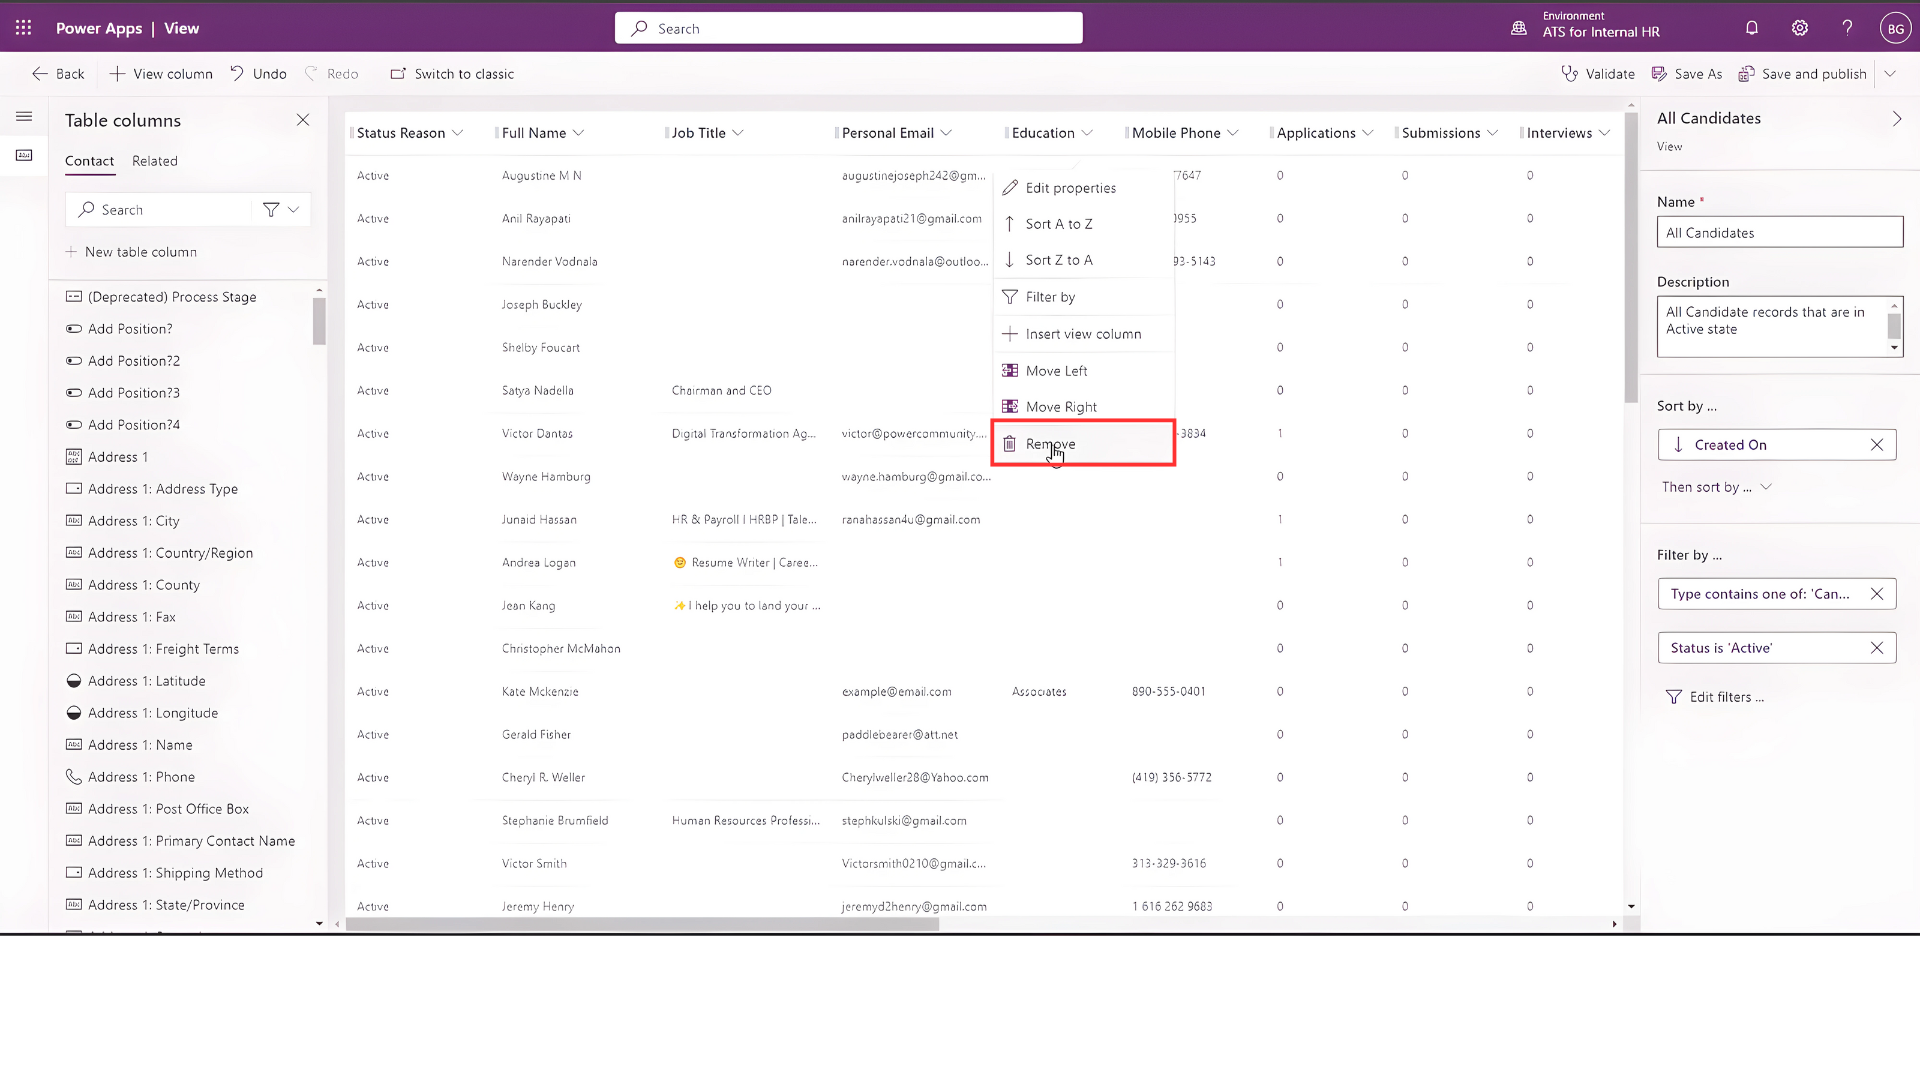
To add a new view column, click on an existing column and select Insert View Column.
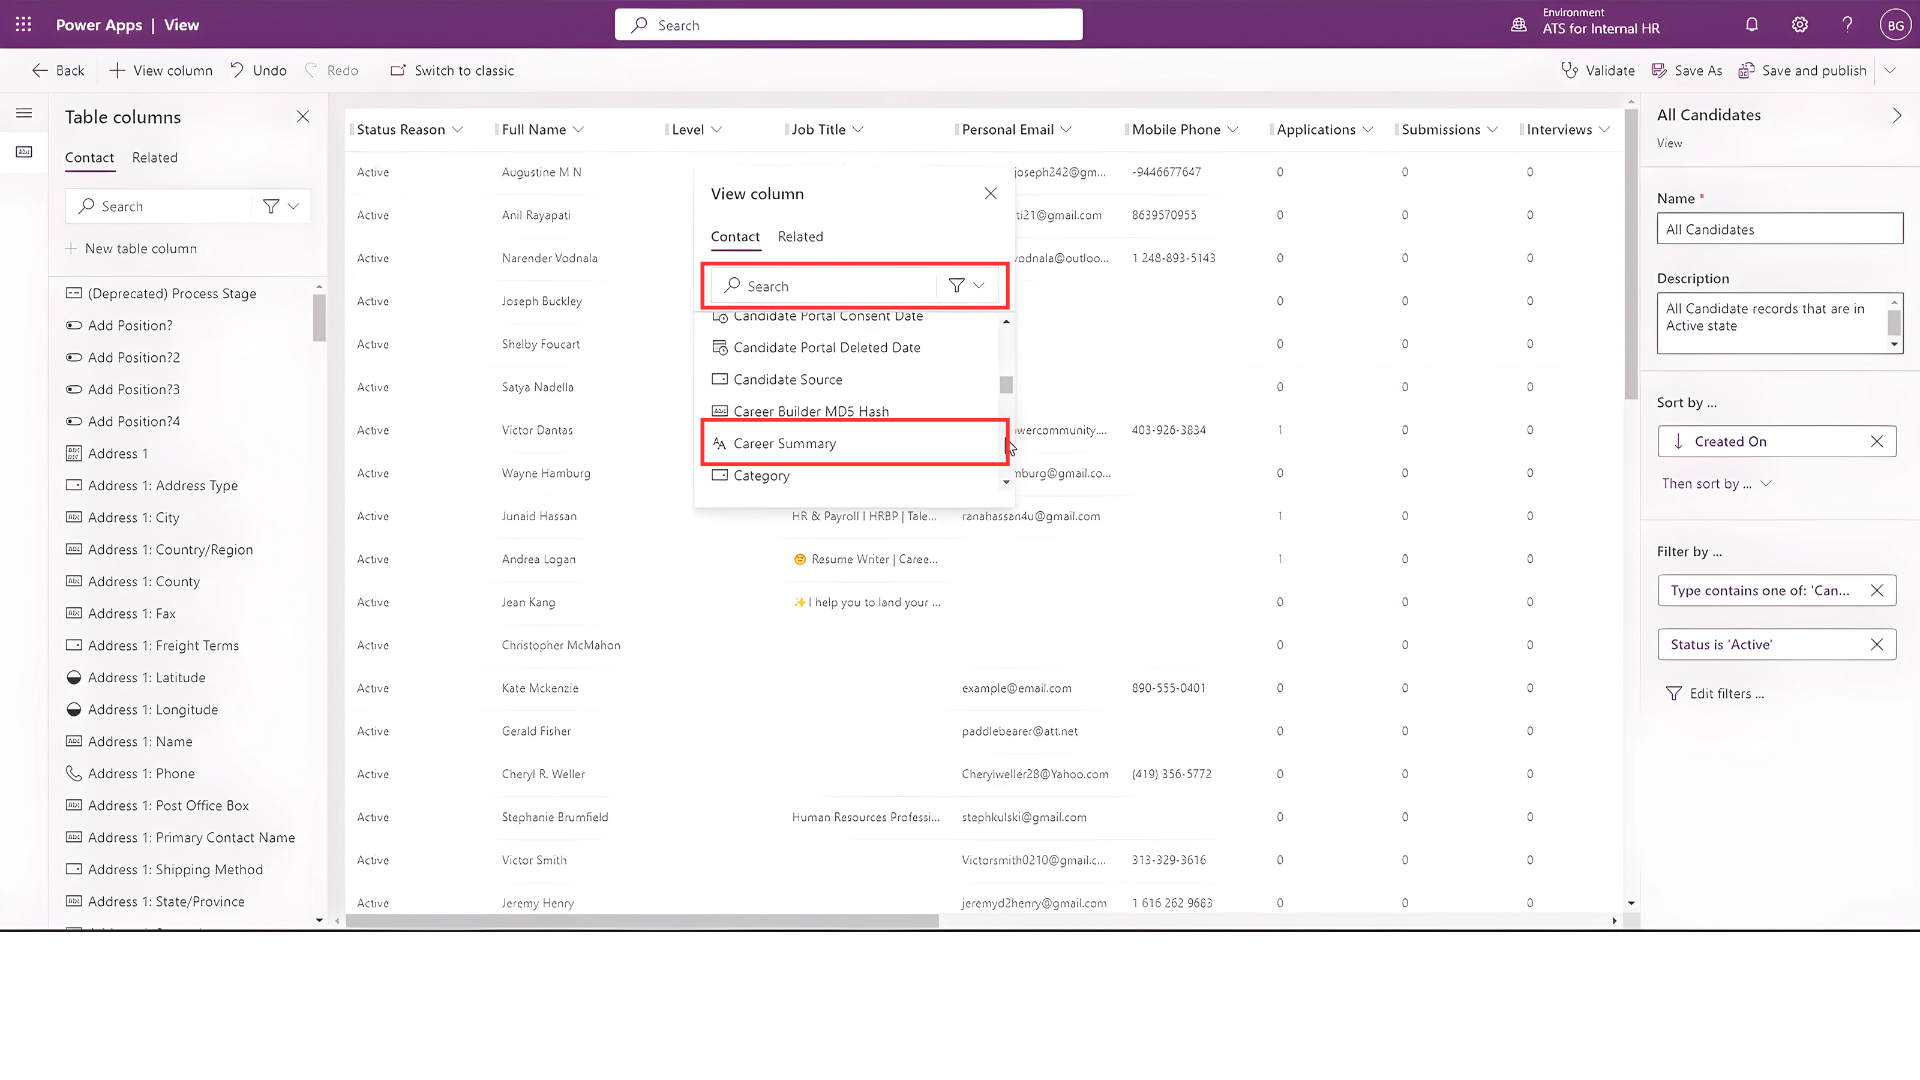
Next, select what information you want to add and select it. You can use the search bar or scroll down to find it.
You can change the order by dragging and dropping the column.
To eliminate a view, you must click on it and select Remove in the dropdown menu.
When you finish, press Save and publishing.
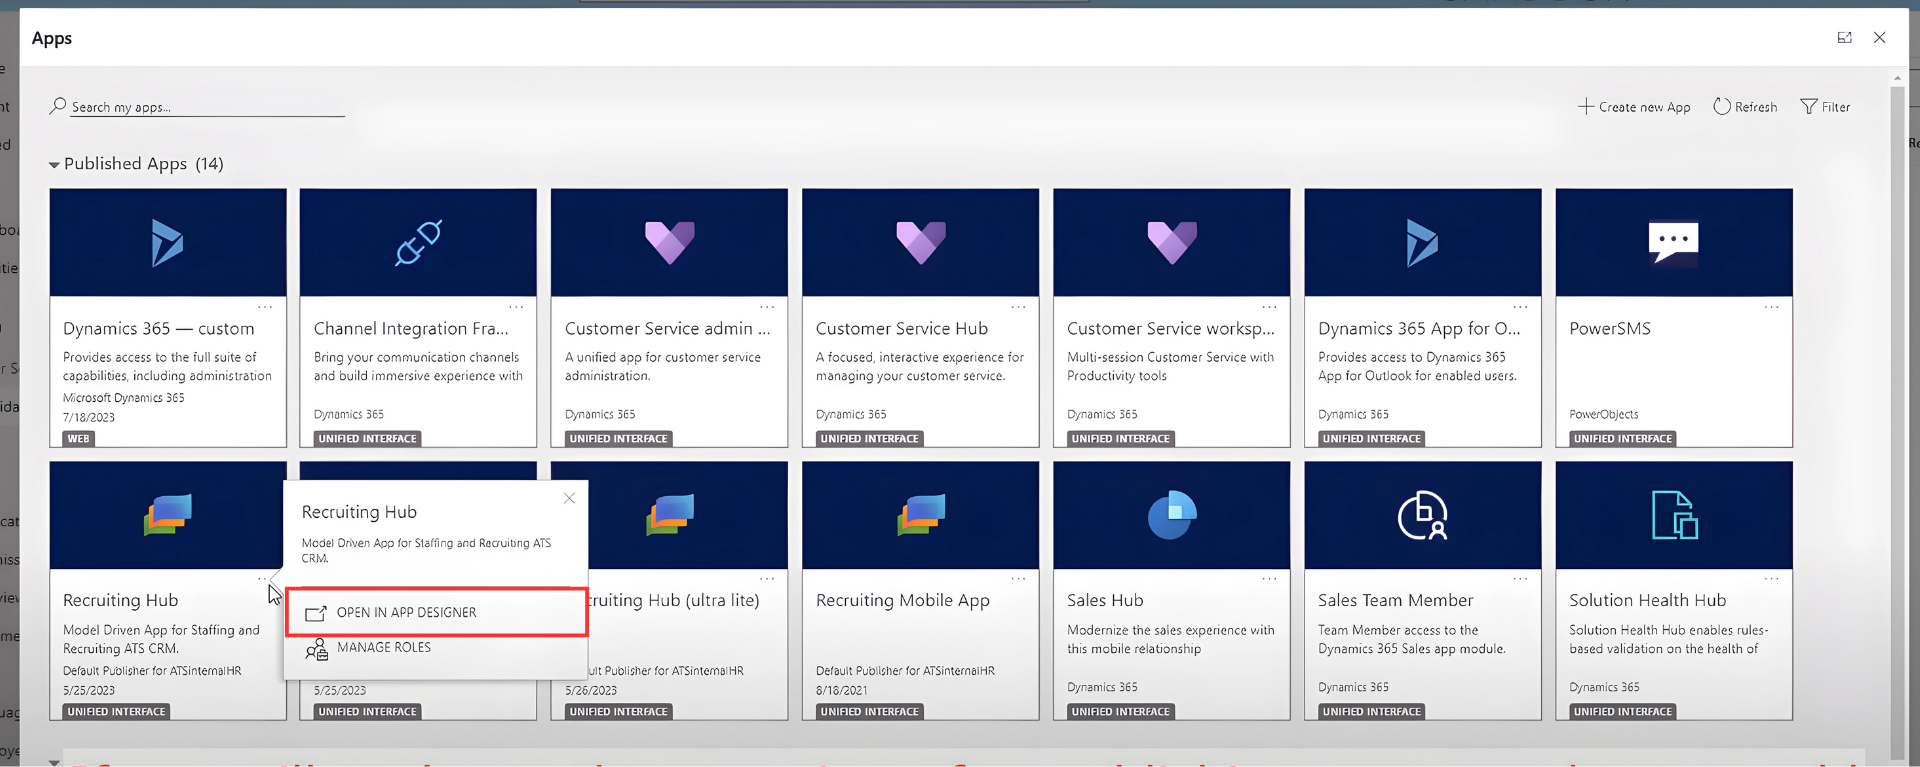
If you can*t see the new view after publishing, you may have to add it to the site map in App Designer.
Press the three dots in the Recruiter Hub (Lite) box and select Open in App Designer.
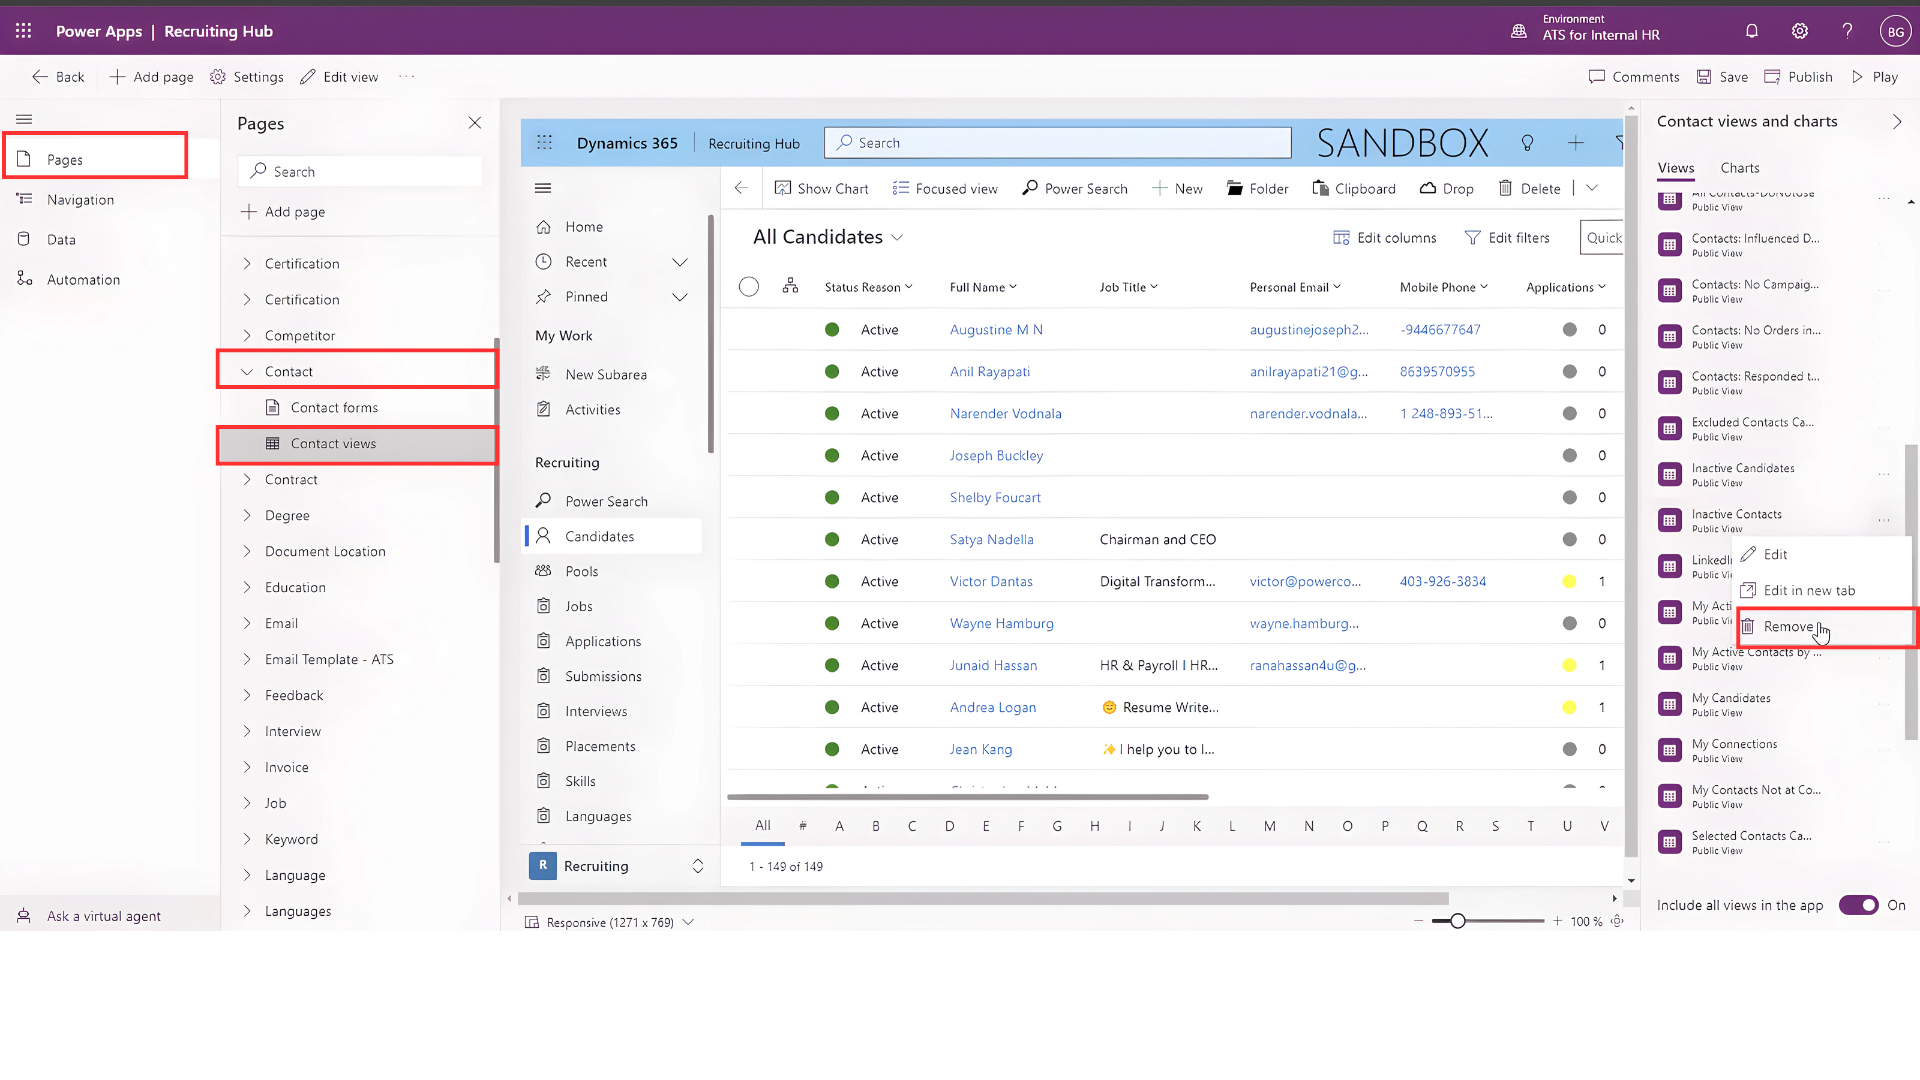
Go to Pages, and next select your new view entity (in our example Contacts**) Then go to *Views (in this case Contact Views.)
Scroll down in the Contact views and charts and find the actual view. Remove it by clicking on it and selecting Remove.
Then scroll down to Not in this App, click the edit icon, and press Add.
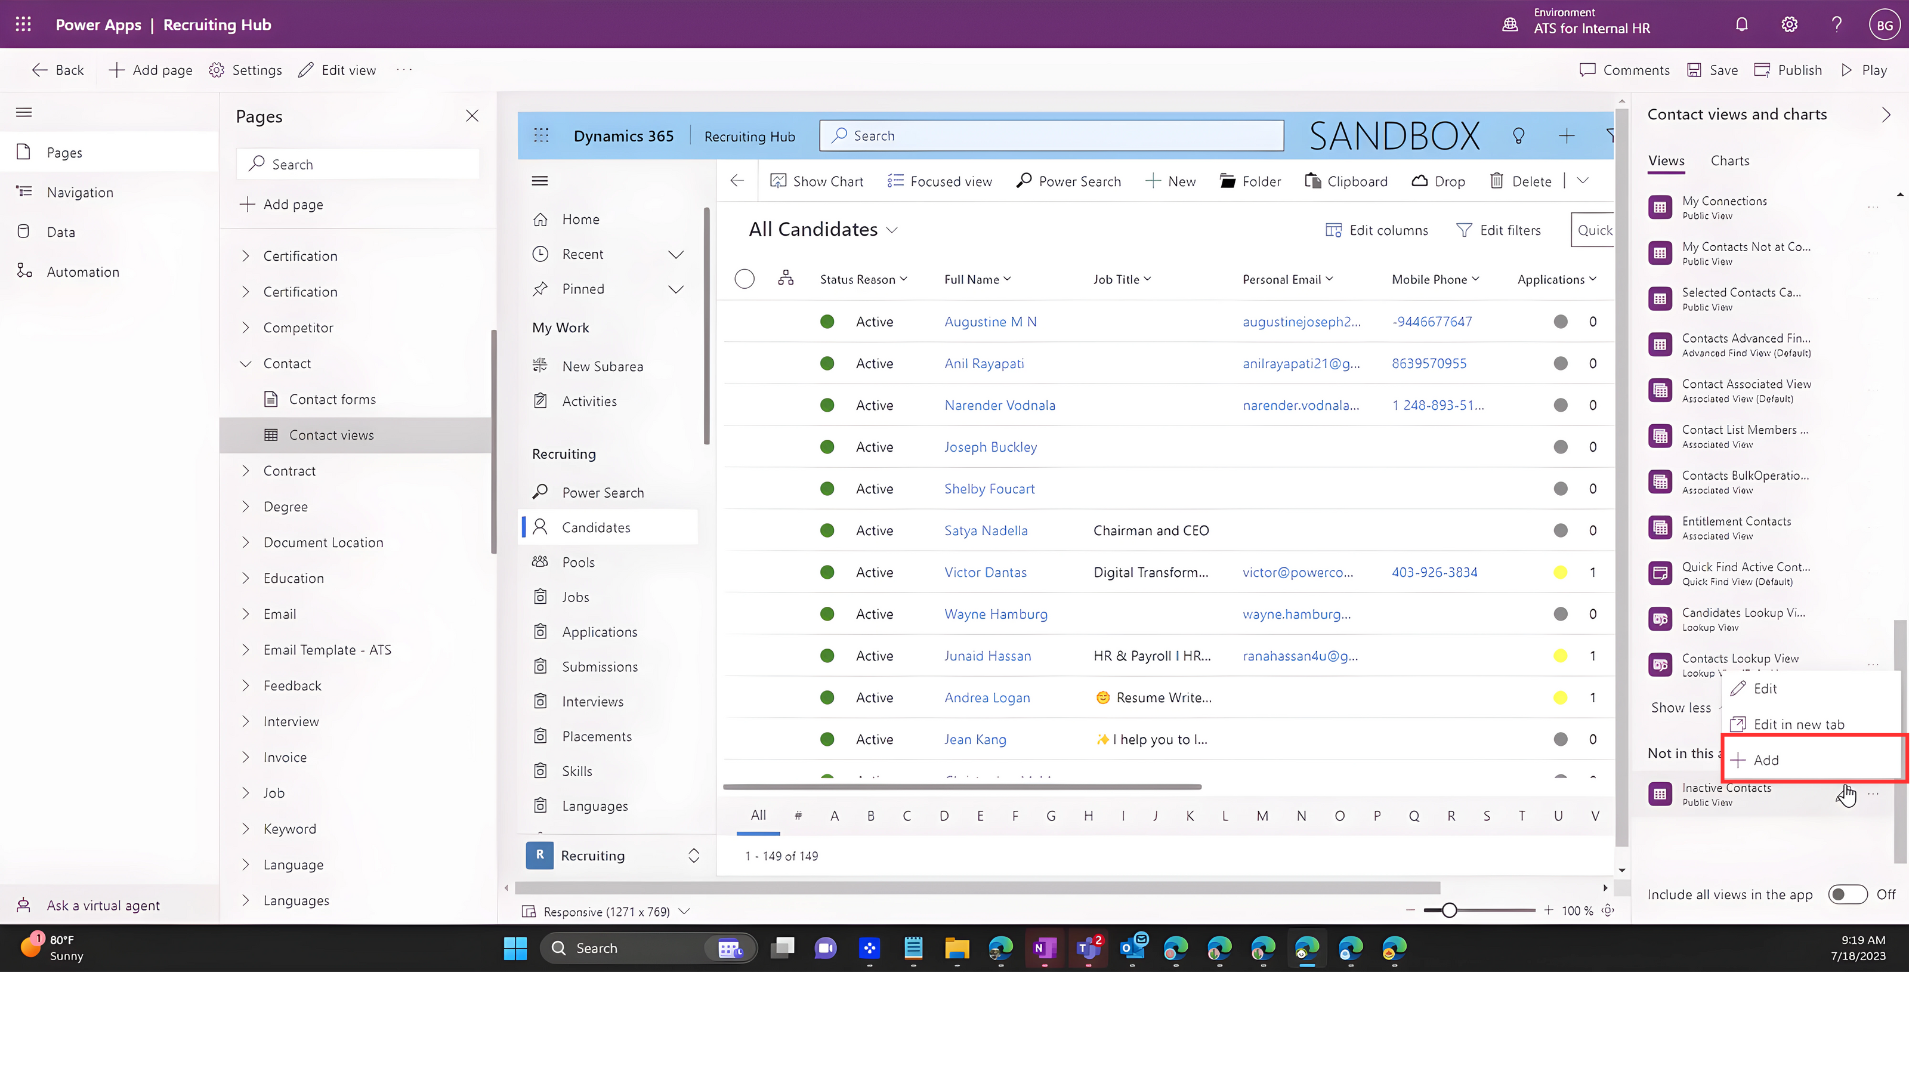
Finally, press Save and Publish.
Post your comment on this topic.