
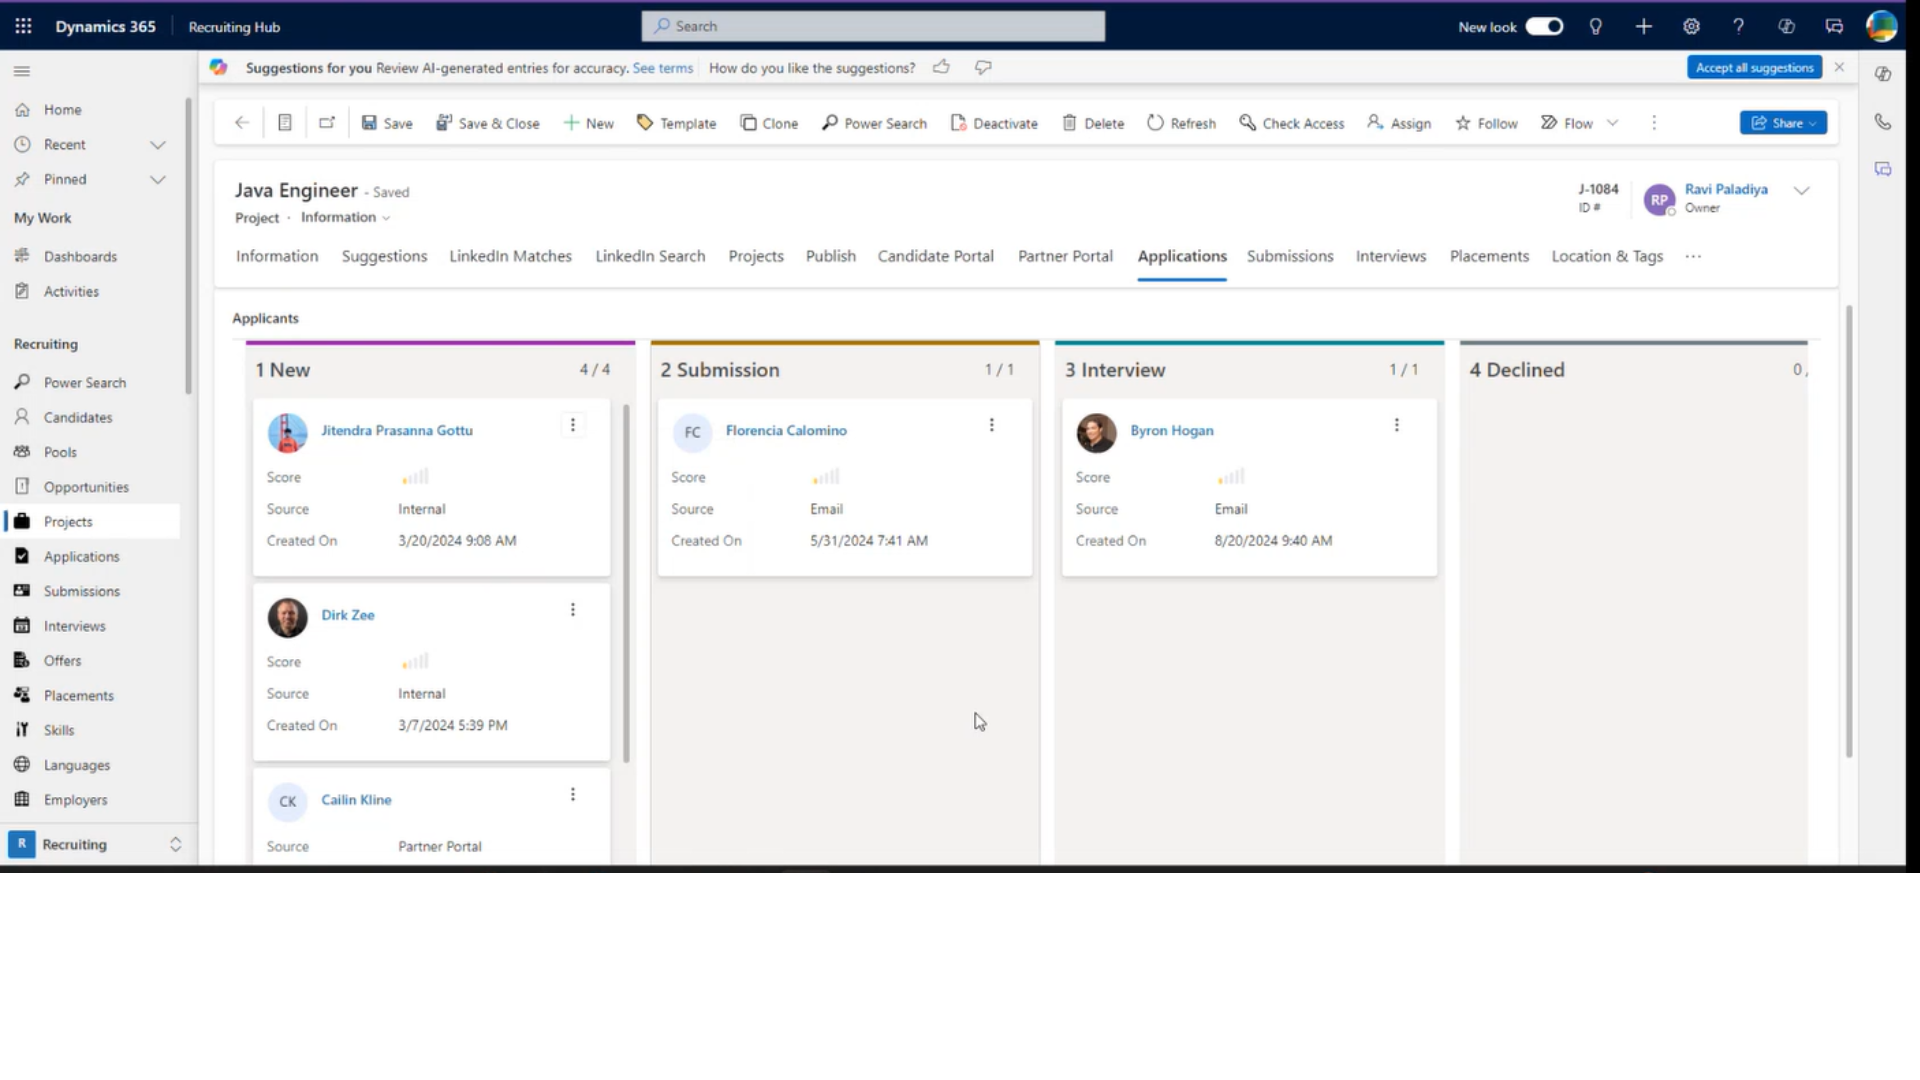
You can select the entities to show in Kanban View.
To start, go to ATS Settings and select Kanban in the Integration settings.
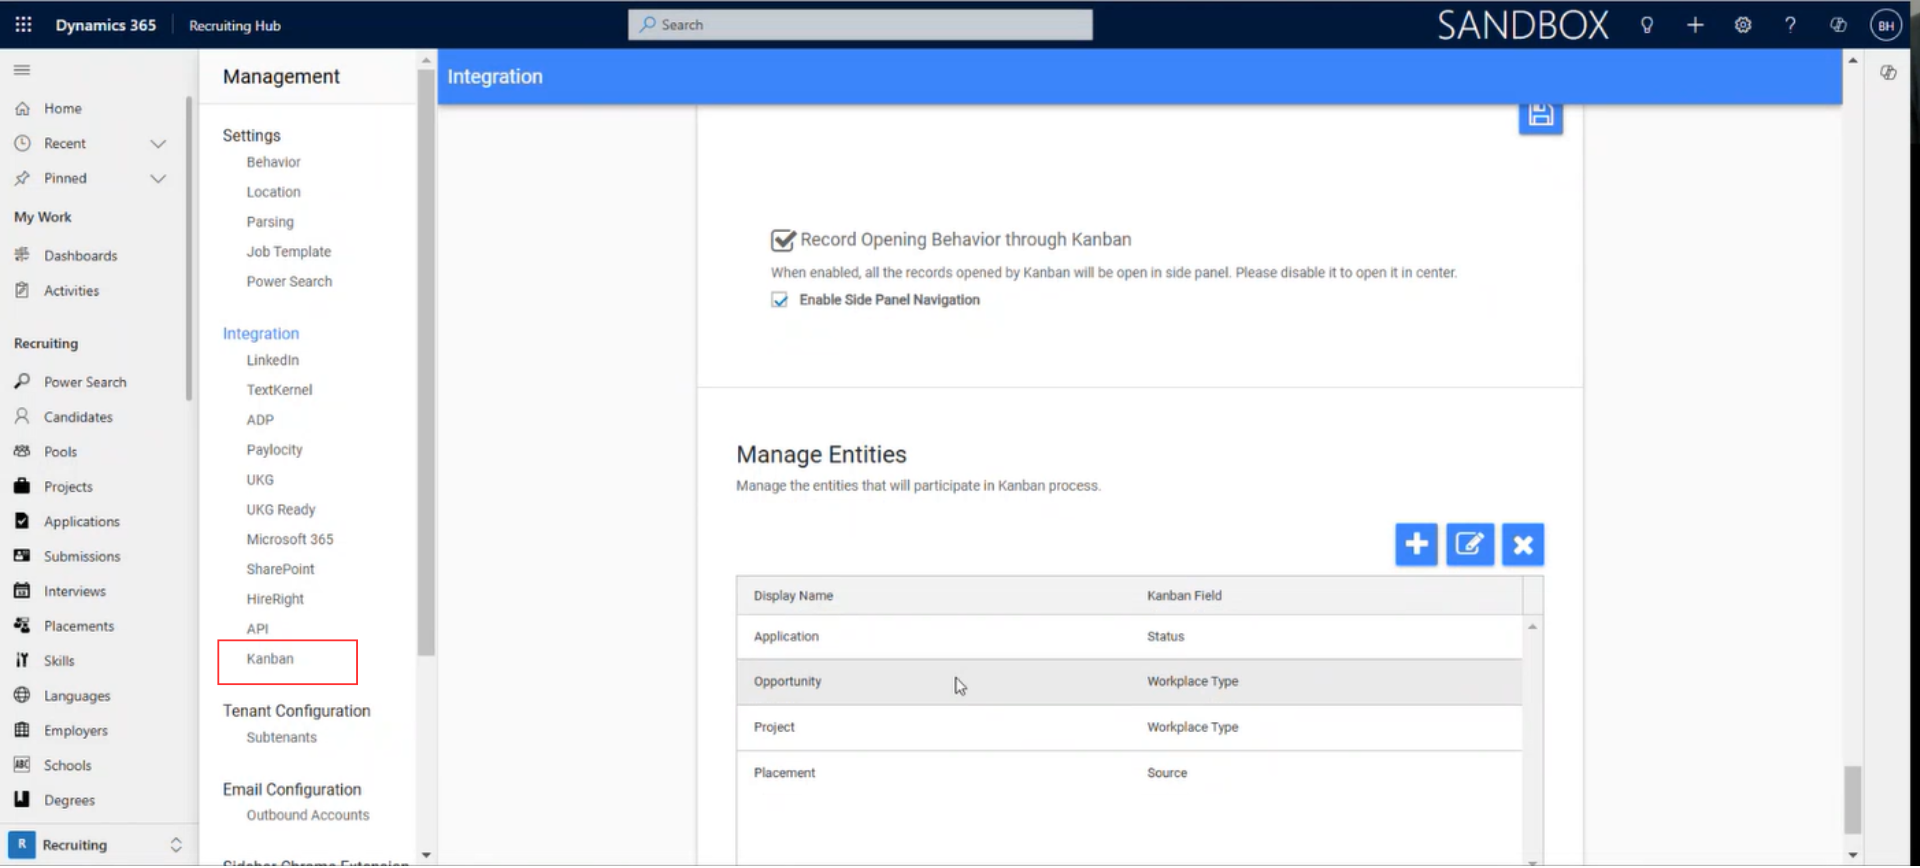
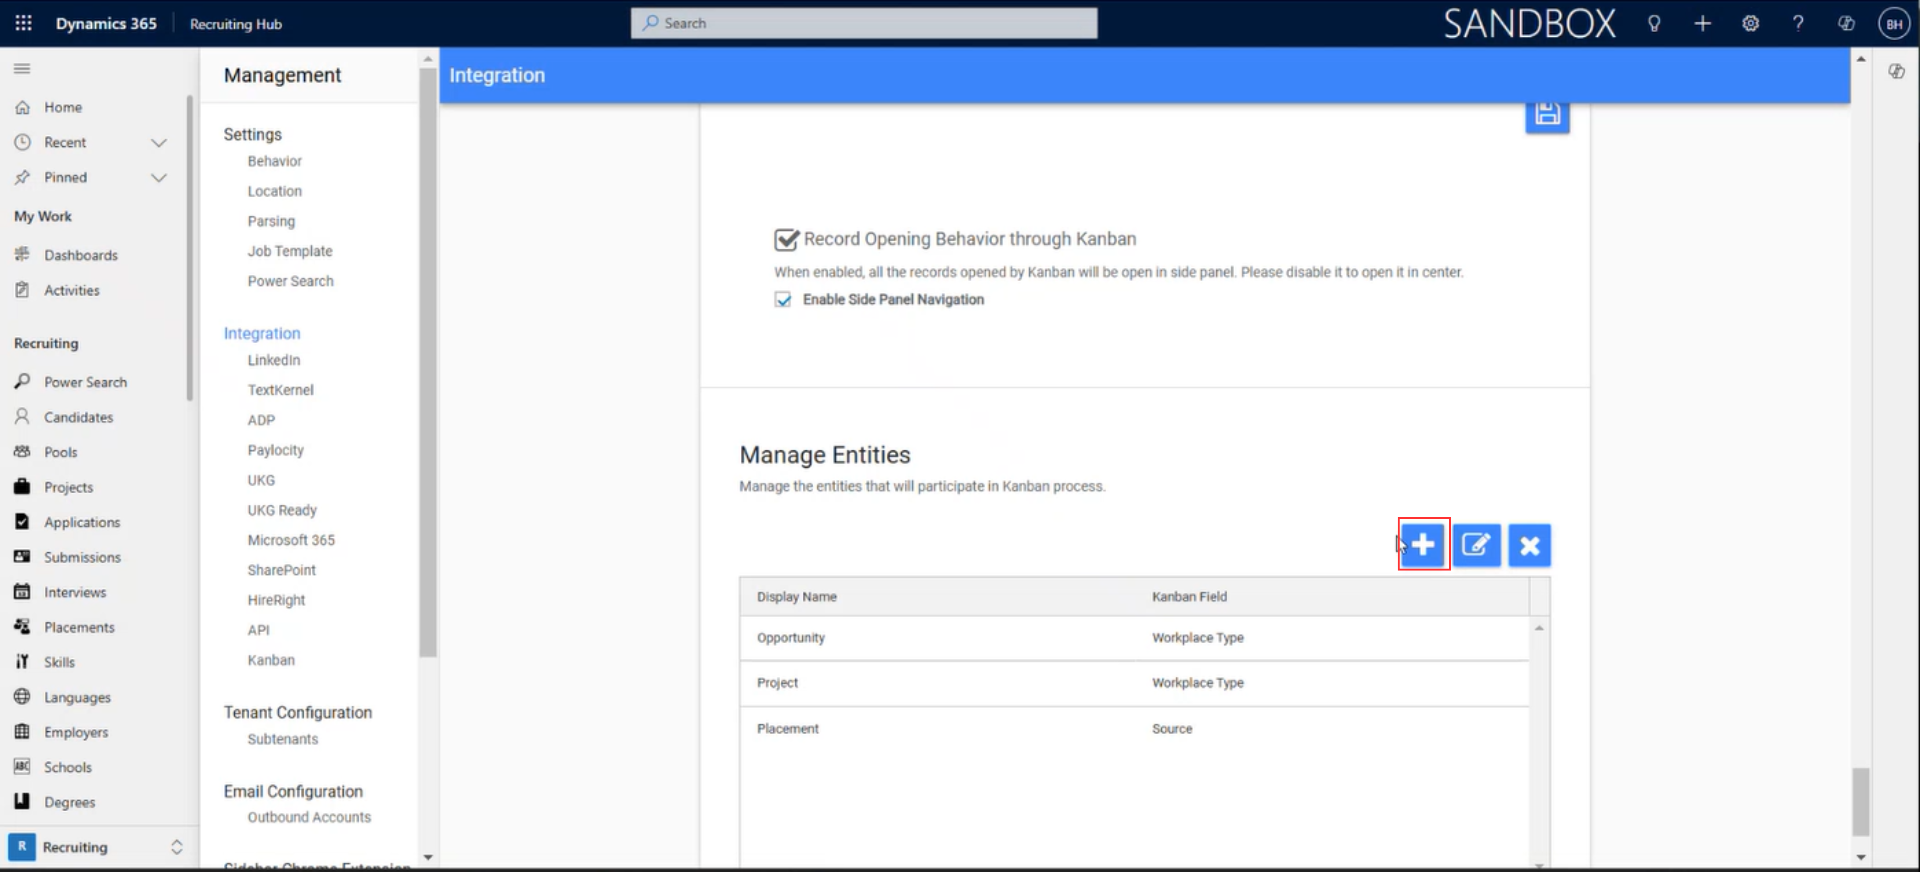
In the Manage Entities section, you can specify which entities should have the Kanban View enabled. To do this, press the plus icon.
There, you will see a pop-up window with the entity options. Select them by marking the checkbox and pressing Add.

You can customize which fields are displayed in the Kanban View preview. To do this, click on the entity name. From there, choose whether to add a status or source field from the dropdown menu. Below, you’ll see the default fields available to show—simply select or deselect them using the checkboxes.
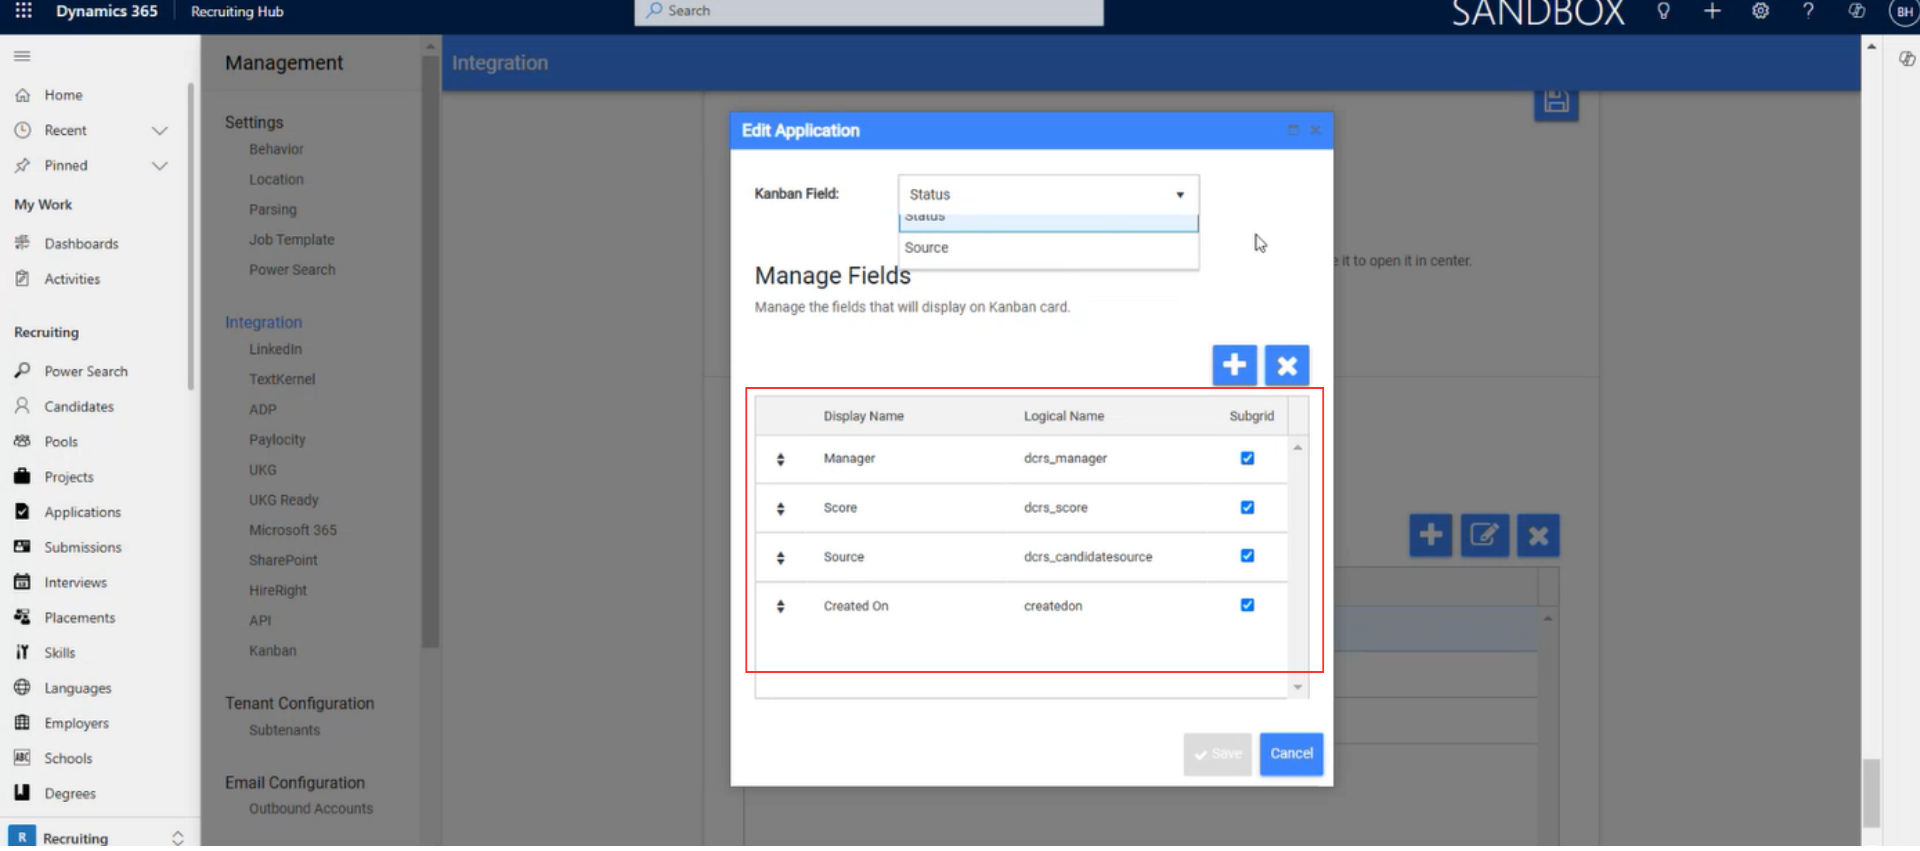
If you’d like to display additional fields on the Kanban Card, click the plus (+) icon.
Search for the desired field in the list or type its name. Once you’ve found it, select it and click Add.
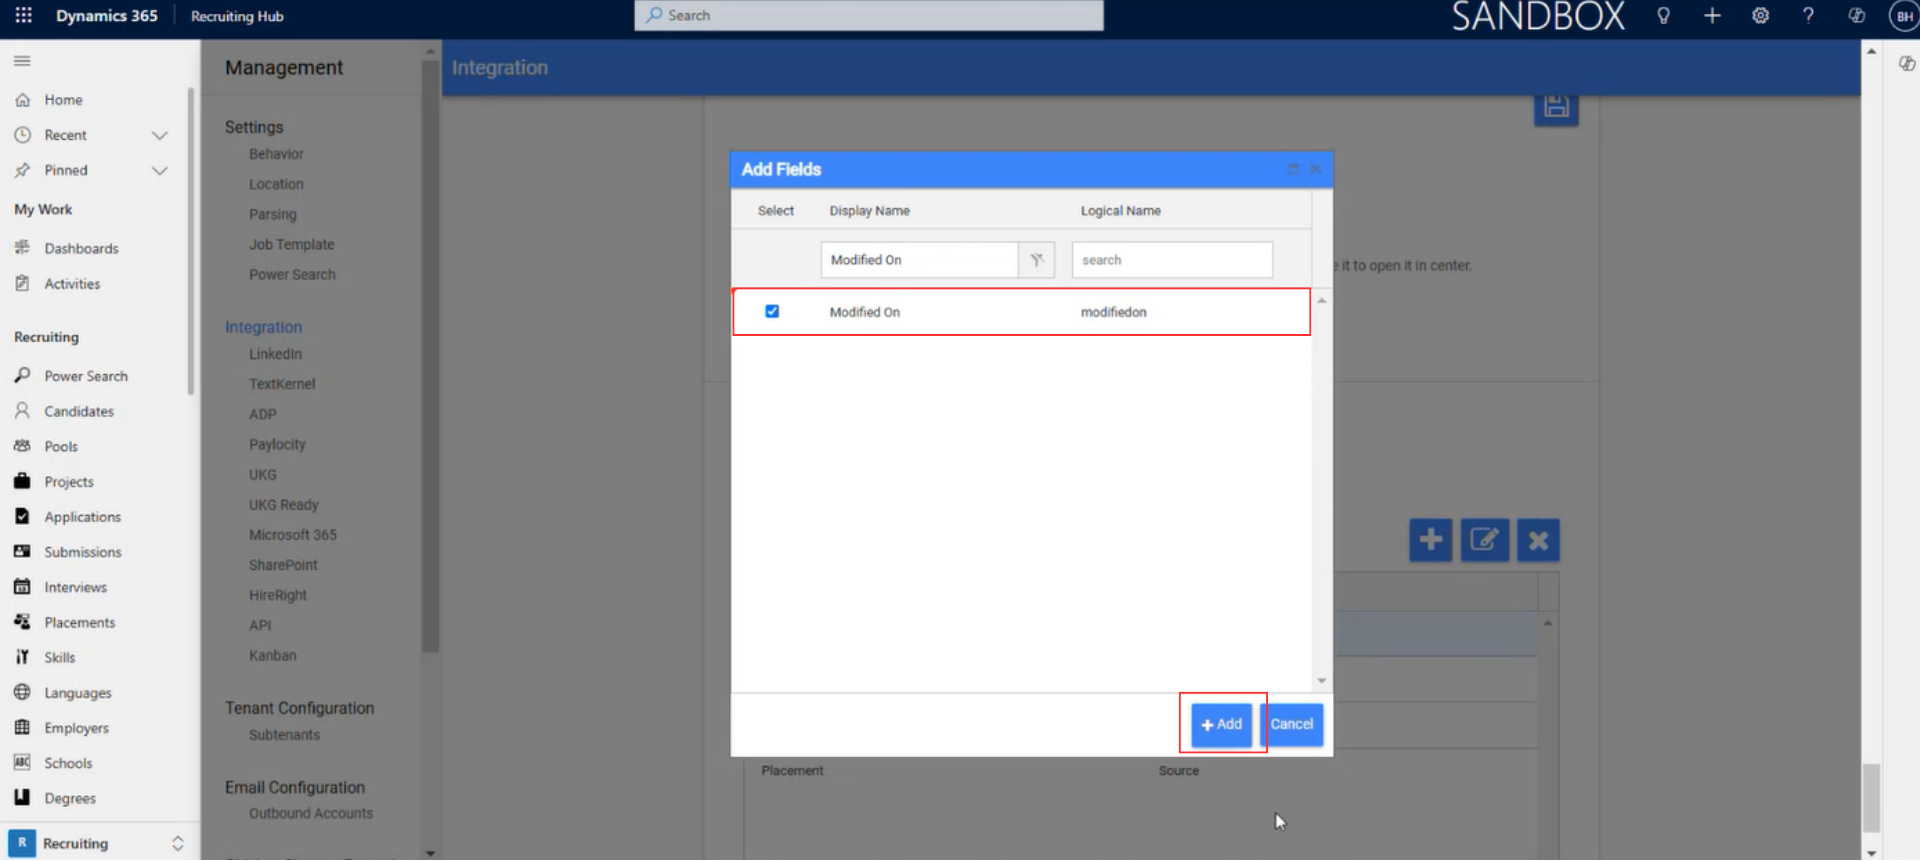
When you’re finished, click Save to apply the changes.
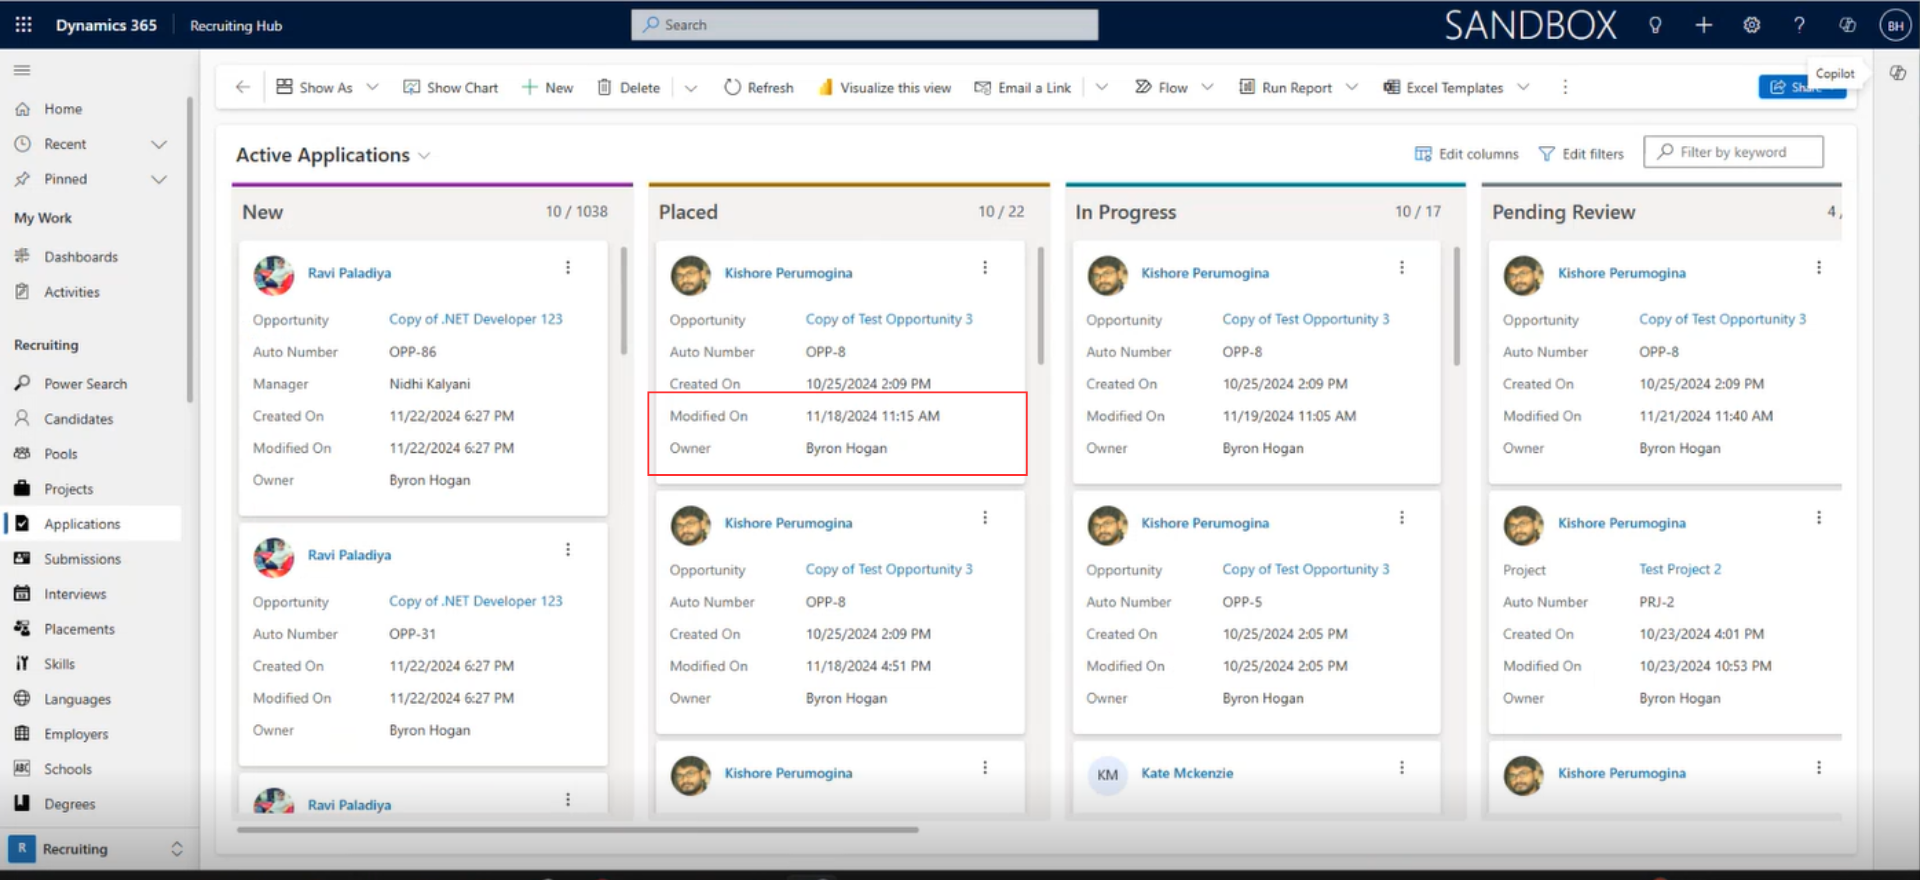
Your updated fields will now appear in the Kanban View of the ATS.
Post your comment on this topic.