
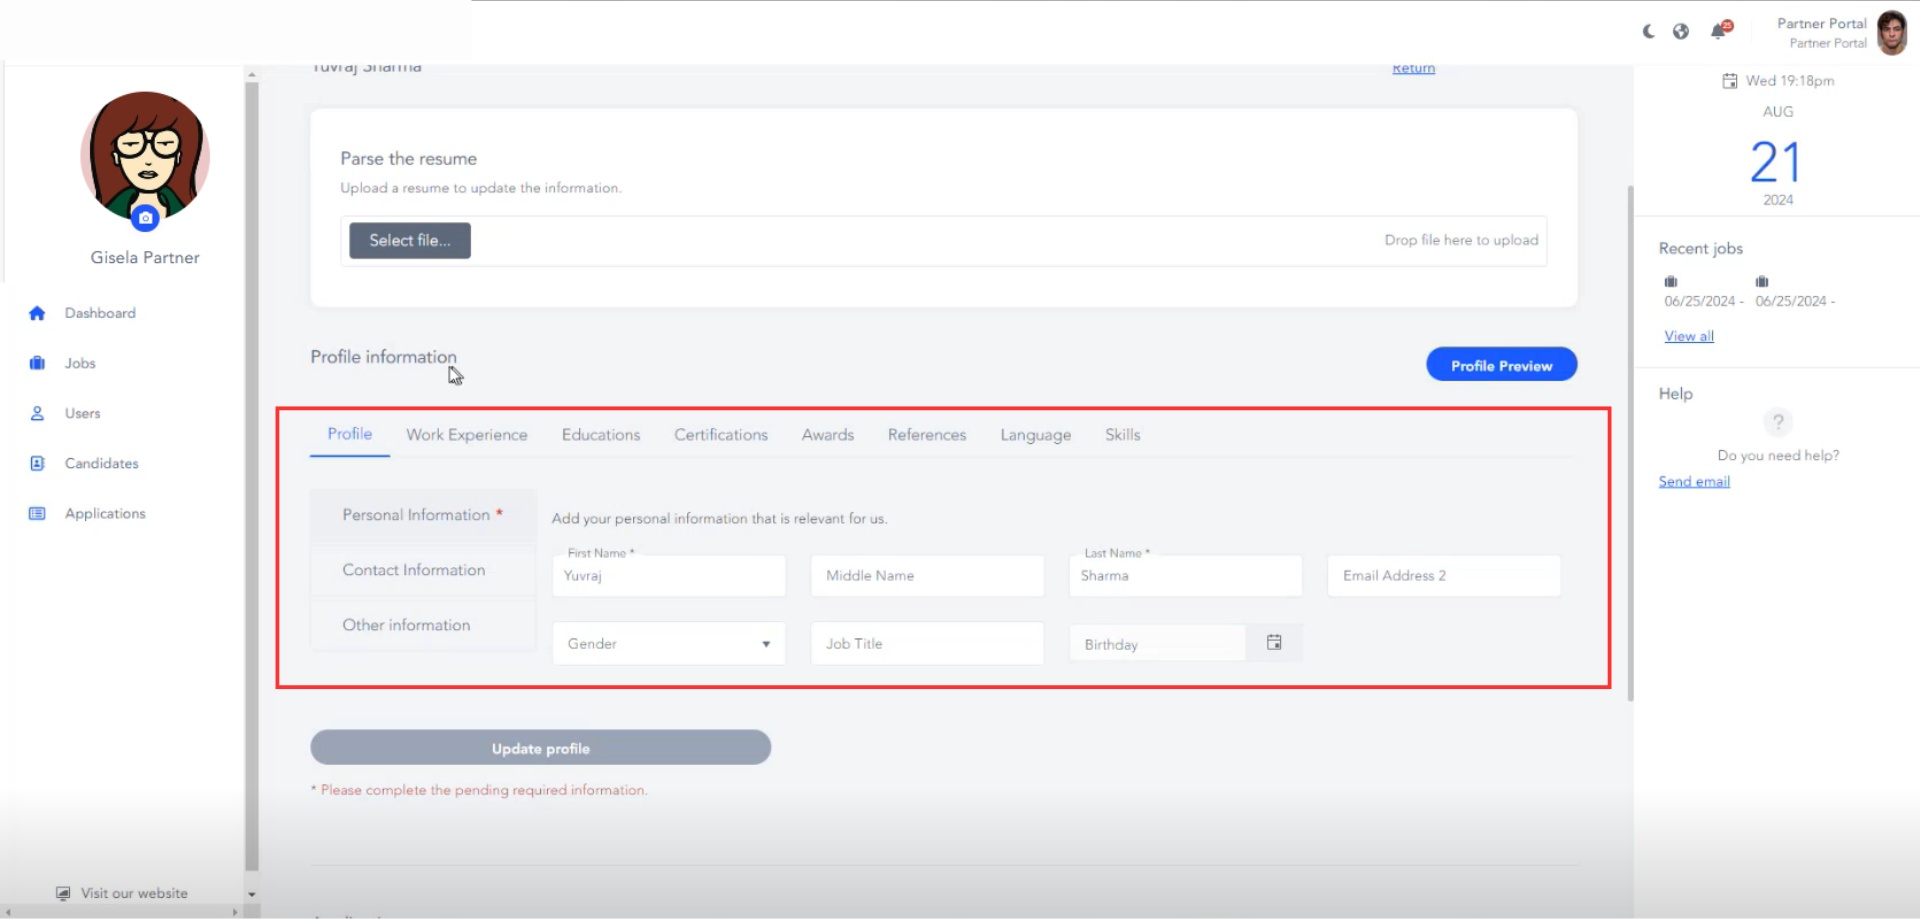
You can customize the information visible to partner portal users in the candidate’s detailed profile.
To do this, go to Partner Portal in the sidebar and select Candidate Configuration.
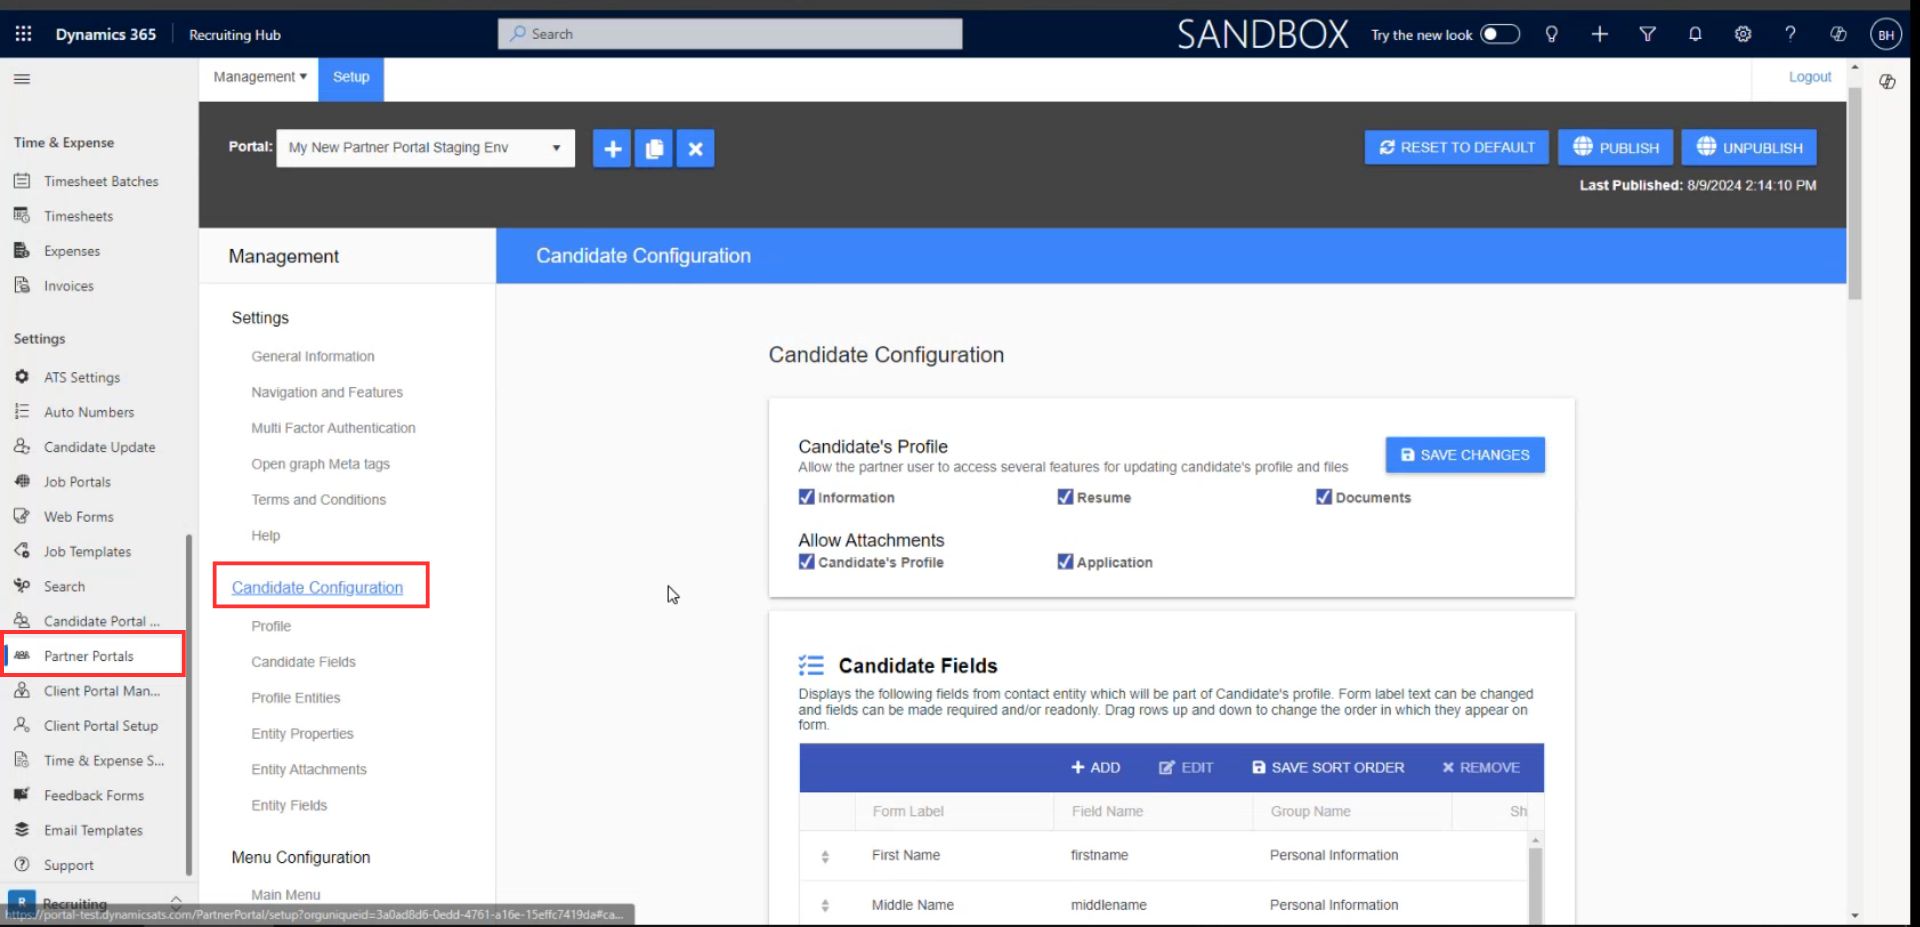
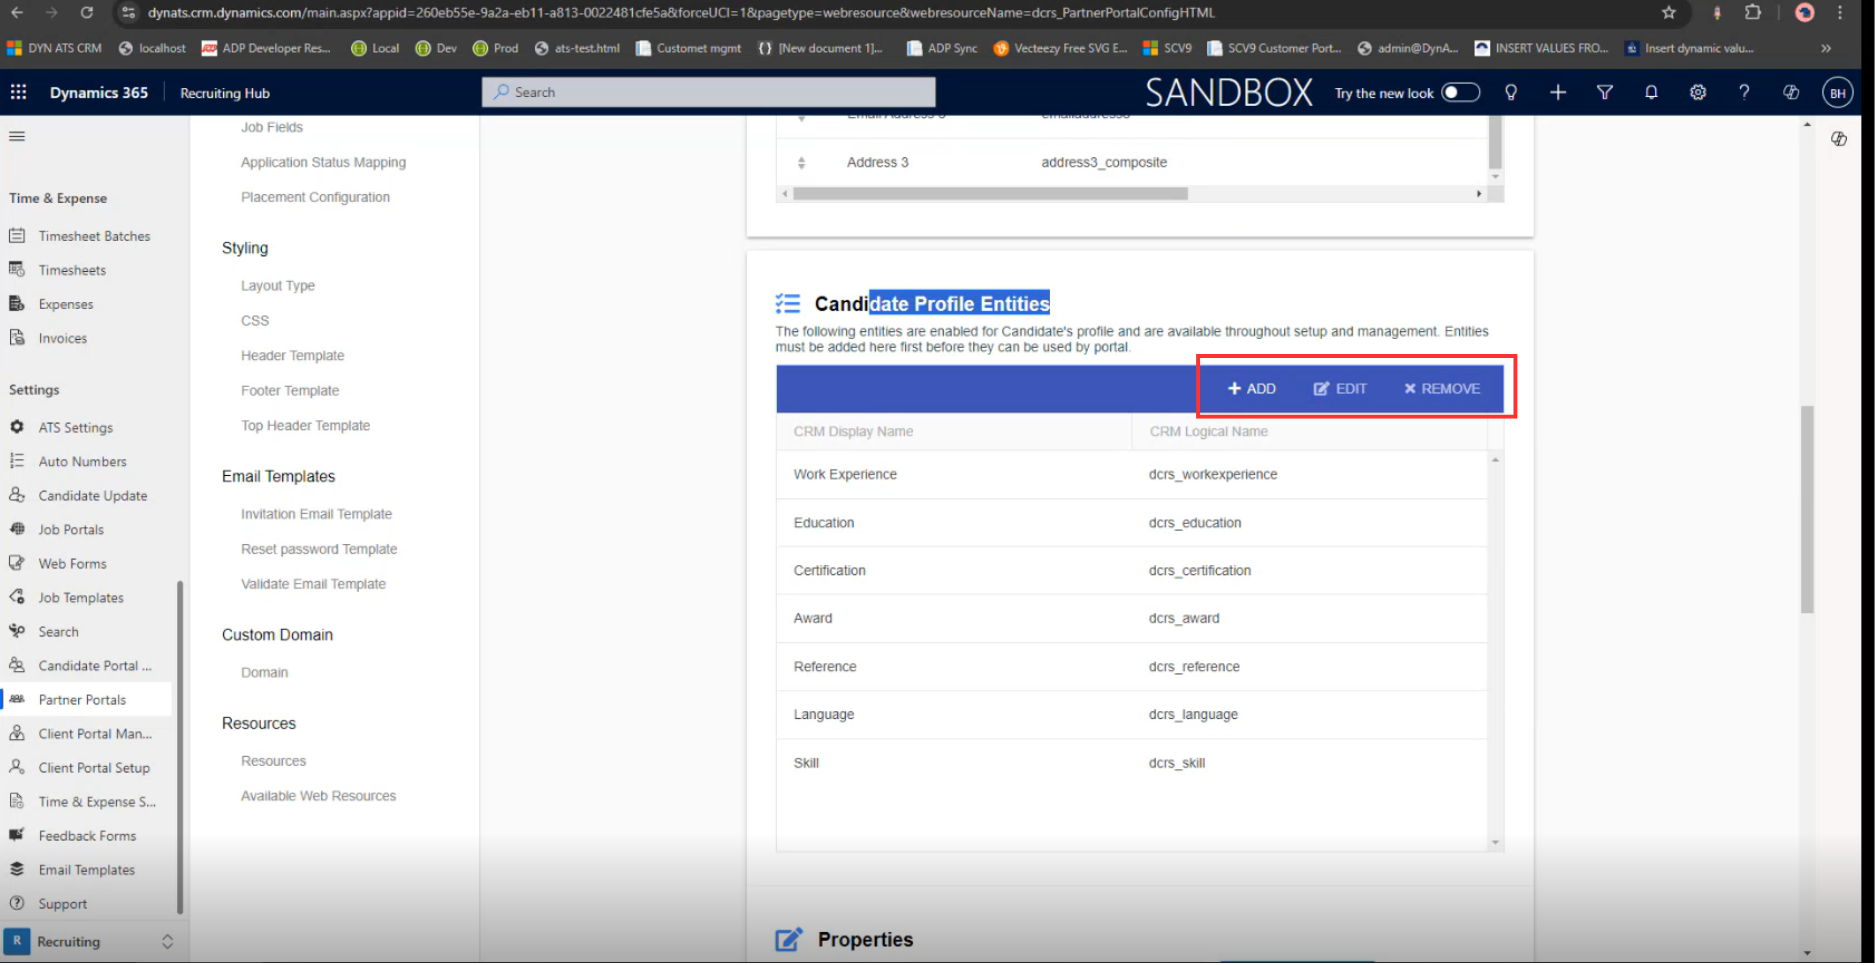
Scroll down to the Candidate Profile Entities section, where you can choose the information you want to display in the candidate’s section.
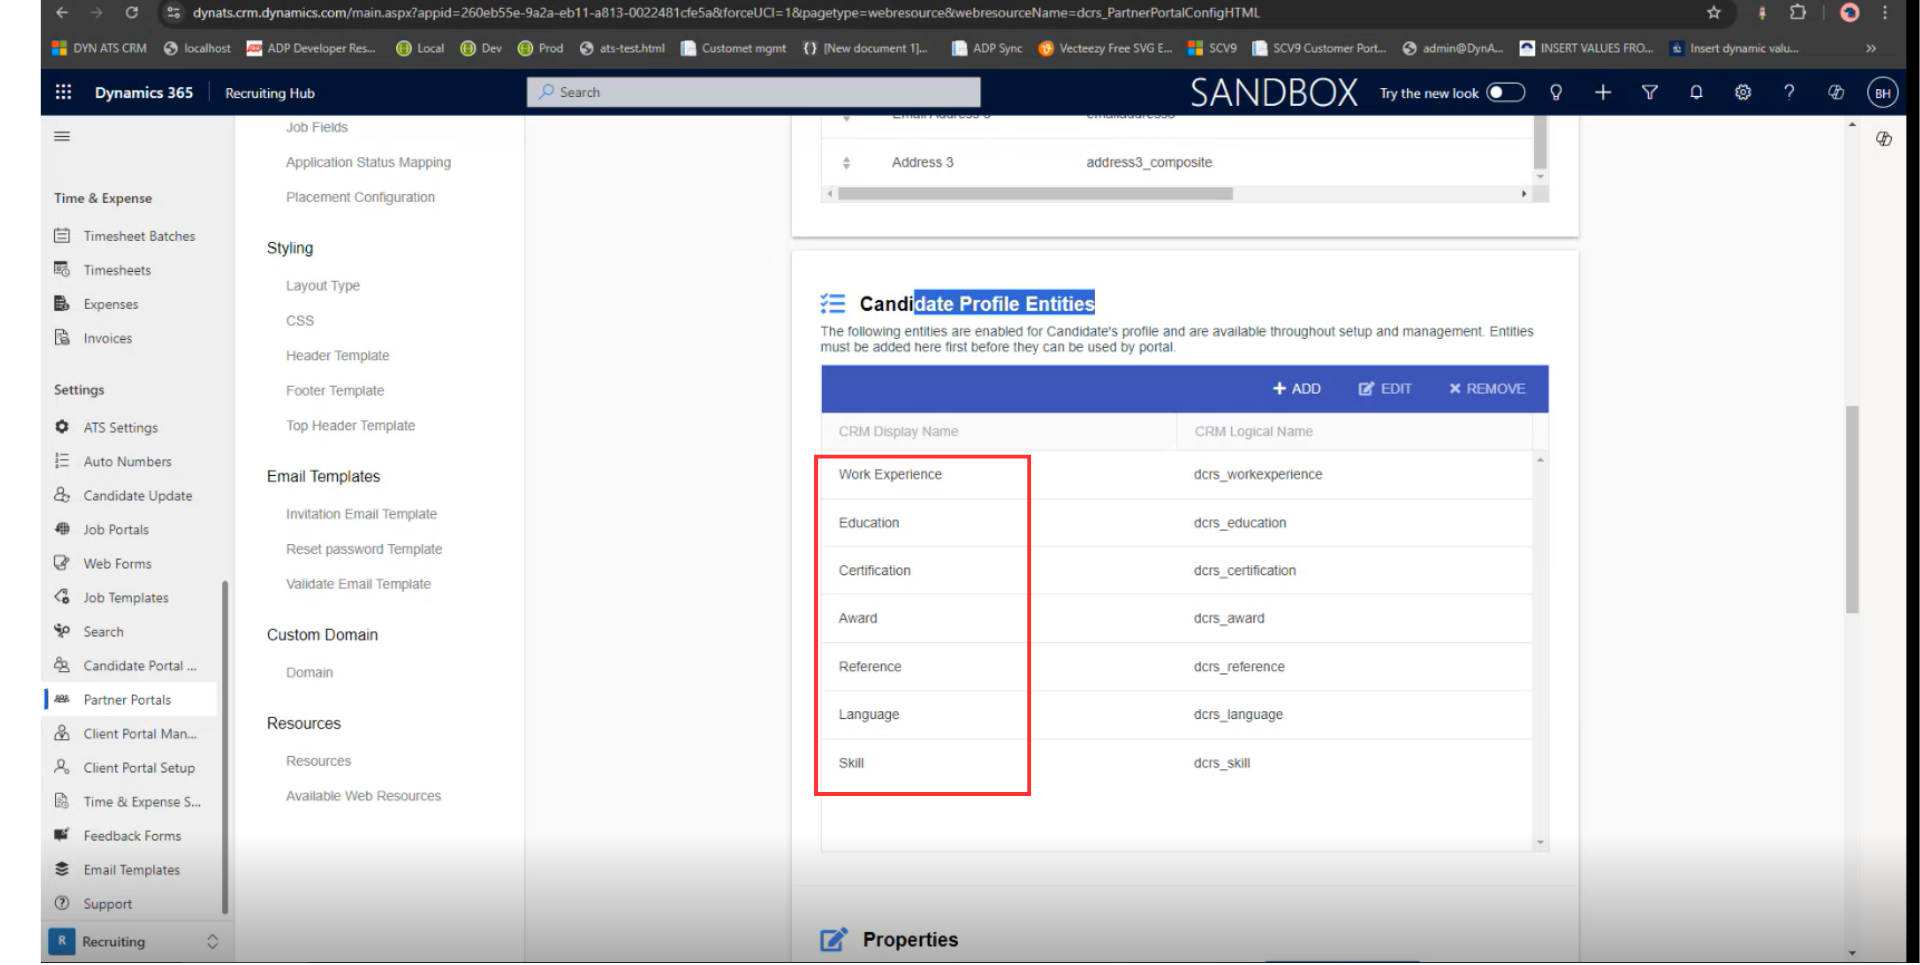
You can add a new one, edit, or remove them.
To save the changes, press Save and Publish.
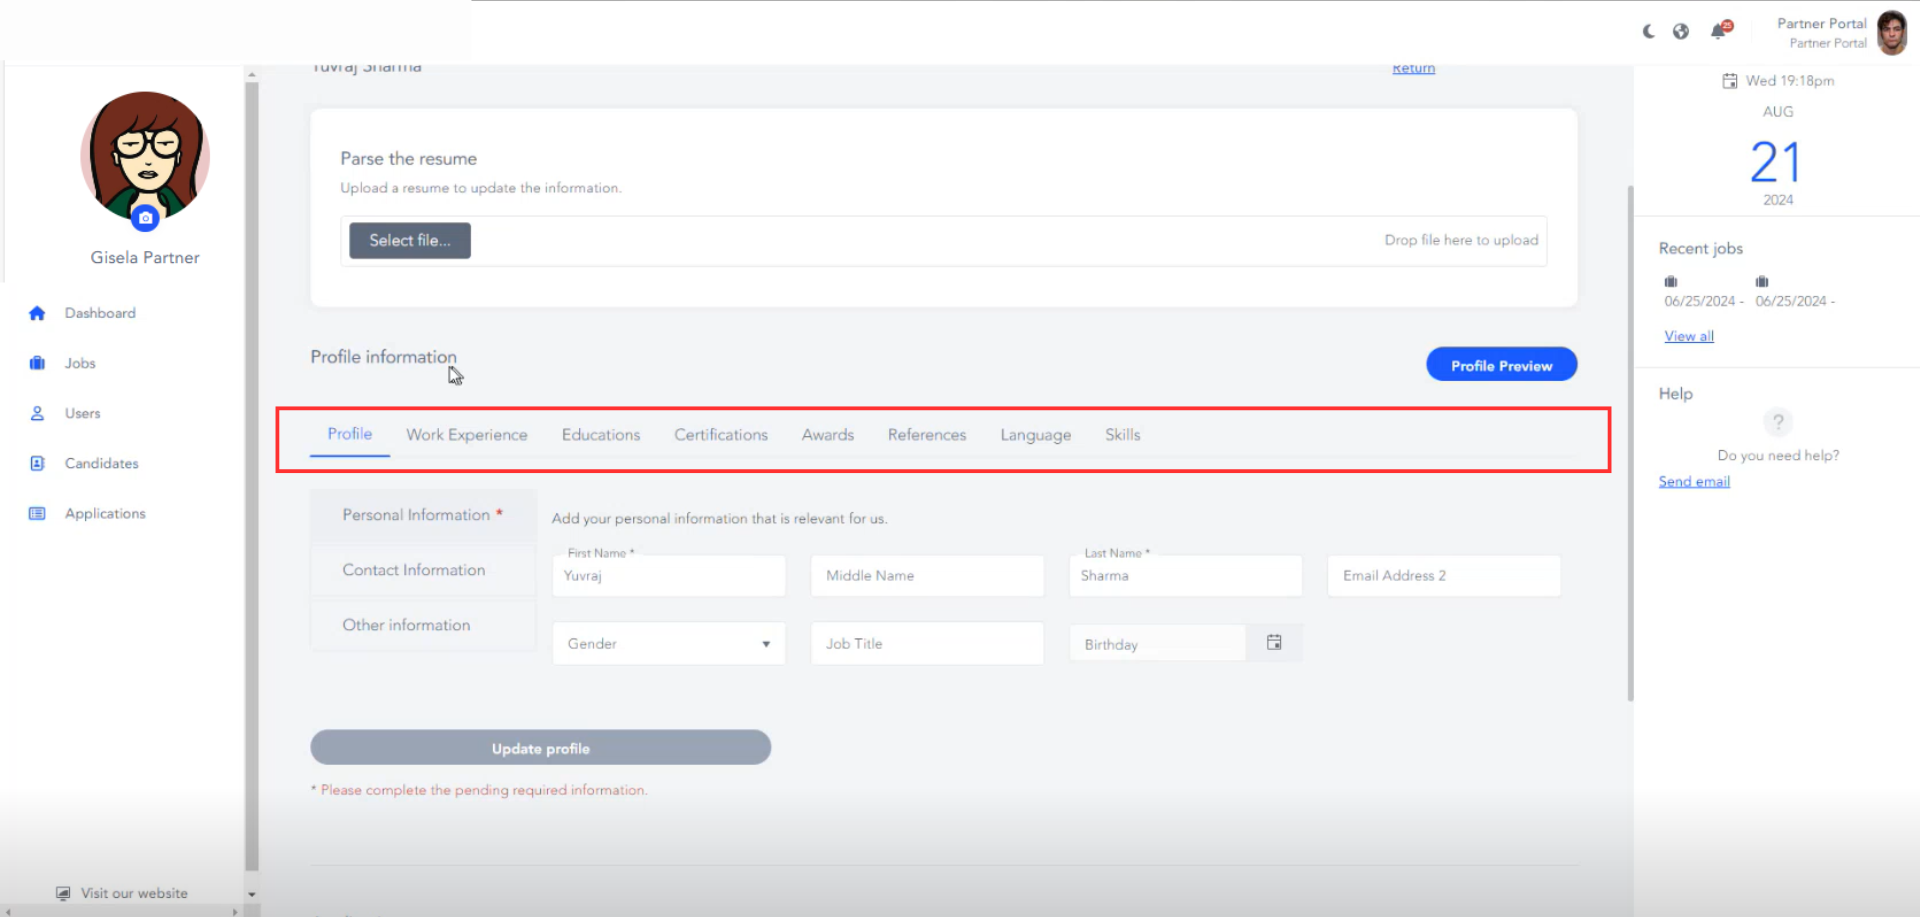
You’ll find them right here in the candidate profile section.
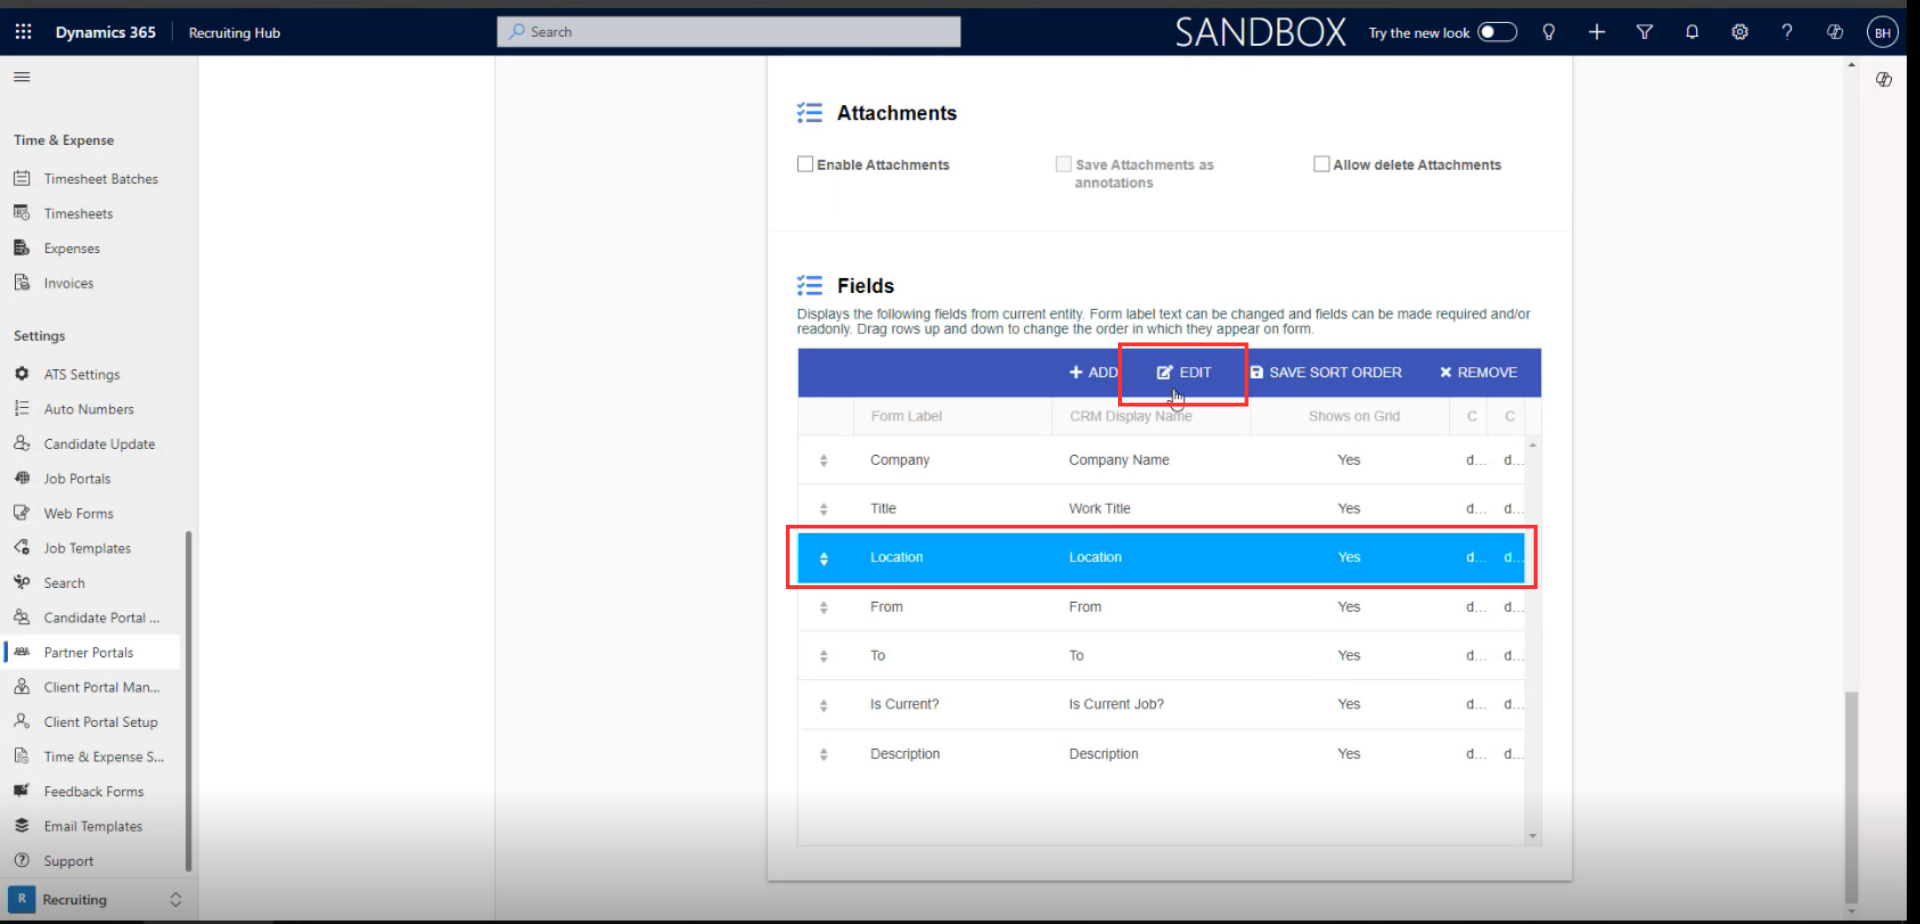
Additionally, you can choose whether the fields in that section will be required, displayed in the grid, or set to read-only.
To do it, scroll down to the Fields section, click on the field, and press Edit.
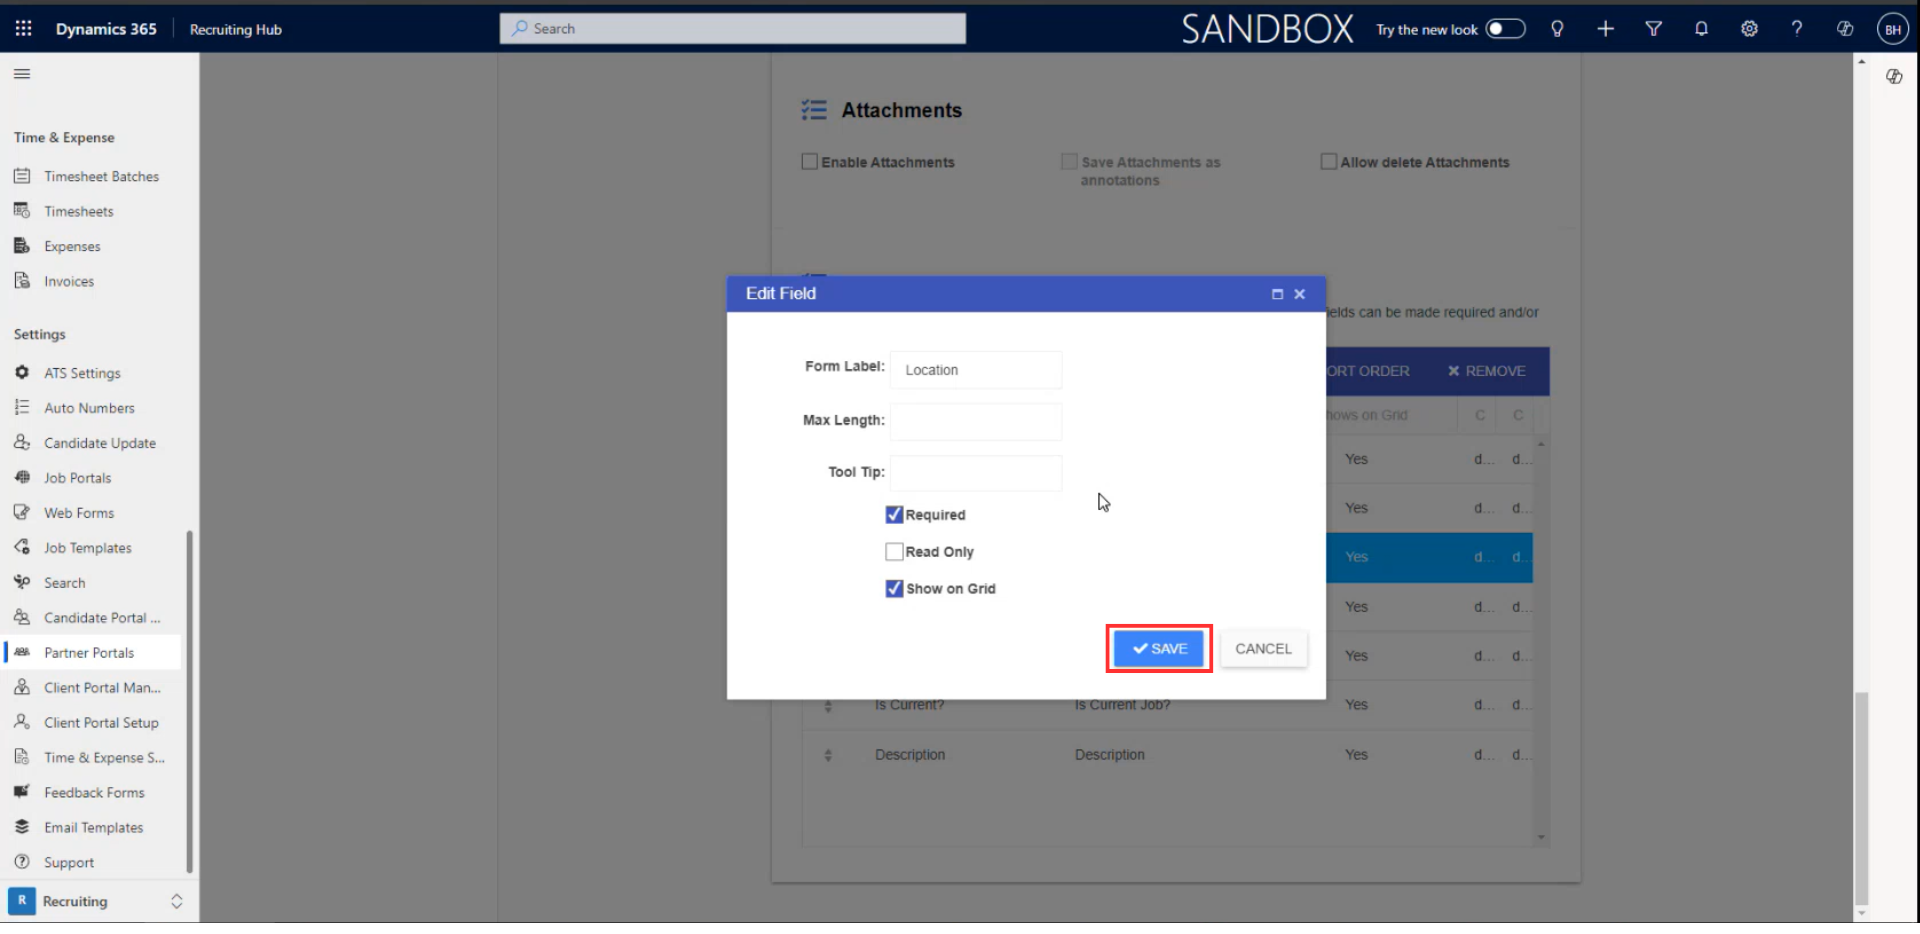
From there, choose whether to make it required, display it in the grid, or set it as read-only. Simply check the box and click Save.
Finally, scroll up and press Publish.
To add more information, navigate to the Candidate Fields section. Click +Add and choose the fields you want to display.

To change the order, you only need to drag and drop the field that you want to move. To save the changes, press Publish.
You will see the changes right here:
Post your comment on this topic.