
You can customize the information that candidates need to fill out in their profile.

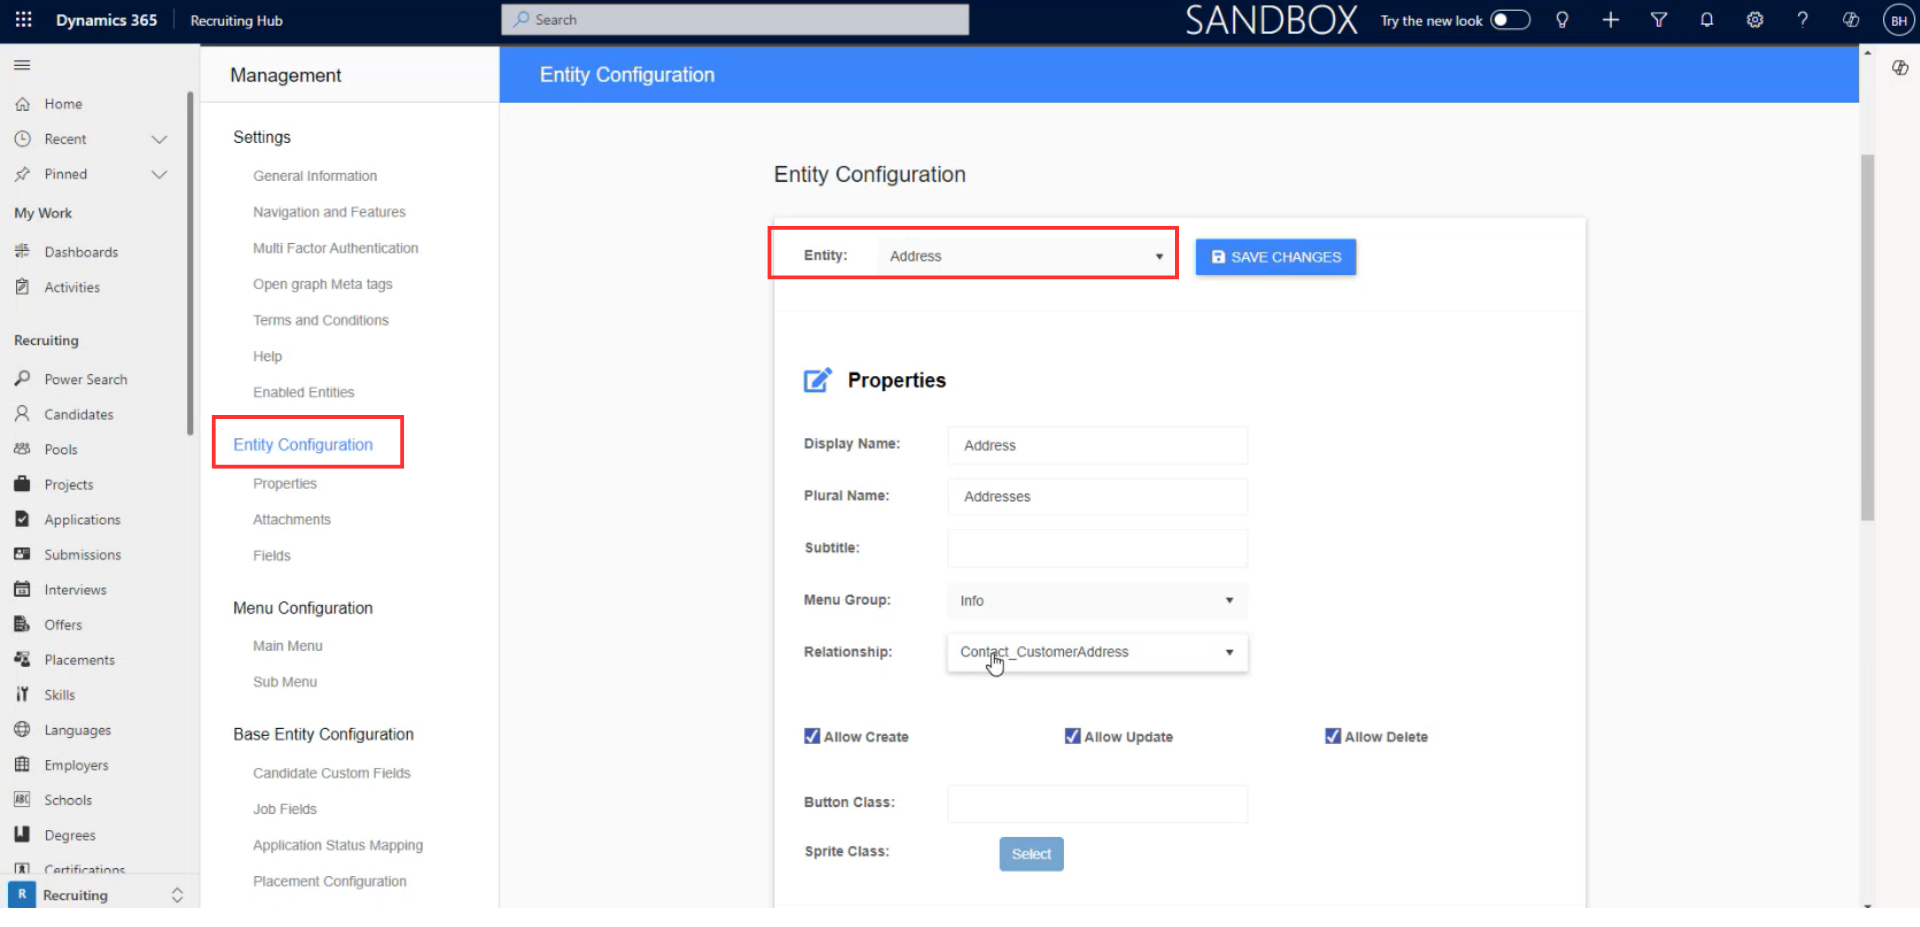
To start, go to Candidate Portal on the sidebar and select Entity Configuration. You will find a dropdown. There, you can choose the entity that you want to configure.
In the Candidate Portal, you will find the entity here:
In the Properties section you can select the Display Name, the Plural Name, the Subtitle (optional), the Menu Group, and the relationship with the entities.

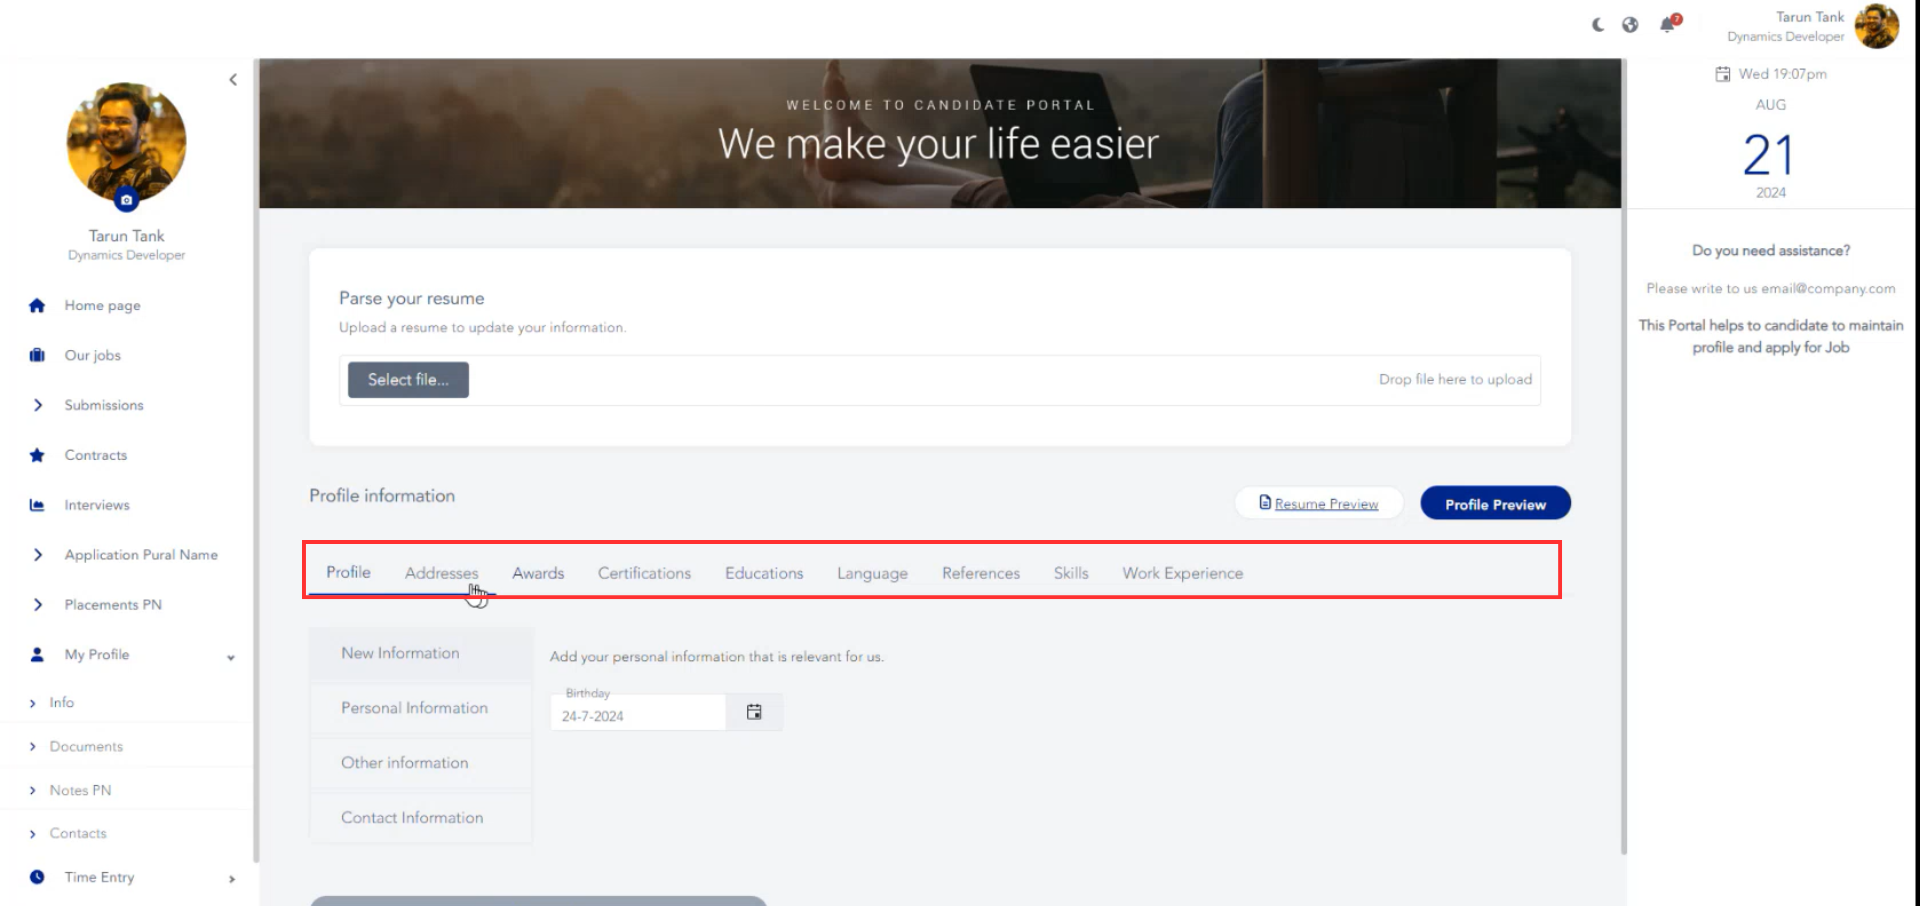
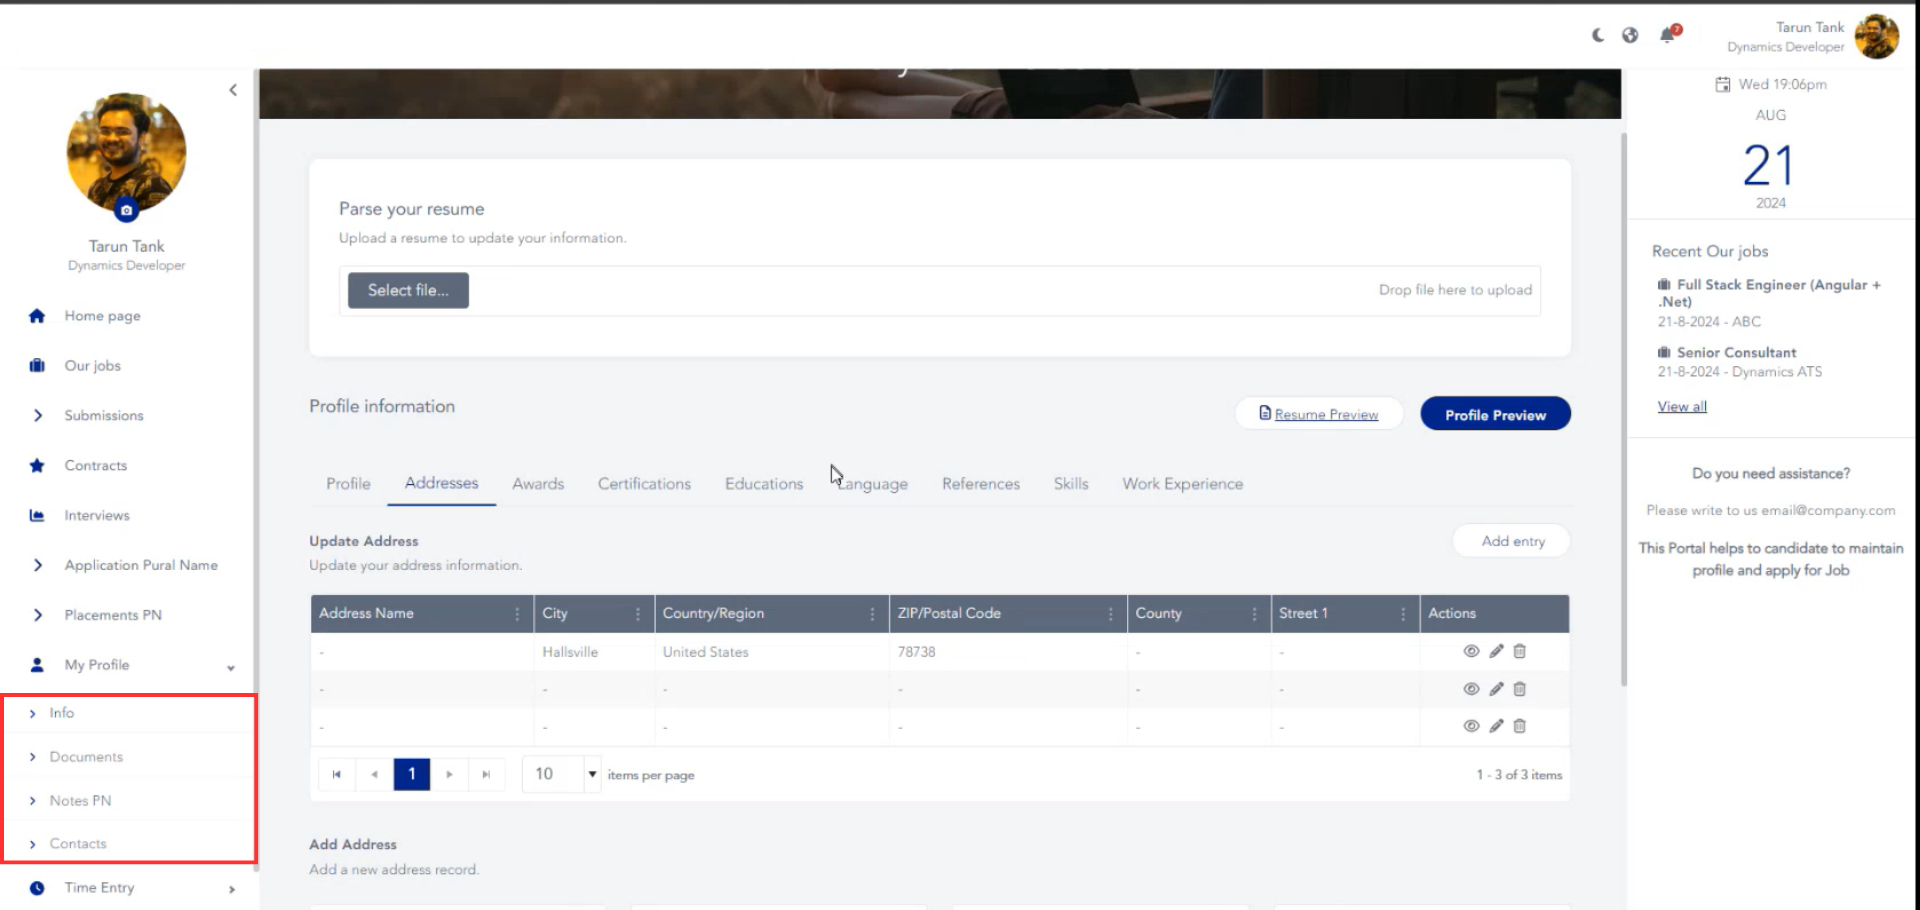
You will find the Menu Group in the sidebar of the Candidate Portal, in the My Profile section.
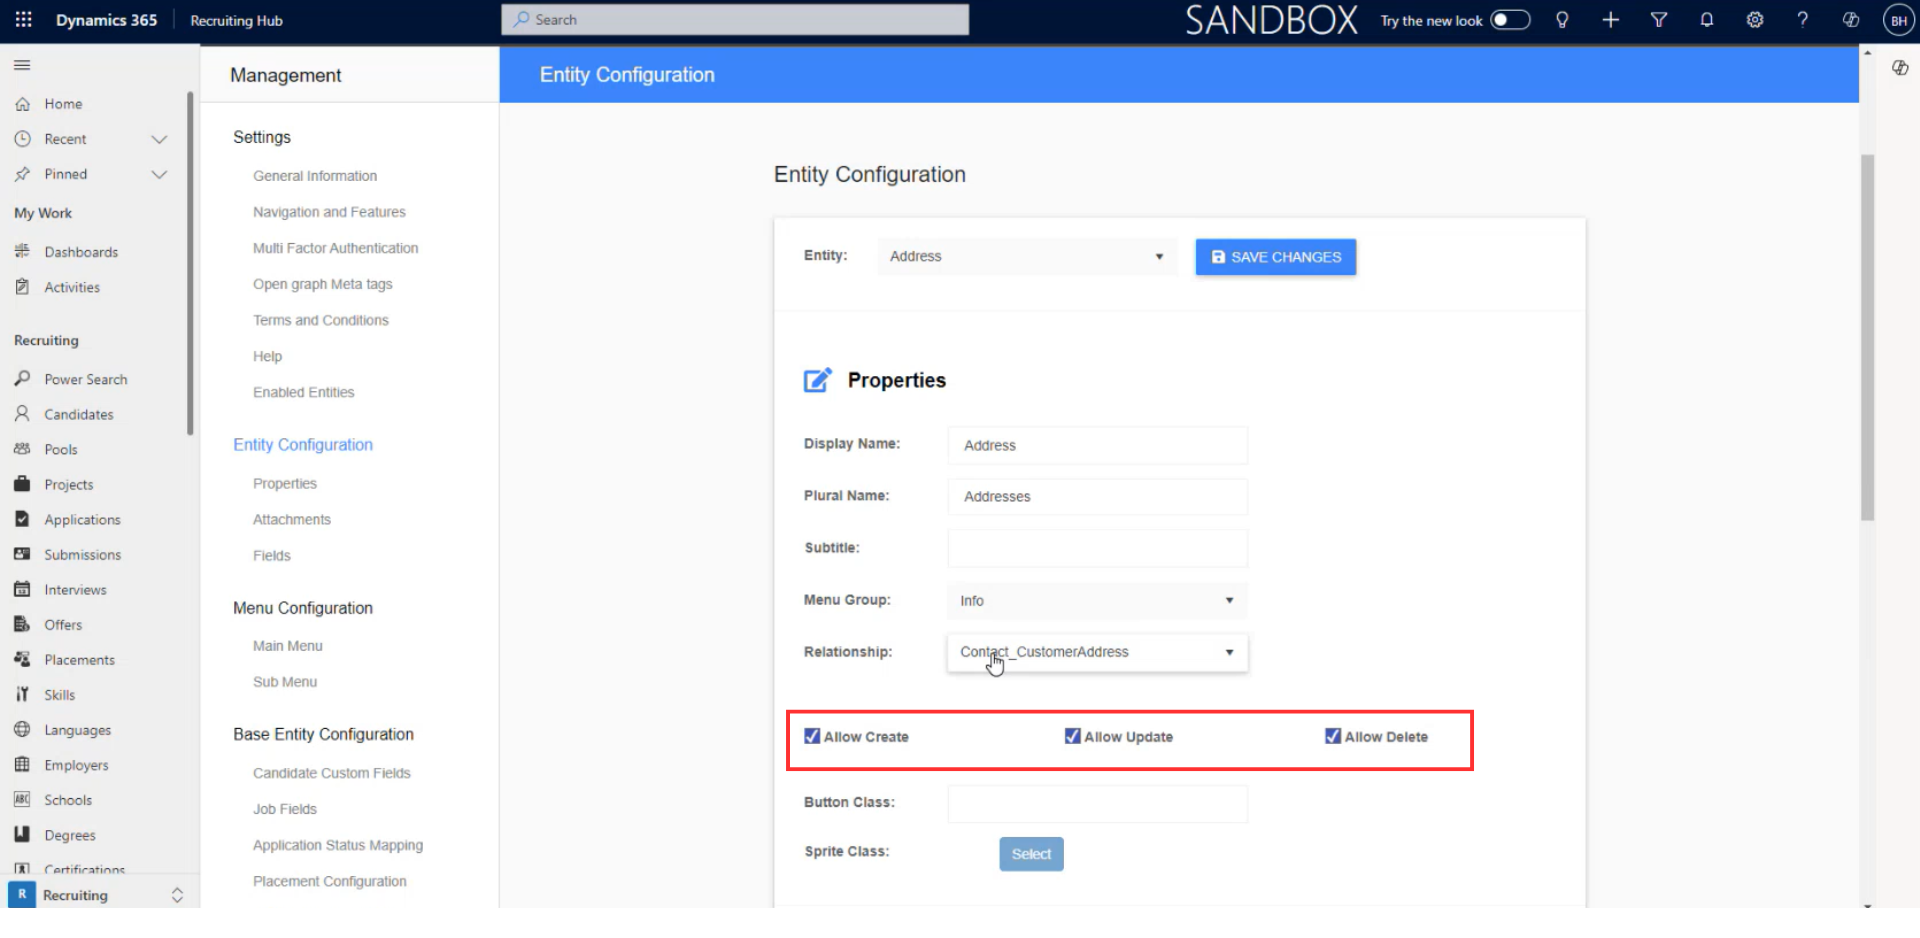
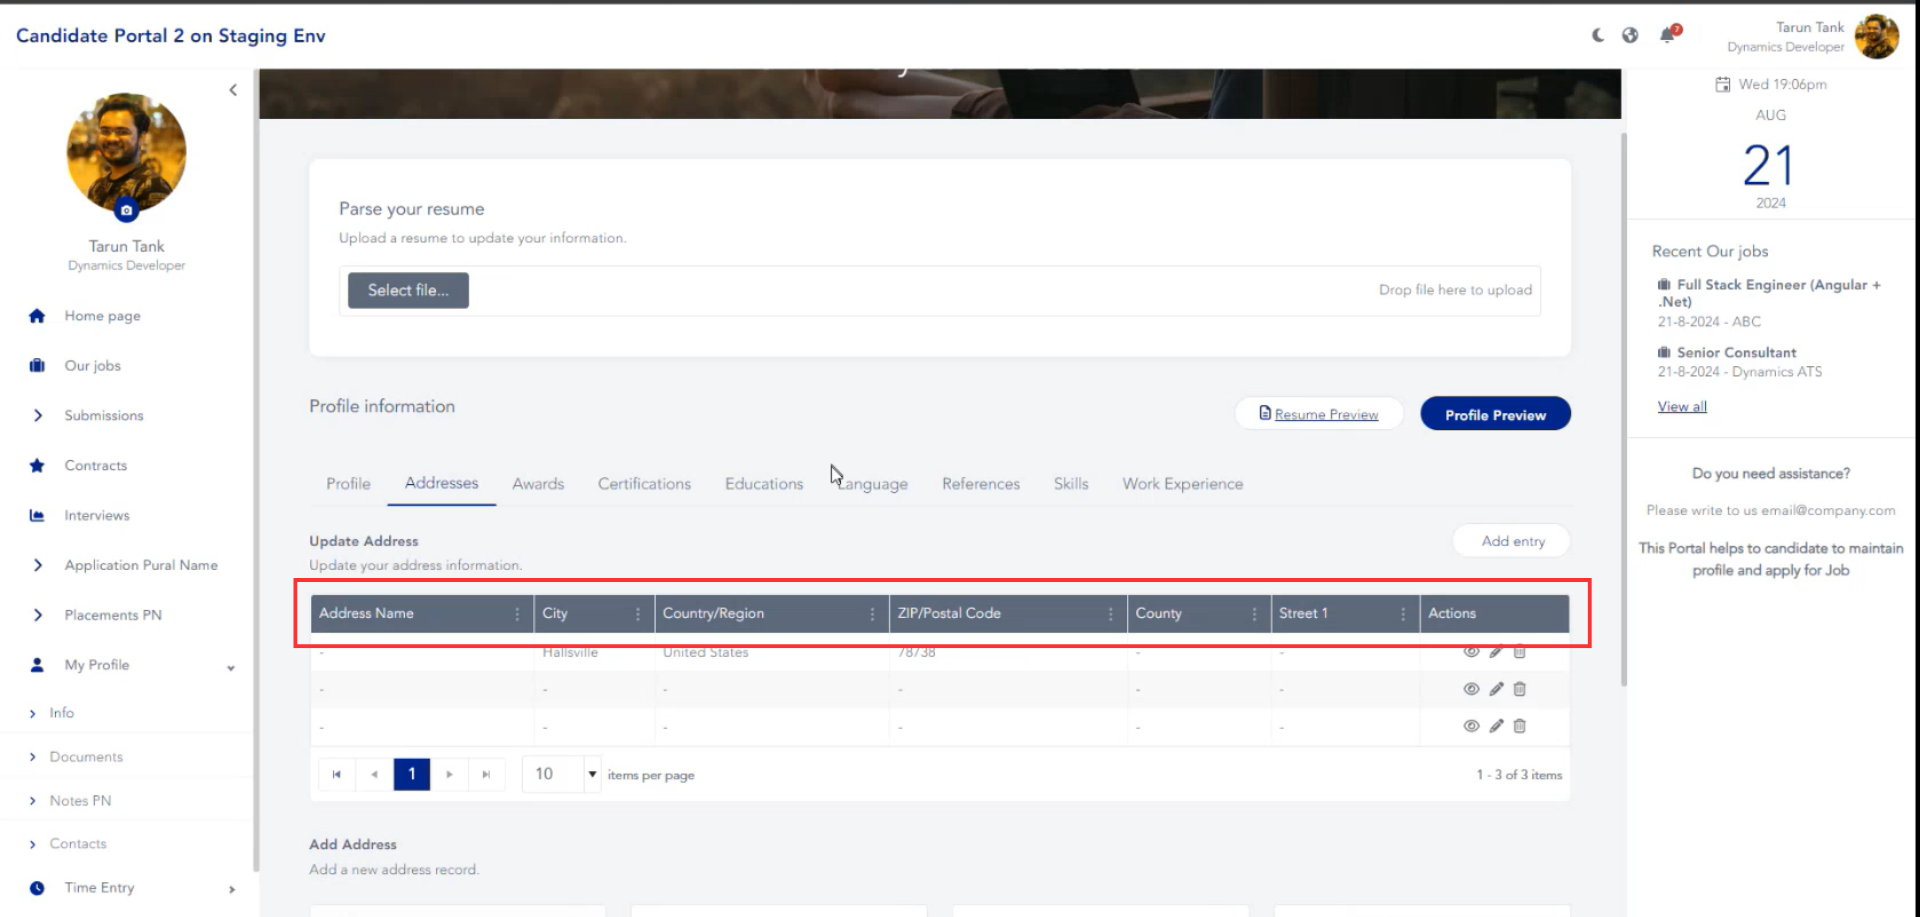
You can also allow the candidate to create, delete, or update that field.
To save the changes press Save and Publish.
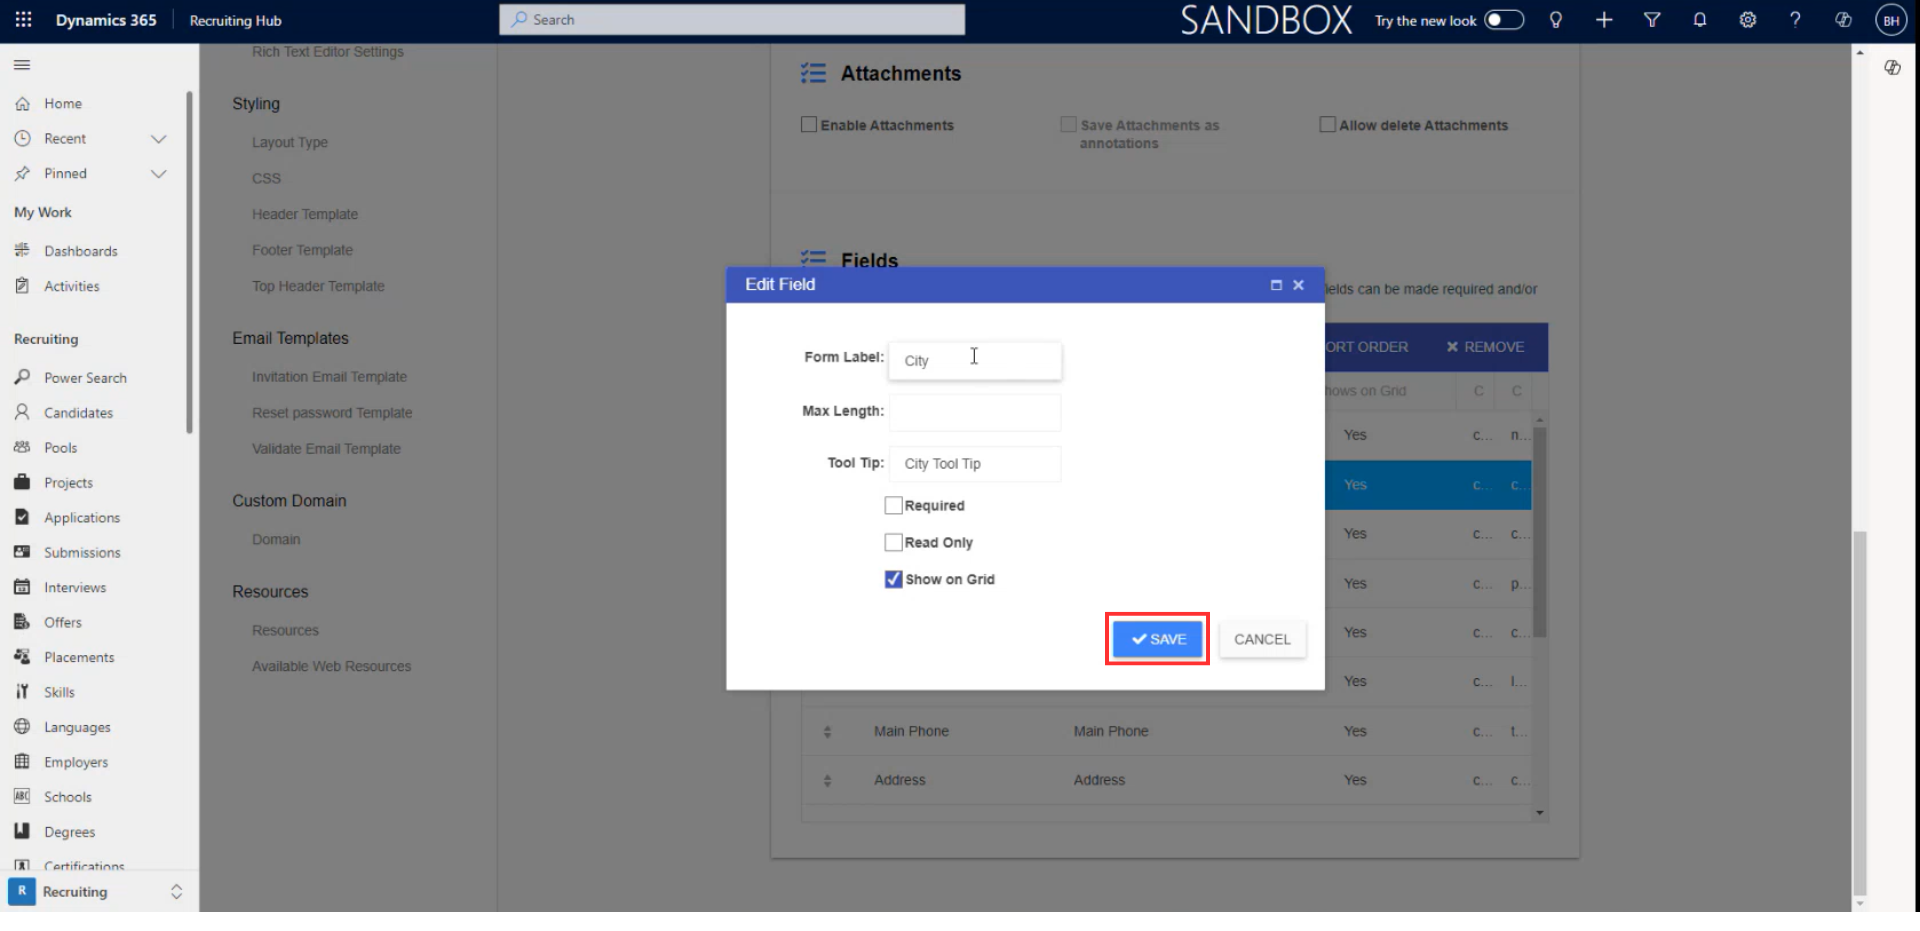
To choose which fields will be shown in that section, scroll down to Fields. You can add new fields or remove them.
Additionally, you can choose whether the fields in that section will be required, displayed in the grid, or set to read-only.
To do it, click on the field and press Edit. From there, choose whether to make it required, display it in the grid, or set it as read-only. Simply check the box and click Save.
Finally, press Publish.
The selected fields for the grid are listed below in the entity section.
Post your comment on this topic.