
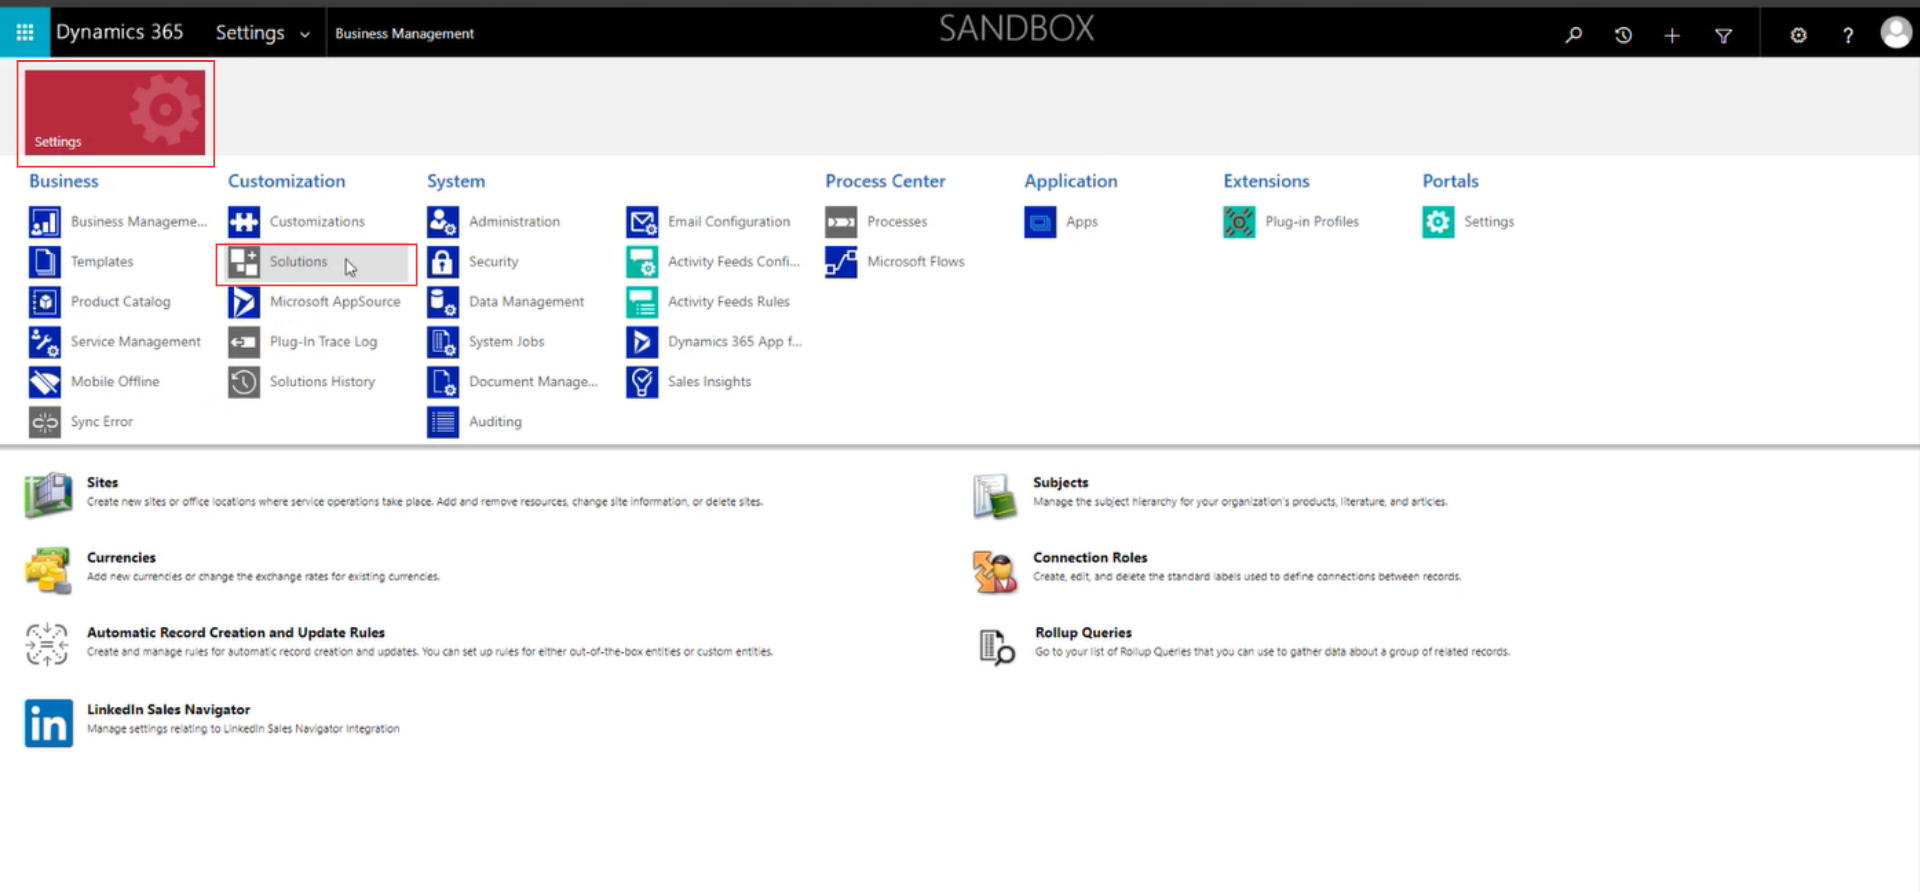
First of all, you may install the Paylocity solution.
To do it, go to Settings, and press Solutions.
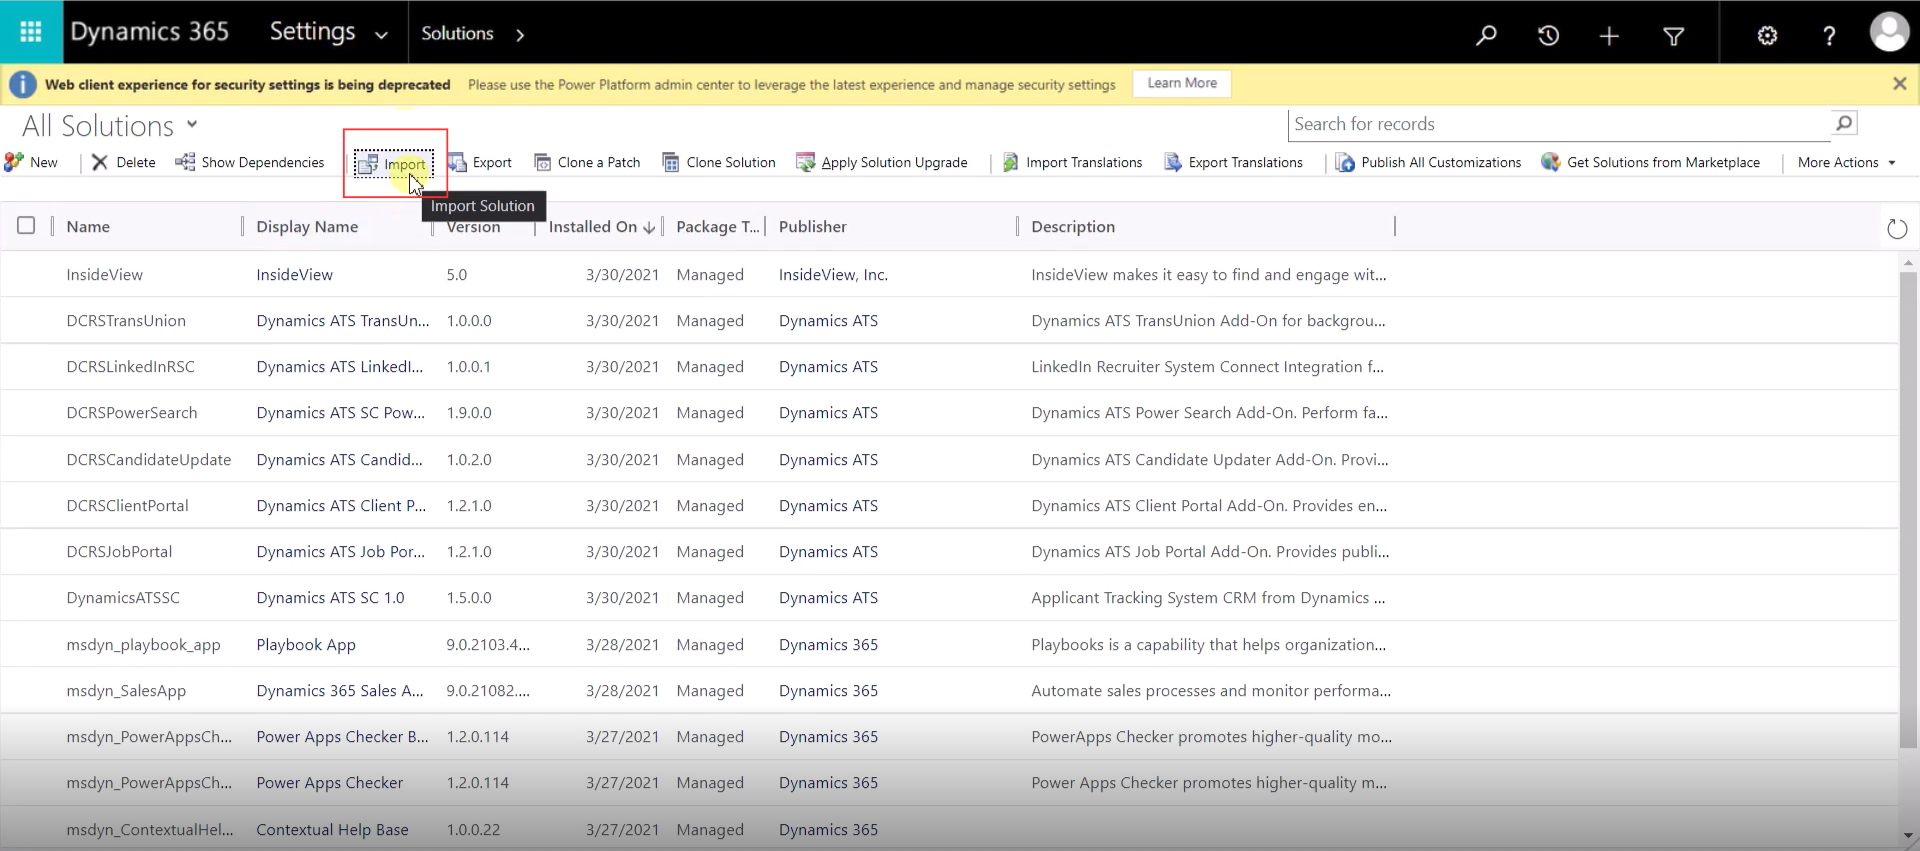
There, click on the Import button.
Select the file, and press Next
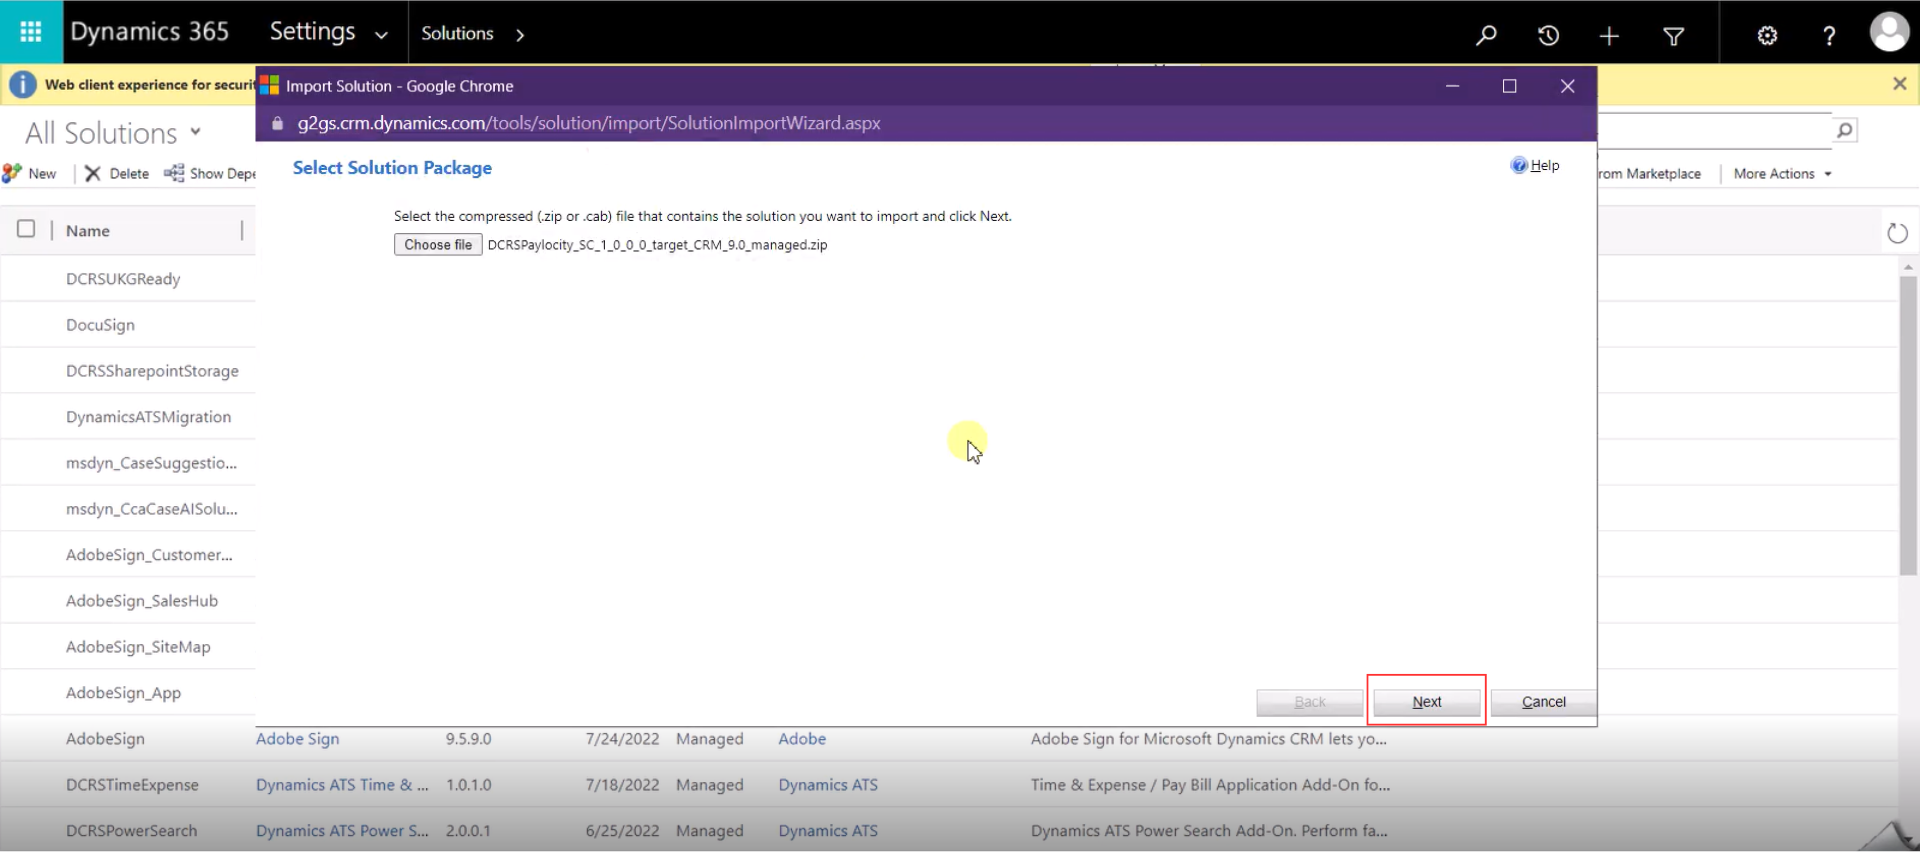
Then, press Import and wait a couple of minutes.
Then, go to ATS Settings in the sidebar and select Paylocity in the integrations section.
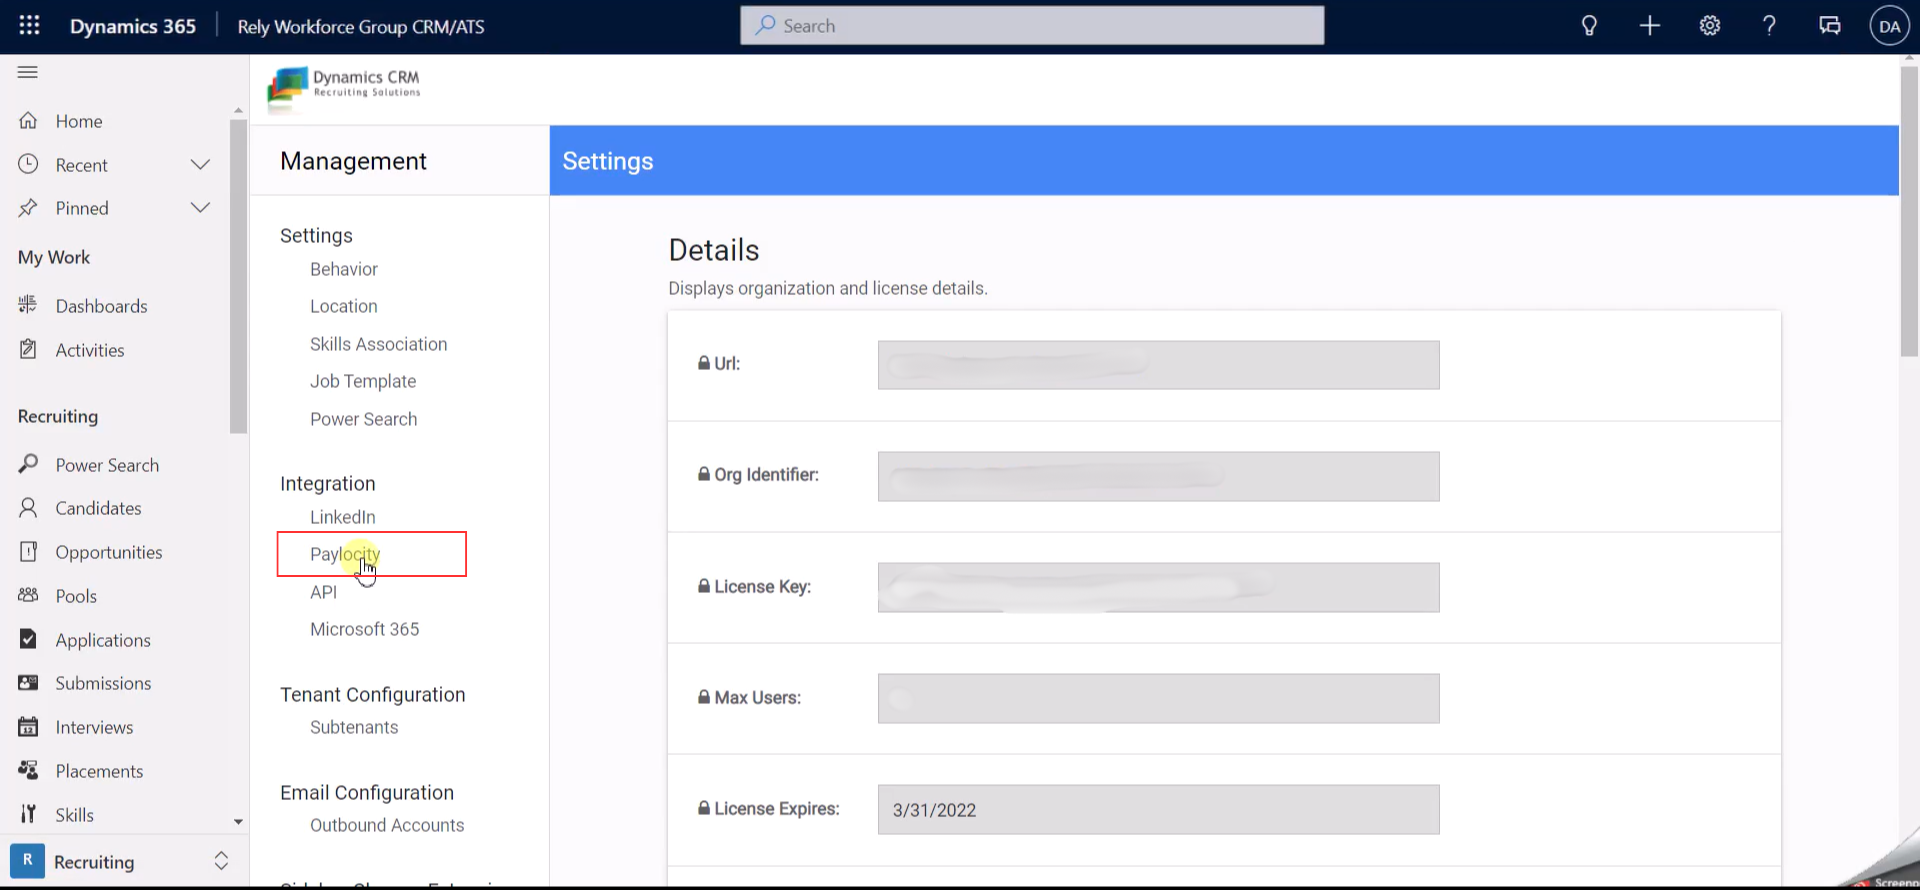
You need to enable the Paylocity API by checking the box. After that, complete the following fields:
- Company ID
- Client ID
- Client Secret
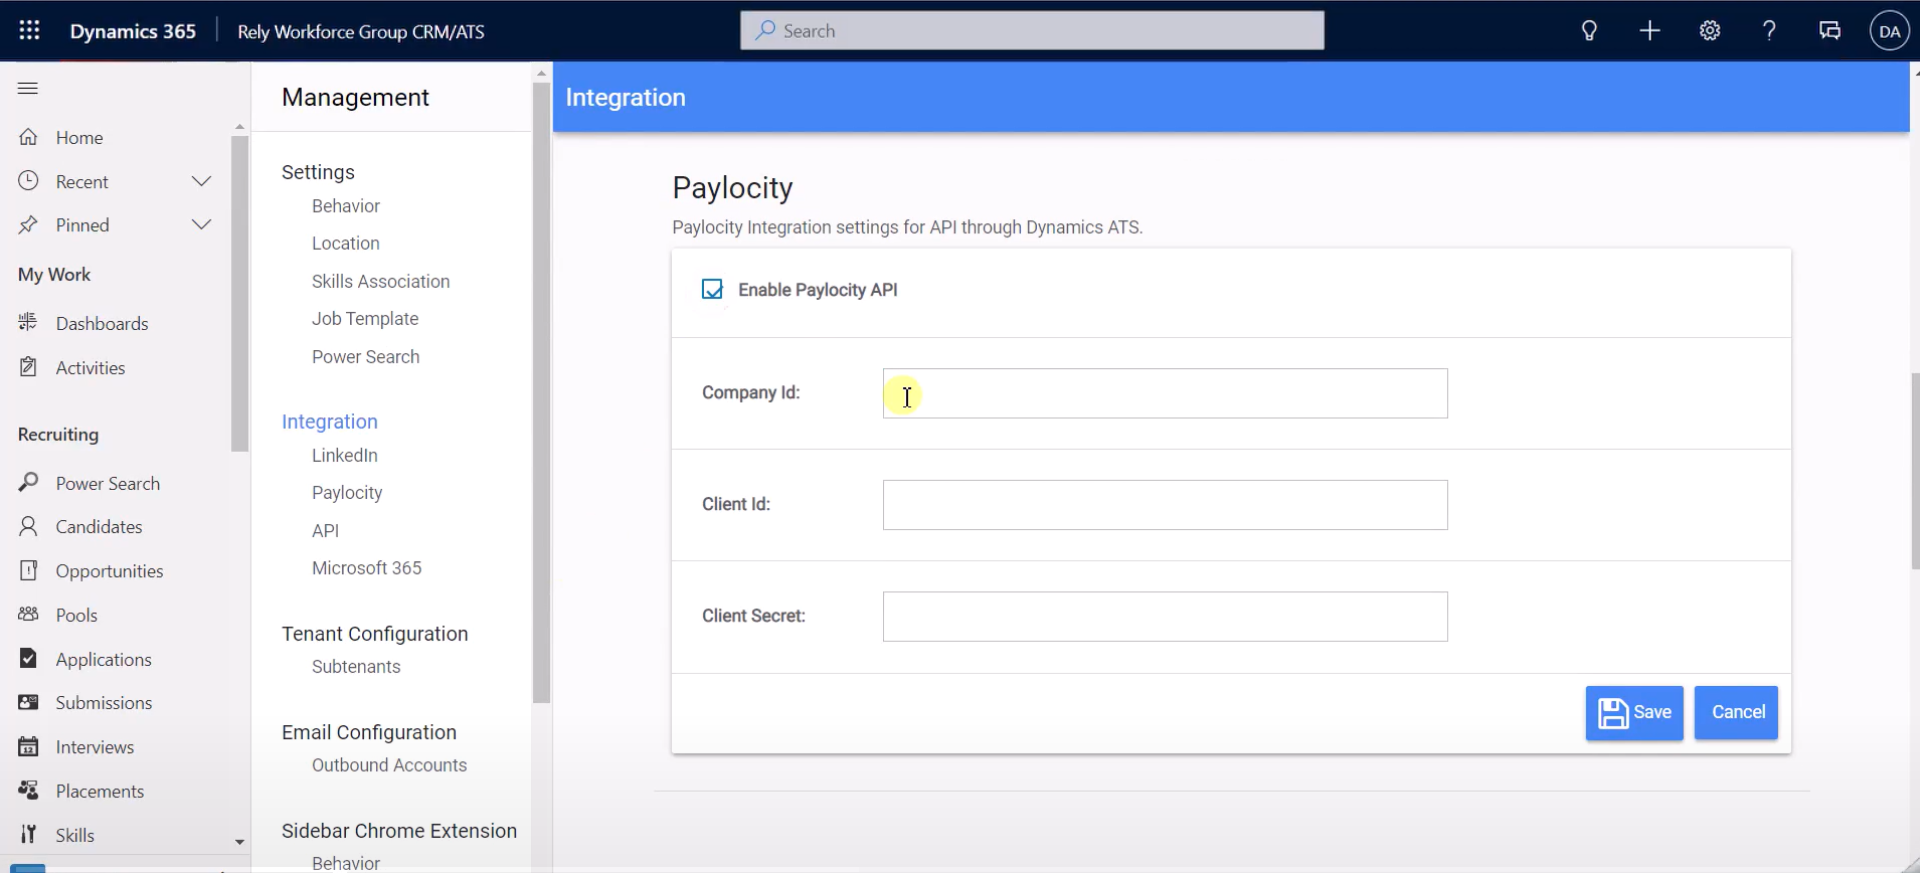
Then press Save.
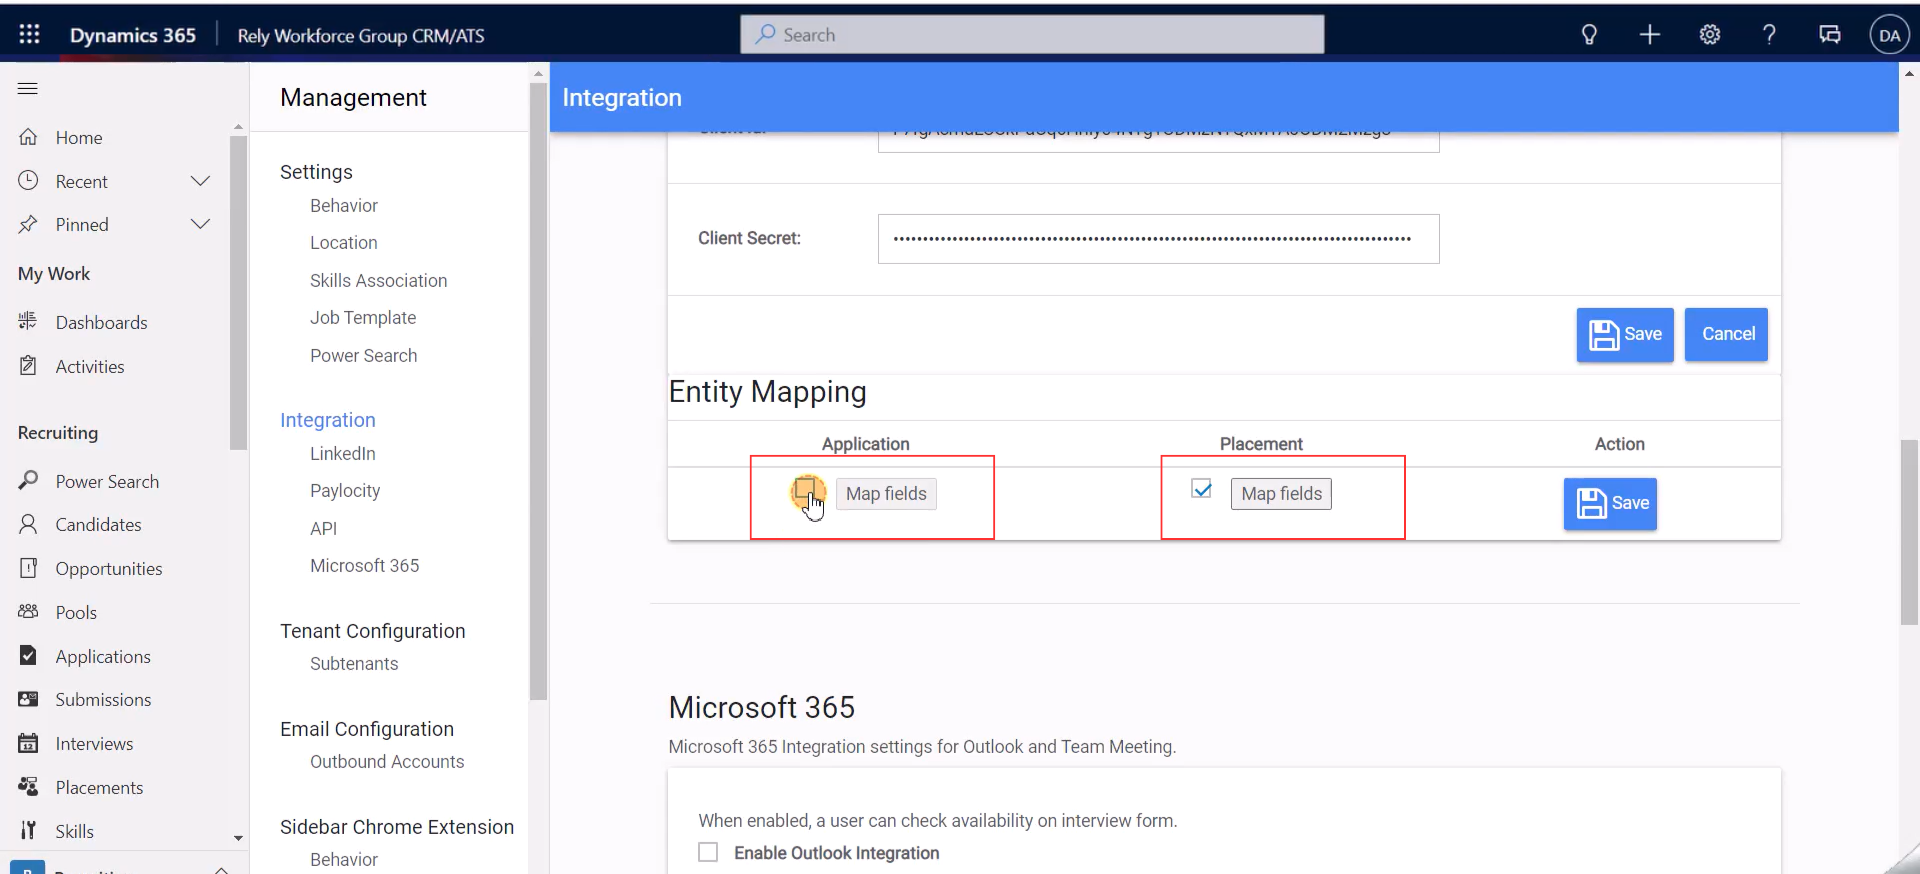
Next, you will see the Entity Mapping section, where you can enable the mapping of Applications or Placements by checking the boxes and clicking Save.
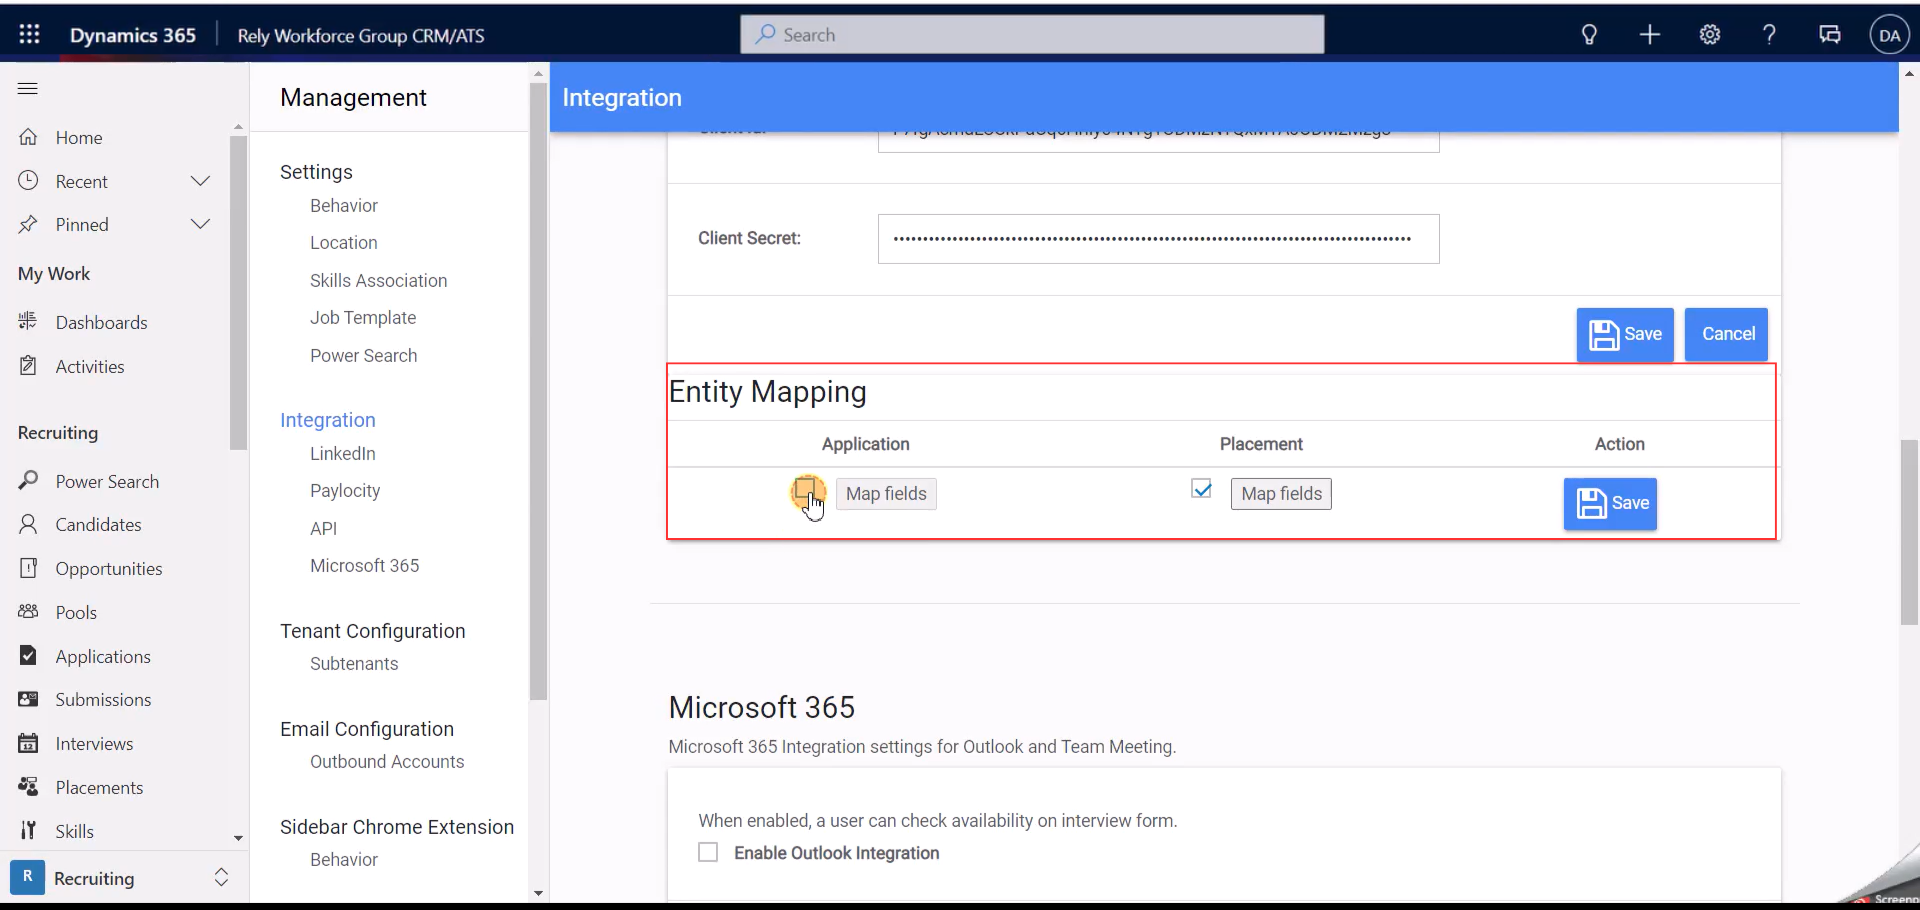
By pressing the Map Fields button, you can set up which fields will appear on the Application or Placement Paylocity Sync screen.
There, you can choose which fields will appear in the Paylocity Sync screen. Select them by marking the checkbox.
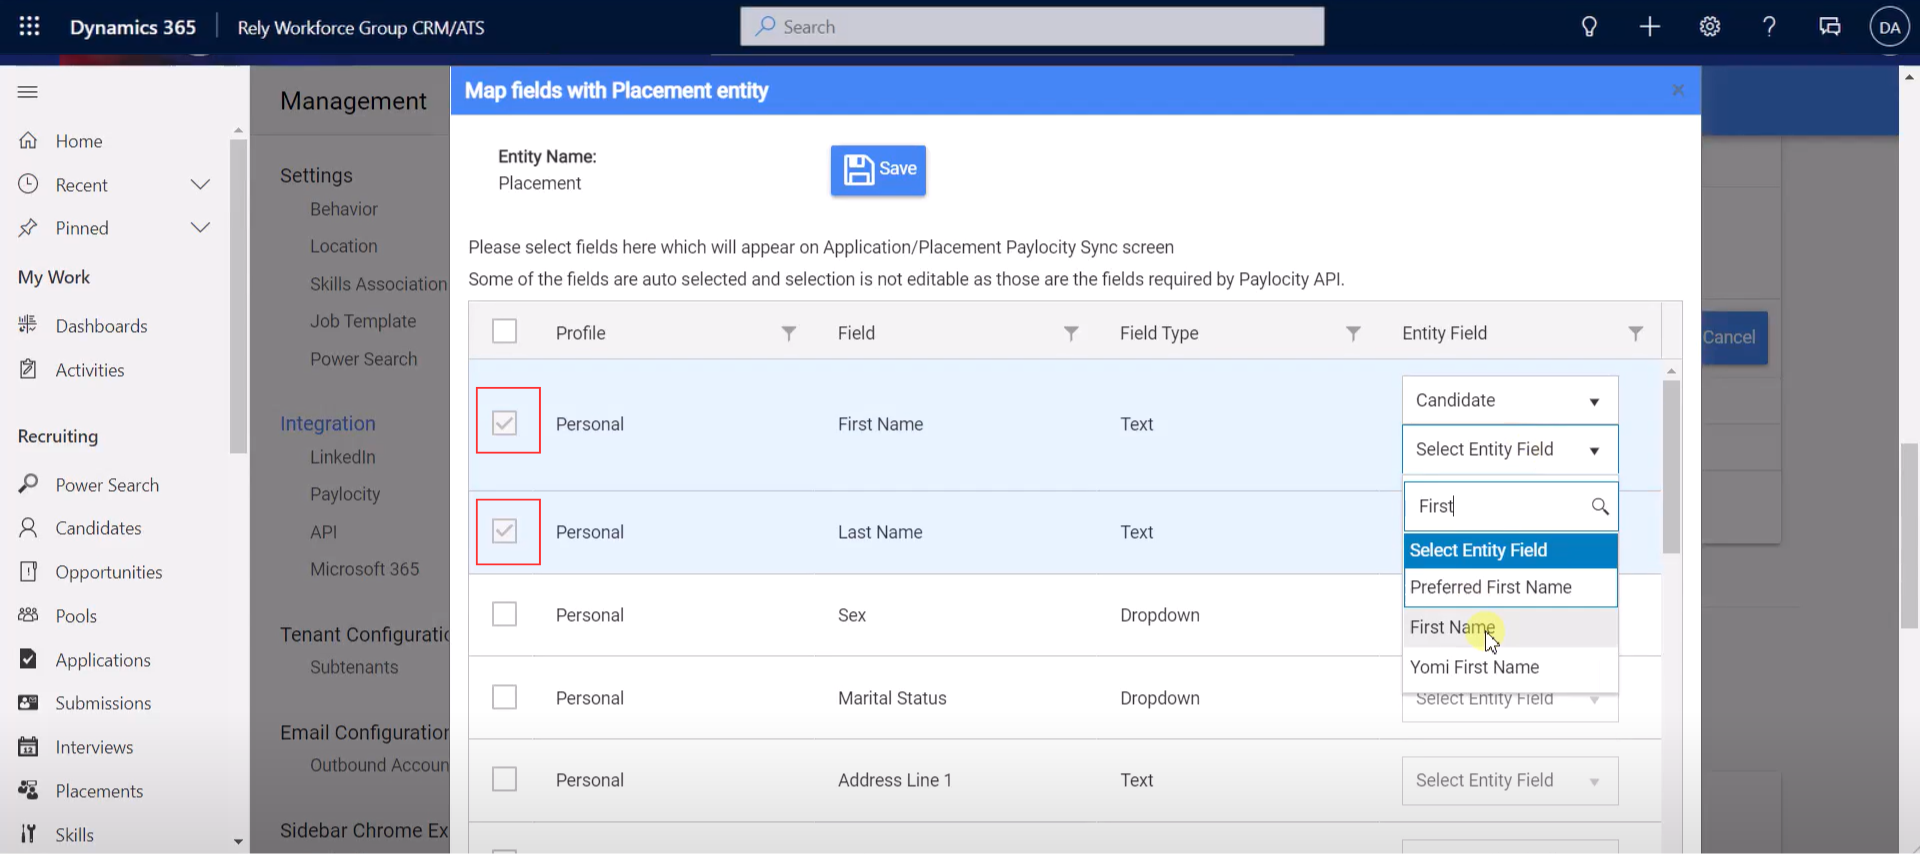
In the first dropdown menu, you can select the entity, and in the dropdown menu below, you can choose the corresponding field.
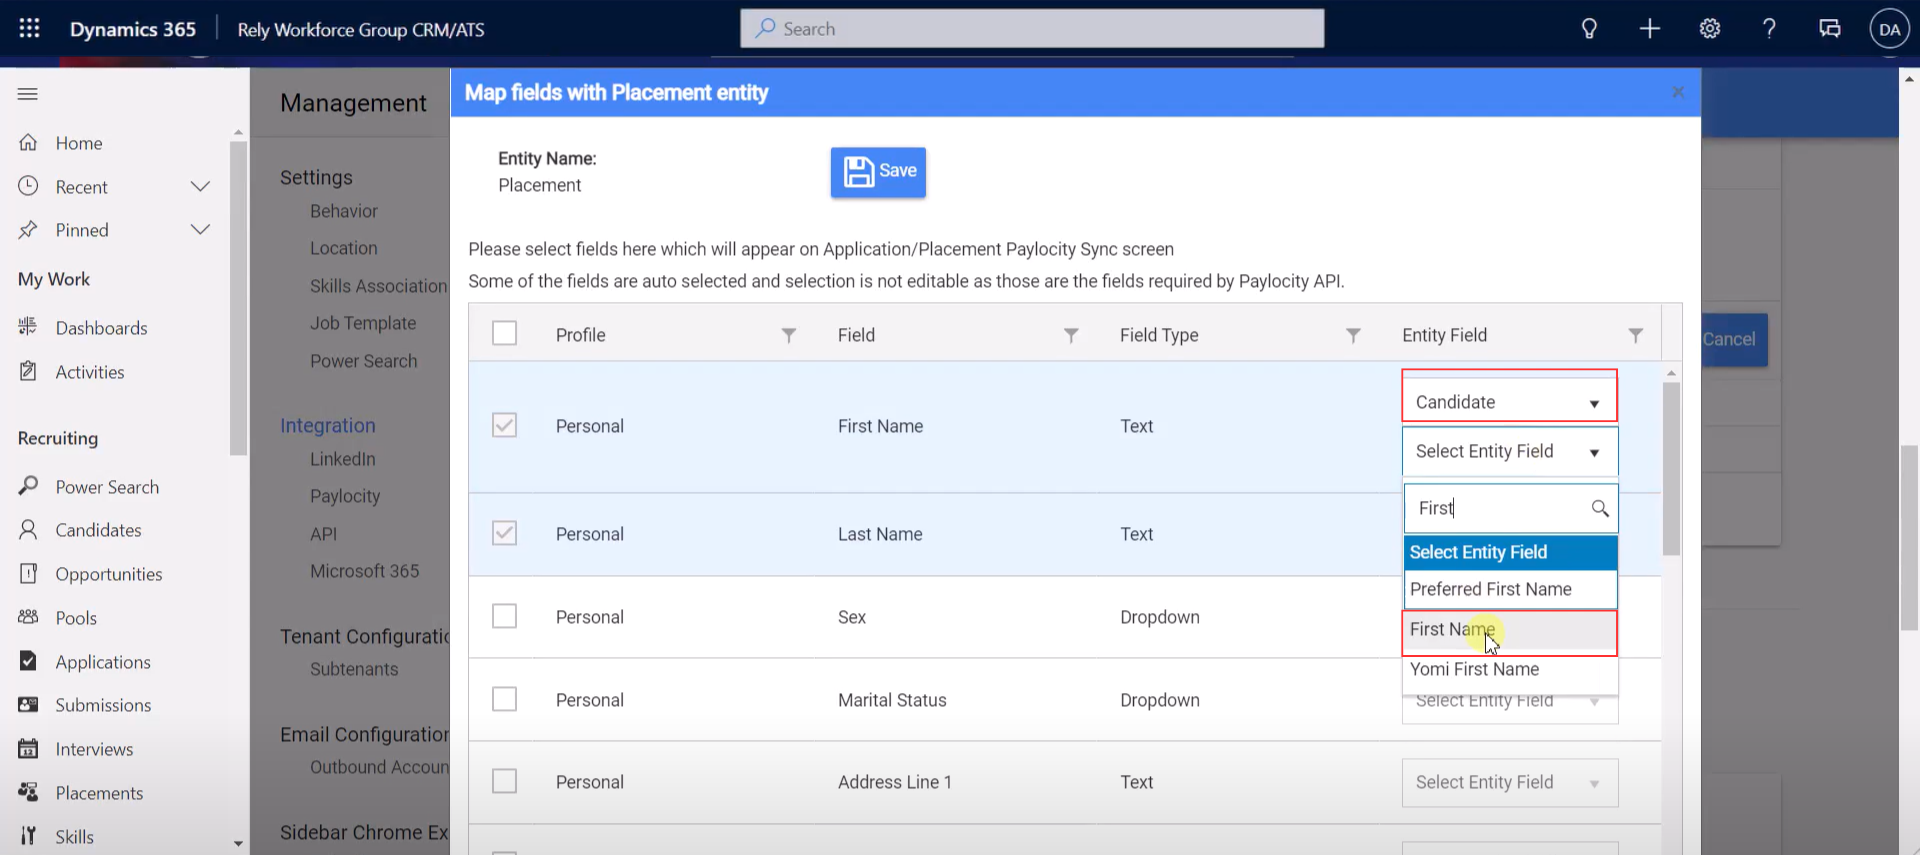
For example, you will see the candidate’s first name field on this screen, which will be synchronized with Paylocity.
Finally, press Save to save the changes.
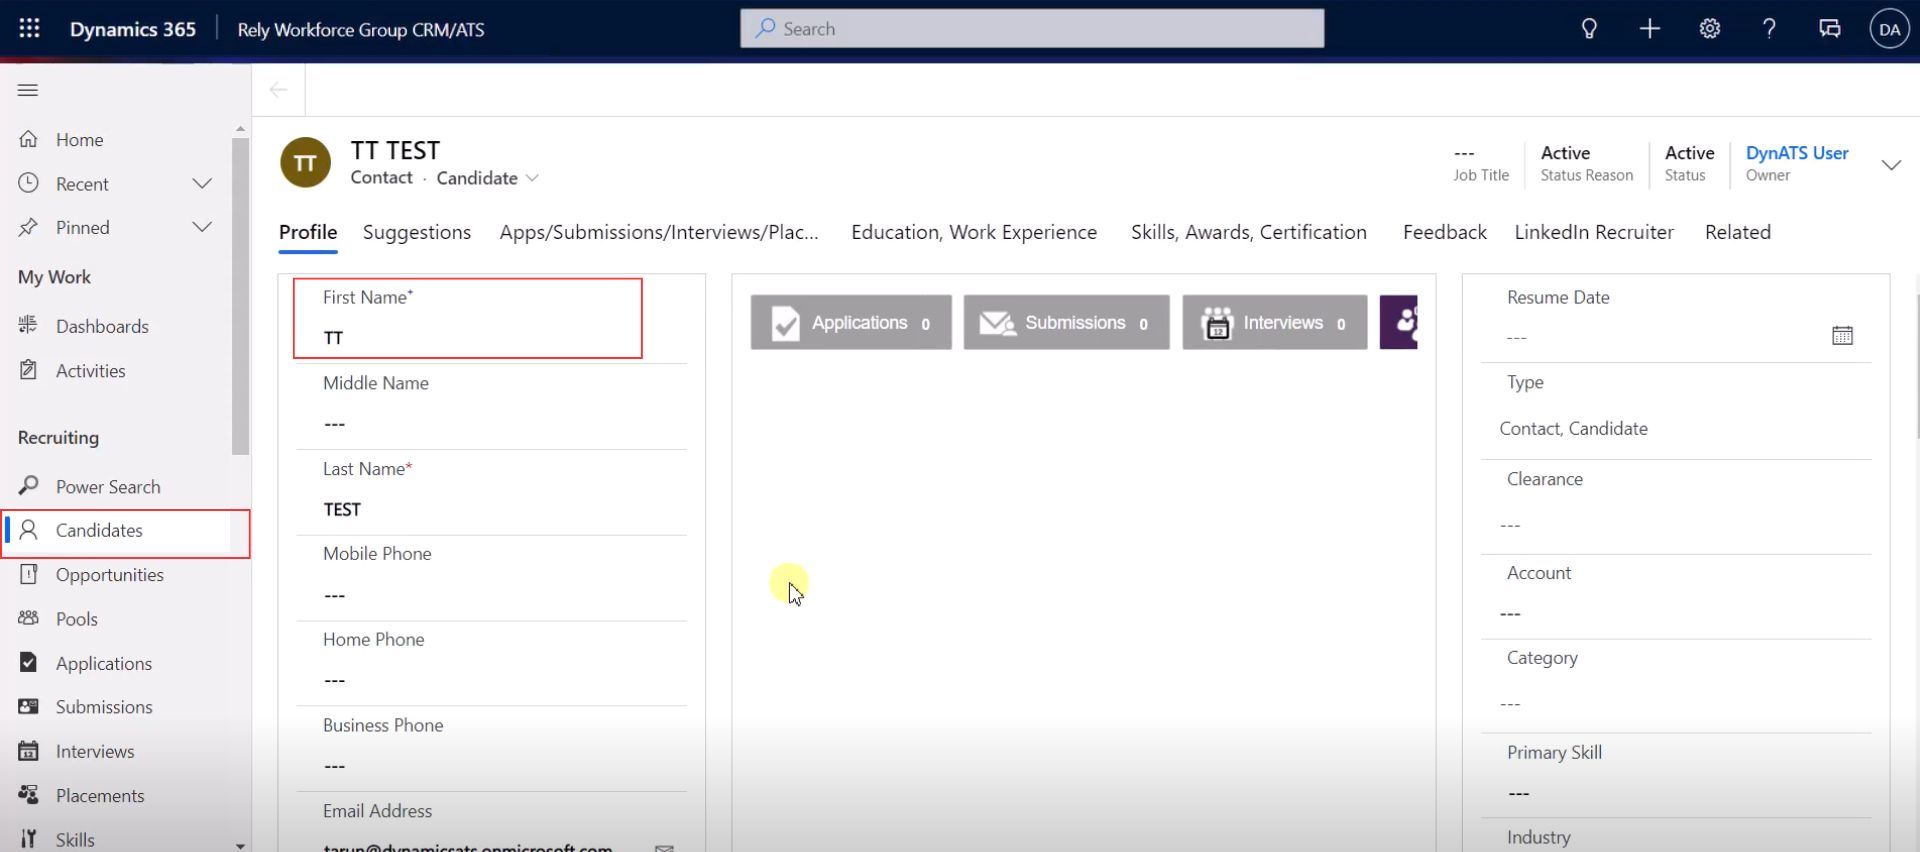
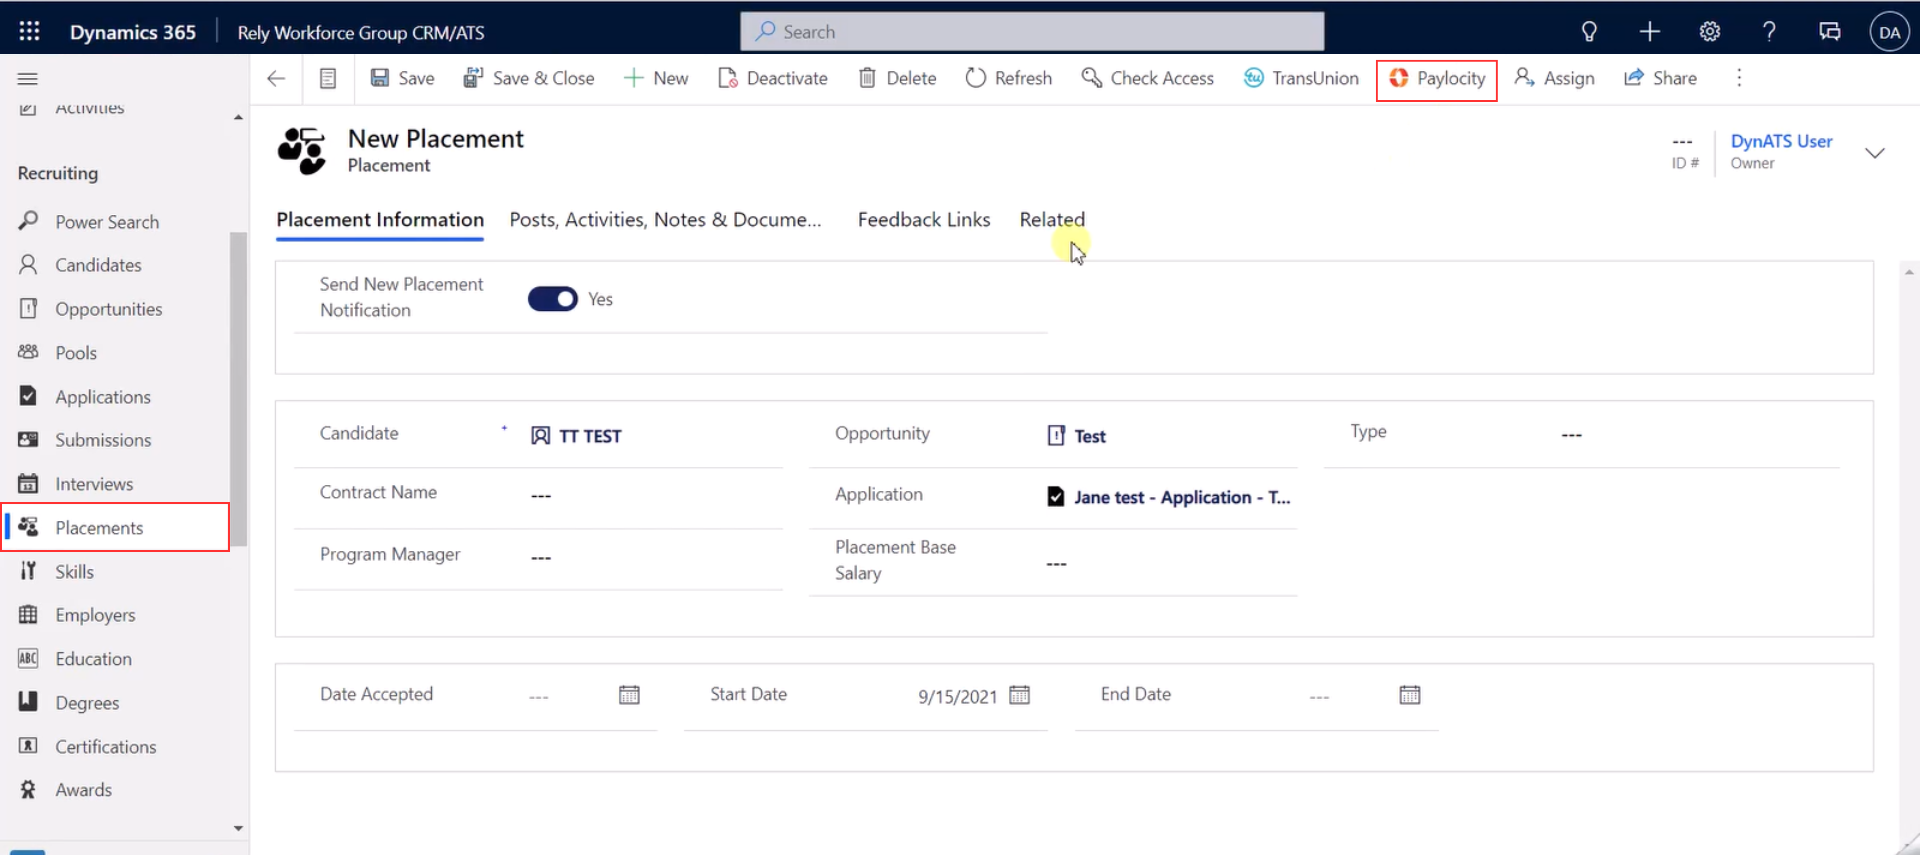
Now you can synchronize the candidate information to Paylocity. To do that, go to Placements in the sidebar, and select the candidate.
In their profile, you will see the Paylocity button.
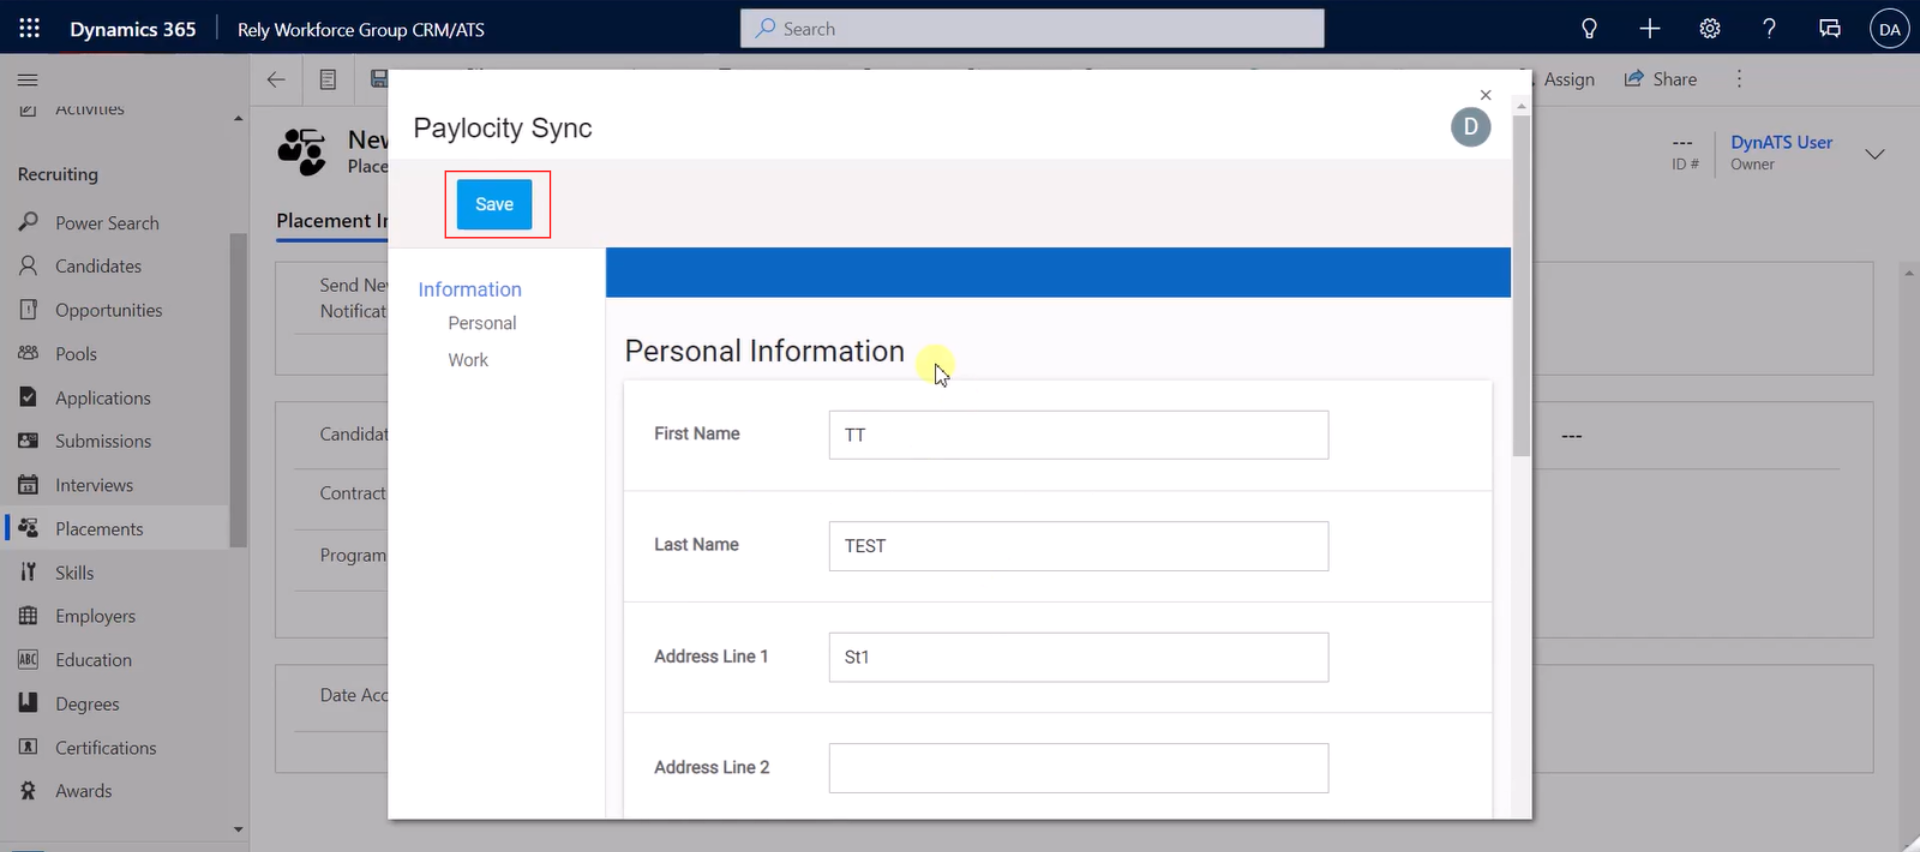
There, you will see the information automatically copied. Press Save to synchronize it.
Post your comment on this topic.