
This feature will allow your users to log into the Client Portal using your company’s Okta Authentication service.
To enable Okta Authentication to the Client Portal, you will have to create a new Application in Okta or use an existing one.
You will need the Client ID, Client Secret, and Organization URL from the Okta application to configure the Client Portal integration.
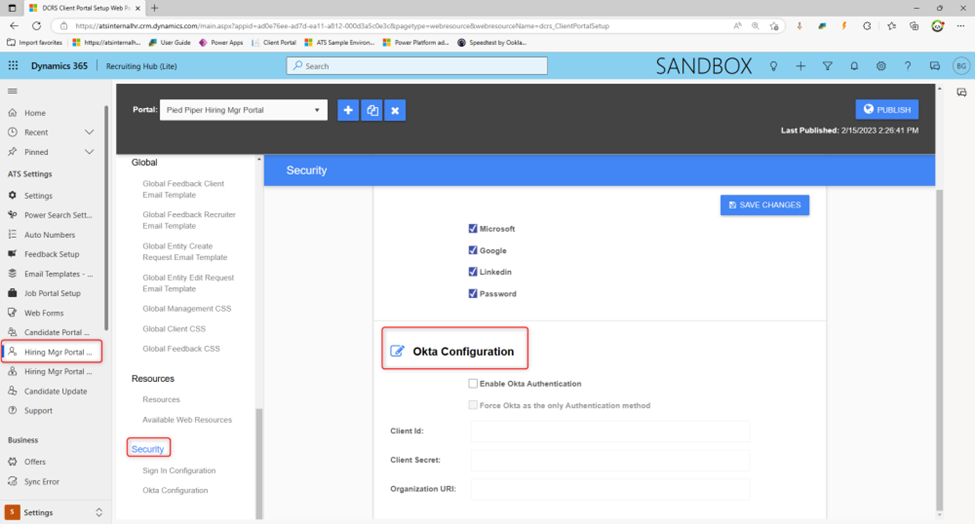
Once you have that information, go to the Client Portal Setup screen, select the portal where you want to enable the integration, and then click on the Security Tab.
As you can see in Screenshot 1, you will have to enable Okta Authentication and complete the Okta information. As an additional option, you can enforce the use of Okta on your Client Portal, disabling other authentication options.
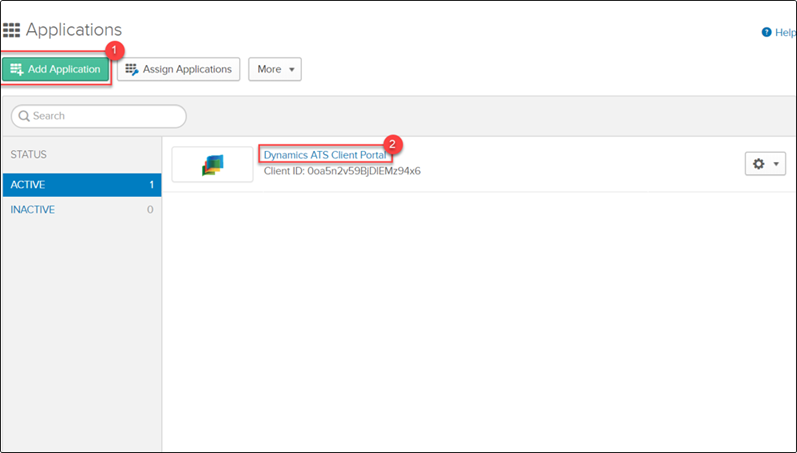
We recommend creating a new application for the Client Portal integration. Ask your Okta administrator to do it, or follow the Okta guides to do it.
We also recommend, as you can see in Screenshot 2 to name the application with an easy name as Dynamics ATS Client Portal.
Application Type: Web
Allowed grant types.
Client Acting on behalf of itself.
• Client Credentials: False
Client acting on behalf of a user.
• Authorization Code: True
• Refresh Token: True
• Implicit (Hybrid): True
• Allow ID Token with implicit grant type: True
• Allow Access Token with implicit grant type: True.
>
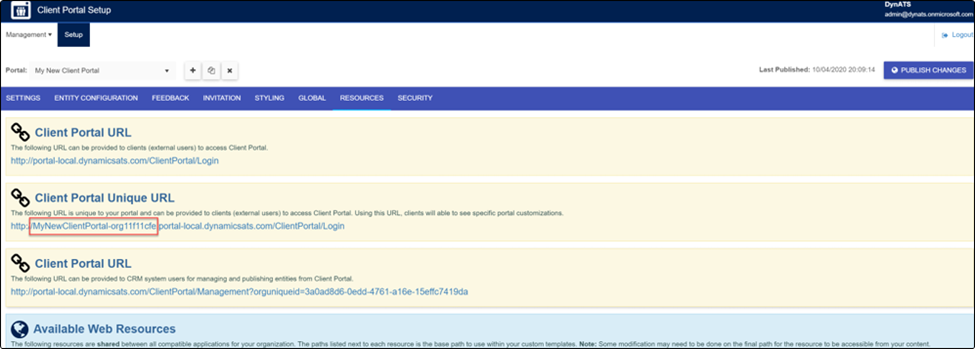
To configure the login redirect URIs, you will need to know your Client Portal unique Subdomain.
The subdomain can be found on Client Portal Setup, Resources Tab in the Client Portal Unique URL section as displayed in Screenshot 3.
To redirect back to the Client Portal, you will need to add the following URIs.
https://portal.dynamicsats.com/authorization-code/callback
https://portal-subdomain.portal.dynamicsats.com/ClientPortal/Account/AssociateOktaAccount
Configure Logout redirect URIs
https://portal-subdomain.portal.dynamicsats.com/ClientPortal/Account/login
Post your comment on this topic.