
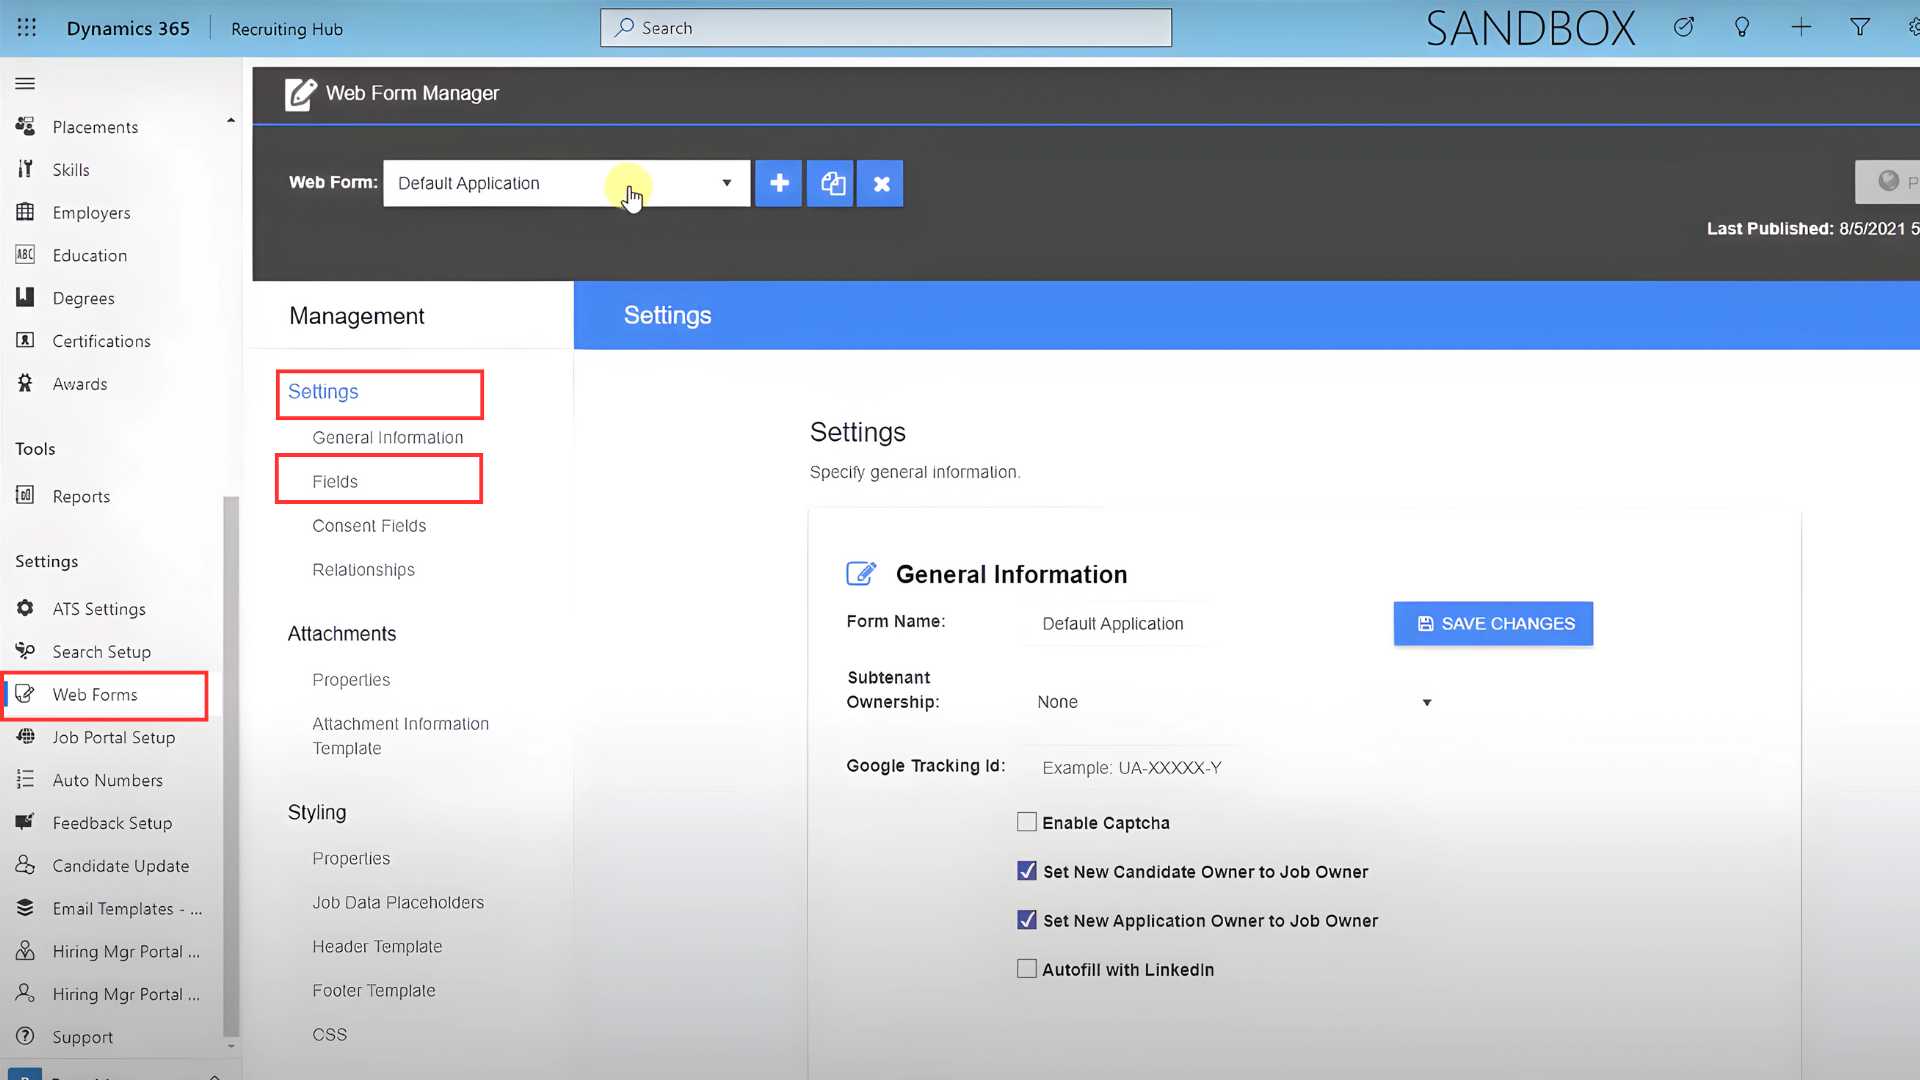
To begin, go to Settings and select Web Forms in the sidebar.
Select General Information in the settings section and then click Fields.
If necessary, add the field you want to convert to rich text. To do this, press Add.
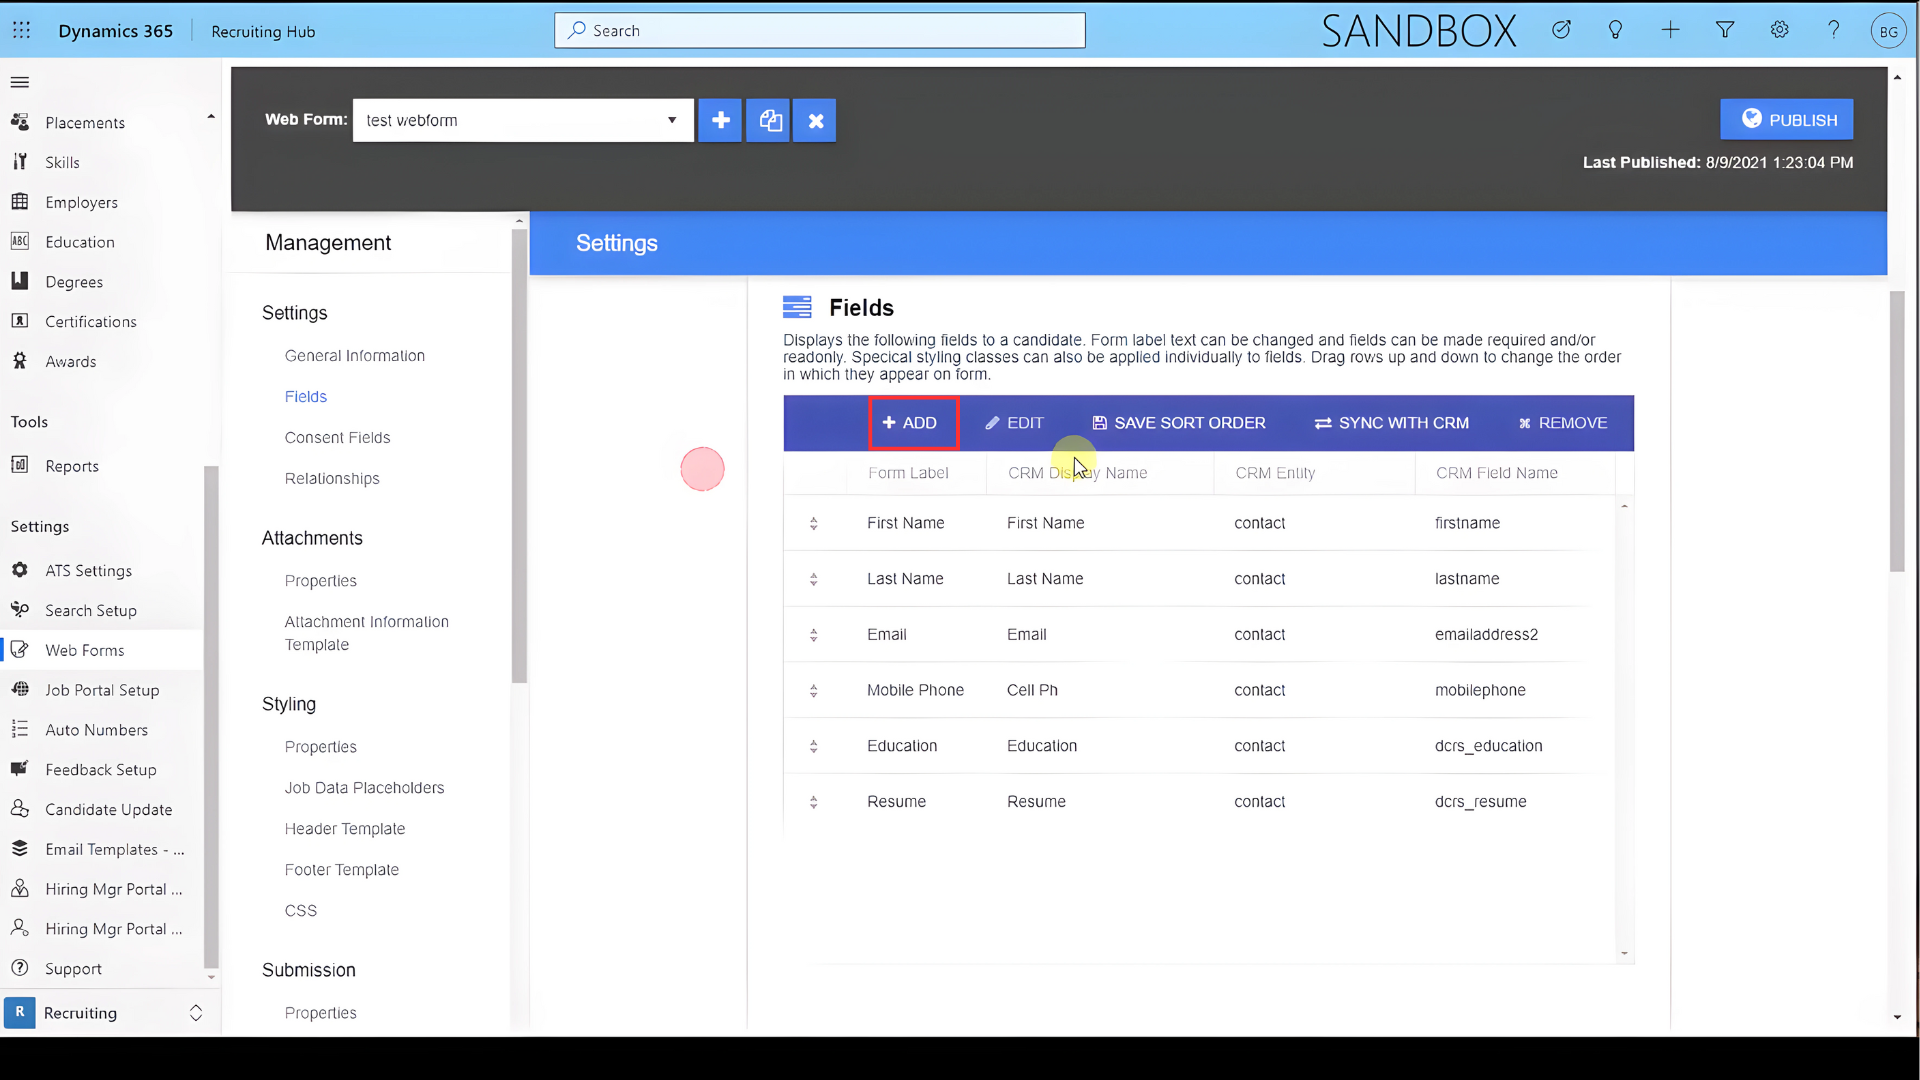
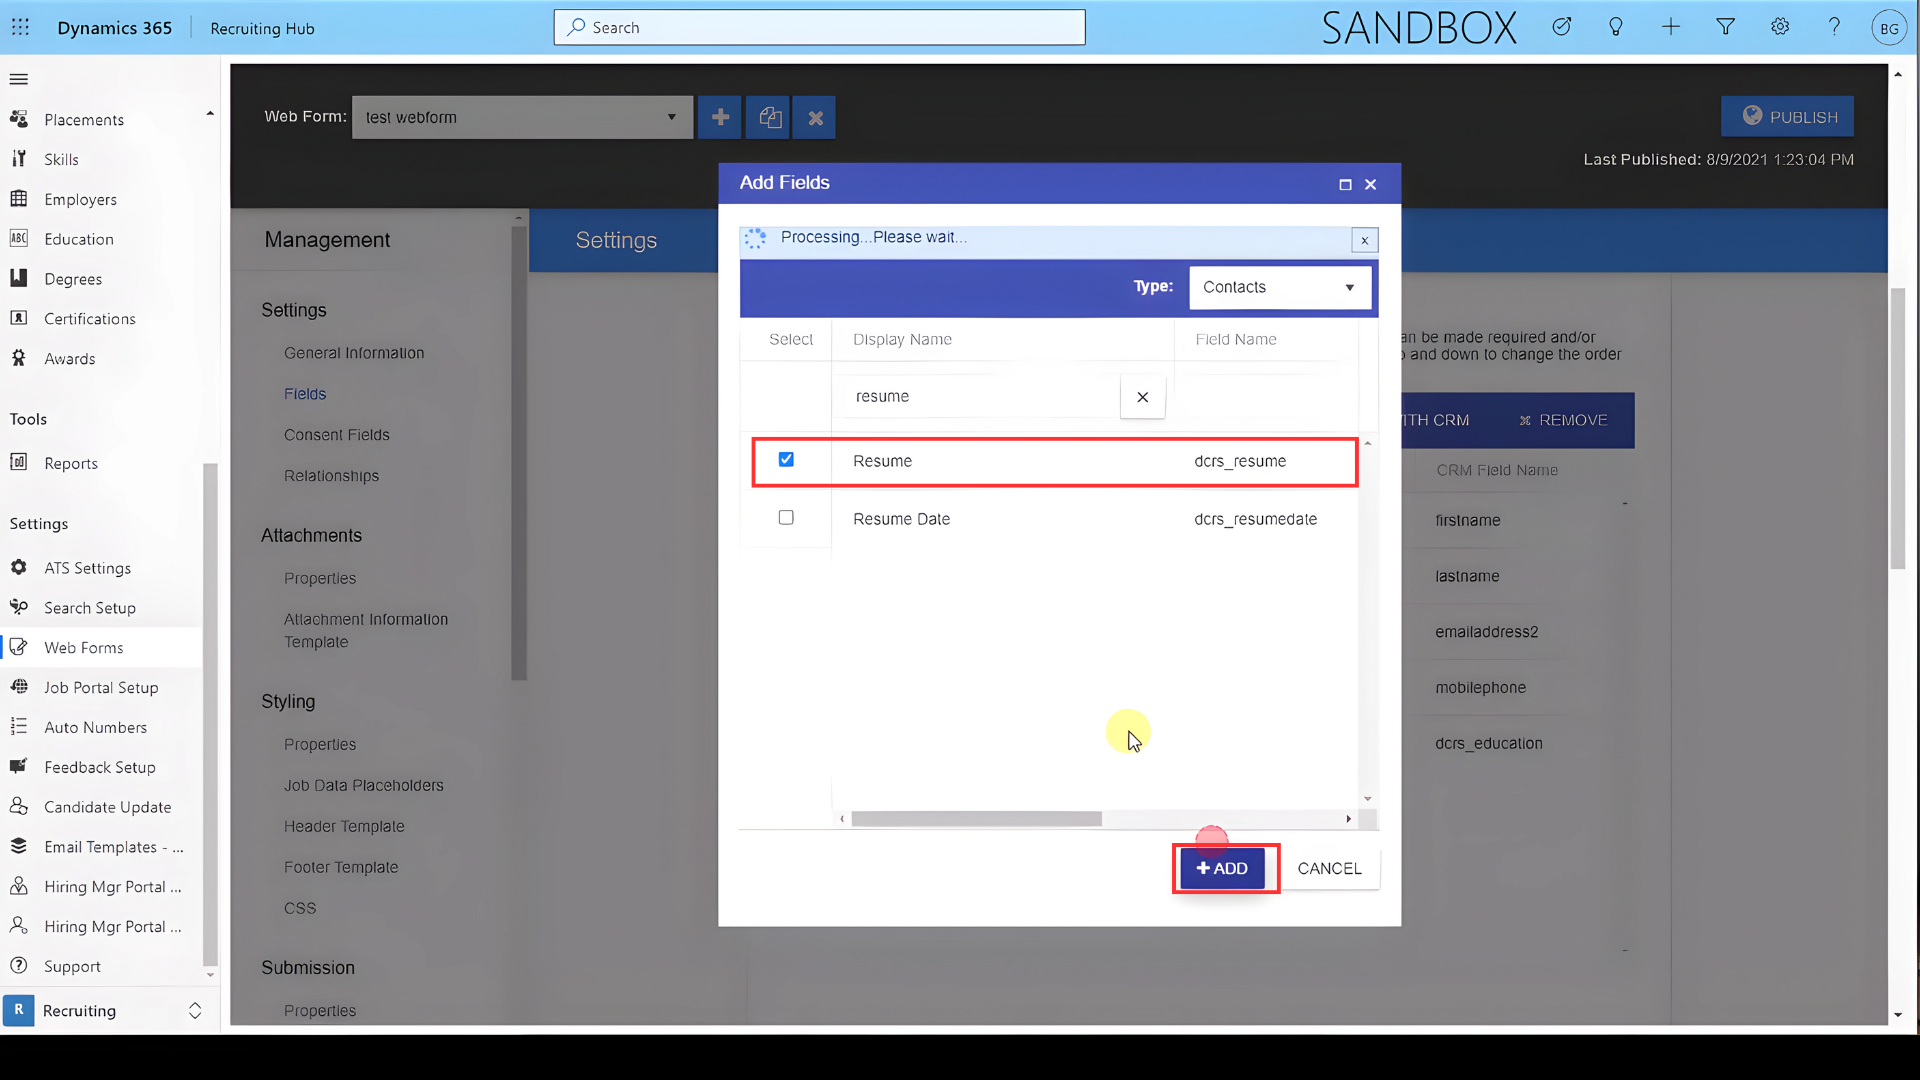
You will find all the fields that currently exist in Microsoft Dynamics on the contact entity. To add any of them, select it and click Save.
Next, click Save sort order on the fields section. Then press Save Changes and Publish.
Scroll down to find the HTML template section and go to the Header Template.
Add a few lines of code to enable rich text formatting. If needed, you can copy and paste existing lines to access the editing area.
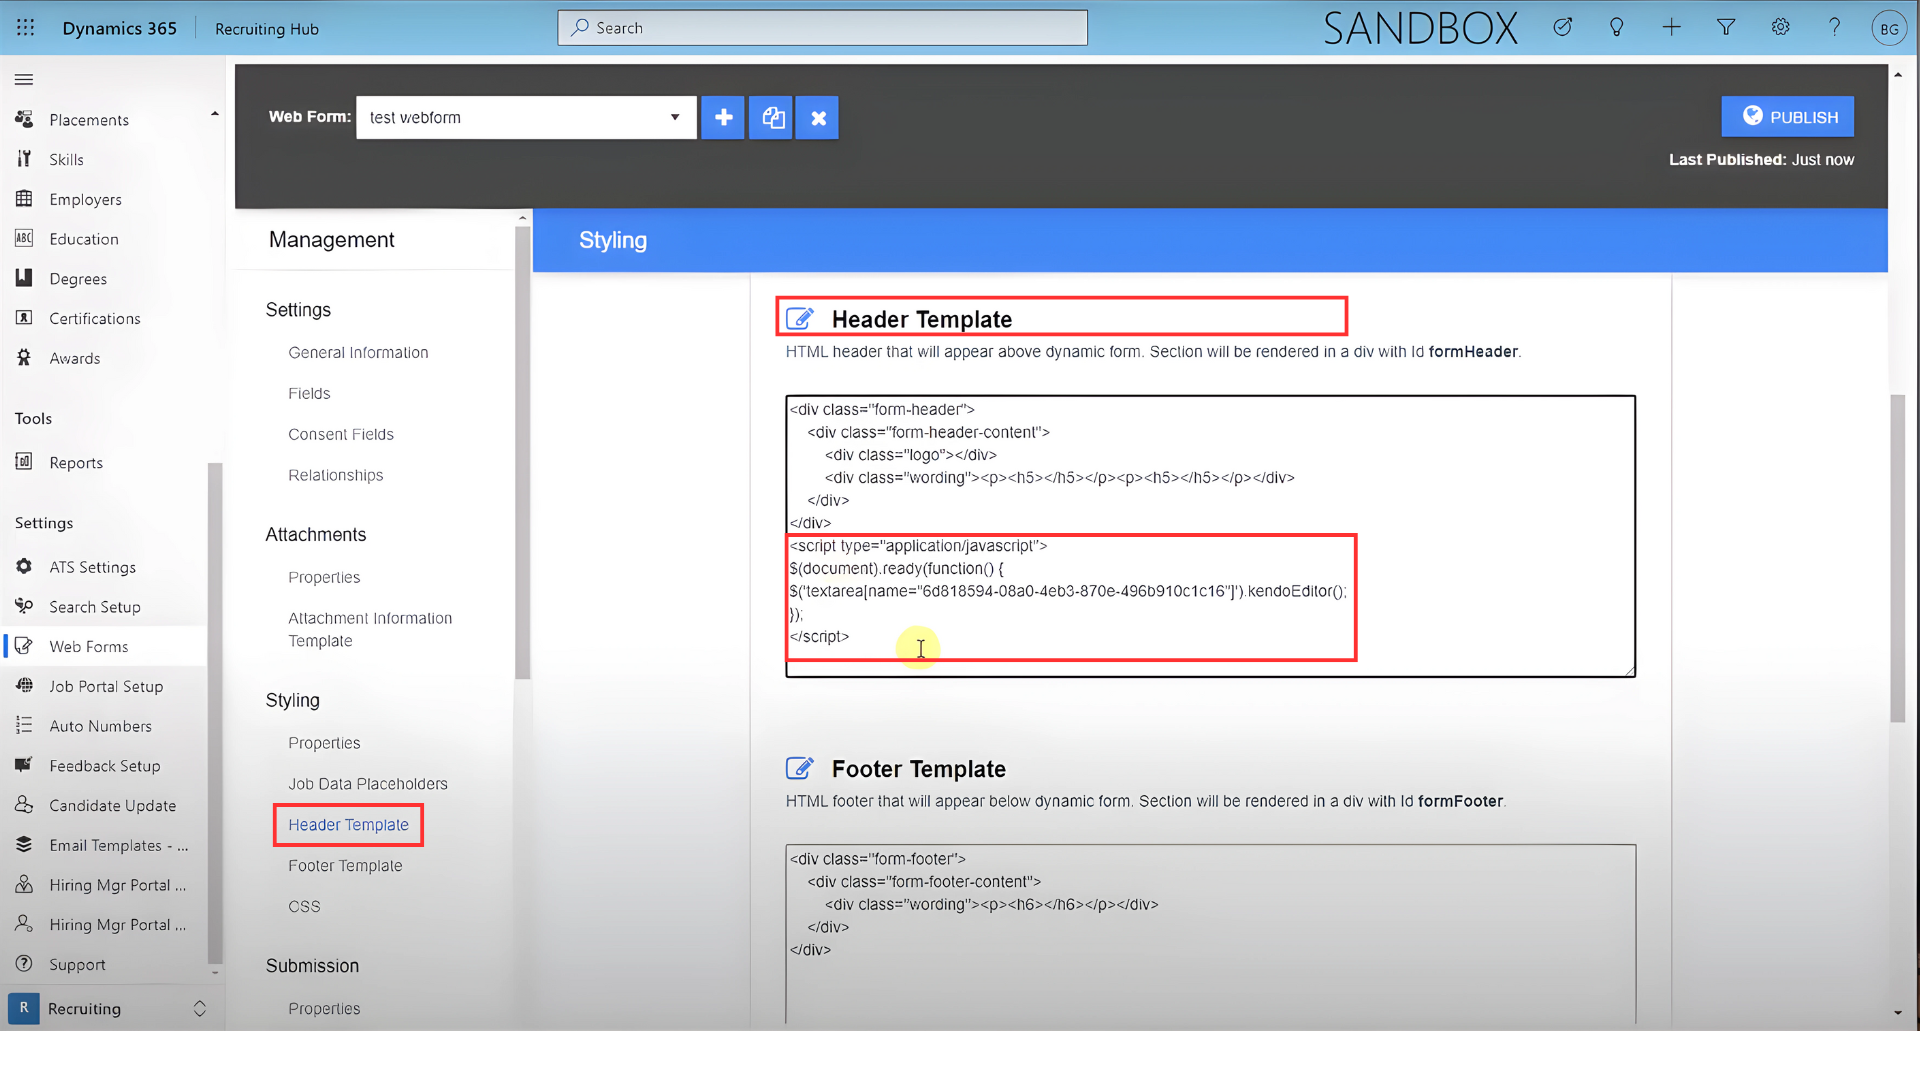
In our example, we use this:
</span> </p>
<script type=“application/javascrip”>
$(document).ready(funvyopm() {
$(‘textarea[name= “6f81594-08a0-4eb3-870e-496b911c1c16”]).kendoEditot();
});
</script>
Save changes and publish.
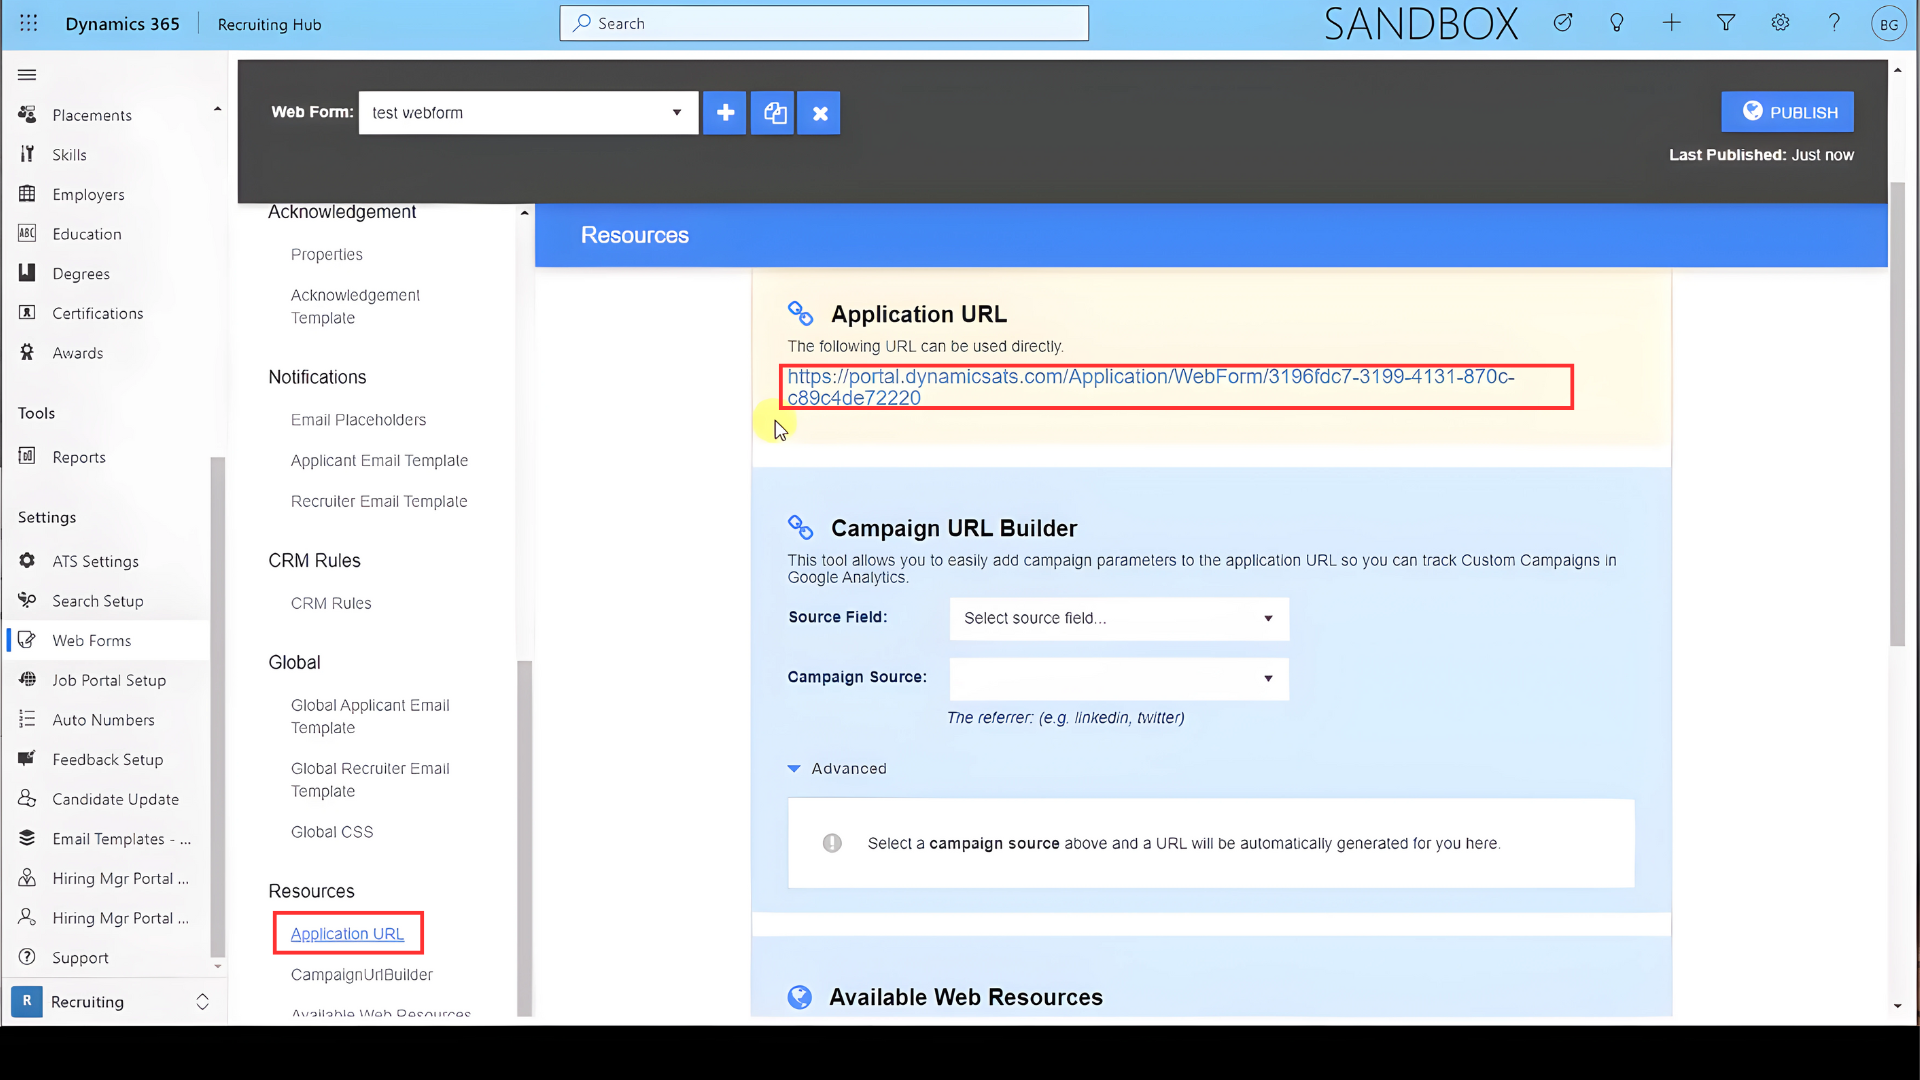
Then you need to edit the field name. To find the actual field ID, go to the Application URL and click the link.
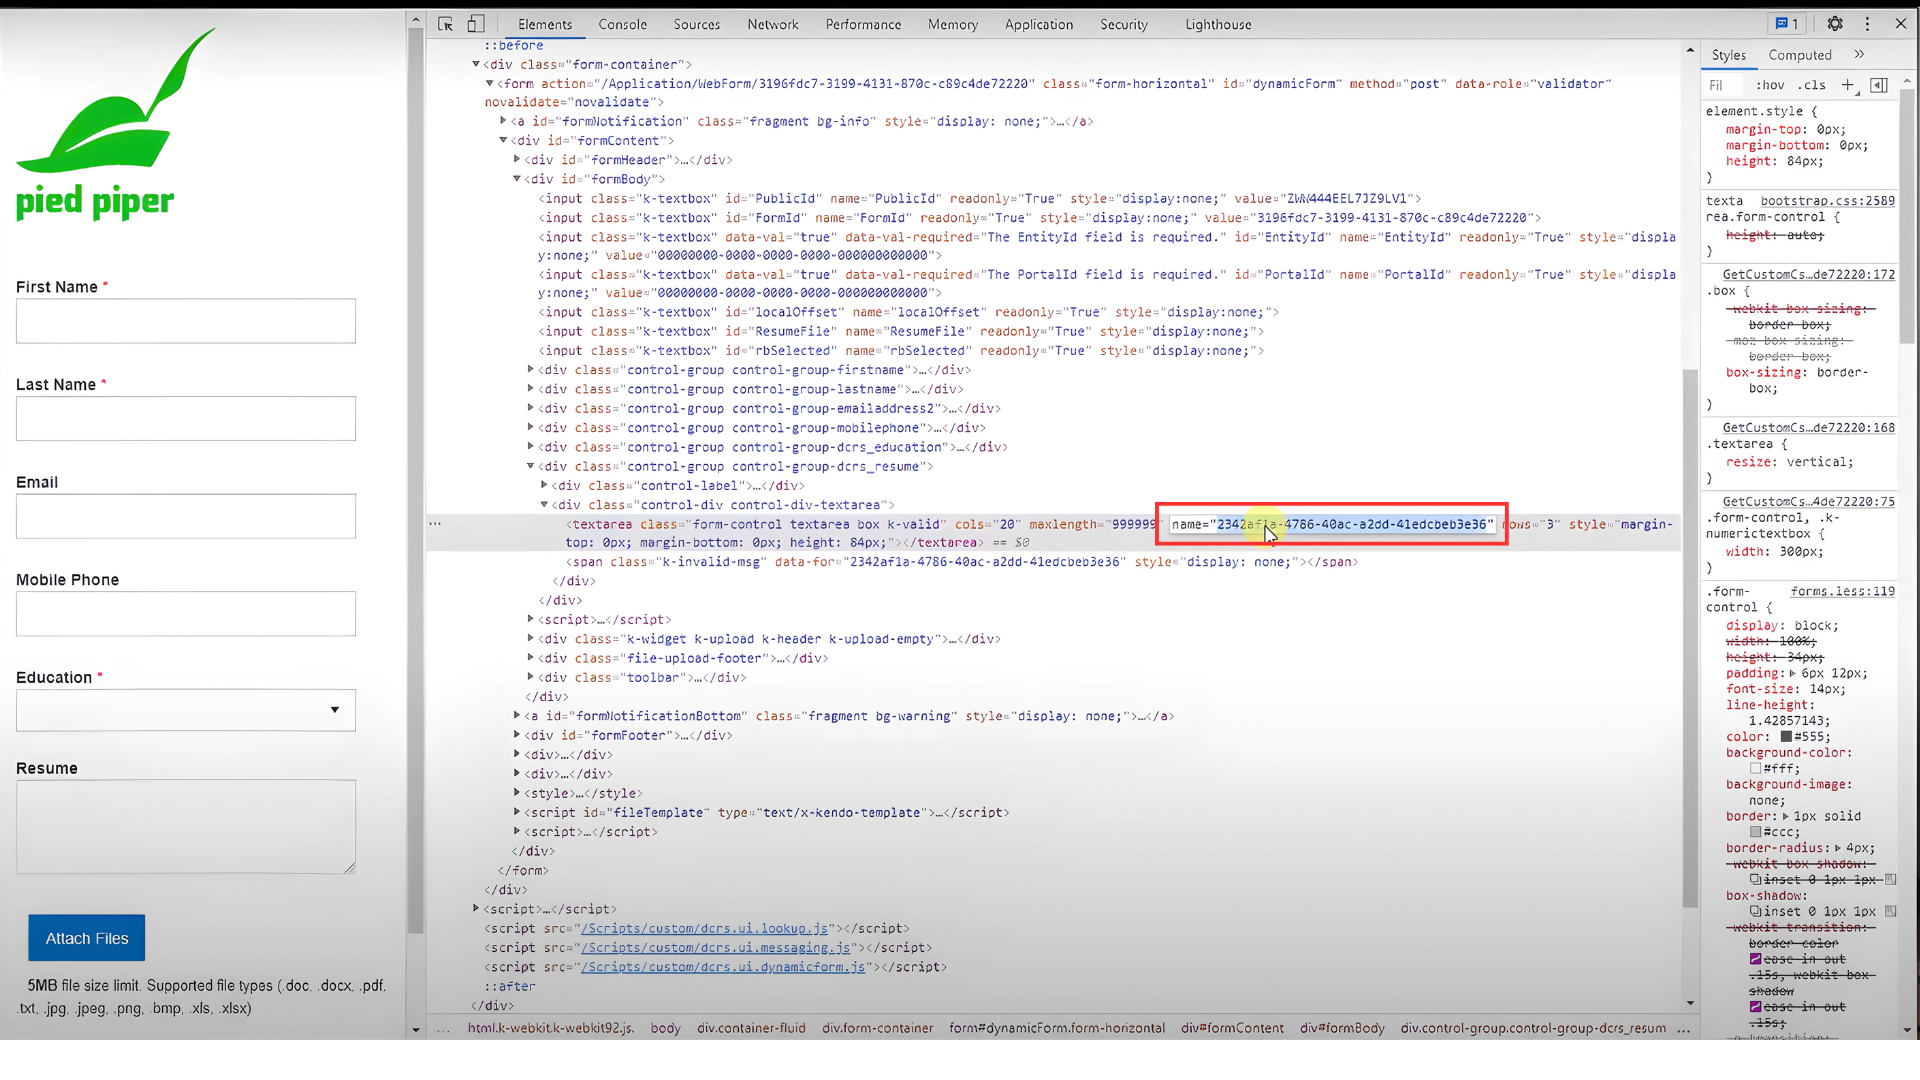
Click right and inspect the element. When you find the name, copy it.
Go back to the HTML template (Styling>Header template) and paste the field name, replacing the existing one.
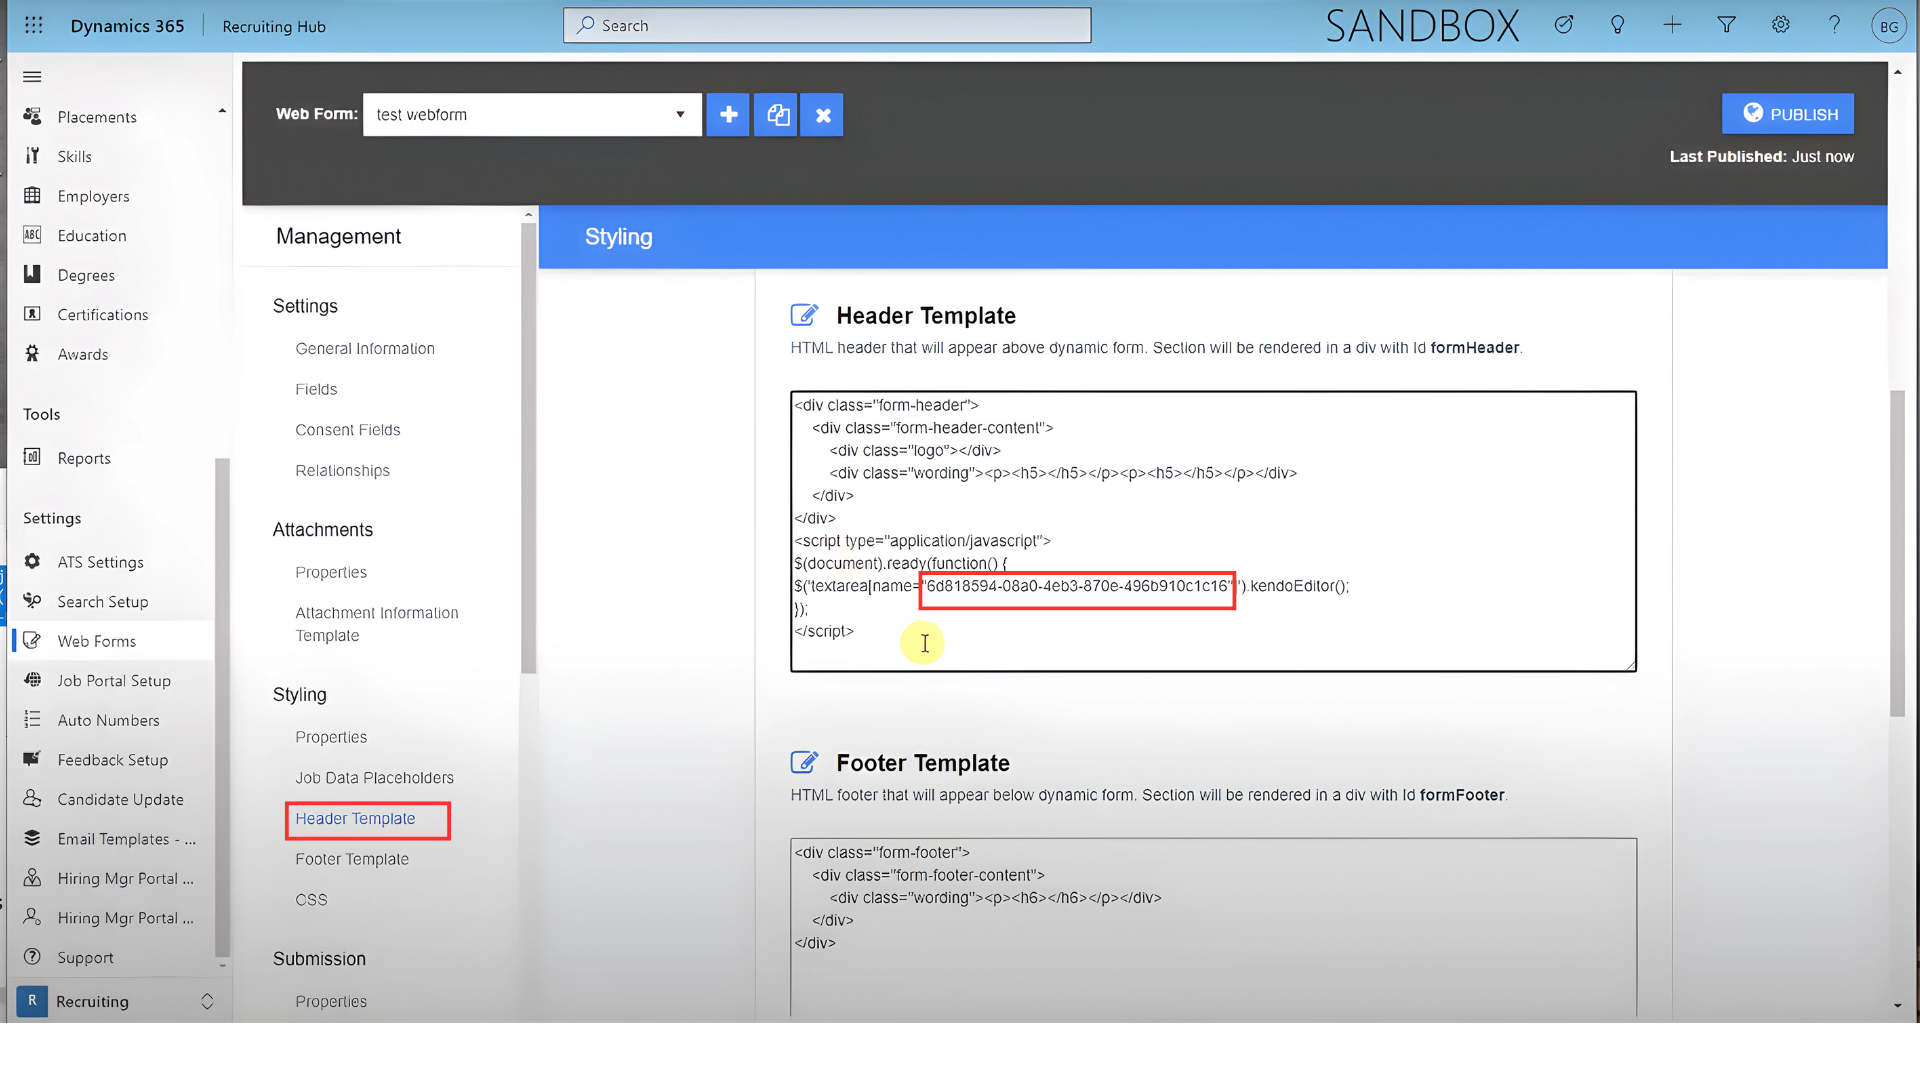
Go back to the HTML template (Styling>Header template) and paste the field name, replacing the existing one.
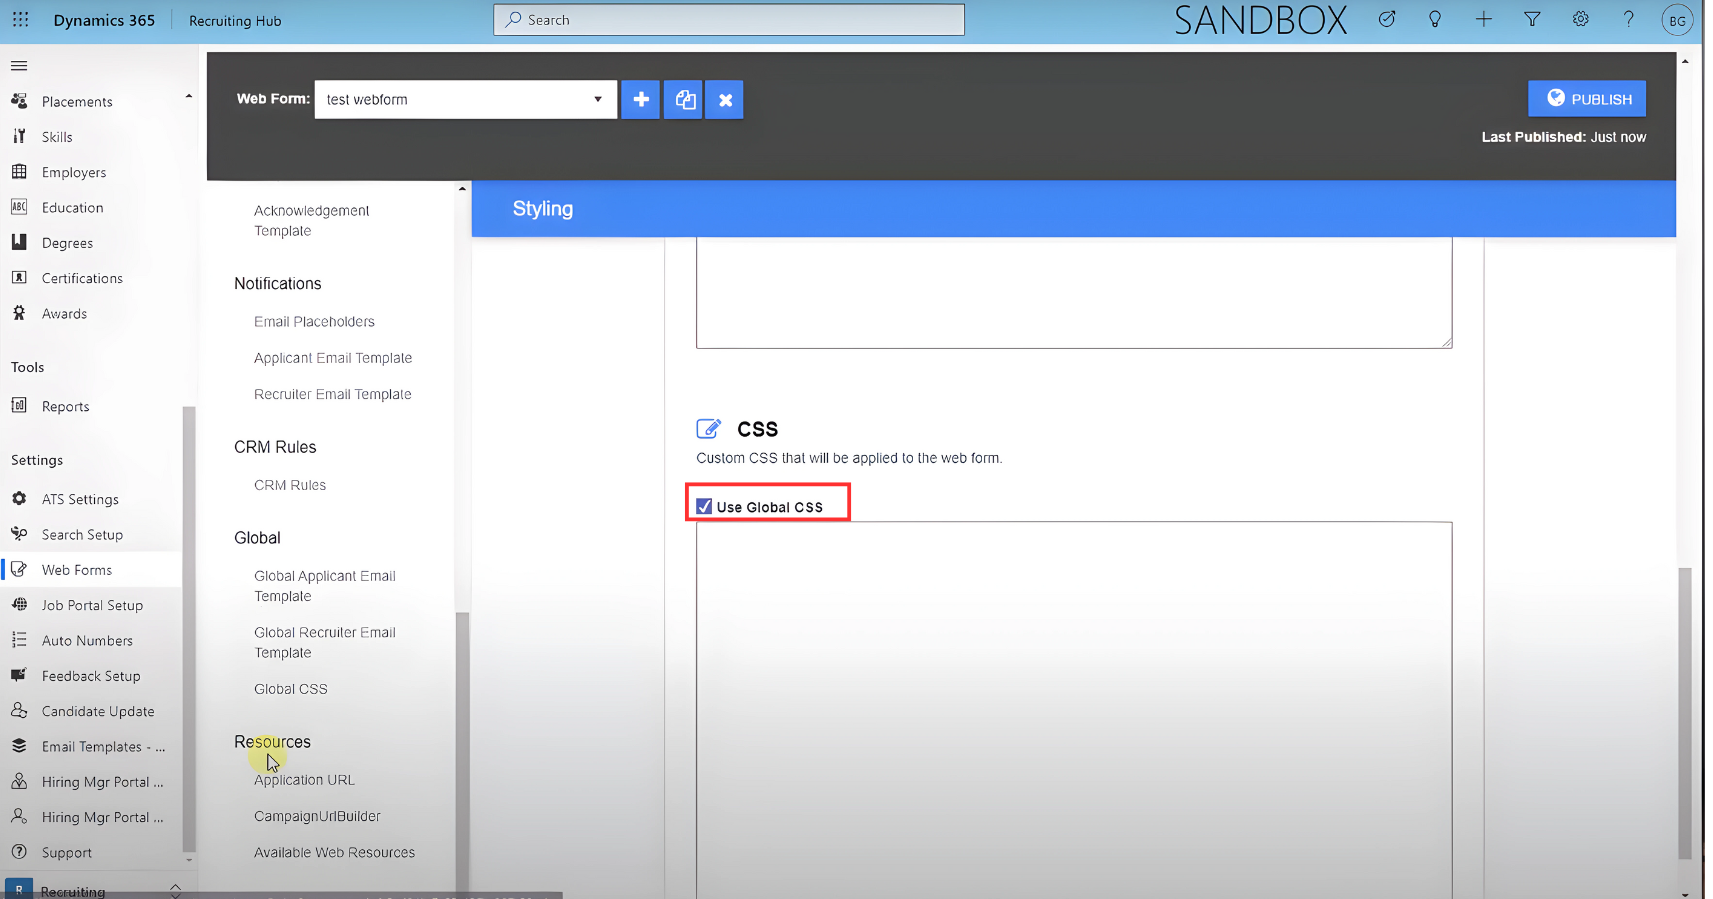
Go to Global CSS and add your code.
In our examples was:
bc. .k-editor-widget {
width : 98% !important ;
}
Table.k-editor{
Height :250px !important ;
}
Save changes and Publish.

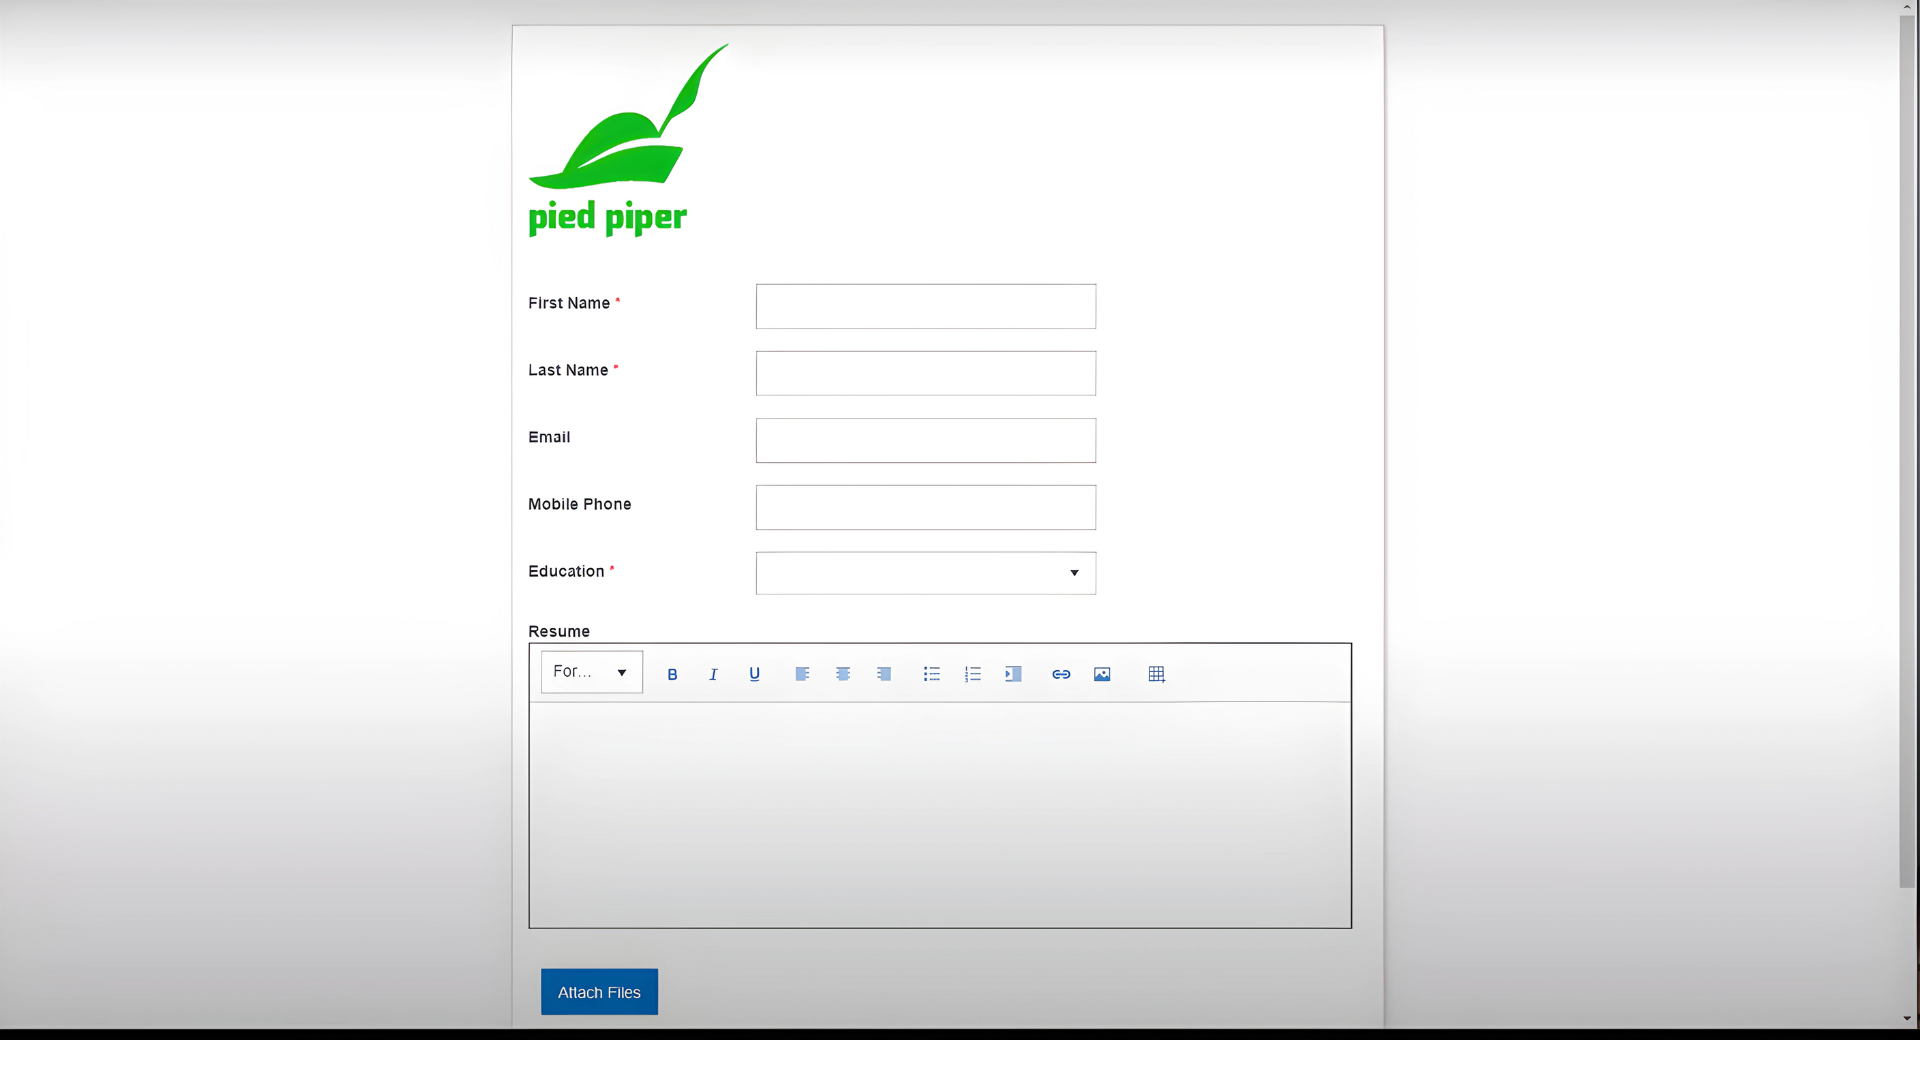
Your web form will look like this:
Post your comment on this topic.