
Location
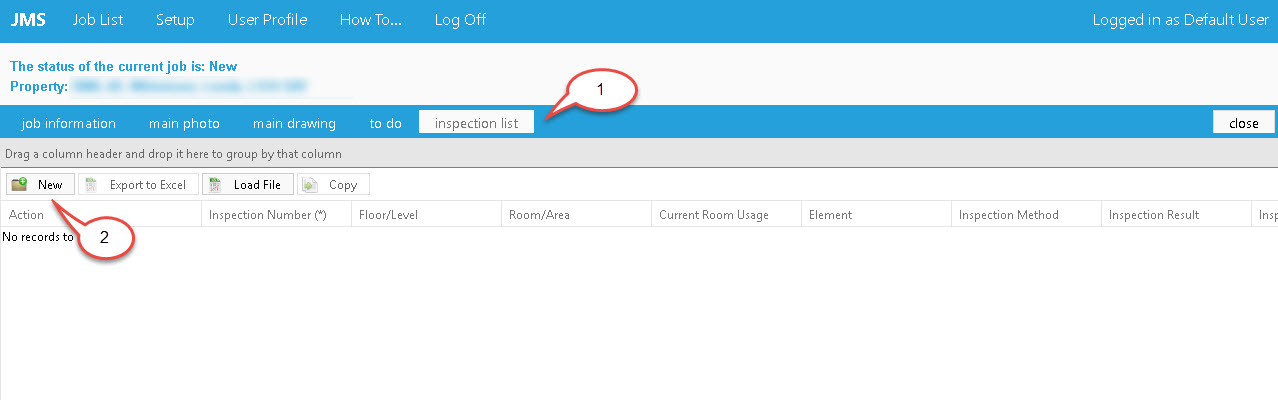
Once a job has been accepted, an inspection can be added. Once you open a job, you may add a new inspection in the Inspection List tab (1). To do that, click the New (2) button.
After clicking new, the Inspection Wizard screen will appear:
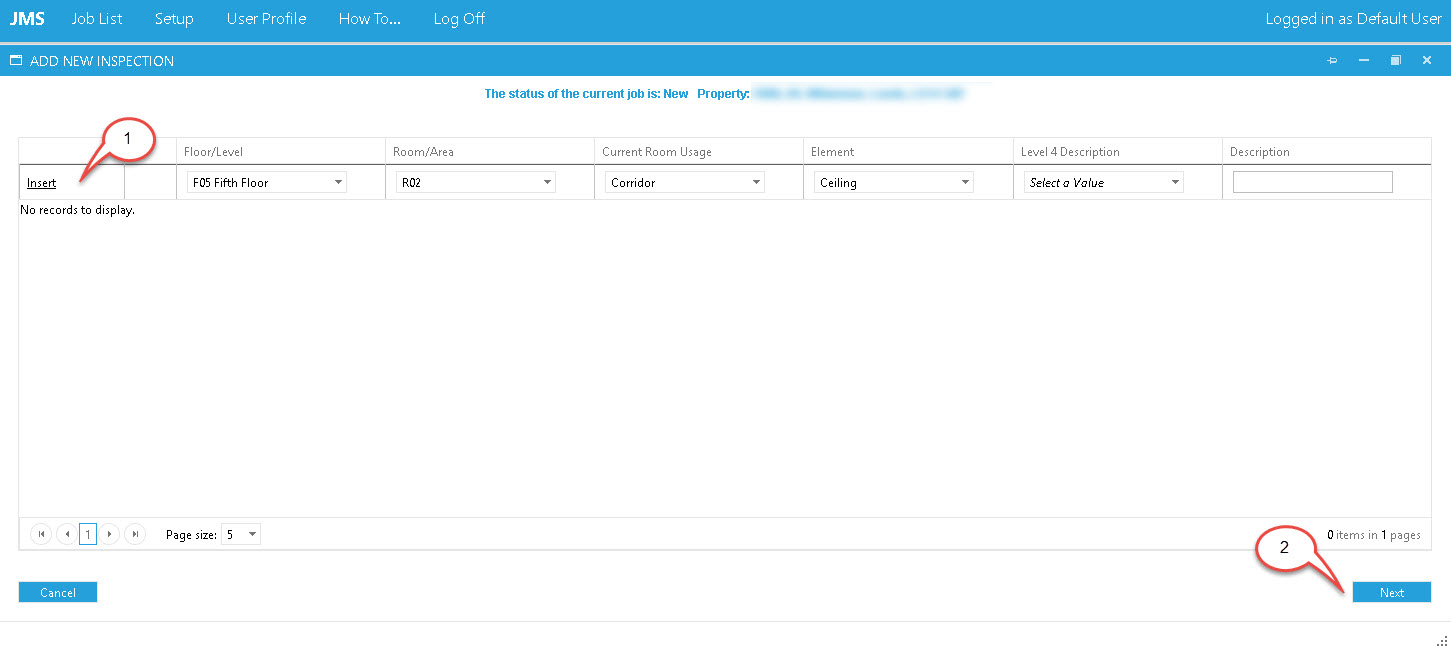
Fill in any relevant location information.
- To add the location click Insert;
- After locations have been added, click Next.
Note that you may add multiple locations in the Inspection Wizard.
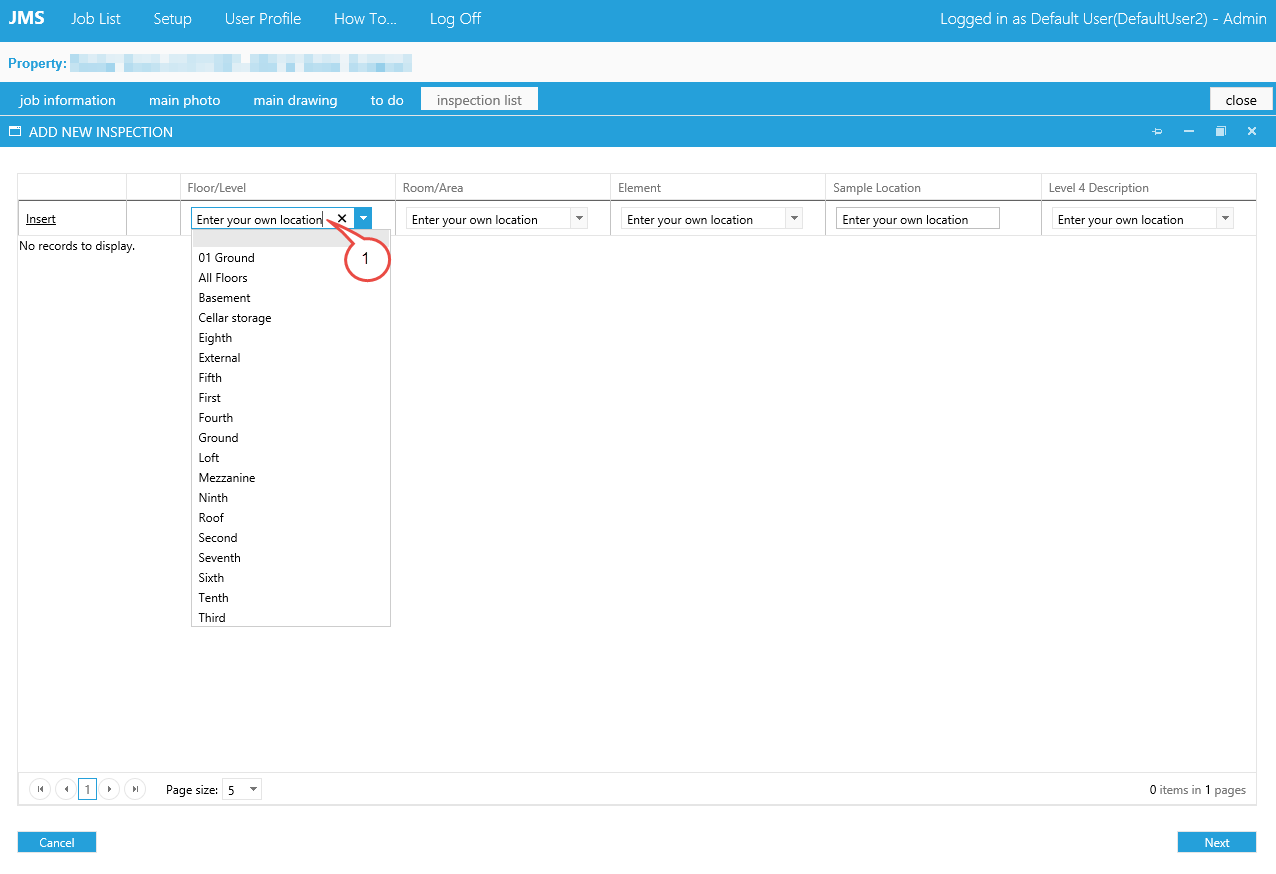
If a location that you need is not listed in the dropdown menu, you can enter a new location by typing in the textbox (1):
Inspecion Details
The following screen contains 3 different areas:
- Selected location for the inspection (1);
- Common field area (2). This Area contains fields which are common through all inspection forms, i.e. Your reference number, inspection date, etc.
- Inspection type dependant area. It contains fields relevant only to the selected inspection form. i.e. Sample No field will be only on Sample form, but not in any other form.

Selecting and filling inspection form
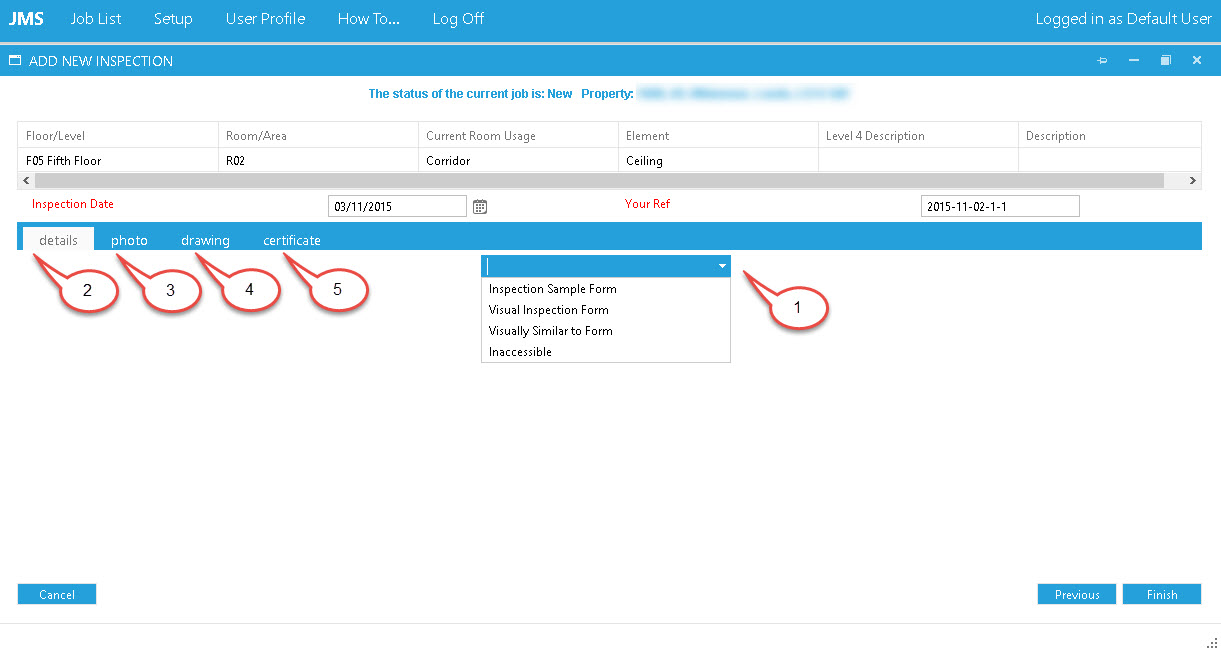
- Click on the dropdown box to select an Inspection Form;
- The Details tab holds the information on the Inspection Form;
- You can add a photo in this tab;
- You can add a drawing in this tab;
- You can add attachments in this tab.
The Inspection Date and Reference Number (Your Ref) are generated by default, you may enter different ones. Once chosen, they will appear the same in all forms.
Selecting a Form
Depending on the Form selected, different data entry forms will be shown. In the following configuration example there are four Forms:
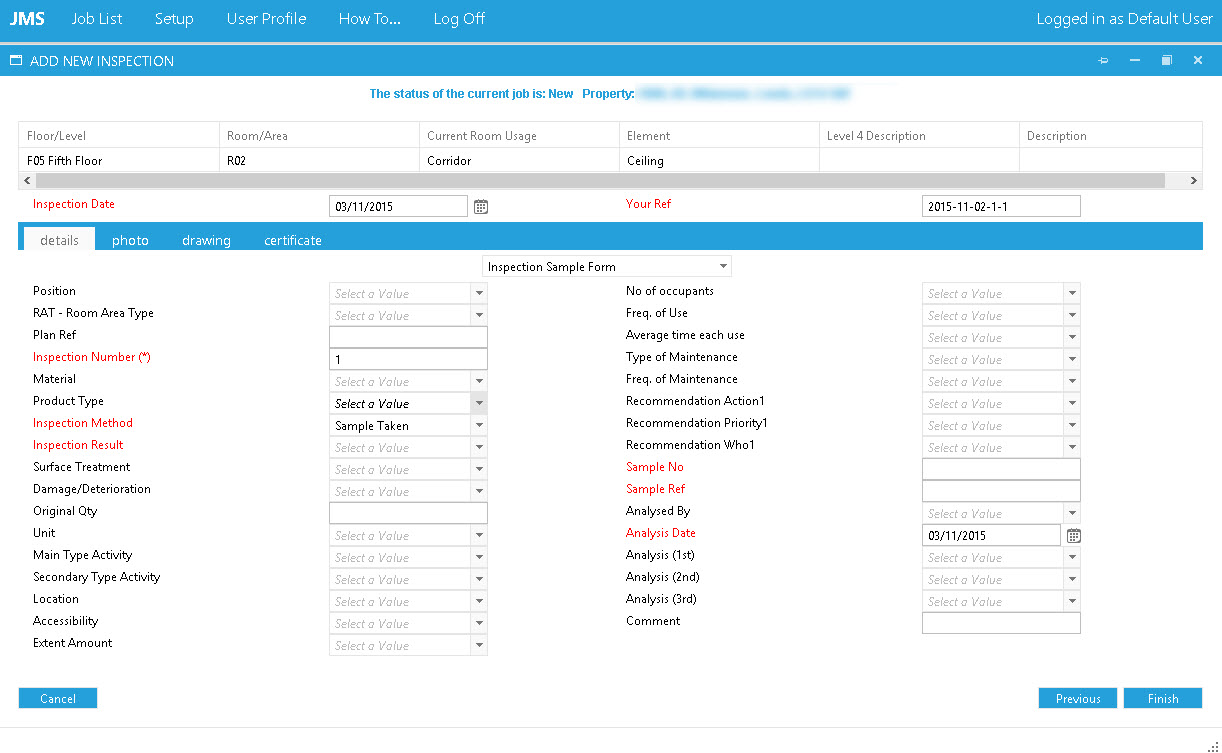
Enter data as necessary. The fields with the red labels are mandatory.
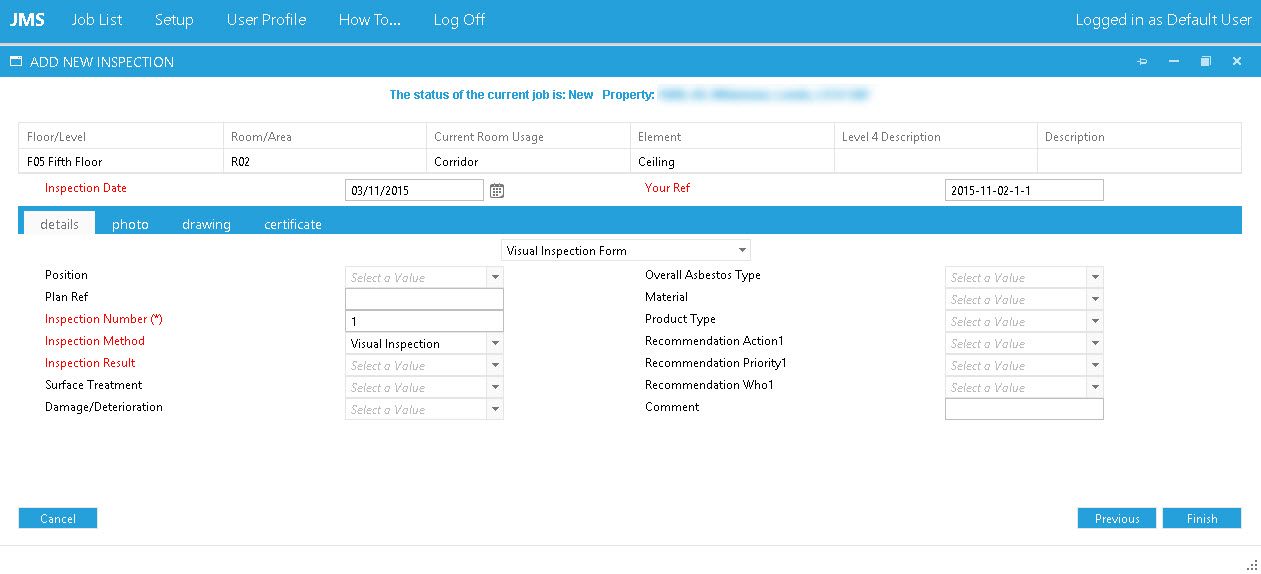
Complete the same steps as in Inspection Sample Form.
Complete the same steps as in Inspection Sample Form.
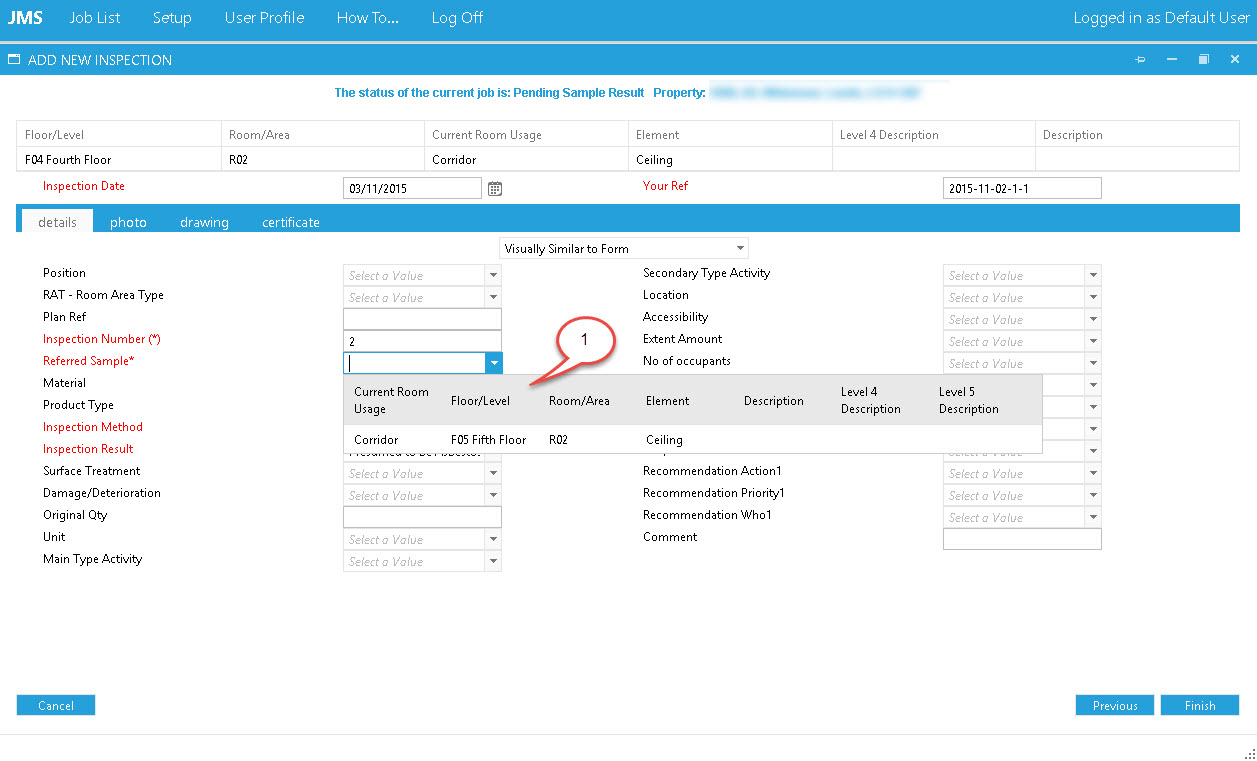
Visually Similar To form is similar to Sample Taken form. It should be used when a surveyor is referring to an existing sample taken instead of taking a new sample. Once the form is selected, the surveyor must select a sample which should be used as a referral to the current inspection. It can be done by selecting the dropdown box (1). All the items in the list are sample taken inspections created for this job.
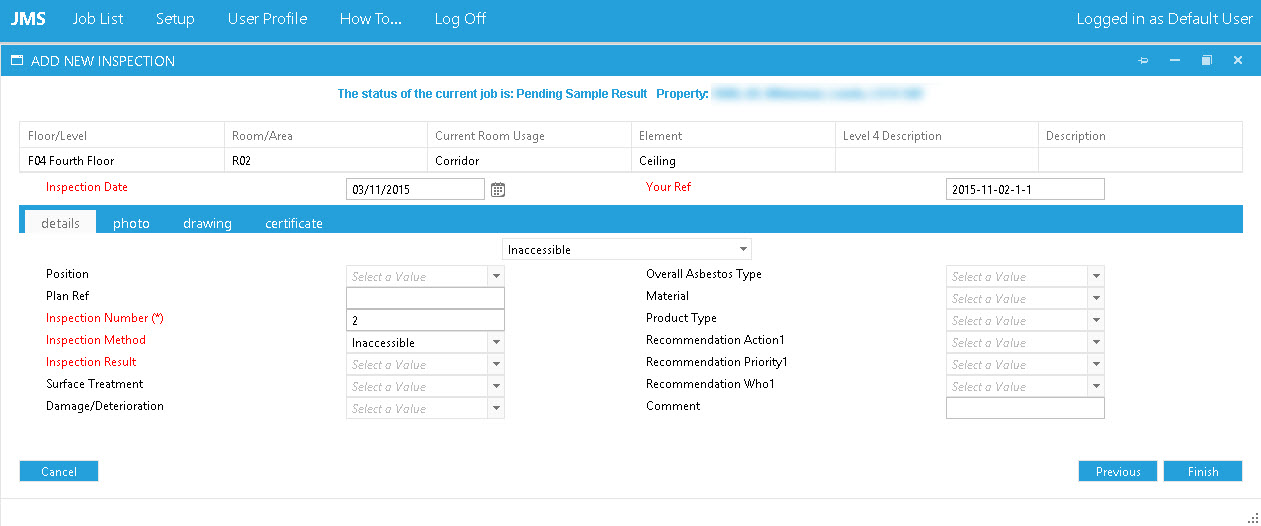
Inaccessible is an Inspection Type. When a location can not be accessed due to any kind of restriction, the Surveyor may choose to name this inspection type as Inaccessible.
Complete the same steps as in Inspection Sample Form.
Attaching a Photo, Drawing and Documents
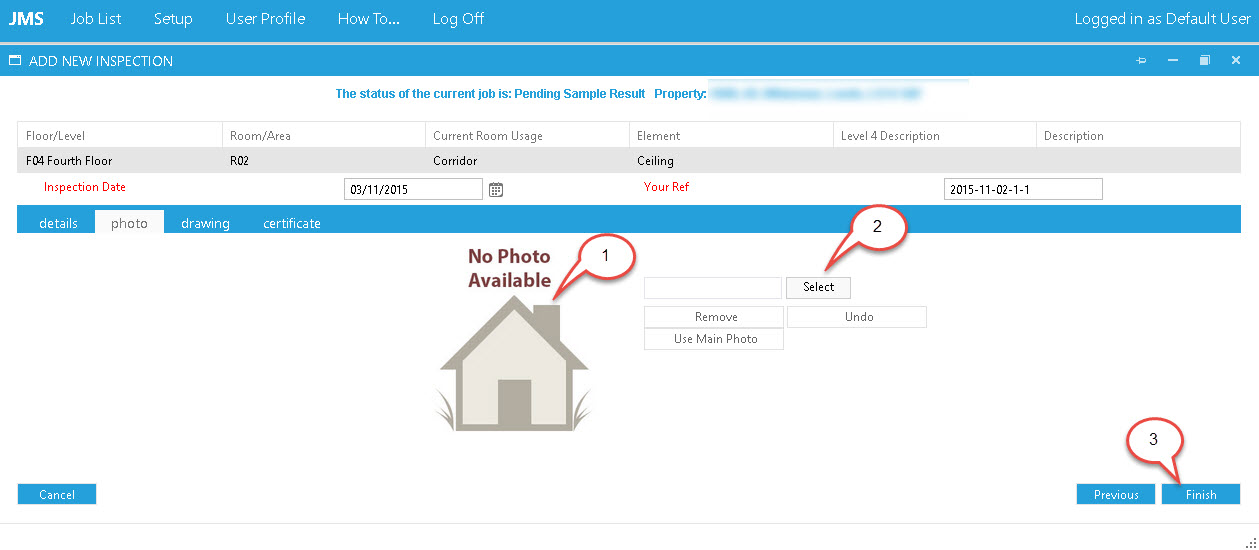
- This will show the photo/drawing you uploaded;
- Browse to select the photo/drawing;
- Click finish to save the inspection and return to the inspection list.
The screen for attaching a document:
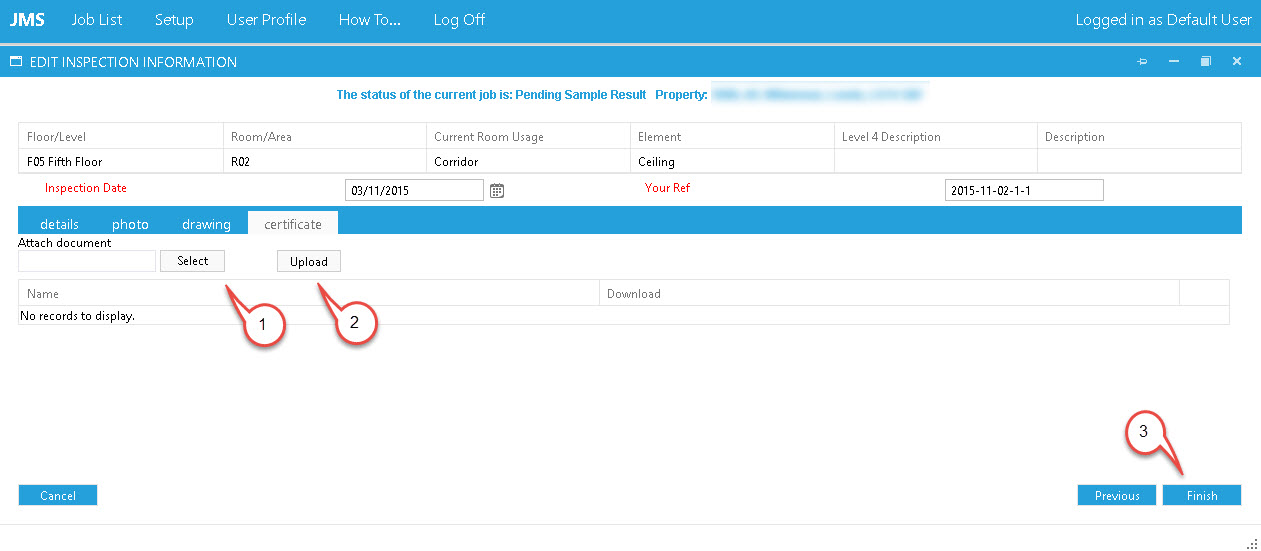
- Browse to select a document;
- Click Upload to attach the document;
- Click finish to save the inspection and return to the inspection list.
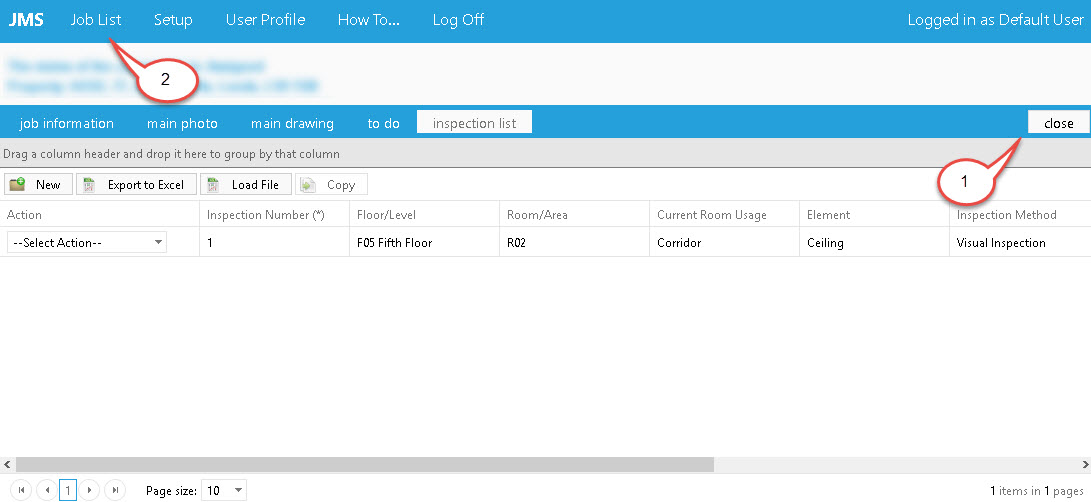
After a new Inspection is added, the Inspection List page appears. Click Job List (1) or Close (2) to save the Inspection and go back to the Job List Page.
Copying an Inspection
If there is already inspections on some location the user has the opportunity to copy the inspection details from the previous location.
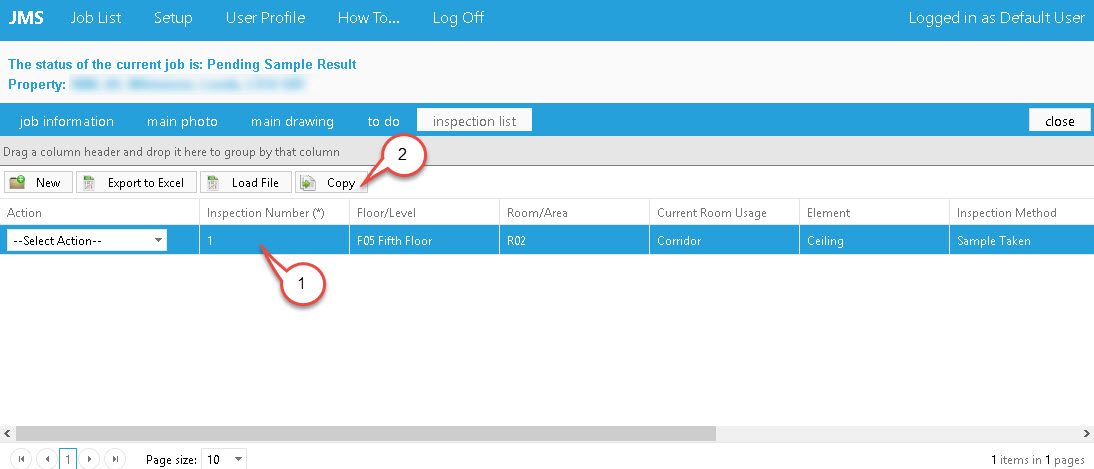
- Click on an Inspections row to highlight the selected Inspection. Note, if an Inspection was not highlighted, the save function will not work;
- Once the Inspection has been highlighted, click Copy.
After clicking Copy, the copying wizard appears:
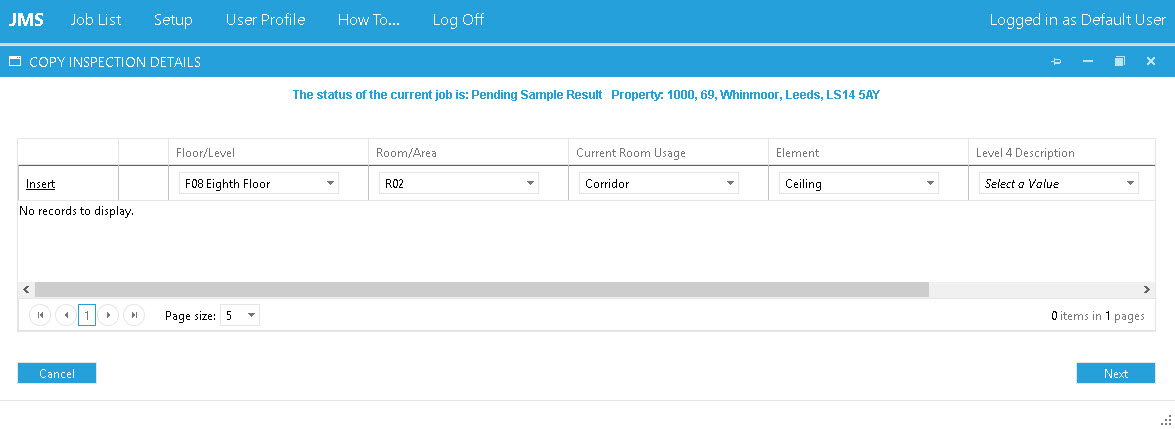
Change any of the areas, insert the location and click next. You cannot add a duplicate inspection if every location is the same.
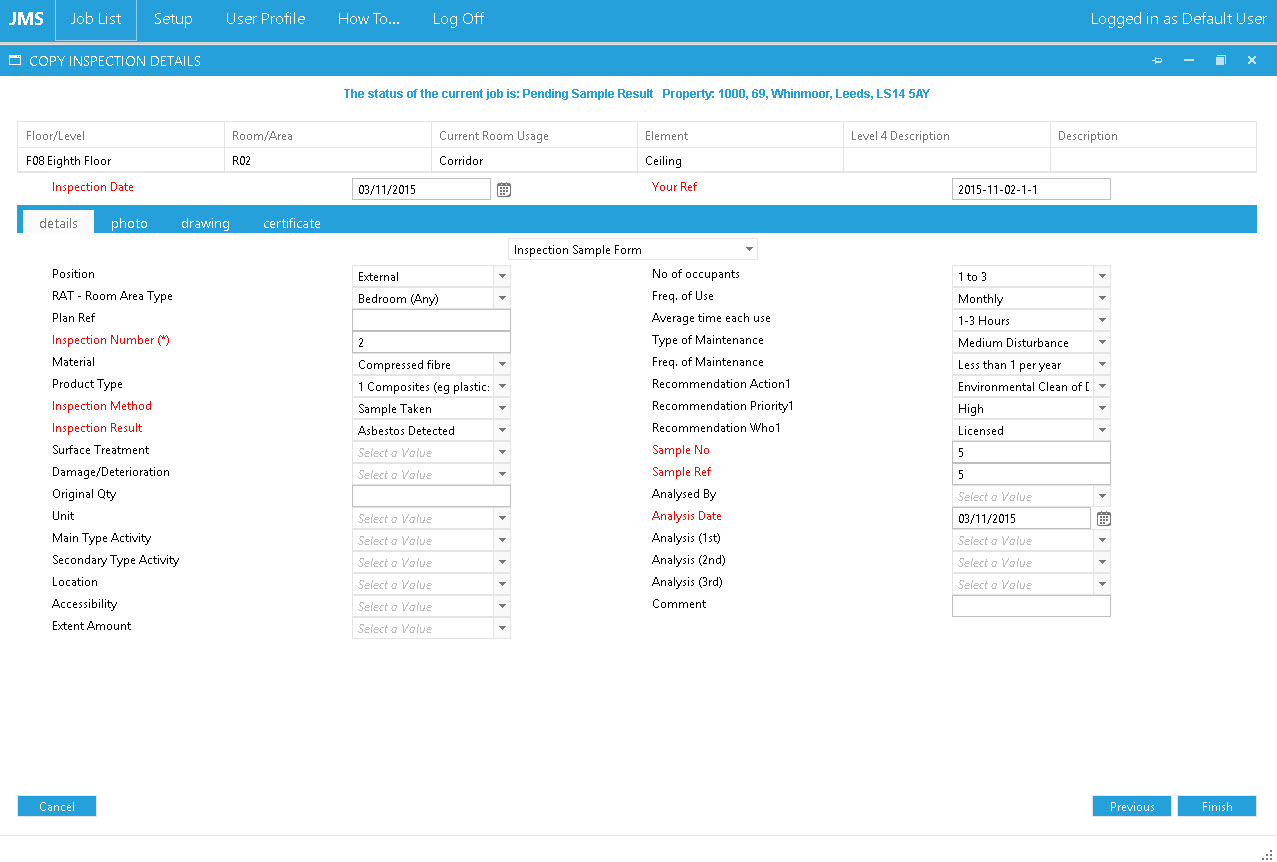
In the last screen you can see that any information that was added in the copied inspection stays the same. You can edit the information to your preference. Once everything is done, click finish.
Post your comment on this topic.