
The Re-inspection data entry can be done by opening the historical inspection and then entering the new inspection data.
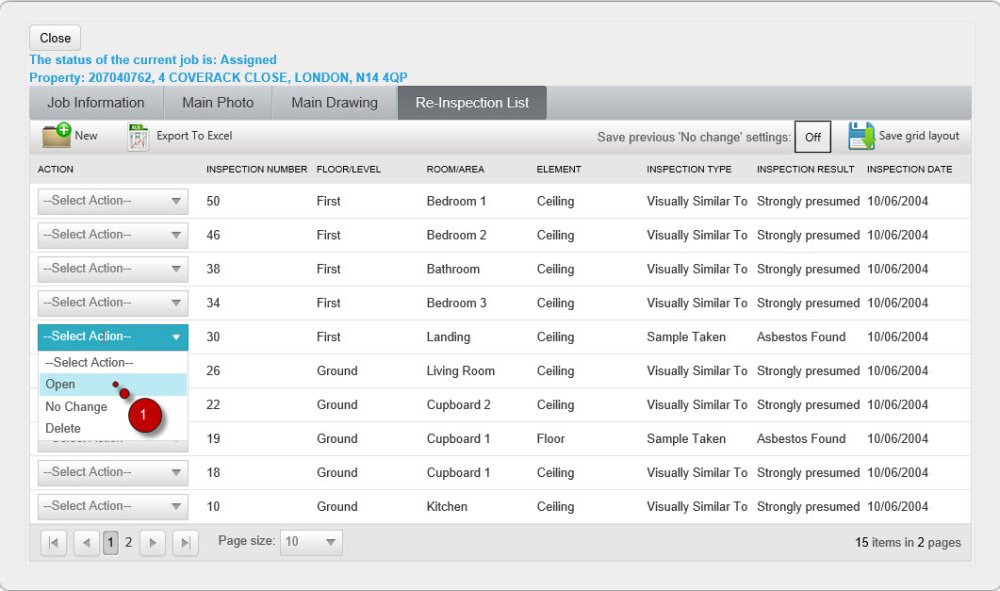
- From the selected Inspection on the grid click on Open from the Action option box
The Re-inspection data entry screen opens:
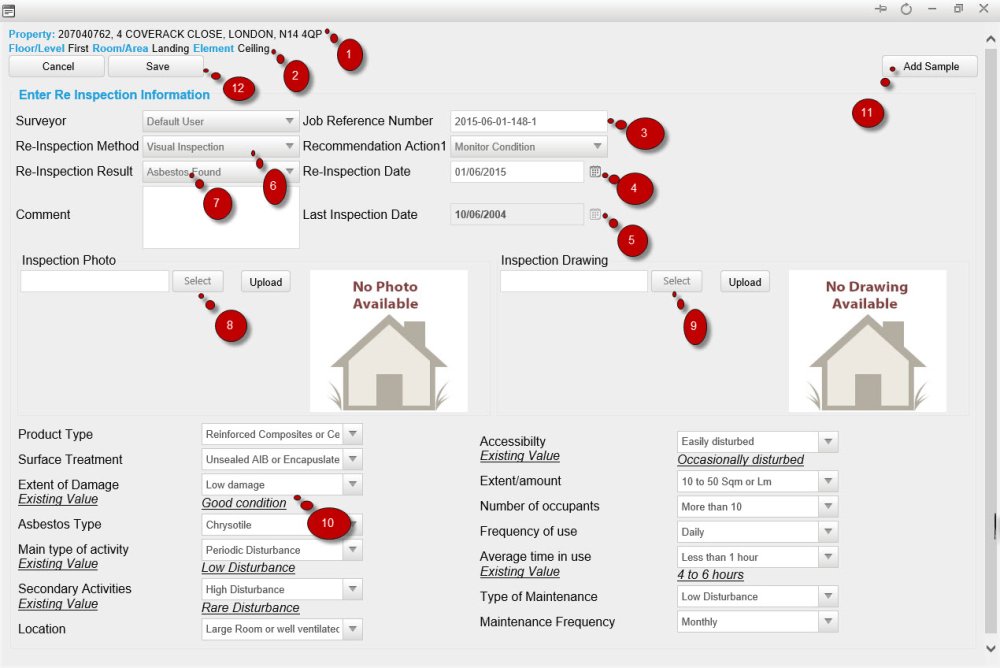
- Property UPRN and address displayed.
- Location where the original inspection took place.
- Job Reference Number. This is an auto generated number. This number can be changed manually.
- The data for the Re-inspection. By default the current date is selected. By clicking on the calendar a new date can be selected.
- Date of the last inspection.
- Select Re-inspection Method. By default the re-inspection method is Visual. If you are taking a new Sample then click on Add Sample button.
- Select Re-Inspection result from the dropdown.
- If you’ve taken a photo upload the photo from the directory where you’ve stored it.
- If you’ve have a drawing upload the drawing from the directory where you’ve stored it.
- Make changes to the data by selecting from the option box. Once the new data is selected the previous data (Existing Value) is displayed at the bottom of that specific field.
- If a new sample is taken click on Add Sample. The add new sample screen will appear (See below).
- Once data entry is completed click on the Save button.
The Sample Result for Re-inspection appears if Add Sample button is clicked.
See Form Designer.

- Add a Sample Ref.
- Add a Sample No.
- Select an Analysis Date.
- Select Sample Analyst from the list.
- Enter a Bulk Certificate Number. The number can be found on the certificate provided by the Lab.
- Select an Analysis result. The user will be able to select up to three Analysis Results.
- Select and Upload a Sample certificate. More than one certificate can be added.
- Once the certificate is uploaded the file name is displayed.
- Click Save
Once saved the user will be taken back to the Re-inspection data entry screen.
Post your comment on this topic.