
Brain hardware (see Adding Brain Hardware to a Project) must be provisioned (assigned) to a space before the Kramer Control application can control the devices in the space.
This article explains how to provision Brain hardware to a controlled space. The provisioning process requires a handset (iOS device, Android device or Kramer touch panel) in order to complete the provisioning process.
To provision a Brain device to a space:
- Download the Kramer Control application from the app store to the handset.
- Open Kramer Control on the handset.
![]()
- Sign in with your Kramer credentials. The Kramer Control screen appears on the handset.
![]()
- In the left pane, click the relevant Project that includes the controlled space you are working on. All sub spaces for the selected Project appear in the left pane.
![]()
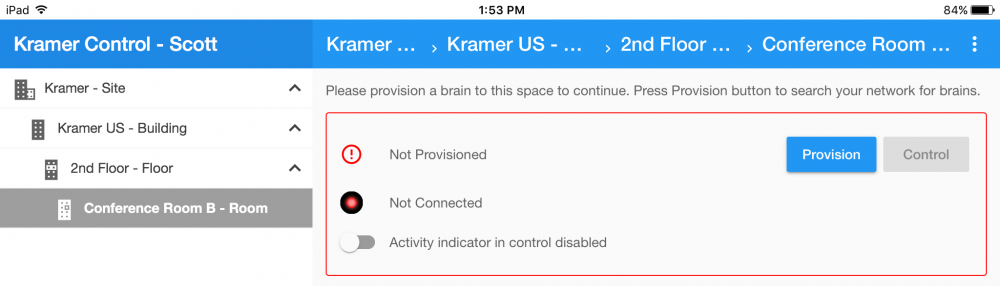
- Select the relevant controlled space. Provision information for the selected space appears in the center pane.
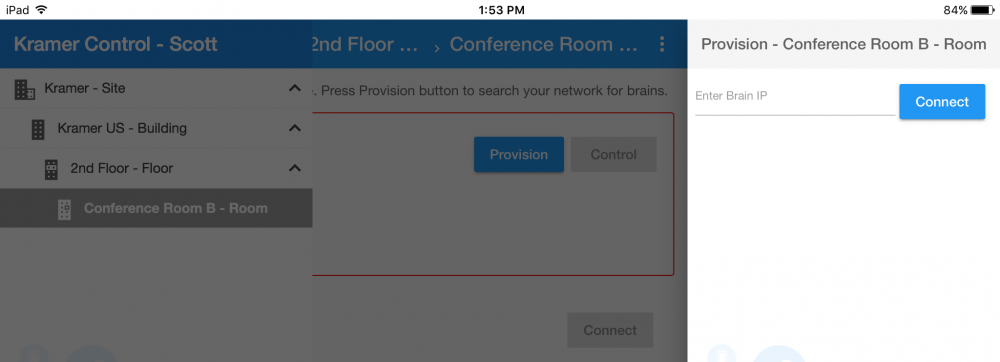
- Click the Provision button. A list of any un-provisioned Brain devices appears in the right pane.
![]()
- Note: If the Brain device does not appear in the list, type the IP address of the device in the right pane in the Enter Brain IP field and click Connect.
- Select the relevant Brain device to provision.
- Note: If the Space has already been provisioned, the Provision button is disabled and the Control button is enabled.


The next step is to control your equipment using the Kramer Control application.
Revision:
6
Last modified:
23 May 2017
Réaction
Copyright © 2025 Kramer
—
Powered by 
Laissez votre avis sur ce sujet.