
Follow the below process to setup a Kramer VIA within Kramer Control.
Process
Before the UI design can be created, make sure that the following steps are finished before moving on:
After importing the device follow the steps below for best results:
- Change category to ‘Video Processing’
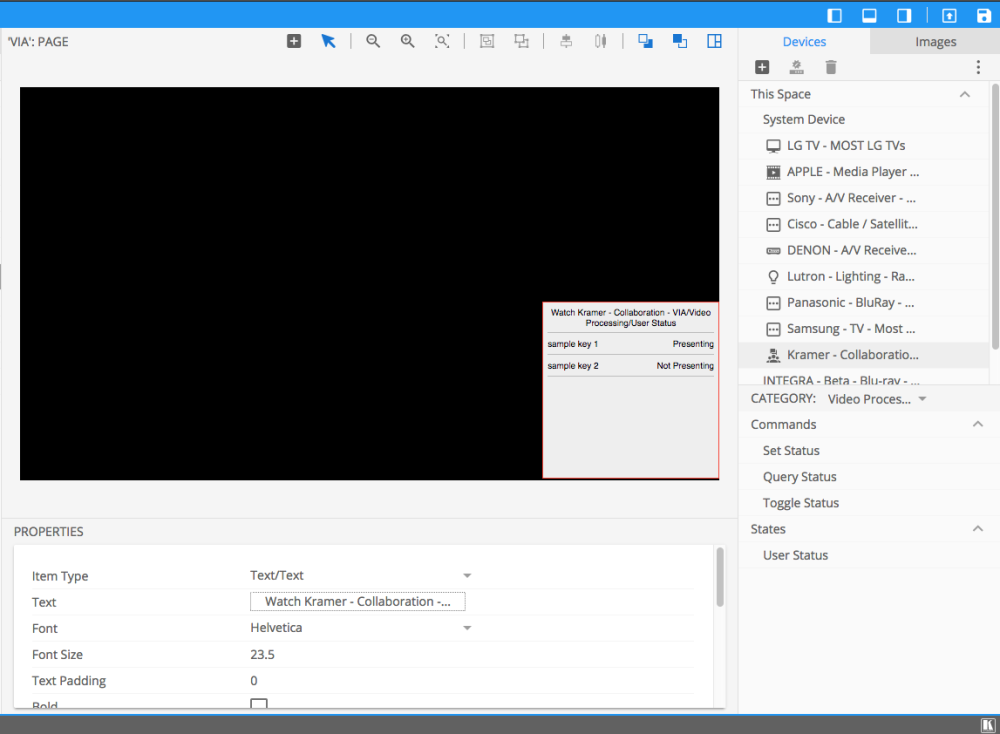
- Click and drag ‘User Status’ state to UI
![]()
- Adjust properties of the ‘List Box’
- Change ‘Item Type’ from Text/Text to Text/Image
- Change any additional property including size, font, font size etc to match the rest of the UI
- Change ‘Text’ field to something more specific to the widget, example User Status
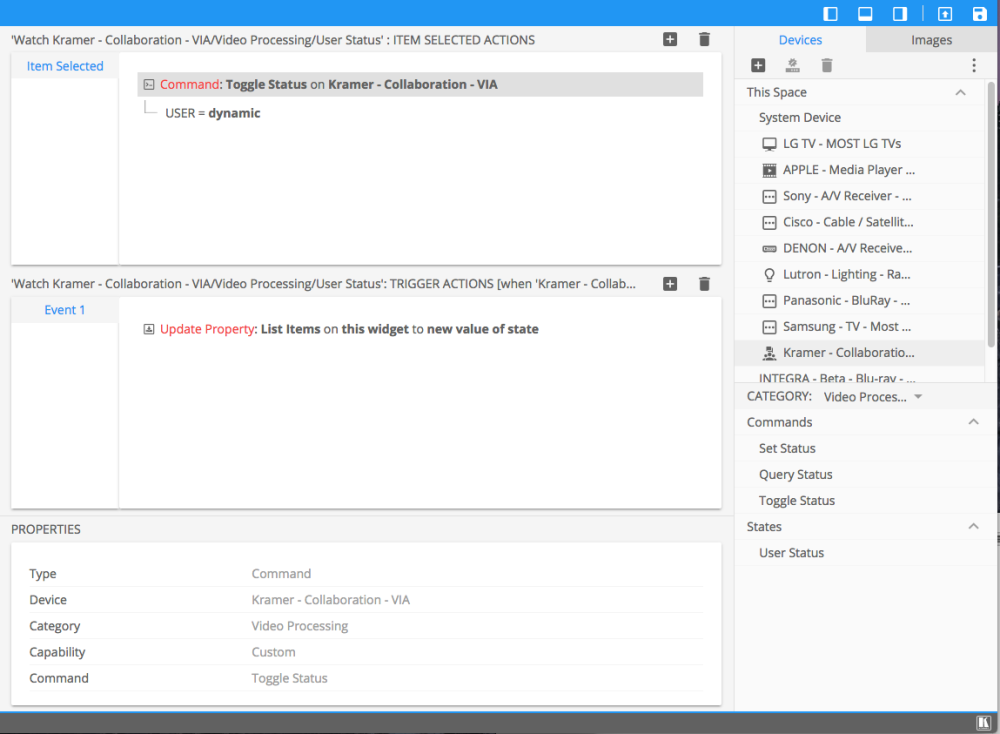
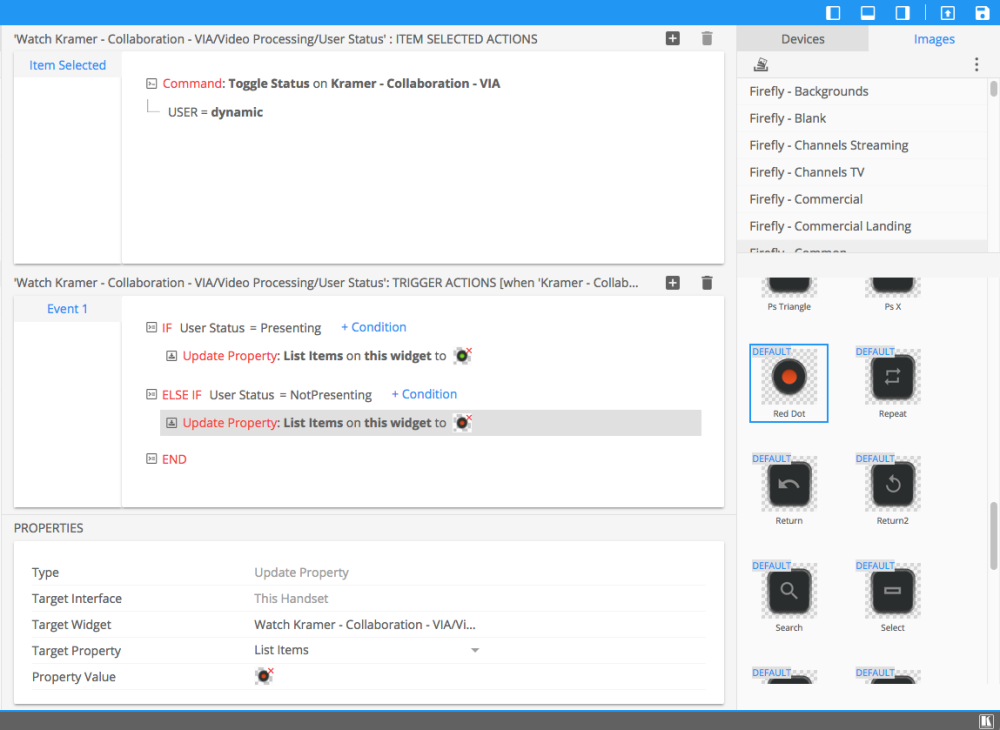
- Double Click on the newly created ‘List Box’
- Drag ‘Toggle Status’ from Kramer VIA device to the command section
![]()
- Within event section, add a conditional
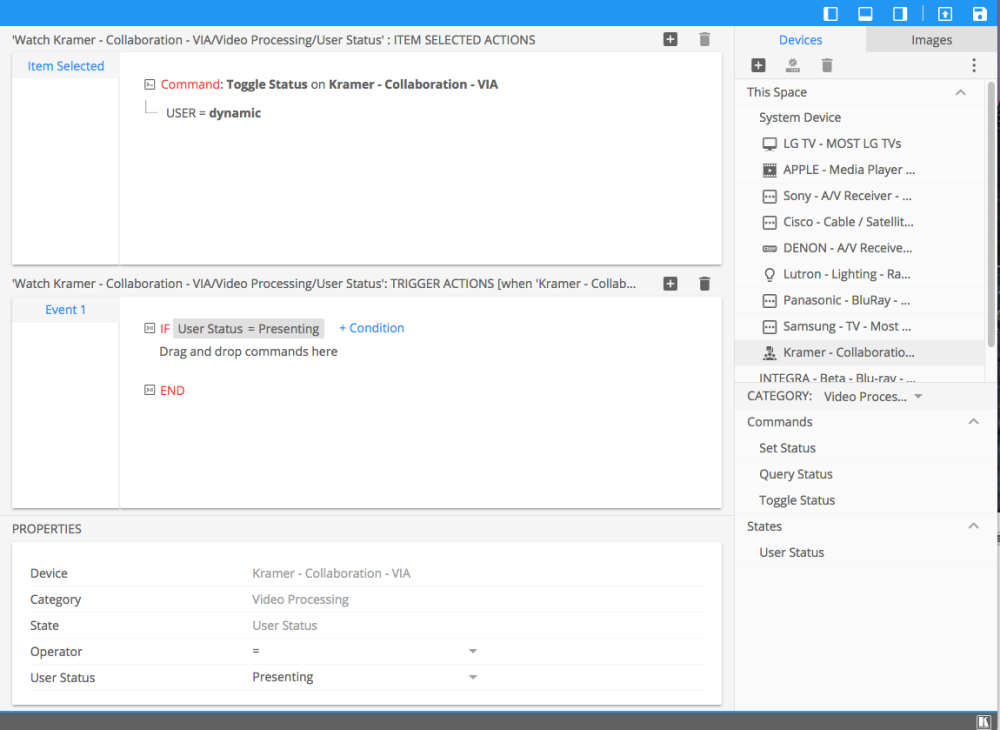
- Drag the ‘User Status’ state to the newly created IF statement
![]()
- In the ‘Operator’ field select ‘=’
- In the ‘User Status’ field select Presenting or Not Presenting
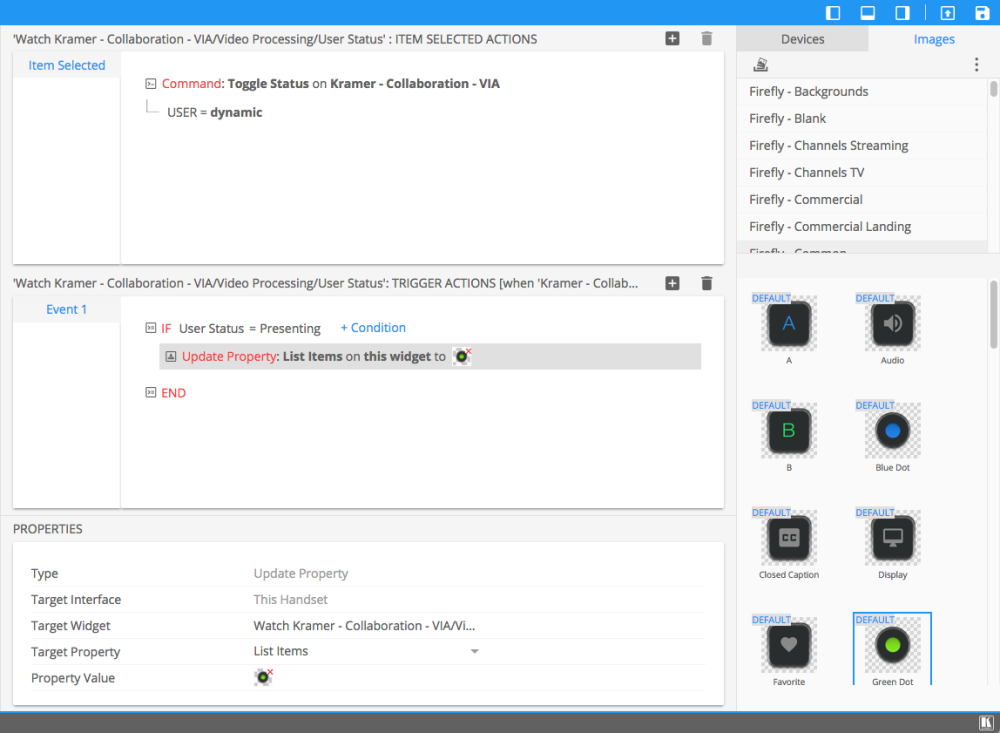
- Add an ‘Update Property’ to the IF statement
- The default property that will appear is ‘Update Property: List items on the widget to’ with a blank image area
- Drag an image that you want to represent the State that you chose in the previous step to the blank image area
- This image will indicate the Presenting/Not Presenting state of any user
![]()
- This image will indicate the Presenting/Not Presenting state of any user
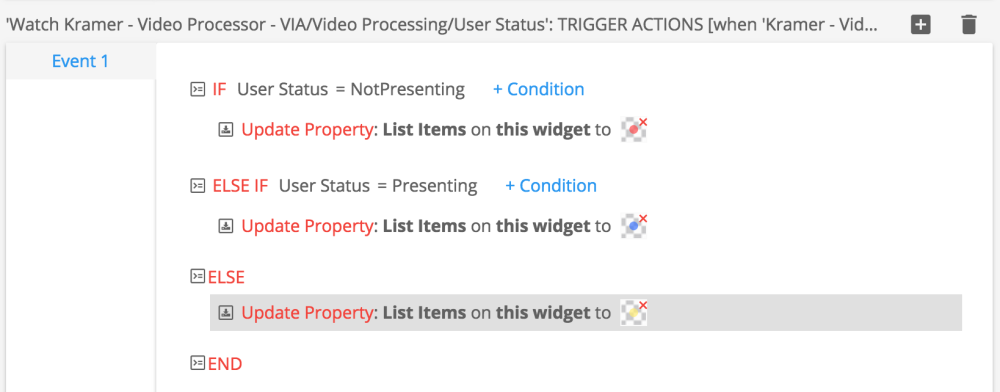
- Click on the ‘+ Condition’ button to the right of the IF statement
- Add an ELSEIF
- Drag the ‘User Status’ state from the device to the ELSEIF field
- In the ‘Operator’ field select ‘=’
- In the ‘User Status’ field select Presenting or Not Presenting (choose the opposite option then what was previously selected in the IF statement)
- Add an update property to the ELSEIF statement
- Drag image to the ‘Update Property’ blank space
- This image will indicate the Presenting/Not presenting state of any user
![]()
- This image will indicate the Presenting/Not presenting state of any user
Note There are more User Status results than Presenting and Not Presenting. You can repeat the ELSEIF steps for each Status, or you can add an ELSE. The image below shows the use of ELSE to reset the image to a default state.
Hardware Setup
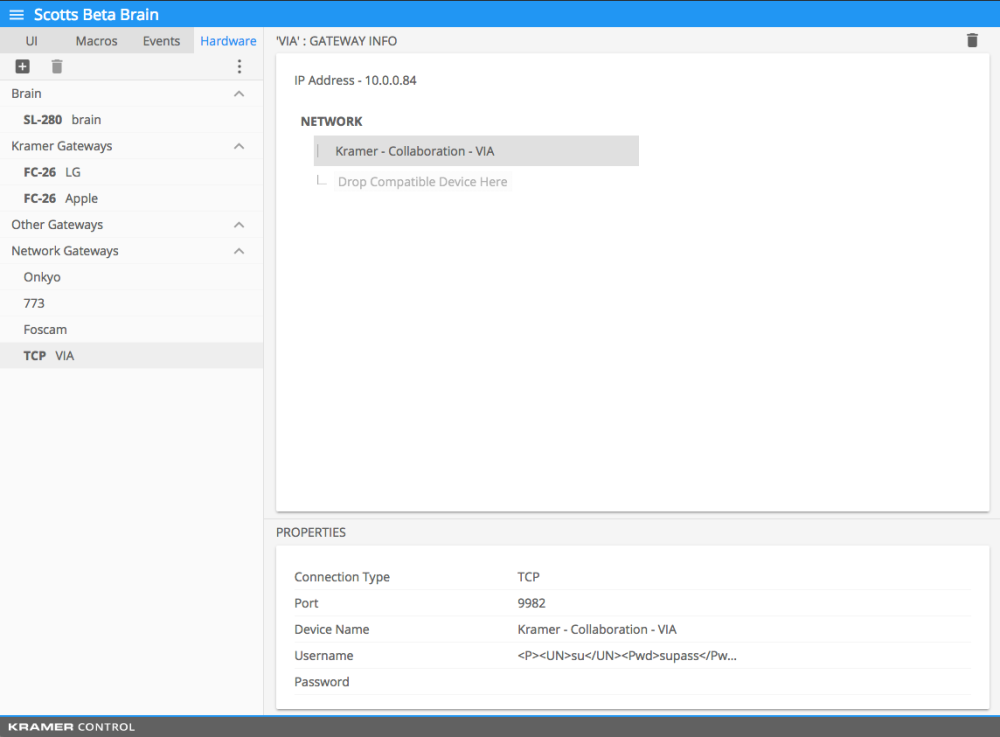
Switch to the hardware tab and choose the option to add hardware
- Enter a name for the hardware
- Choose the Network gateway option
- Enter IP address of the VIA unit
- Identifying the IP address of the VIA can be done by looking at the Room name of the VIA in the on-screen layout of your display or by using a network scanning tool to scan the network for connected devices
- Click ‘Create’
- Drag the device to the ‘Drop Compatible Device Here’ section of the center pane
![]()
Publish the Space
After publishing, check the installed client handset for the latest VIA user information
*Note – Only Users that have launched the VIA app and have logged into the room will appear in the list

Revision:
4
Last modified:
8 January 2018
Réaction
Copyright © 2025 Kramer
—
Powered by 
Laissez votre avis sur ce sujet.