
The Macros tab in the Kramer Control Builder enables the designer to create the necessary control macros in one place, then reference those macros throughout the controlled space. When designing multiple interface types within a single controlled space, there is bound to be redundancy in many areas including control macros. Instead of recreating the macro within each user interface, create the macros in the Macros tab and then add the macro to the different interfaces.
This article explains how to design a macro as well as how to add the macro to an interface element.
Adding a New Macro
- Create a user interface and launch into Builder
- Click the Macros tab in the left pane.
- Click the three vertical dots.
- Select the Add macro option.
A popup window opens, asking you to name your macro. - Type a unique name for the macro to help identify what the macro does.
- Click Complete.
The popup window closes and the Macro Configuring screen appears in the center pane of the Builder.

Adding an Action/Capability to the Macro
The Actions section of the Macro Configuring screen is where you design the macro sequence of actions. This includes adding the necessary Actions/Capabilities from your device drivers to create single-press activity launching.
The instructions below show how to create a Power On macro to turn on a system and switch sources to Apple TV.
- Click the Devices tab in the right pane.
- Expand the location of your device (This Space or Device Reference).
For information on devices and device references click here - Click the name of your device.
- Select the category of the required command.
For this example, select the Power category. - Drag your Capability to the center pane.
In this example, drag the Set Power command. - A popup window appears.
The content of this window is different for different devices. The image below shows an Onkyo A/V Receiver that includes the following Capability parameters:- Power – the name of the Capability
- Power State – state of the device after executing the above Capability
- Power Zone – the zone that is being controlled (Main Zone = Zone 1)
- Define the parameters as required and click Submit.
The popup window closes and the Actions section shows the Execute Command line information from the added Capability. - Repeat the prior steps for each command in your macro sequence.
Once the macro is completed, a series of Capabilities is displayed (see the image below).

Adding Elements to the Macro
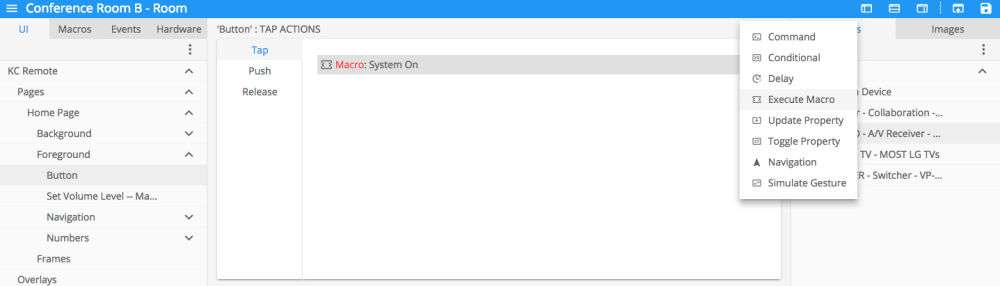
Click the ‘ + ‘ Icon in the Macro toolbar (in the center pane) to add one of the following to the macro:
- Command – enables defining a placeholder for adding an Action/Capability from your controlled device (see the procedure above).
- Conditional – adds an IF statement to your Macro. Using IF THEN programming, you can embed logic into your macro.
- More information about Conditional programming is found here.
- Delay – creates a pause between Capabilities, the length of which can be defined.
- To edit the delay time, type the required time in seconds (a half second is typed as 0.5) in the Properties section of the center pane.
- Execute Macro – enables the designer to embed and execute a macro within a macro.
- To add an embedded macro, select the main macro in the Properties section of the center pane and select the macro to embed from the drop down list.

Moving an Item Within the Macro
To move an action to a different position within the Macro, drag the relevant action and drop it in the new position.
Macro References
Under the macro Actions section of the center pane, you will find the Reference section. The Reference section lists every place within the User Interface that this macro is being used.
The identifying information is displayed in the following way (see the image below): Space/Interface/Page/Button

Adding a Macro to a Button
- Select the UI tab from the left pane.
- Add a button in the center pane.
- In the left pane, select the Macros tab.
- Drag the name of the relevant macro from the left pane to the button in the center pane.
- Double-click the button to see the New Execute Macro within the Actions section.
Laissez votre avis sur ce sujet.