Overview
Within the release of v2.0, we have added a Timer functionality within the System Device driver that exists within each programmed space. This Timer function can be used within Events to trigger Actions such as Macros, Update Properties or Navigation. Follow the steps below to setup your timer within Kramer Control.
Process
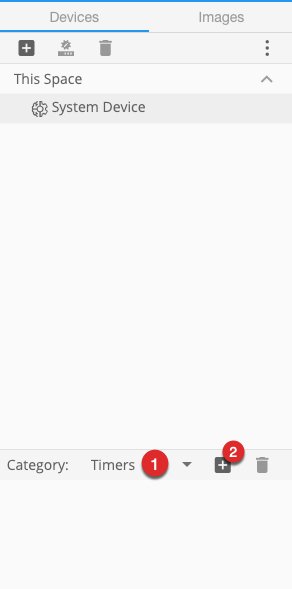
Change category within System Device to Timer and Click the ‘+’ sign

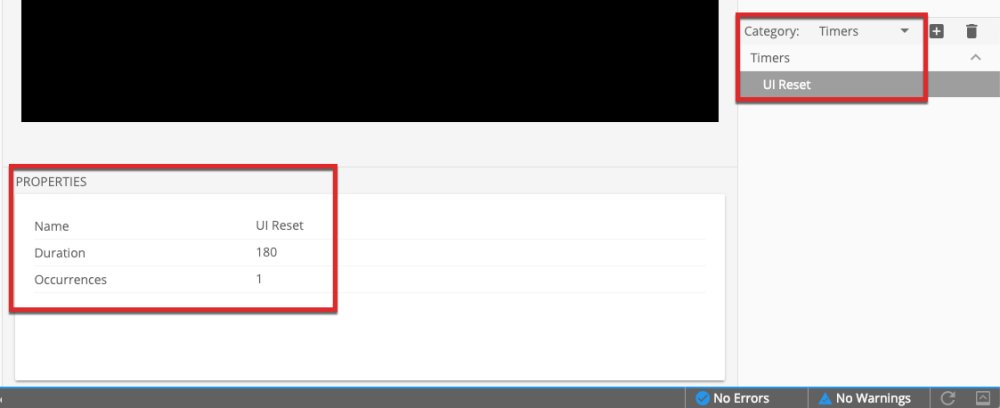
Within popup window enter a Timer Name, enter a Duration for the time and the number of occurrences that the timer should execute. Once you have finished click Create
- Note – The Duration is time value based in seconds
- The Occurrences option is the number of times this timer will execute. If you select a value greater than 1, the timer will run the duration then repeat the same duration until the occurrences have finished

After creation, you will find the new Timer within the category list and you will be able to edit the properties of the Timer after finishing the popup wizard

Timer Capabilities
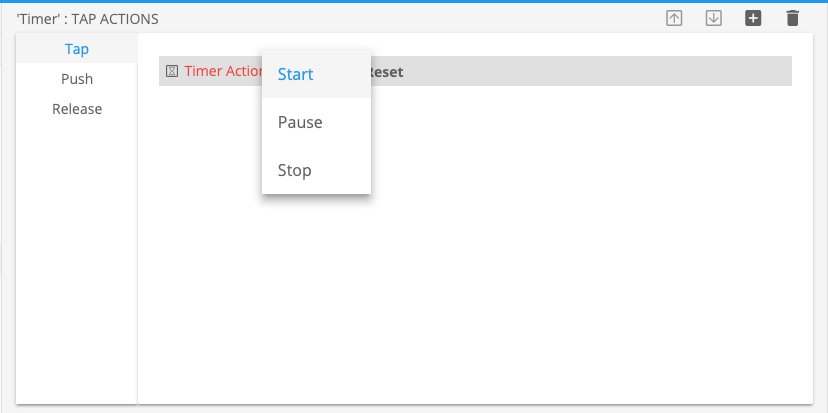
By dragging and dropping your newly created Timer to any Actions field within the Builder you will see 3 different Actions for your TImer
- Start – Starts the countdown of your timer
- Pause – Pauses the timer at the current value of the countdown
- Stop – Stops the timer and resets the value to the programmed defined duration

Use Case – Timer Event
This example will cover how to Add the Timer Event within the Builder
Go to the Events tab and Select the Option to Add a New Event

Within the new popup provide a name for your event, select when the timer expires and click create

The next steps will be to drag your timer from the System Device category to the top section of the center window where you see the red Timer: then add the Actions you would like to occur once the Timer has ended

Save and Publish your changes to test your new timer


Laissez votre avis sur ce sujet.