
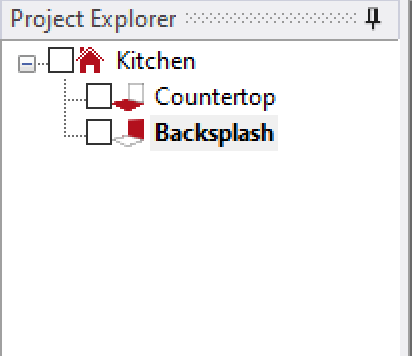
Full-height backsplash can be measured in the same project as countertops
To measure Full-height backsplash, create folder with a Vertical plane for each wall area. These measurements can be taken at the same time as countertops, or separately.
After measuring the countertop area:
- Click on the ‘Backsplash’ button on the measurement ribbon
![Flexijet Stone Backsplash Button]()
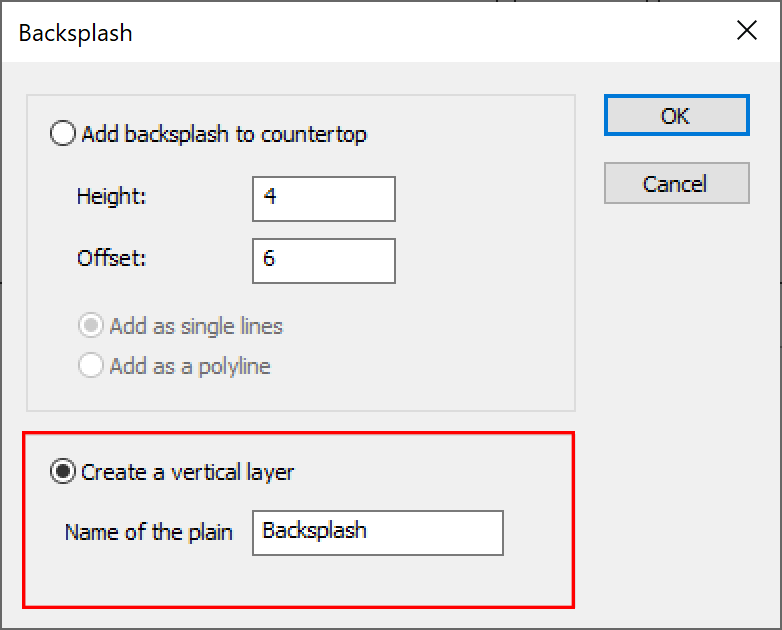
- Select the ‘Create a Vertical Layer’ section. Also, name your backsplash.
![Backsplash dialog create a vertical layer highlighted]()
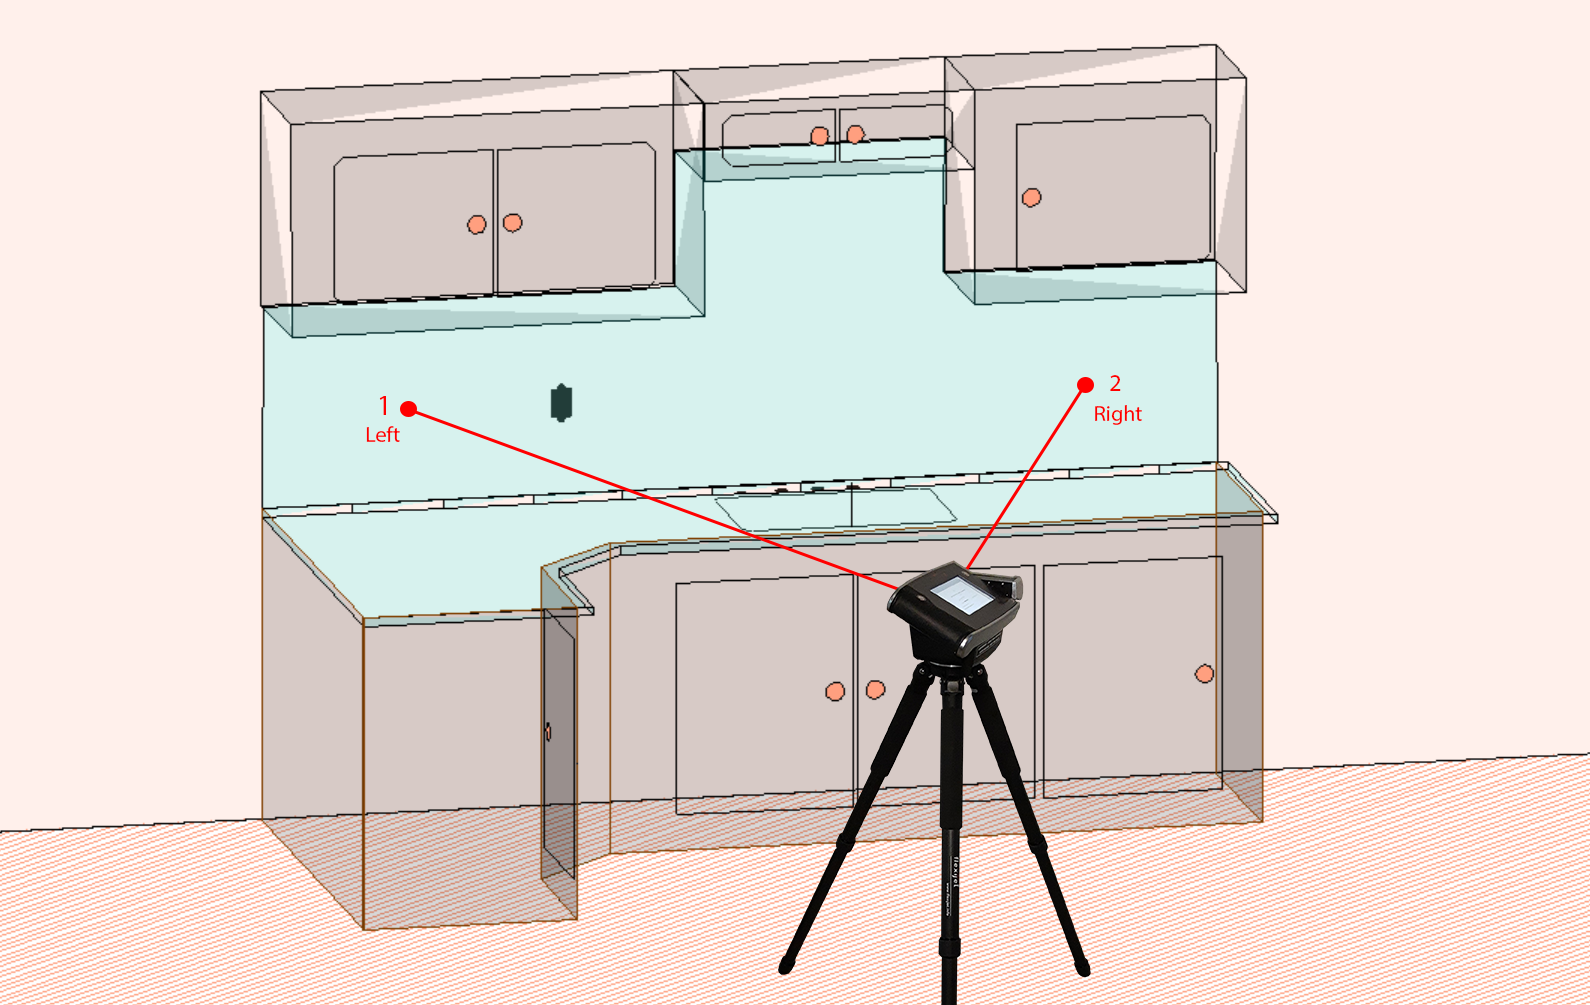
- We will now set the plane, measuring two points on the wall with Flexijet, one point on the wall on the left left side and one point on the wall on the right side of the Full-Height backsplash area. You may also click on the drawing on your computer from left to right.
![]()
![]()
- You have now created your Full-height backsplash folder. Ensure the folder for your backsplash has been selected in the Project Explorer.
![]()
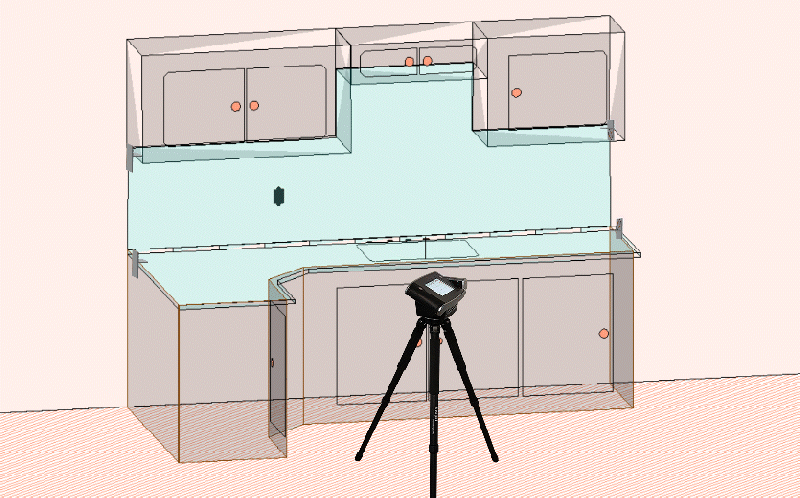
- When measuring full-height backsplash, be sure to measure to the edges of the surface to be measured. For example, to measure the top edge of the Full-height at the underside of the cabinets, it is typical to measure on the underside of the cabinets themselves.
![]()
Verification
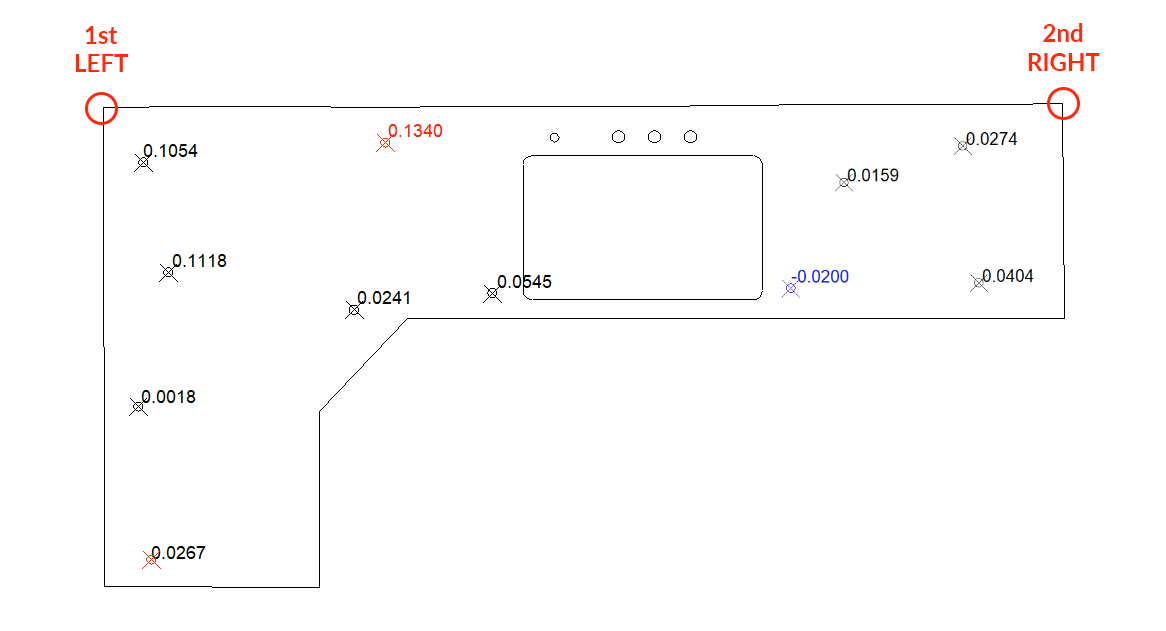
- Step 1 of Verification: Connect corners as needed, and use Show Corners and Show CAD-Point to aim Flexijet at the corners for visual verification.
- Step 2 of Verification: Use the Dimension tools to place measurements on the page, and verify with tape measure.
Measuring additional Full-Height backsplash areas:
- Select the ‘Countertop’ or other corresponding folder, and then again use the ‘backsplash’ button to create another vertical folder and follow the prompts to define the plane by either clicking or measuring the corresponding left and right points.
Each different plane of Full-height backsplash requires its own vertical folder.
Inserting plugs and other cutouts:
- Plug cutouts may be inserted directly as installation symbols or drawn manually.
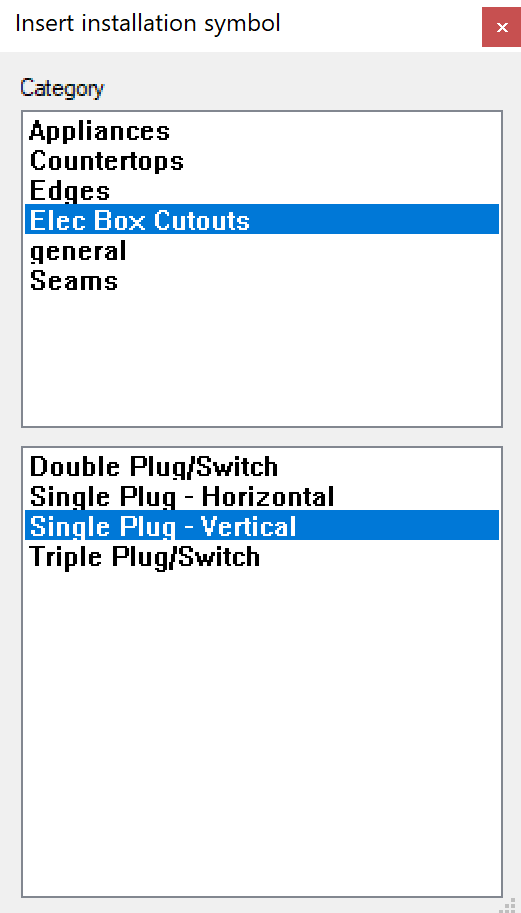
- In order to insert a plug using a pre-loaded cutout shape in an installation symbol, open the ‘Installation symbols’ dialog, select the appropriate symbol, and click the desired point or aim Flexijet and measure a point.
![Insert Install symbols selection with elec box highlighted]()
- You may also measure the electrical box using the ‘Rectangle over 2 points’ command, accessible from the screen of the Flexijet, or measure the centre screw with the ‘point’ function, or measure between the upper and lower screw using the ‘multiple lines’ function, and draw in the exact shape of the plug cutouts at a later opportunity.
In order to see your project in 3D, click on the Root folder (often called ‘Kitchen’) in Project Explorer.
![]()

To transfer points (e.g., the elevation of the underside of a cabinet, the height position of plugs, etc.) between folders:
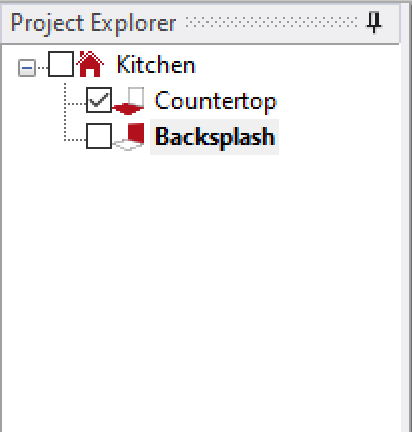
- To see elements from another folder, click the checkbox next to that folder to turn on its visibility. In the image below, the ‘Backsplash’ folder is active, while the ‘Countertop folder elements are visible (viewed from the front view).
![Project explorer with backsplash folder active and countertop visibility turned on.]()
- Ensure that 2D snap mode is active when tracing between folders. Press F9 or click the 2D button at the bottom right corner of the application to toggle between 2D and 3D snap modes. This will ensure that any points selected will be transferred to the active plane.
![]()

- Select any points to draw as start or end points of lines. Remember to un-check any checkboxes next to other folder when not referencing them.
Tips
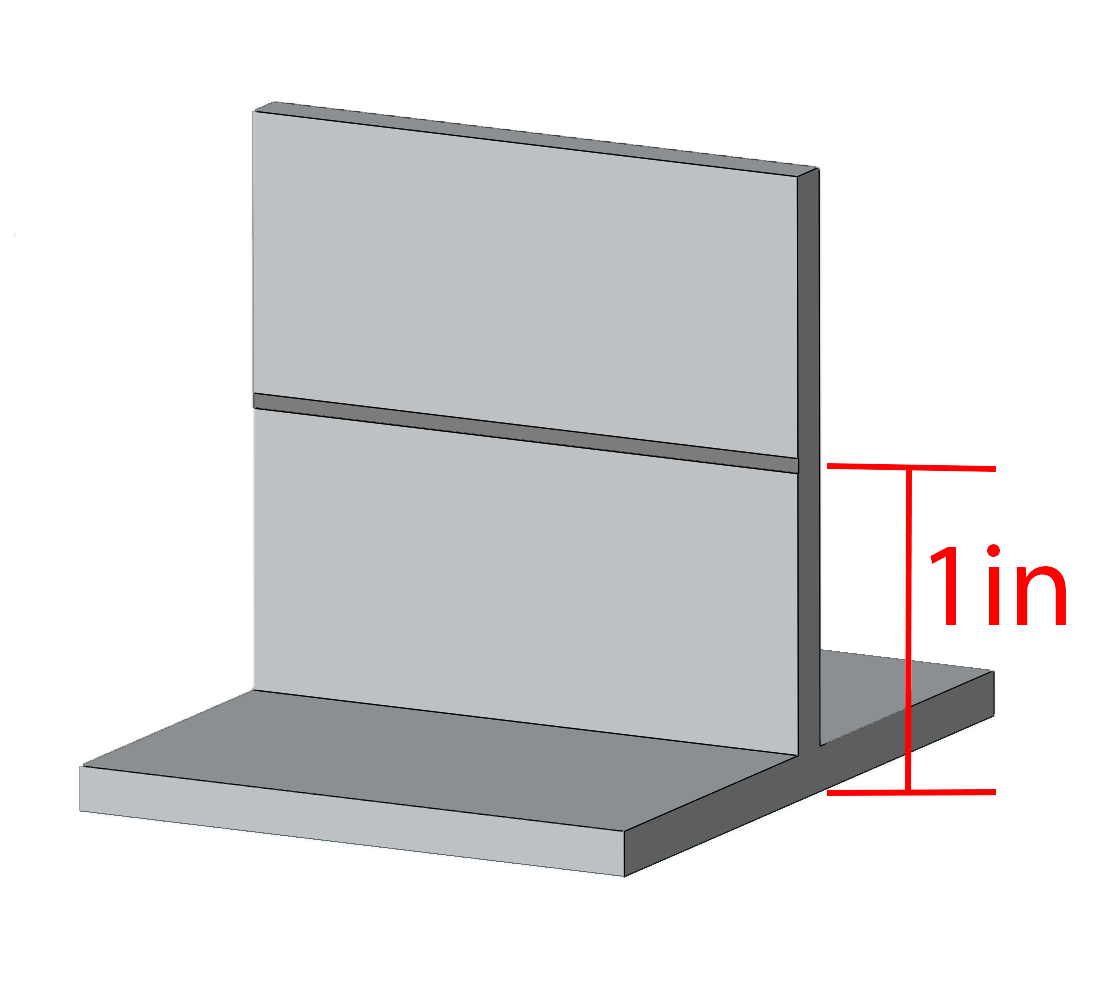
- When measuring a very reflective surface, a common tip is to use the T targets that came with your Flexijet as an offset target. Simply draw a mark at (1 in) from the bottom, or you can even use a location sticker with the horizontal line placed 1” from the bottom. Use a remote control to accurately aim at these targets.
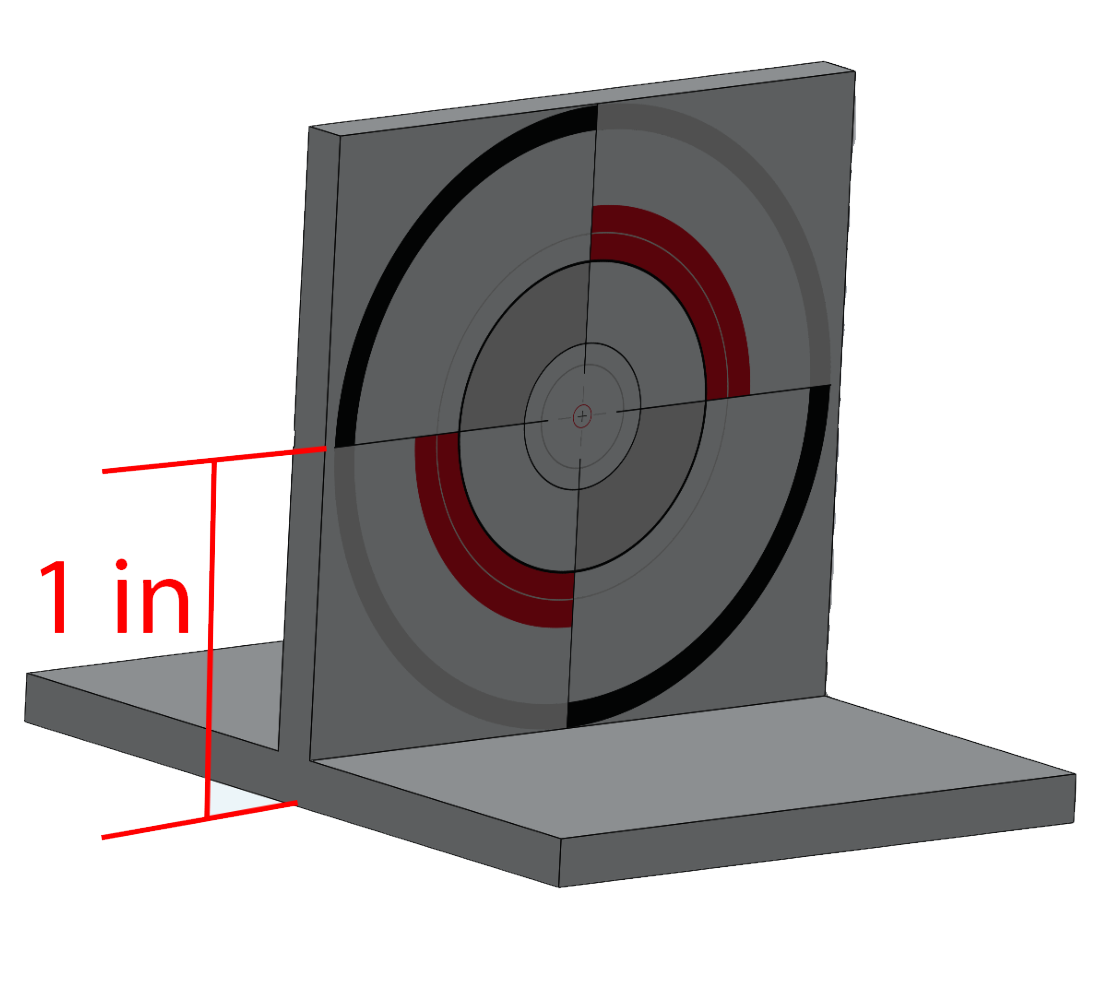
You can see how to use them on a reflective surface like a countertop.
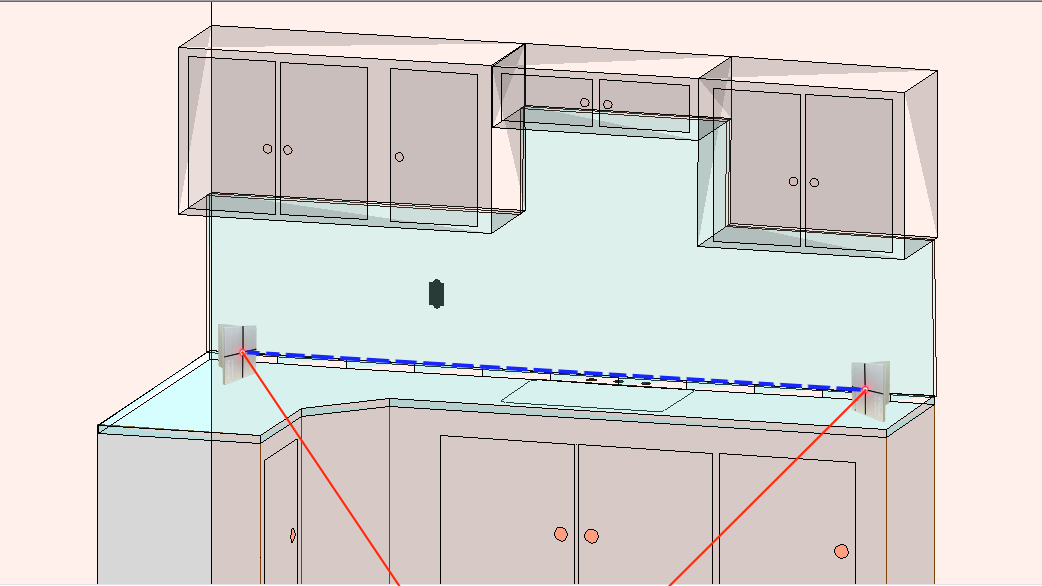
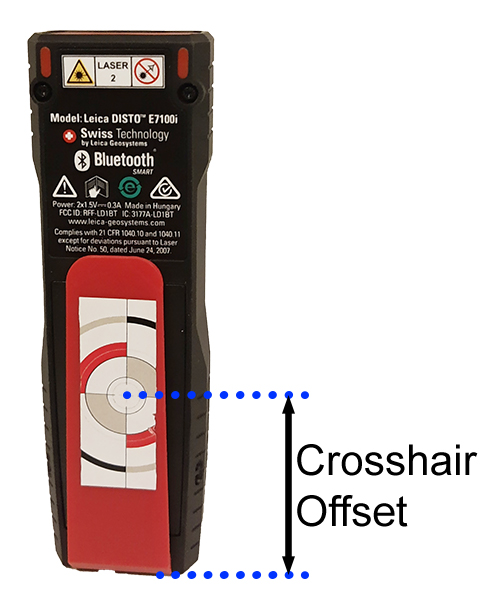
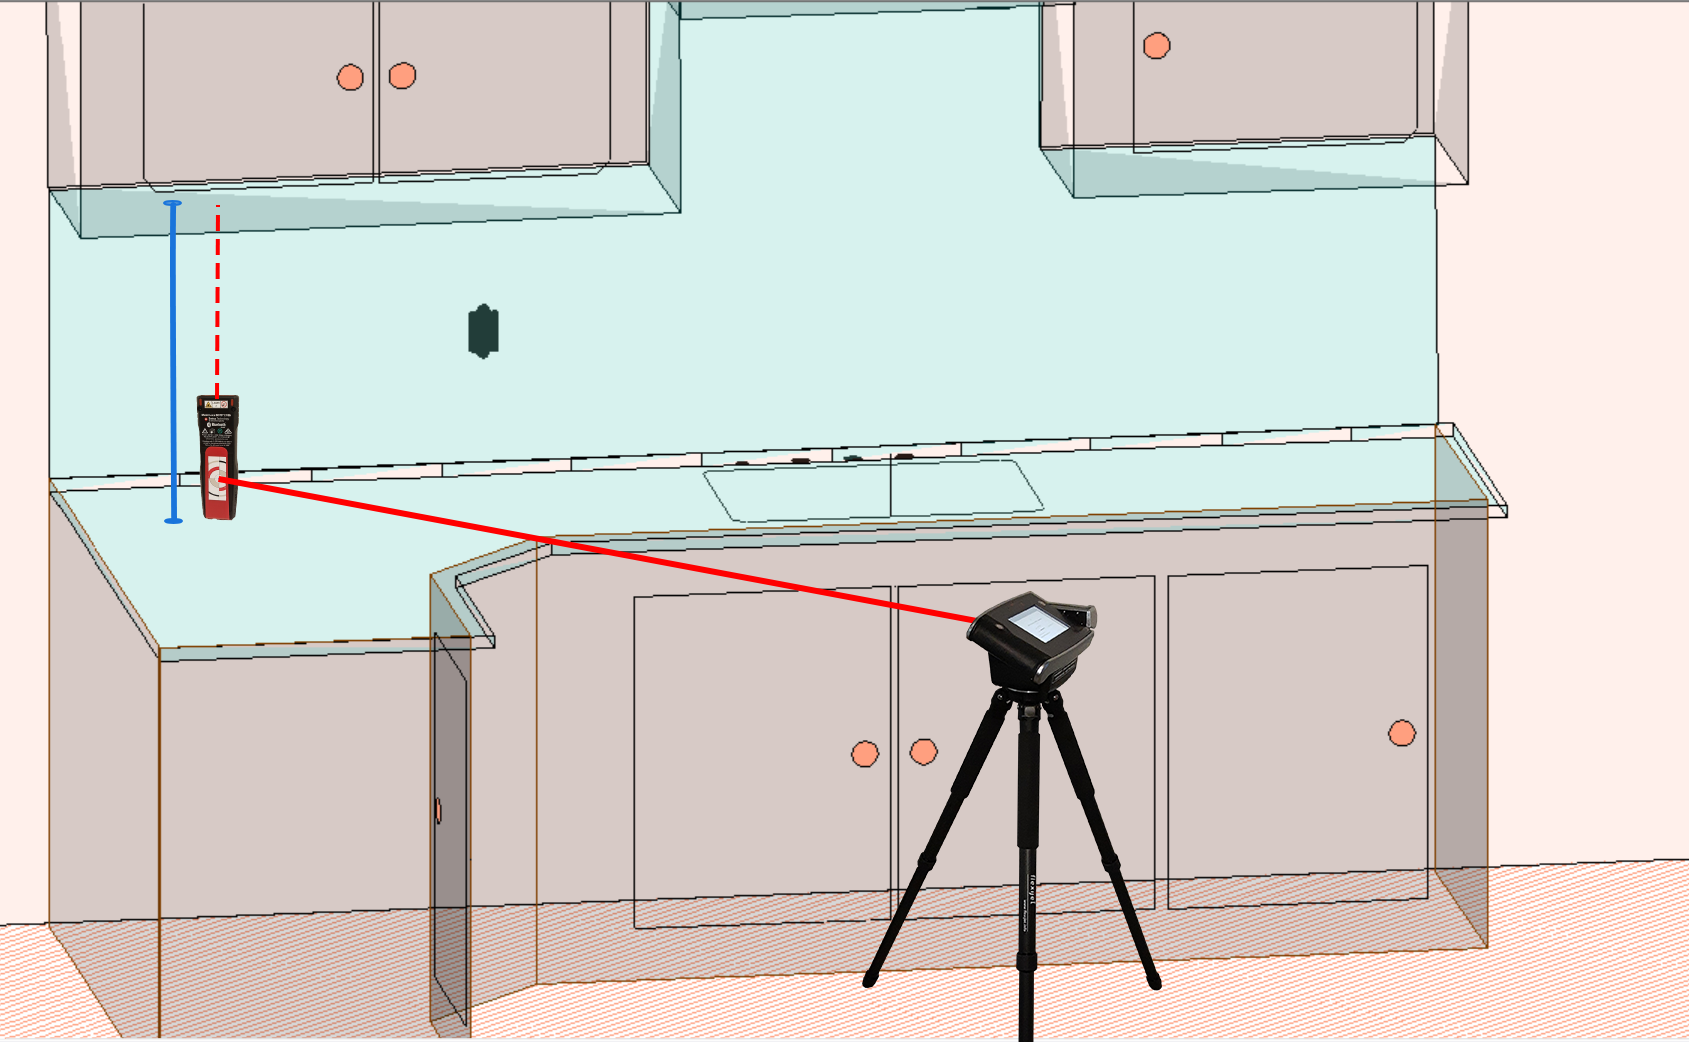
- When measuring a full-height Backsplash with very reflective surfaces on cabinets, you can use the T targets above or an Optional Handheld Laser to efficiently and accurately measure these areas. You can put a mark or a location sticker at a determined height from the bottom (Crosshair Offset).
![Back of Leica handheld laser with crosshair sticke]()
Here you can see how to use the Optional Handheld Laser when measuring Full-height backsplash. aim the Flexijet at the target in the hand laser, and the hand laser will send the actual measurement from the countertop to the cabinet as shown with the blue line.
Feedback
Copyright © 2025 Flexijet GmbH
—
Powered by 
Post your comment on this topic.