
In order to measure a waterfall, a folder with a Vertical plane must be created for each waterfall. A Vertical folder can be created using the ‘New Folder’ button, or by using the ‘backsplash’ function, which will create a new folder for each area.
![Countertop with Waterfall 3D view]()

A waterfall can be measured from the same position as countertop, if Flexijet is able to measure the required points from its position. If not, you have to reposition Flexijet and continue measuring in the same drawing, use Repositioning
After measuring the countertop area:
- Click on the ‘Backsplash’ button on the measurement ribbon
![Flexijet Stone Backsplash Button]()
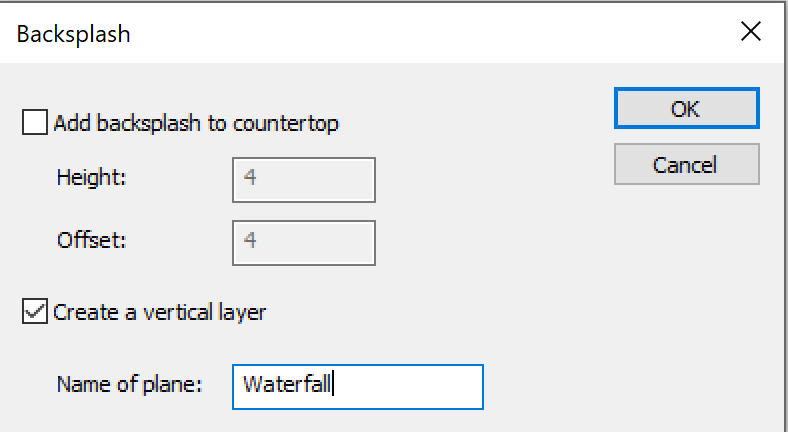
- Deselect the ‘Add backsplash to countertop’ section, and select the ‘Create a Vertical Layer (full-height) section. This will create a vertical folder for the waterfall. You may also name your waterfall folder.
![Backsplash dialog window with Create a Vertical Layer checked and waterfall as name]()
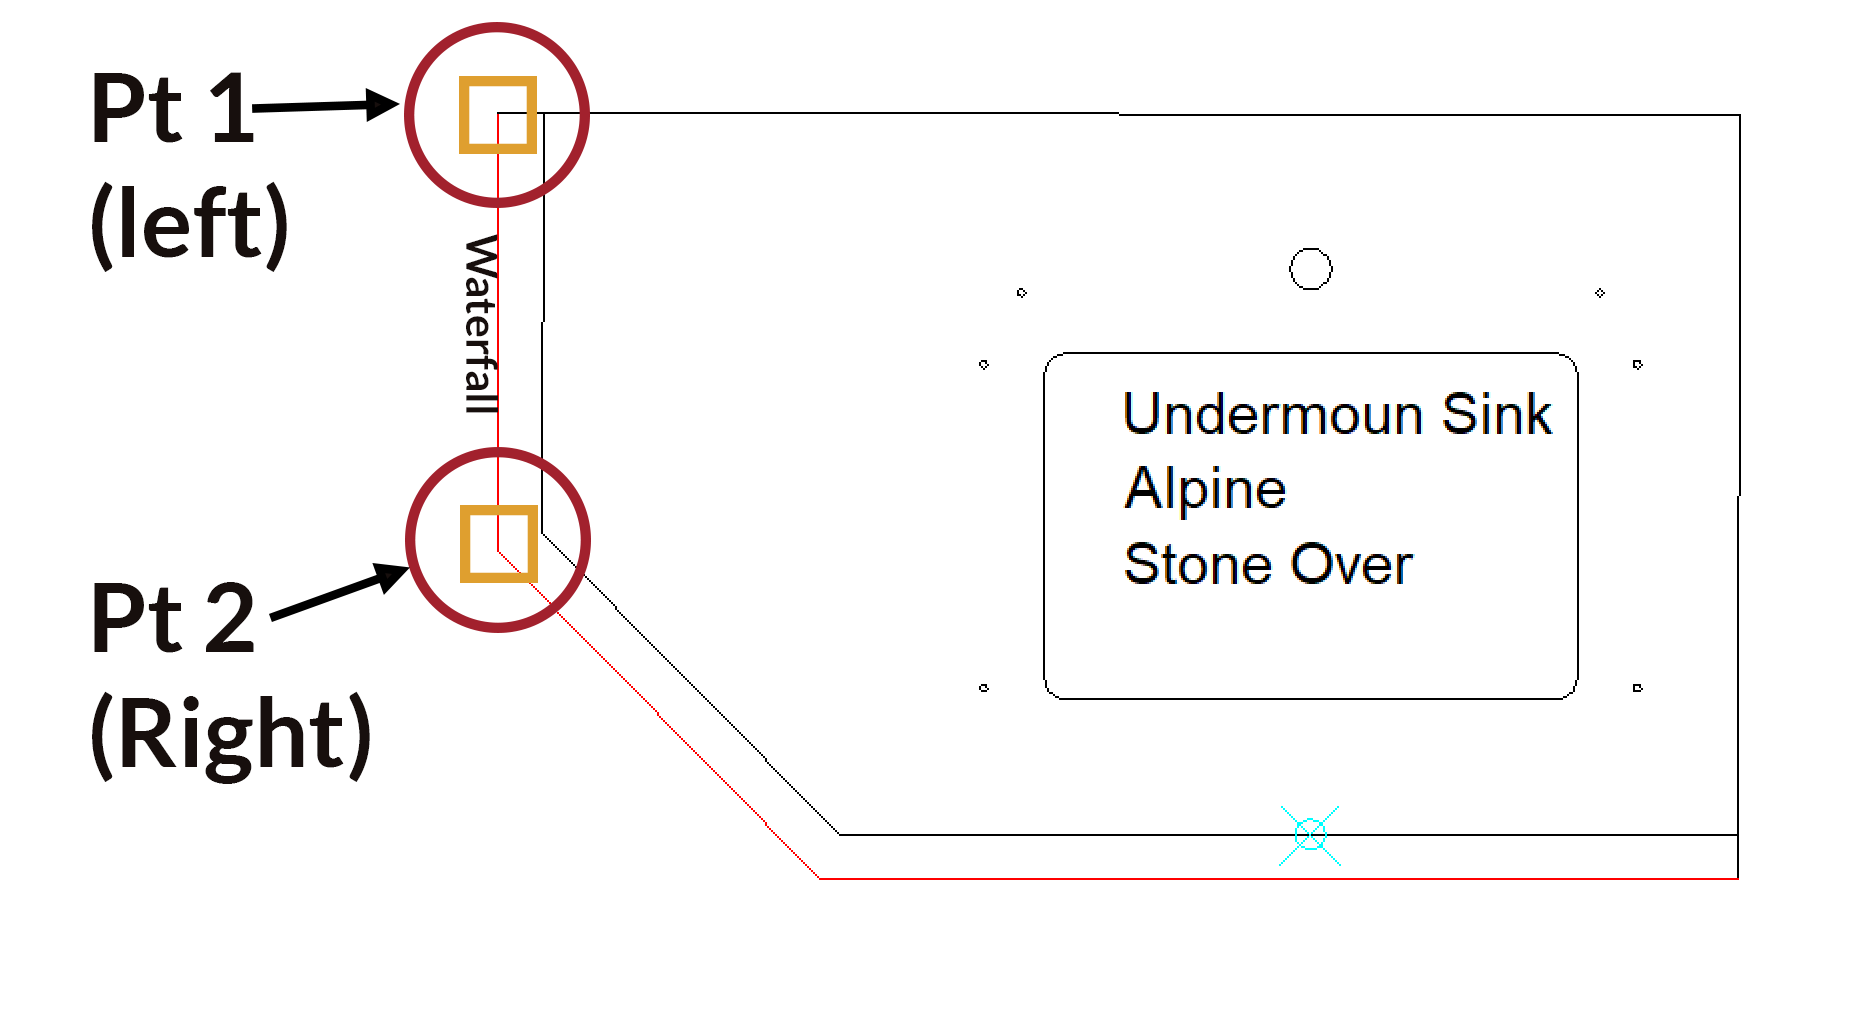
- To define the waterfall’s vertical plane, click on the left side point of the where the Waterfall will be drawn. If material thickness of the countertop is known and countertop edges have been offset, you can select the outside edges of these this countertop area, with left and right being from the direction the waterfall is viewed.
![Waterfall where to click points on countertop to set plane]()
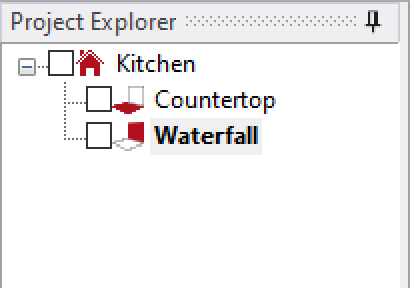
- The waterfall folder is now created, and should be active.
![Project Explorer with Waterfall folder active]()
- When measuring a waterfall, measure along the floor and the wall using the desired function (Polyline or Multiple Lines). You may also measure the top edge of the cabinets, for a reference where the cabinet height is located.
- To create additional waterfall folder, select the ‘Countertop’ or other corresponding folder. Use the ‘Backsplash’ button to create another vertical folder and follow the prompts to define the plane by either clicking or measuring the corresponding left and right points for the next waterfall.
- In order to see your project in 3D,click on the Root folder (often called ‘Kitchen’) in the Project Explorer.
To transfer points (e.g. elevation of underside of a cabinet, height position of plugs, etc) between folders:
- In the folder you are editing, click the checkbox next to another folder to turn on its visibility. In the image below, the ‘Watefall’ folder is active, while the ‘Countertop’ folder elements are visible (though viewed from the front view).
![]()

- Ensure that 2D snap mode is active. Press F9 or click the 2D button at the bottom right corner of the application to toggle between 2D and 3D snap modes. This will ensure that any points selected will be transferred to the active plane.
![]()

- Select any points to draw as start or end points of lines.
Feedback
Copyright © 2025 Flexijet GmbH
—
Powered by 
Post your comment on this topic.