
These are the typical steps used to setup Flexijet to measure a horizontal countertop.
- Set up your Flexijet. Ensure your Flexijet is well positioned to measure all areas as easily as possible, avoiding unnecessary tight angles, etc.
- Connect to your Flexijet’s Wifi Network. When the Flexijet’s screen background is Green, open Flexijet Stone software.
- Select the ‘Auto-Level’ button from the ‘Flexijet’ Ribbon, OR on the screen of the Flexijet.
![Auto Leveling button on Flexijet sreen]()

- OPTIONAL: Align to cabinets/wall using the ‘Align to object’ function from the ‘Flexijet’ ribbon, OR on the screen of the Flexijet. You may also align later, using the ‘Align’ function.
- In Flexijet Stone, go to the ‘Measurement’ ribbon and select the ‘Countertop’ button. Name the folder, and press ‘OK’
![Countertop Button]()
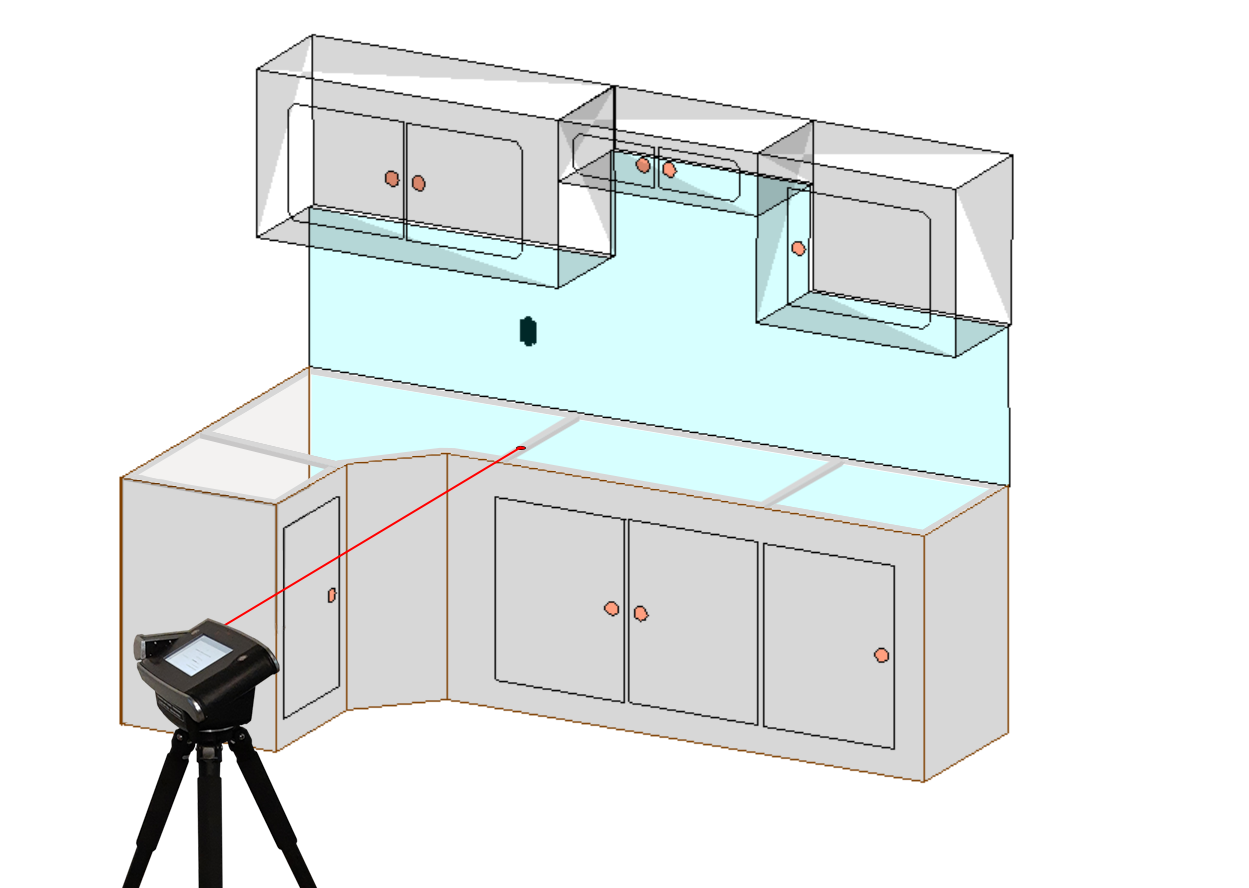
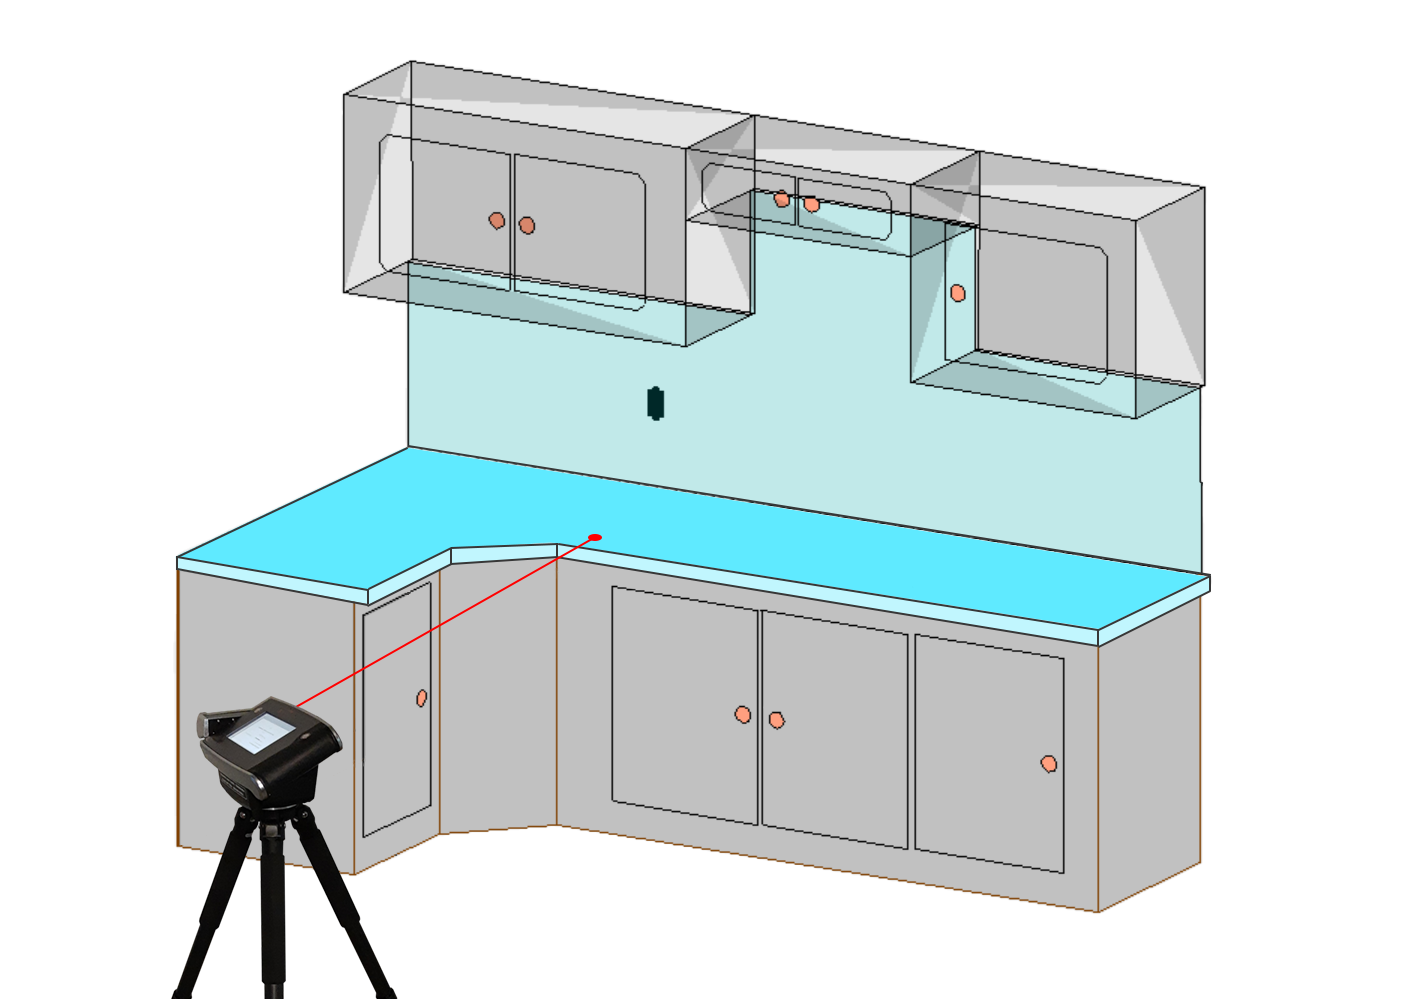
- Now, the Command Window will display, ‘Please measure a point on the countertop’. Aim the Flexijet at the surface of the countertop/cabinets to be measured and measure a point to set the horizontal plane. A Home folder is created automatically if one doesn’t yet exist.
![]()
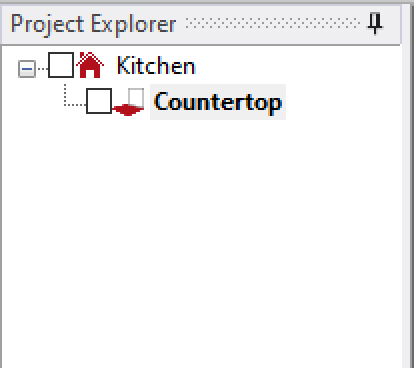
- When completed, the Project Explorer will display the Root folder (Kitchen) and the Countertop Folder (named in step 5), with the Countertop folder selected (text bold). The command line will display ‘Folder Countertop Active’.
![Project Explorer with kitchen and Countertop folders]()
Where and how to measure with Countertops:
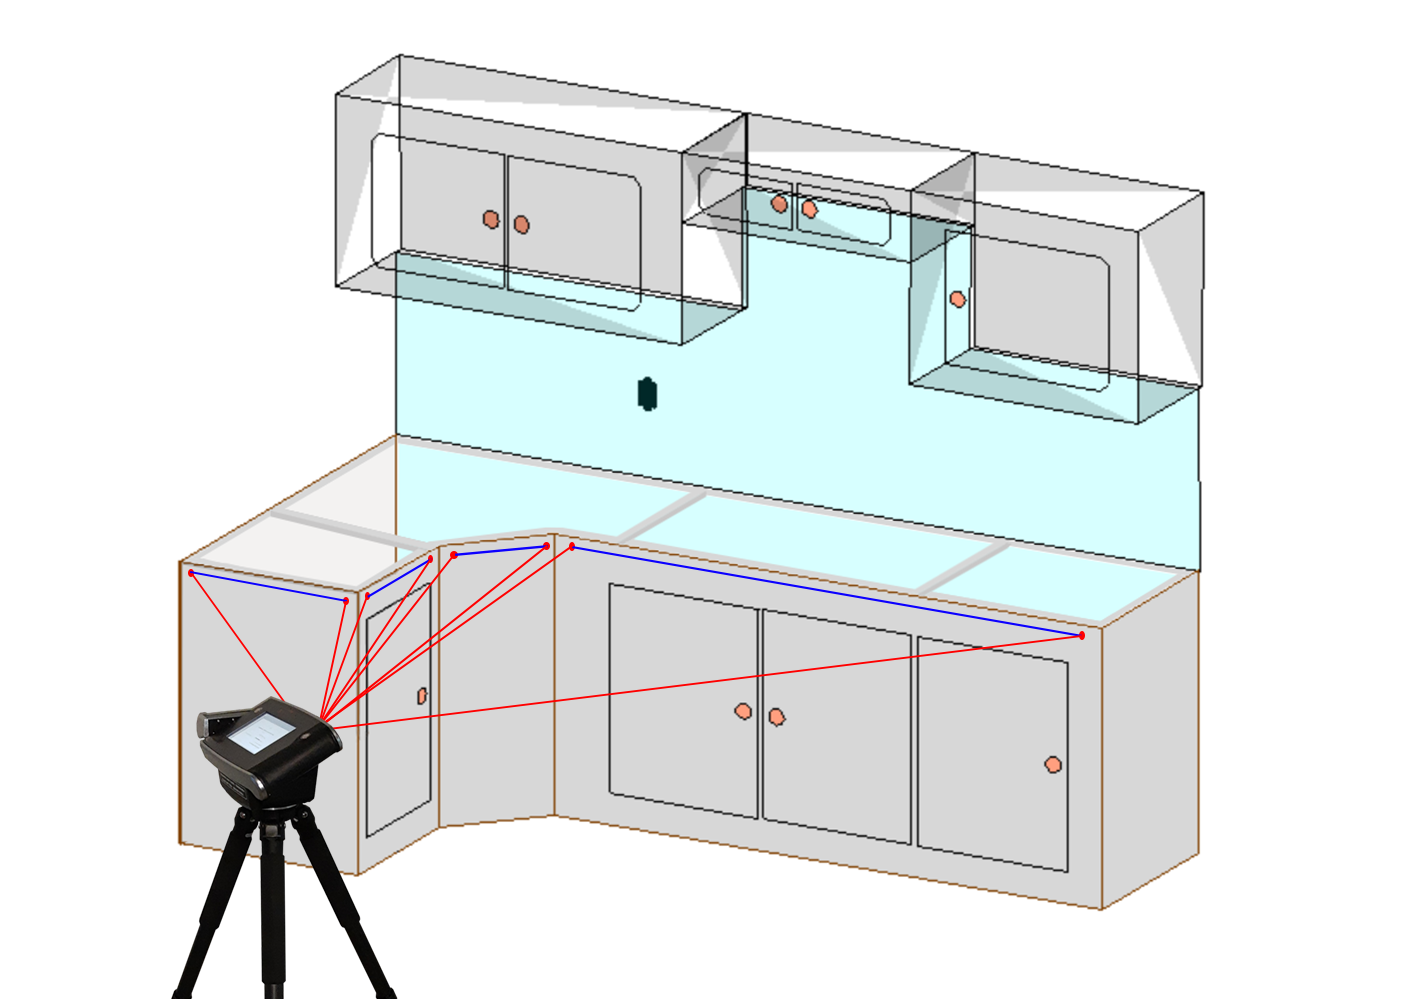
- For front edges, the ‘Multiple lines’ function is also recommended, as these are typically straight sections. Measure a first point and a second point, and Flexijet will draw a line.
![]()
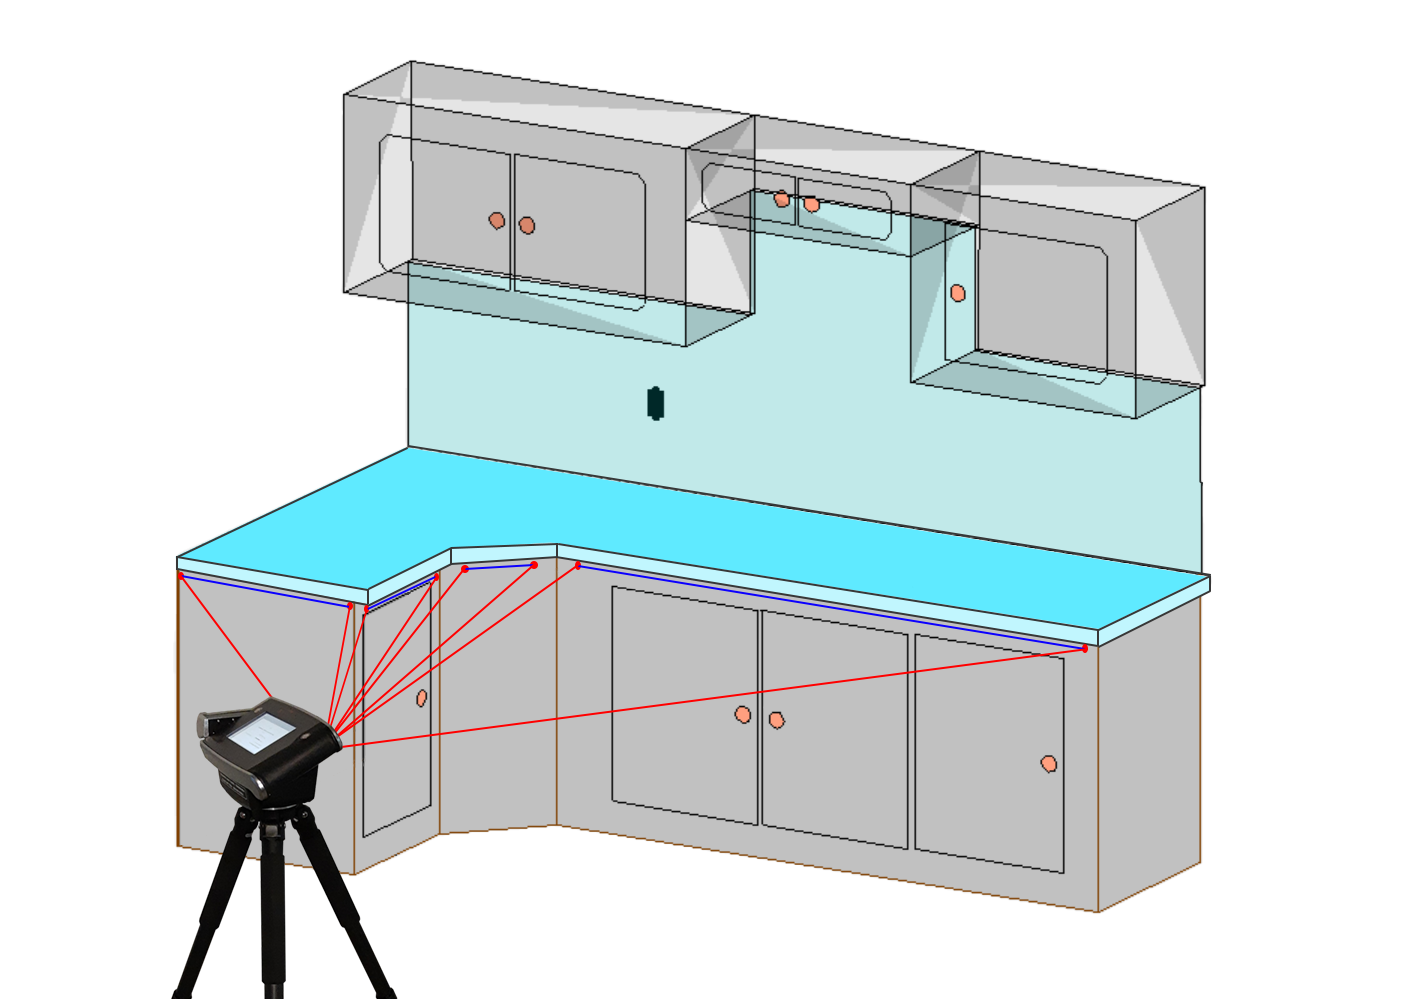
Continue measuring a new start point and a second point for additional lines: no need to restart the function.
![]()

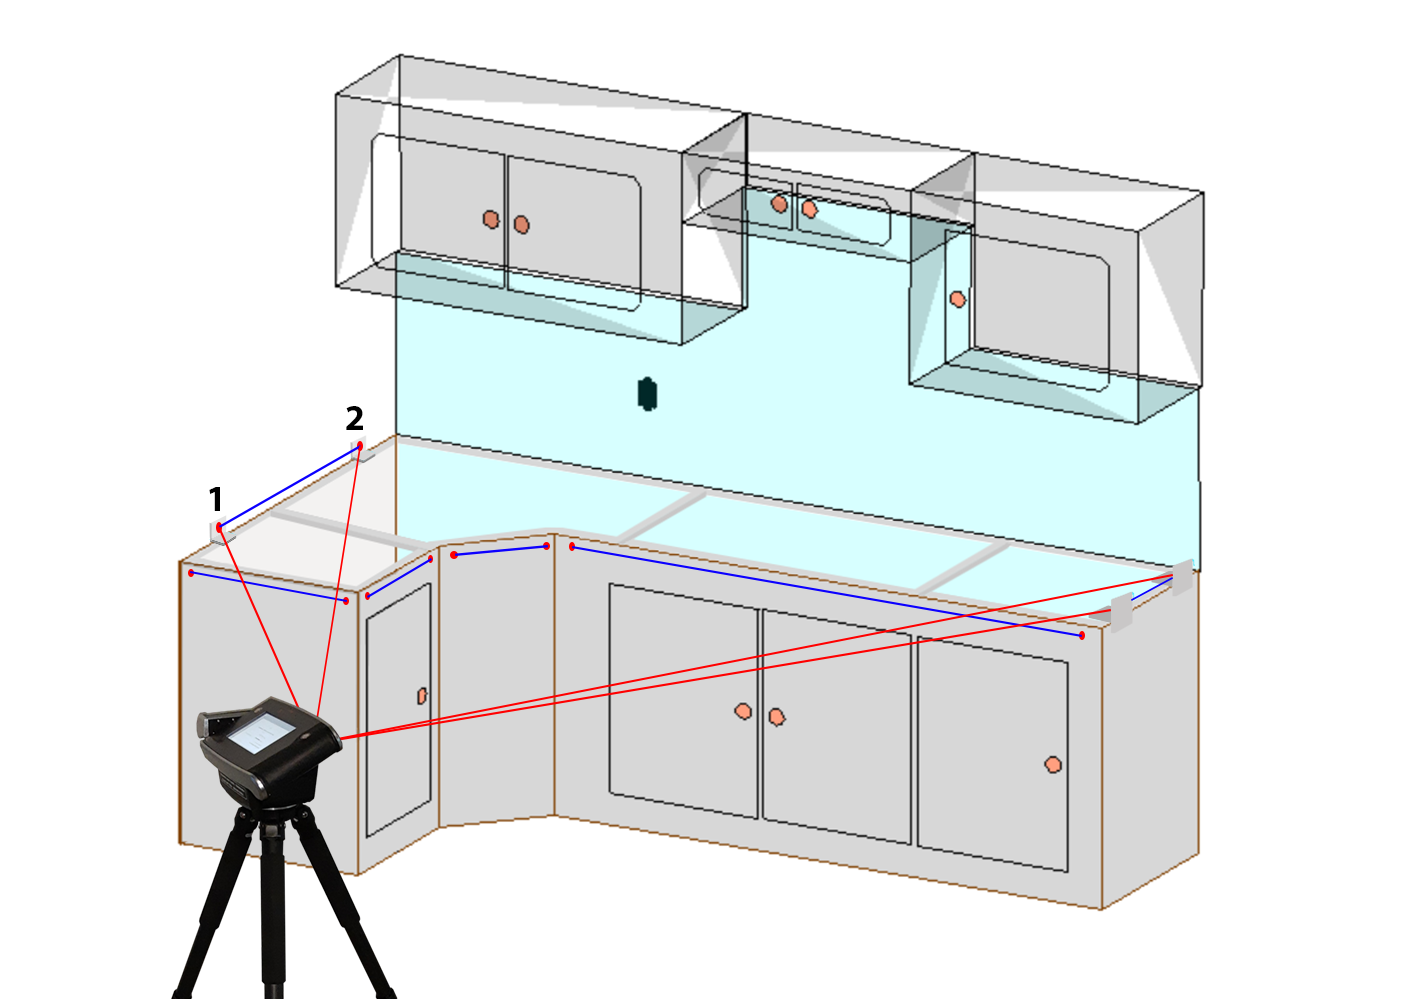
- For areas that cannot be measured directly from the front, you may use the included aluminum T-Targets as indicated. These targets allow the Flexijet to measure the exact edge without the need to relocate.
![]()
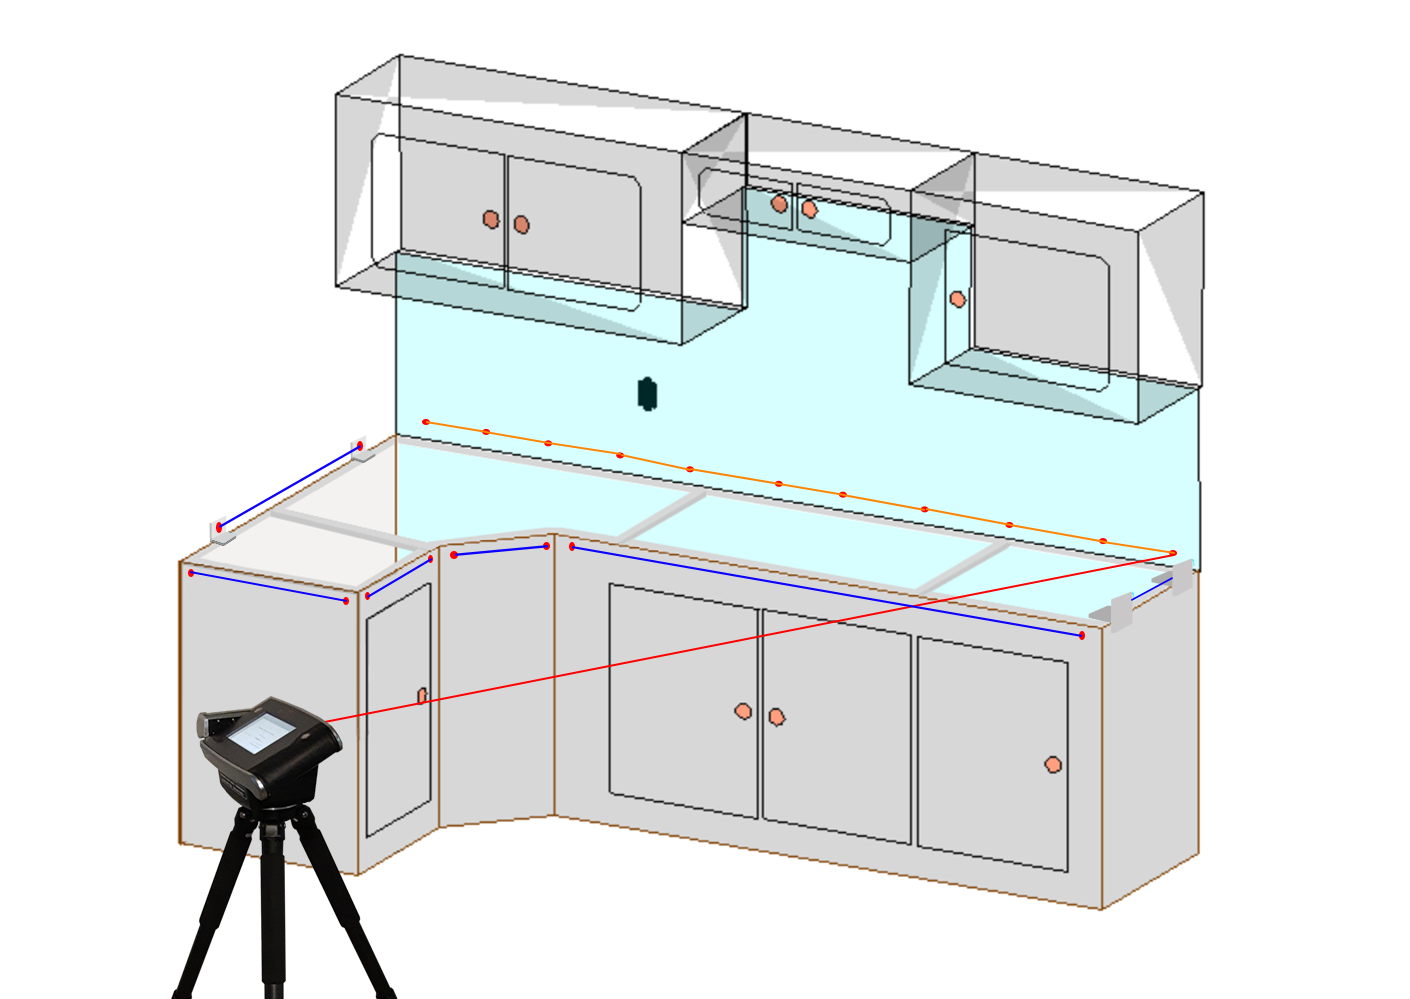
- For walls and other surfaces that may bow in and out, use the ‘Polyline’ or ‘Iines’ to measure (scribe) with multiple points on the surfaces. Typically, measuring every 4 to 8 inches along the back wall with more points spaced 2 to 4 inches apart in the corners (where drywall buildup often affects the shape) will yield good results.
Start a new polyline for each wall section. The corners can be connected later using the ‘Connect’ Tool
![]()
Verification
- Step 1 of Verification: Connect corners as needed, and use Show Corners and Show CAD-Point to aim Flexijet at the corners for visual verification.
- Step 2 of Verification: Use the Dimension tools to place measurements on the page, and verify with tape measure.
To measure additional countertop areas:
- After moving the Flexijet, Auto-Level in every new location. If you are moving to a new location using Repositioning/3D locations, Auto-levelling may be selecting as part of the ‘Resume location’ function.
- Now, use ‘Align to object’ to orient your the new canvas area by measuring a point on the left and right of the back wall, or front of countertop area. If you skip this step, the orientation can be adjusted using the ‘Align’ function, or later during editing with the ‘Align a single folder’.
- From the ‘Measurement’ tab, select ‘Countertop’ and name your new countertop, and measure the point to set the horizontal plane of your new countertop surface.
- When switching between countertop folders, ensure that the correct folder is selected (active) in the Project Explorer in Flexijet Stone, or on the screen of the Flexijet.
To Import a Drop-in sink or cooktop, or a draw a sink or cooktop:
See the section, Import Drop-in, or draw a rectangular sink or cutout using the Draw a Sink or Cutout tool
Feedback
Copyright © 2025 Flexijet GmbH
—
Powered by 
Post your comment on this topic.