
NEW in Version 3.3.7.0 and later:
Using the ‘Wall’ button:
- Setup Flexijet 3D, connect, and Auto-level Flexijet (anytime setting up, after moving, or starting a new project).
![Auto Leveling button on Flexijet sreen]()
- If measuring only a wall: In the ‘Measurement’ ribbon, click on Wall.
![Measure Wall button Flexijet Stone]()
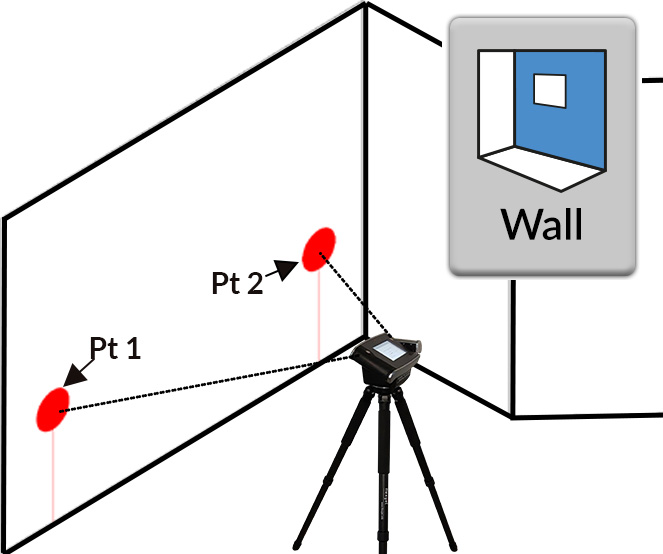
- Set the plane on the wall, measuring on the wall towards the left and then on the wall towards the right. If you have not used ‘Align to object’, the plane of the first wall will also be used to set the x-axis alignment automatically.
![Vertical plane - where to set points image]()
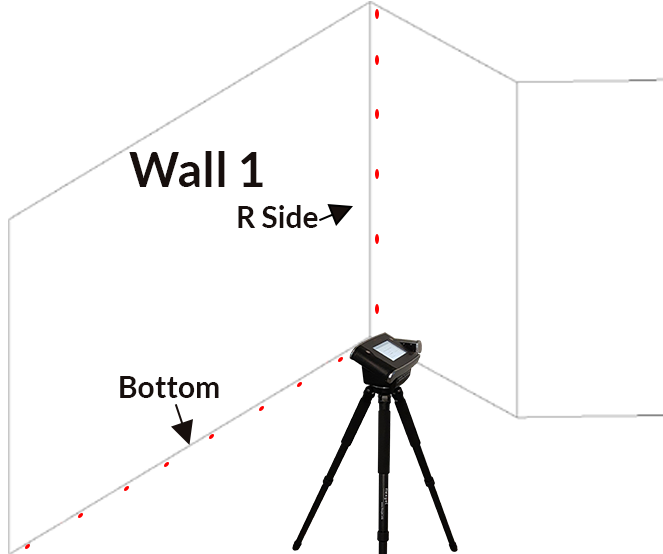
- Now, measure the geometry into this wall using Multiple Lines and Polylines. Similar to how a countertop is measured but on a vertical plane, measure the surfaces that intersect to the wall to capture the outside shape of the wall with Multiple Lines for straight sections, and Polylines/Lines for scribed sections. Each measured point will be flattened perpendicularly to the vertical plane.
![Wall where to measure with Flexijet]()
- To measure additional walls: Click the ‘Wall’ button again, and follow the prompts to define the plane of the new folder.

Verification
- Step 1 of Verification: Connect corners as needed, and use Show Corners and Show CAD-Point to aim Flexijet at the corners for visual verification.
- Step 2 of Verification: Use the Dimension tools to place measurements on the page, and verify with tape measure.
Versions 3.3.6.0 and earlier:
- Setup the Flexijet, and connect to it. When the Flexijet’s screen is Green (waiting for incoming Application Connections), Open Flexijet Stone software.
- Auto-level the Flexijet (anytime setting up, after moving, or starting a new project).
![Auto Leveling button on Flexijet sreen]()
- If measuring only a wall: In the ‘Measurement’ ribbon, click on ‘New Project’. This is different from measuring countertops because the ‘Countertop’ button creates a project folder for you automatically! This will make a root/project folder in the File Explorer.
![New Project button Flexijet Stone]()

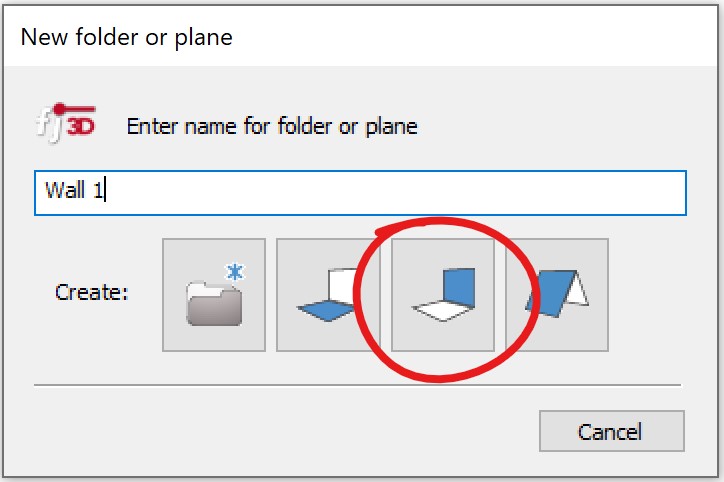
- Now, click the New Folder button. The New Folder dialog window will pop up, allowing you to name the new folder and choose the type of plane. For vertical surfaces, select the vertical plane button on this window.
![New Folder button Flexijet Stone]()
![New folder or plane dialog window vert plane circled]()
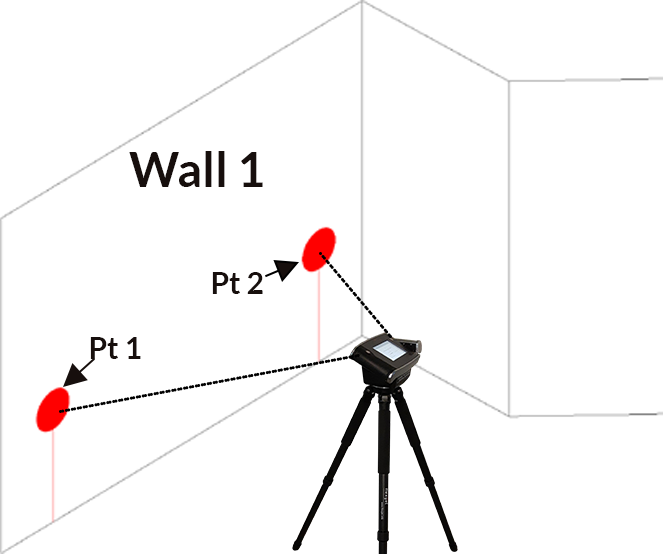
- You will be prompted to measure 2 points to set the vertical surface to set the plane – on the face towards the left, and on the face towards the right. These 2 points will define the vertical plane’s location, extending straight up and down, and on the plane between these 2 points.
![Vertical plane - where to set points image]()
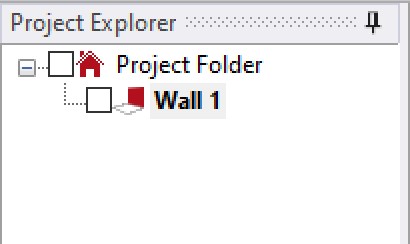
- Your folder structure should show this wall as active.
![Project Explorer showing Project folder and Wall 1 folder]()
- Now, measure the geometry into this wall using Multiple Lines and Polylines. Similar to how a countertop is measured but on a vertical plane, measure the surfaces that intersect to the wall to capture the outside shape of the wall with Multiple Lines for straight sections, and Polylines/Lines for scribed sections. Each measured point will be flattened perpendicularly to the vertical plane.
![Wall where to measure with Flexijet]() \
\ - * To measure additional walls:* Select the the root (Project) folder, and follow the steps above to create the folder and set the plane for each additional wall.
Verification.
- Step 1 of Verification: Connect corners as needed, and use Show Corners, Show CAD-Point or Quick-Aim to aim Flexijet at the corners for visual verification.
- Step 2 of Verification: Use the Dimension tools to place measurements on the page, and verify with tape measure.
To measure the plumbness/elevation of a wall manually, use Distance Point to Plane and measure on the surface of the wall. A measurement point with a distance between that point and the set plane will be drawn on screen.
Or, use Hatch/Digitize Hatch command to measure the plumbness of the wall surface automatically according to a defined grid.
Feedback
Copyright © 2025 Flexijet GmbH
—
Powered by 
Post your comment on this topic.