
Before project goes live the Administrator has to make decision on the following items so that they can be configured beforehand.
1. The Asbestos Survey Forms
In JMS while doing data entry for Asbestos Survey the user would require to select a form to enter inspection data. These form names are configurable. Also user can determine how many and what type of forms are required for data collection. The example of the forms are as below:

2. The Form Contents
The form contents are configurable. Each forms can be designed with the necessary fields only. If a field is not used for data entry it is better not to include them in the form. User also can decide which ones of this fields are to be mandatory.
Below is an example of a No Access Form:

3. Bulk Sample Form
If the Job type is Bulk Sample the user will have only one form available to select form. This form name should contain the word ‘Bulk’ in it. For Example the form name could be ‘Bulk Sample’ or ‘Bulk Sample Inspection Form’. The content of the form is also configurable.
Example:
Bulk Sample form selection:

Bulk Sample Form Content:

4. The QC Report
The QC report needs to be checked thoroughly before project go live. Needs to make sure logos, data tables, photos, drawings, certificates and overall format of the report is correct. To view a QC Report in JMS from My Job grid open the report as below:
Example:

5. The Format of the Property Address
On Job creation when a property is searched the address is displayed on the top of the form. The format of the property address i.e. the order of the address fields on the form is configurable.
Example:

6. The Fields of the Property Search Screen
For the Property Search screen user can decide what and in which order property search screen should be displayed. Number of columns and position of the columns are configurable.
Example:
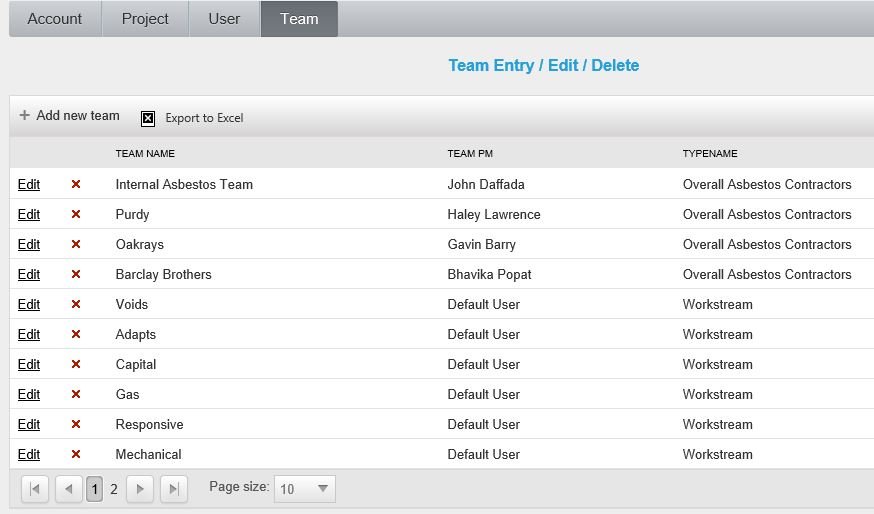
7. The List of Teams and Default Team PM
It is possible to have one or many Team in the system. The name of the Team has to be pre-populated before project goes live. Each Team also must have a Team PM. The Team PM is the the default Team Leader who will be assigned automatically during job creation unless different one is selected.
Example:
8. The Priority Dropdown.
On the Job Request form in ‘When’ section the Priority dropdown is configurable. Below is the example of the Priority Dropdown:

9. The Workstream Dropdown
On the Job Request form in ‘Who’ section the ‘Workstream’ dropdown is configurable. Below is the example of the Workstream Dropdown:

10. The Service Provider Dropdown
On the Job Request form in ‘Who’ section the ‘Service Provider’ dropdown is configurable. Below is the example of the Service Provider Dropdown:

11. Dashboard Configuration
On the Dashboard in ‘Progress’ section the numbers for green, yellow and read area for each criteria is configurable. User also can decide the range for each item on the progress dashboard.
Example:

12. RAT (Room Are Type) Configuration
The fields that are auto populated in the inspection forms on RAT (Room Are Type) selection are configurable. RAT is configured in ACT application. User decides how many RAT is required to facilitate the data entry.
Example:

13. The Mirror Fields
There are some fields on the forms can be set as mirror. Mirror is when selection of one field copies the same value to other filed(s) on the form. Mirror triggers are set in ACT.
14. Linking Job Fields to Survey Fields:
There are some fields of Job Information form that can be linked to the survey fields. For example The Job Ref can be used as Survey Ref, or, the Service Provider field can be used as Firm field in Inspection forms. User needs to decide whether these links are required before project goes live so that configuration can be made beforehand.
Exmaple:
Following two screenshots show where the Job Reference field of Job information can be used as Survey Ref field in Inspection form.


Post your comment on this topic.