
Approval cycles often involve multiple individuals before changes can be implemented. This is often the case as business activities that are subject to change may affect multiple different roles and resources, requiring their consent prior to change. These approval cycles can vary dependent on the organization, and the importance of the request being made. As such, the EPC supports both parallel and serial approval cycles.
| Approval Cycle | Description |
|---|---|
| Parallel | All approval requests are simultaneously sent to approvers. The changes will be approved once all approvers have approved. E.g. A request for approval is sent out to a controller, the VP Finance, and the CEO simultaneously |
| Serial | Approval cycle following a sequential of approvers. Approval requests are first sent to the initial approver. Upon approval, a secondary approval request will be sent to the following approver and so on. E.g. First approval request sent to a controller, then the VP Finance and finally the CEO. |
Web Modelers can set an approval cycle for all EPC objects. The Approval button is available on the toolbar under the object’s Details tab.
Web Modelers need to ensure they have the permission to be a Web Modeler, their displayed content is set to Show Latest, and their editing tool is the Web.
Follow the instructions to set an Approval Cycle
1. Navigate to the details section of the object and click on the  box.
box.
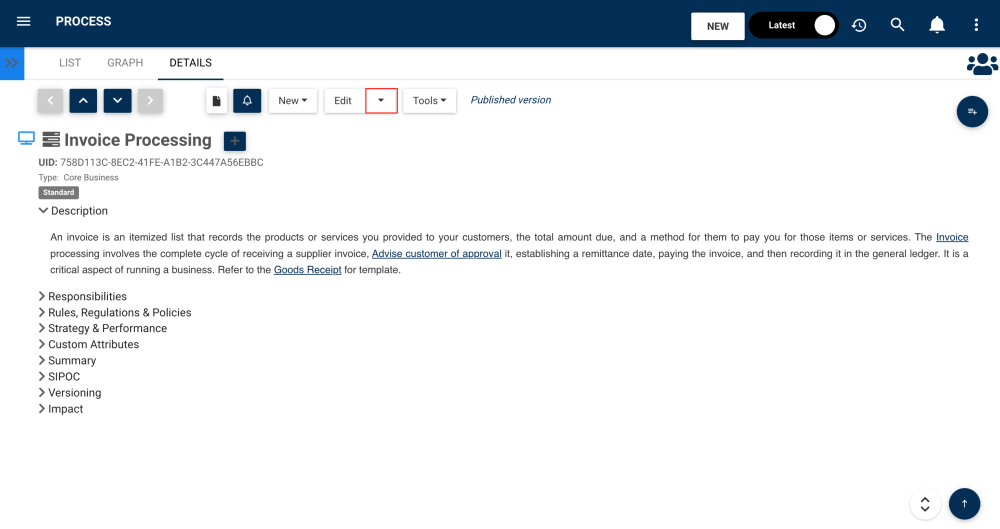
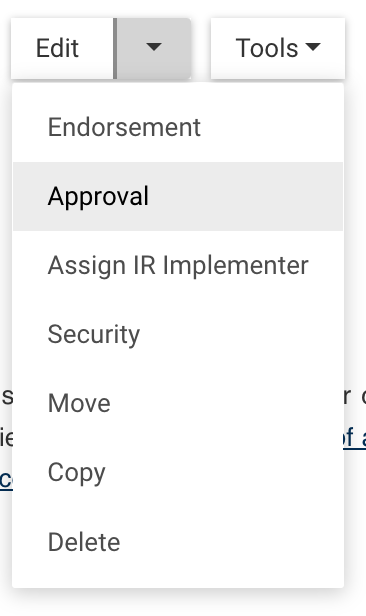
2. A drop-down menu will be generated. Choose “Approval”.
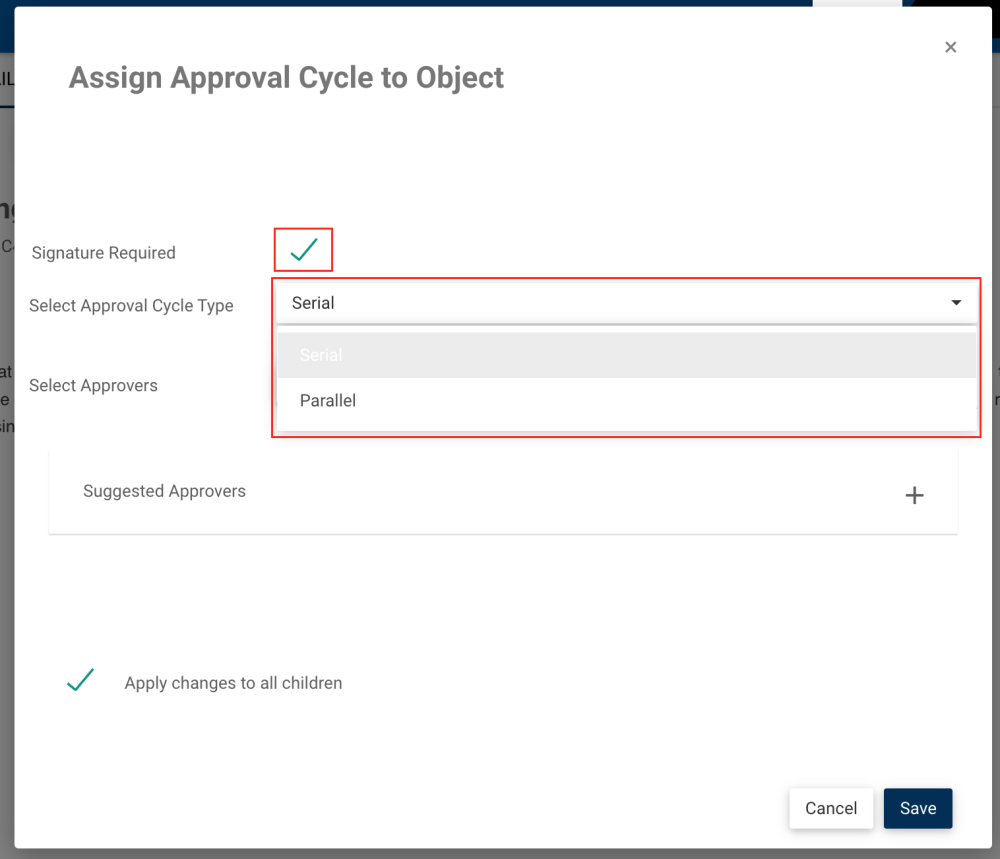
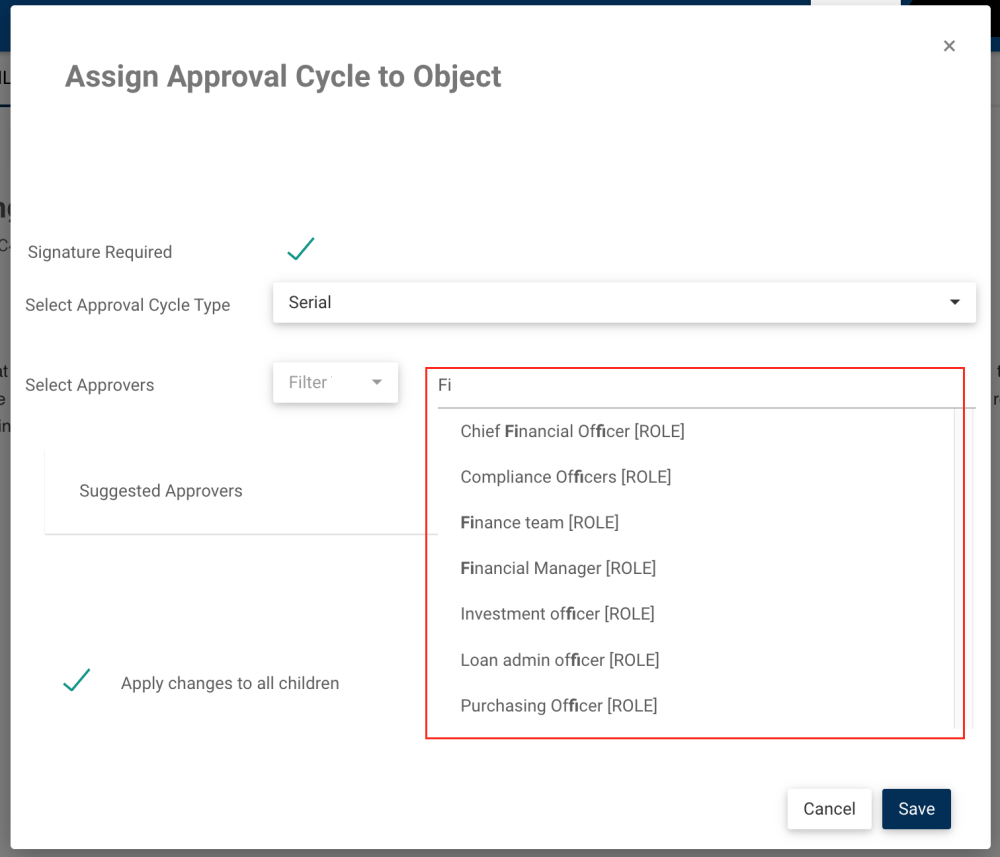
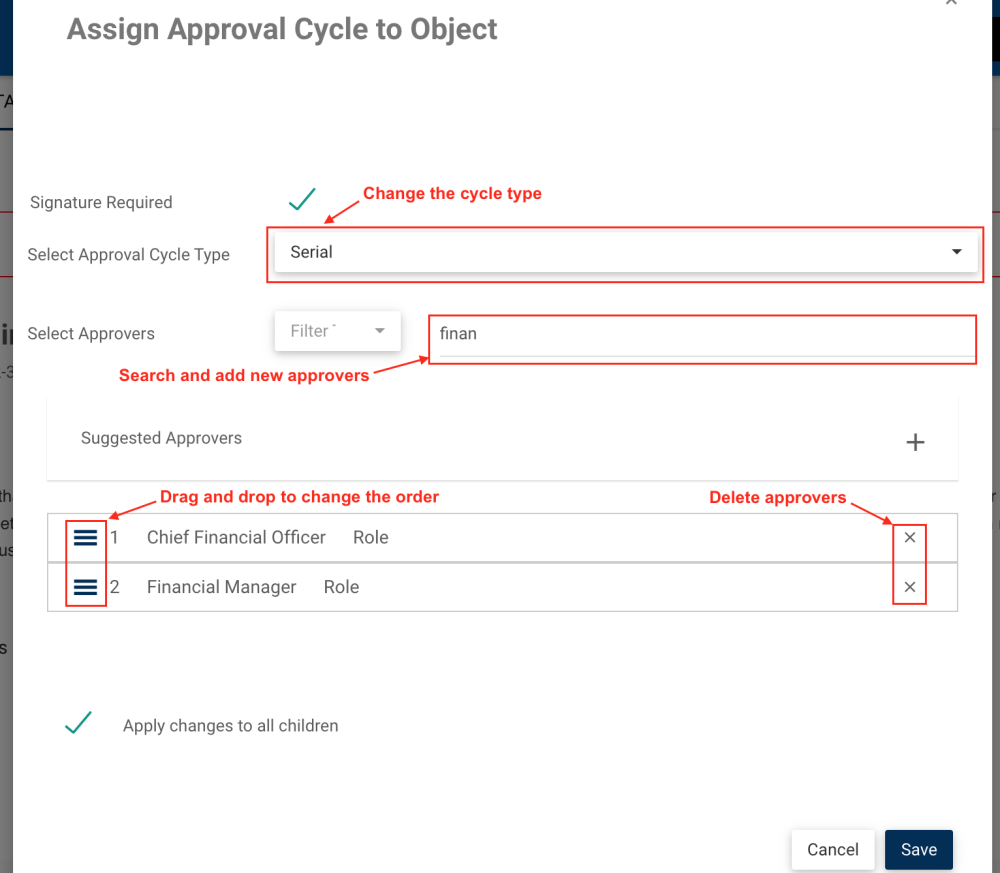
3. The “Assign Approval Cycle to Object” pop-up window will appear.
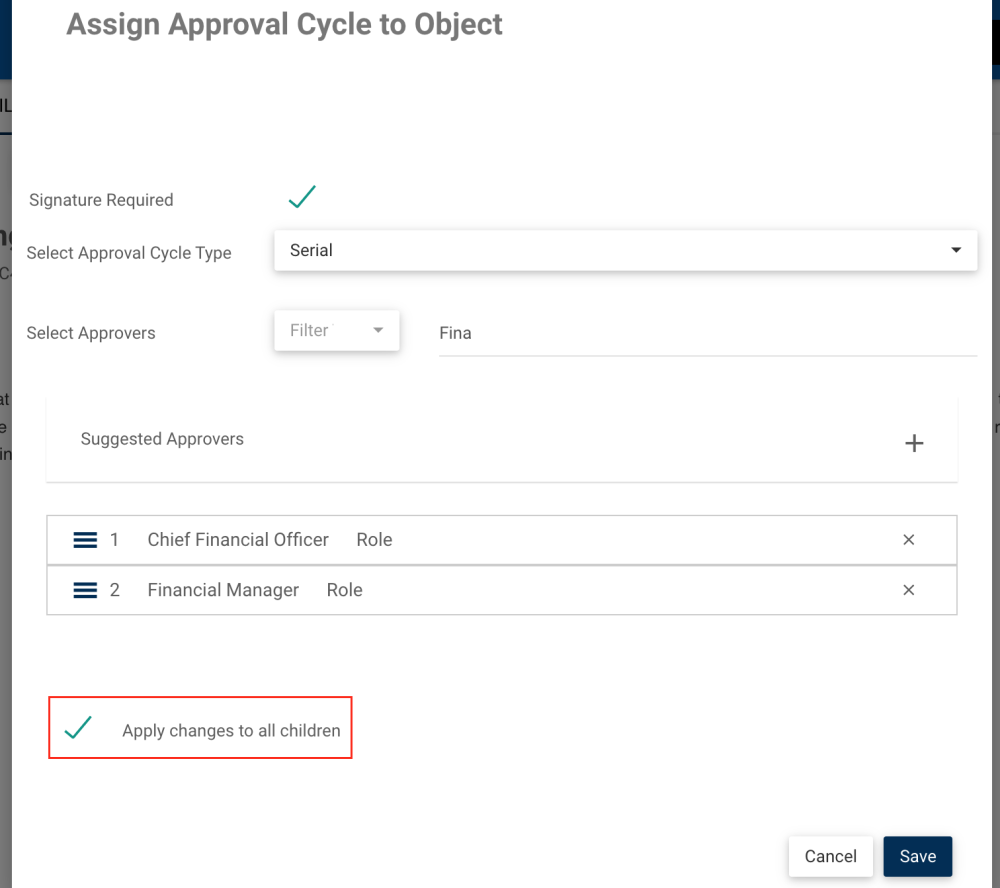
- You can deselect the “Signature Required” box if no signature is required for a user to approve the object.
- Select the desired Approval Cycle Type, between Serial and Parallel, as explained above.
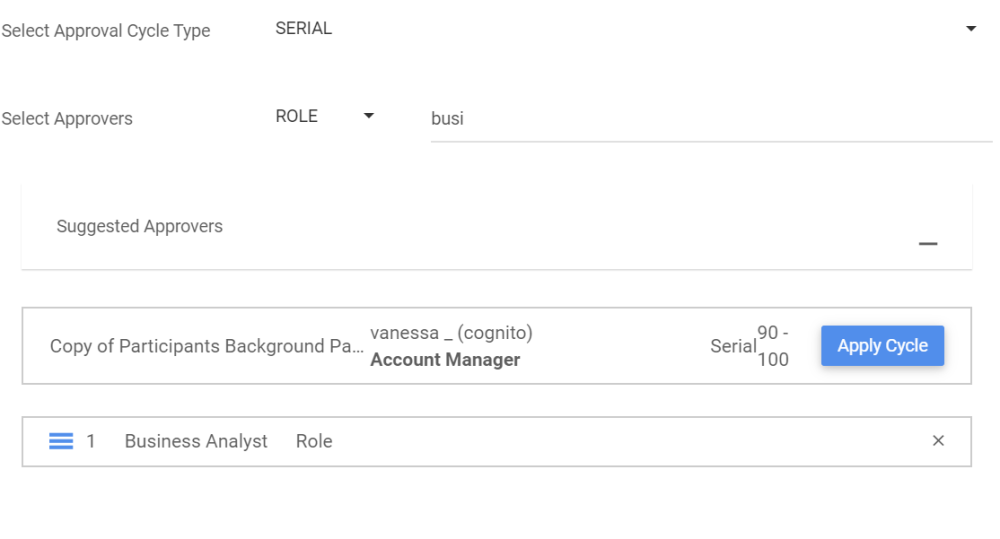
4. Navigate to “Select Approvers. Type the name of the role or resource you want to assign as the approver. The search suggestions will populate based on key wording typing.
- If needed, you can use the Filter, which lets you filter by Resource or Role.
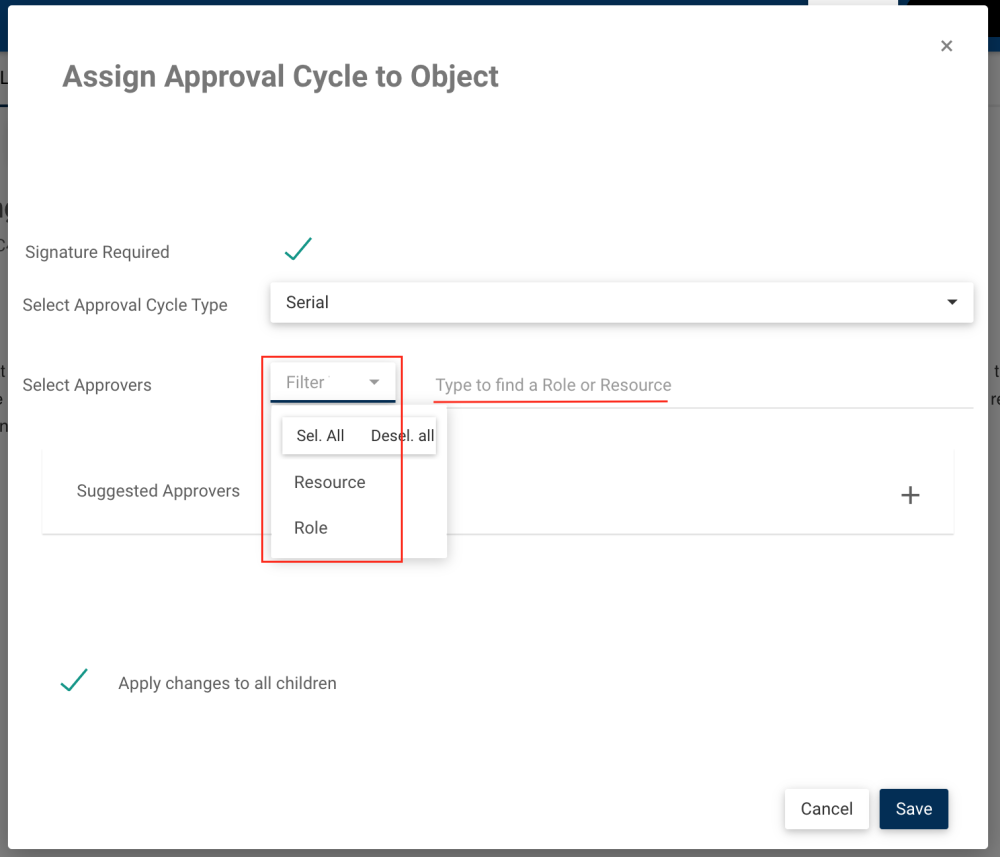
5. Click to select the role(s)/resource(s) you want to assign.
6. You can expand the “Suggested Approval” section to view suggested approvers from a similar objects. Select “Apply Cycle” to the desired suggestion and the approvers will appear in a table.
7. The “Apply changes to all children” box is checked by default, which will automatically assign the same configuration to all its child objects. If the user unchecks this box, organizations may not have an approval cycle for all objects, allowing users to easily publish objects without any approvals.
8. Save the Approval Cycle
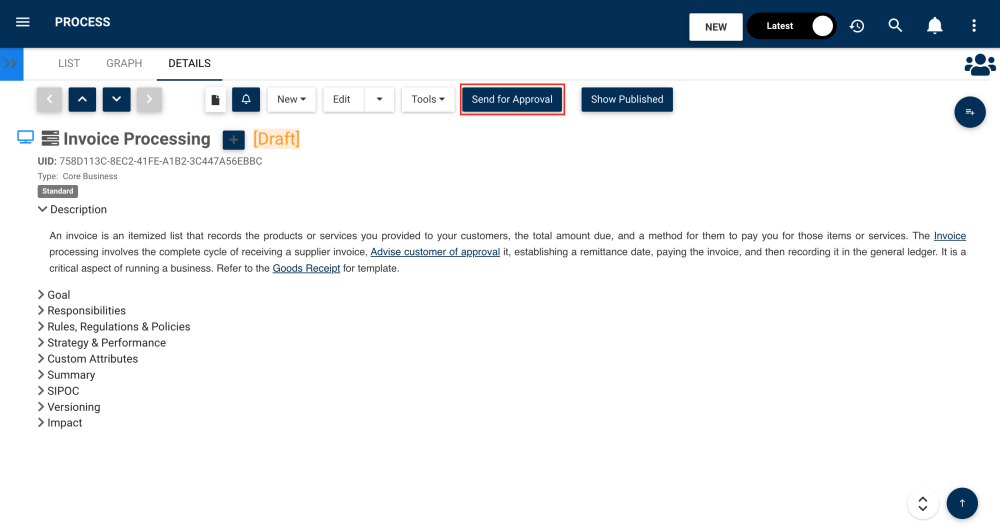
Sending an Object for Approval
Once the object is ready to be sent for approval, please follow these instructions:
1. Navigate to the object’s Details page and click on the “Send for Approval” button.
2. The “Send for Approval Confirmation” pop-up window will appear.
- In the Approval Comment box, you can enter the desired comment that approvers can view when they will approve the object.
- Define the “to-be” release version (e.g., version 2.0) when submitting for approval, rather than waiting until the time of publishing. This ensures that the approved version matches the published version. If no approval cycle is required, the user must define the “to-be” release version during the publishing process.
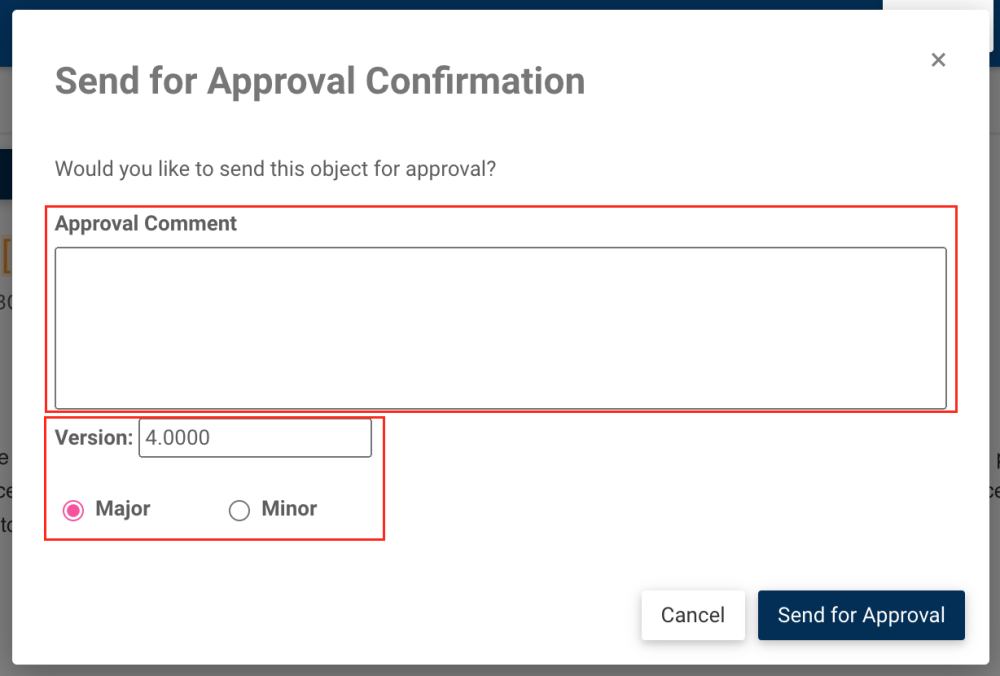
3. When ready, click the “Send for Approval” button to confirm the approval request.
4. When the object has successfully been approved by approvers in the cycle, the Web Modeler will be able to publish the object. To learn how to access approval cycles assigned to your role(s) or resource, click here
Edit the Approval Configuration
Users can now modify the configuration of the approval cycle while an approval cycle is in progress. The changes done will apply to the ongoing approval cycle. Users can:
- Delete an Approver
- Add a new Approver
- Change the Cycle Type
- Change the Order of Approvers
Users cannot change these settings when an approval cycle is in progress:
- The requirement of the digital signature
- Select or deselect the “Apply changes to all children” button
Need more help with this?
Visit the Support Portal