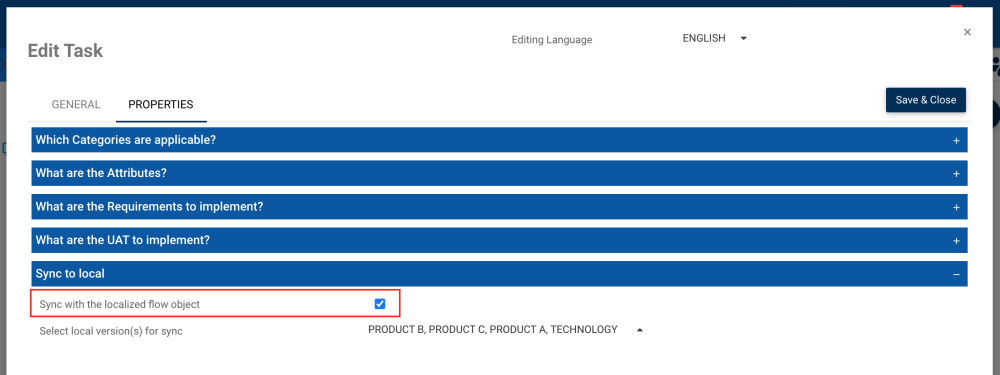
Users can navigate to a Source flow object and choose which Locals will sync with that specific flow object. For example, a user can go to a Source flow object named “Review Payable Hours” and can choose which flow object will be synched and which will not. This ensures that only the desired source objects will be synched to the locals.
Users can access this feature 2 ways:
1. In the Edit form
1. Make sure that the flow object/process in question is already localized. To learn how to localize a flow object or process, please see here.
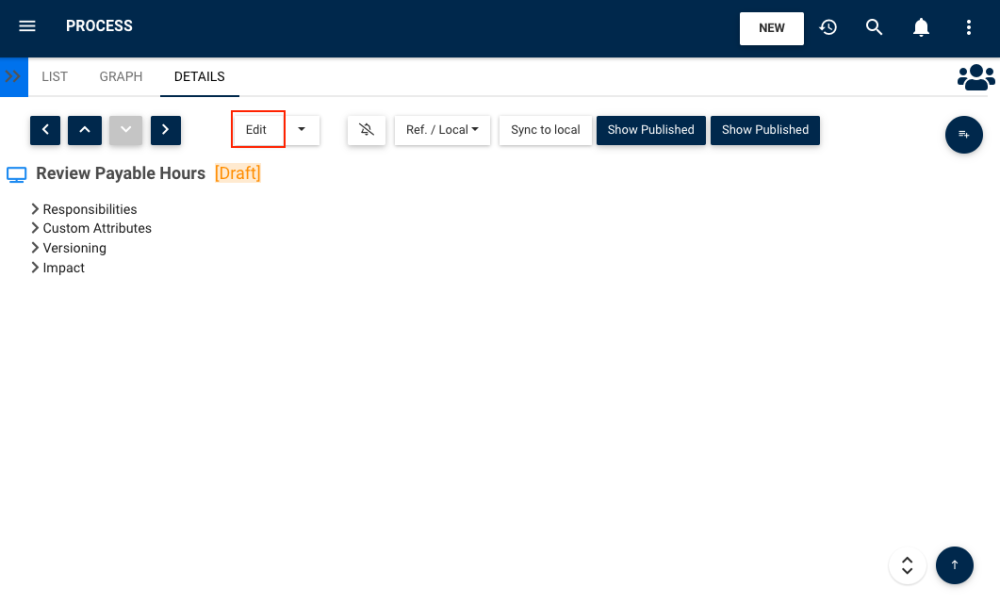
2. Navigate to the Source flow object Details page. Click on the Edit button.
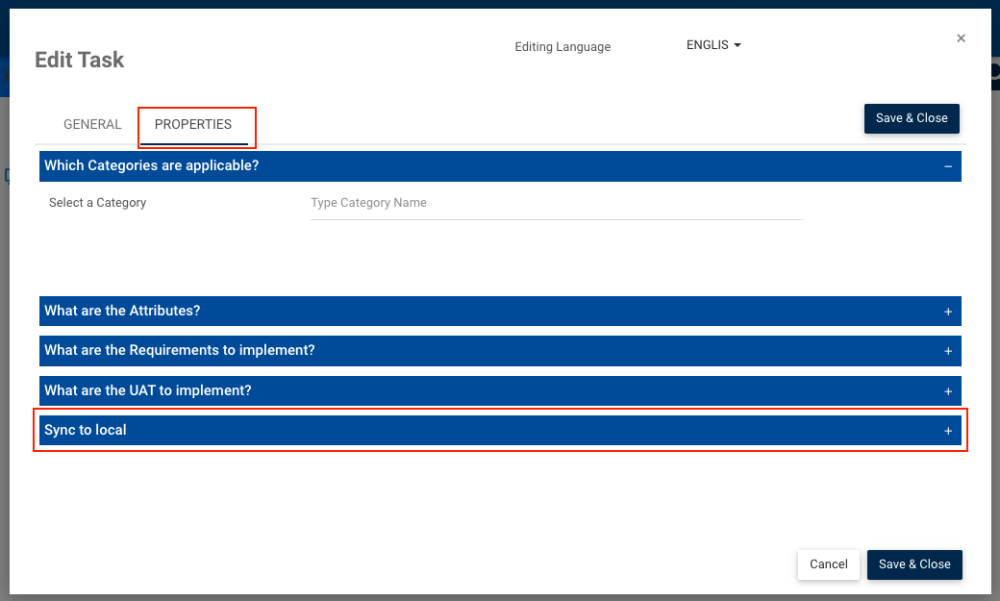
3. The Edit Process form will open. Click on the Properties tab and then the Synch to local bar.
4. By default, the Synch with the localized flow object checkbox will be checked. If users don’t want the Local equivalent flow object to be synched with the Source process, uncheck the checkbox.
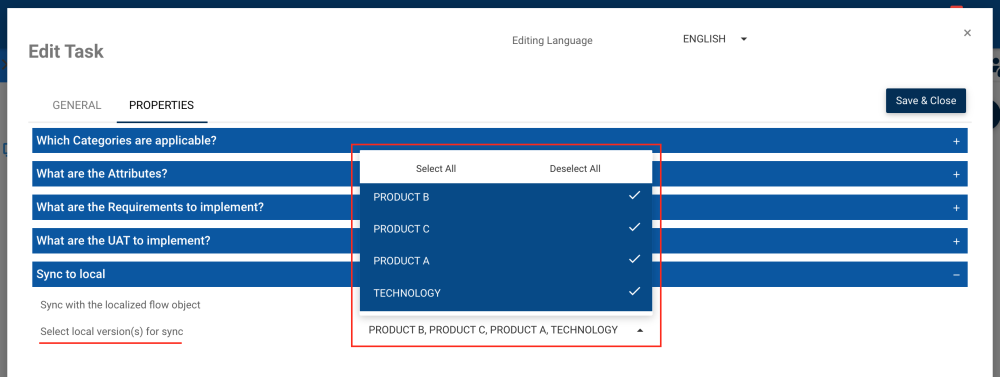
5. If users want to keep some Locals in sync and some not, they can deselect them from the drop-down menu and all unselected locals won’t be synched. To save your preferences, click on Save & Close.
2. In the Graph Edit
1. Navigate to the Graph page of a localized object and click “Edit”.
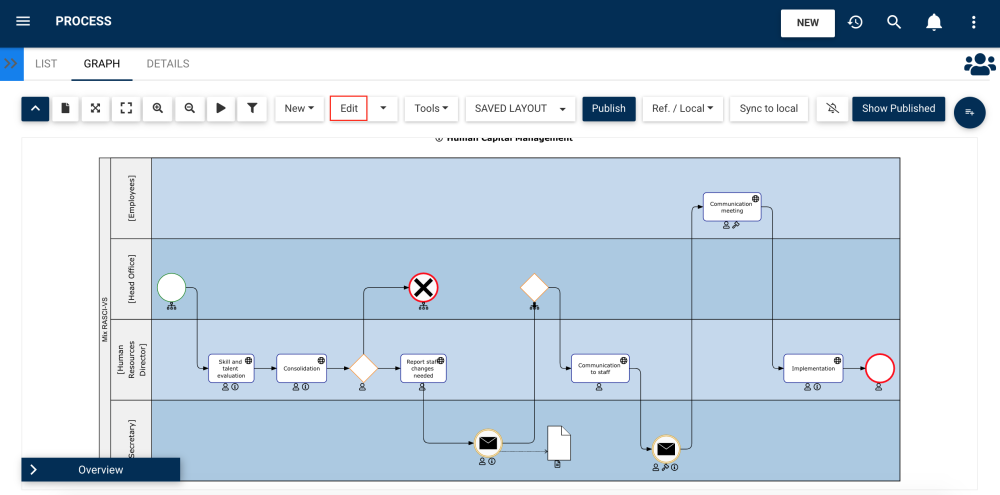
2. Select as many objects as wanted, right-click, and select “Sync with Local”.
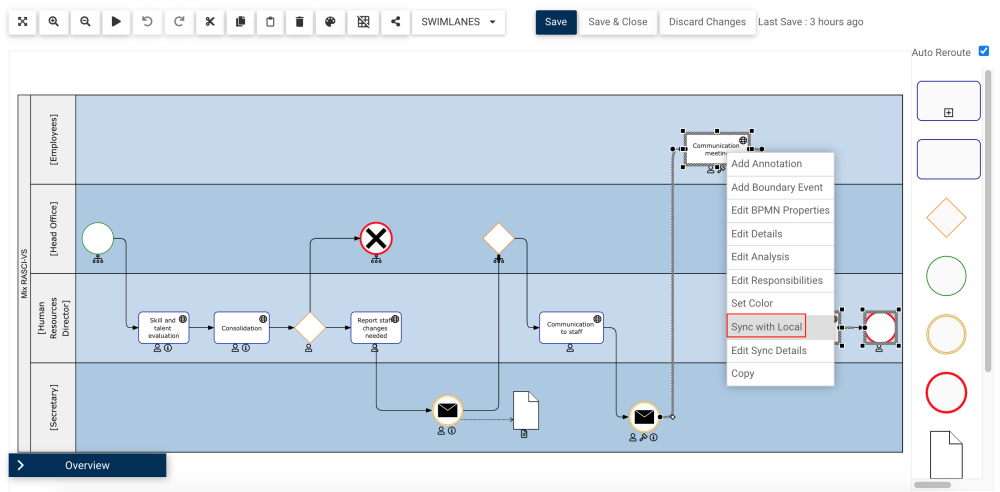
3. Here, users will be met with a pop-up window allowing them to do the same actions as in the previous steps (4 & 5). Click “Done” to save the changes.

Need more help with this?
Visit the Support Portal


