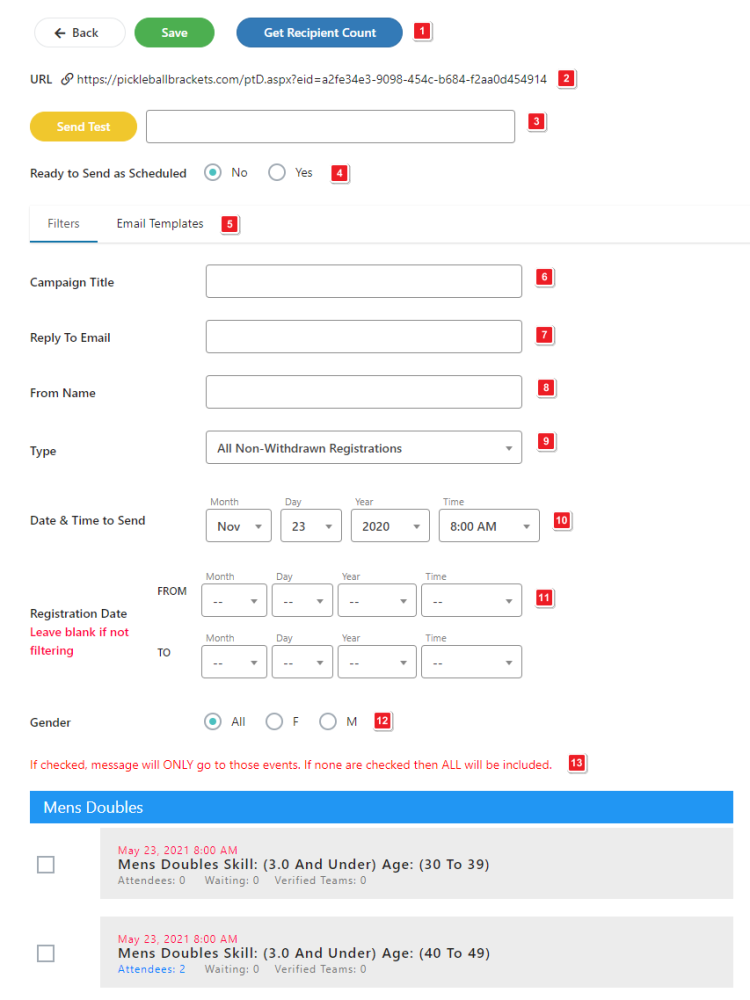
Message Filters
- Get Recipient Count – Click this button to see the number of players who will receive this message based on the current, active filter.
- URL -Click to copy the tournament URL. Paste this into your browser to view the tournament on PickleballBrackets.com. This allows you to view all tournament information even if it is not currently active.
- Send Test – Type an email address here and click the yellow button to send a test copy of the campaign message to anyone.
- Ready to Send as Schedule – Switch this to Yes when you are ready to send your campaign message.
- Filters/Email Templates – Use these buttons to select what to work on.
Filters – This is the filter page. Filters control who will receive the message.
Email Template – The format and message. Working with the email template will be covered in the next section of this manual.
- Campaign Title – Give this campaign a title that has meaning for you. For example, a message about available lodging might be titled “Hotel Partners.”
- Reply to Email – This is the email address that players may respond to.
- From Name – The responsible person sending the email or authorizing it to be sent.
- Type – There are a number of built in filters that can be selected here. Use the drop down menu to limit the Campaign to a selected group of players.
- Date and Time to Send – Messages scheduled to send less than an hour from the current time, will be queued immediately.
- Registration Date – Use a date range to limit the campaign to only those who registered before, after or between specific dates.
- Gender – Use this if you wish to send the message only to Men or Women. The default is to send to all players.
- Select Events – Check your event choices below if you wish to send your message only to players in specific events. If no events are check, the message will be sent to players in every event.


