


When a tournament is created, you will have to add at least one event. That event can then be copied and modified to create all of the other tournament events. As you change the first event on the list, pay special attention to factors that you will repeat for other events. These include such things a dates, bracket formats, waiting list options, time display format and costs. If you standardize these with the first event, you will have fewer edits to make on the later copies.
Select the Add An Event button to add your first event to the tournament. The following pages of this manual will describe how to configure all of the parameters for that event.
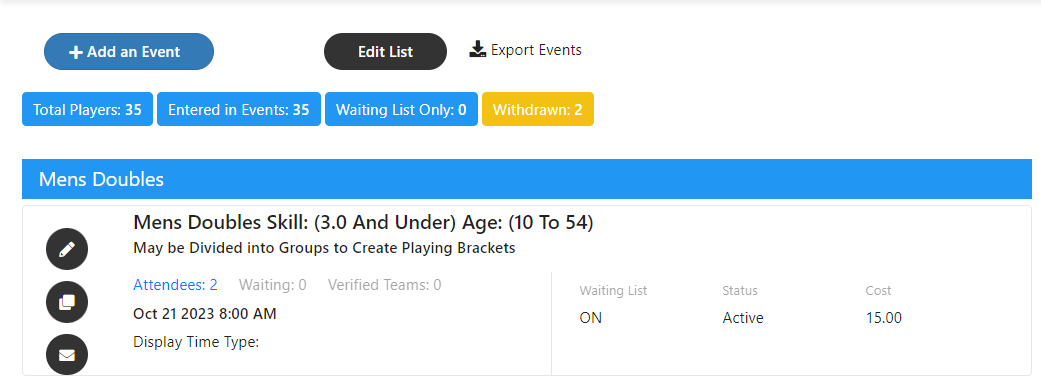
If events already exist for the tournament, you will see them listed here.
Some features can be edited from the Main event screen.
These include:
- The date and time of the event
- Waiting list status, On or Off
- Active or Inactive Status (can only be changed for events with no players,)
- A switch for deleting an event (can only be used for events with no players.)
- How to display the time on the main player and event screens.
- The maximum number of teams in an event. (For events with Age Splits, this is managed on the Age Splits screen.)
- The maximum number of teams permitted on the waiting list. (For events with Age Splits, this is managed on the Age Splits screen.)
- Whether or not to print the next score sheet automatically while the event is running. This should be turned off for round robin events where all of the score sheets are printed in advance.
- The price for this event, if there is one.
These changes can be made to as many events as needed from this screen. Once all changes are made, click on the Green save button that will appear on the upper left side of the screen to save all of your changes.
© 2025 Pickleball OpCo LLC, All Rights Reserved
Powered by
Powered by