Photo editing is available in both Preset Documentation and Cue List views. The functionality is very similar within both views, with some minor differences.

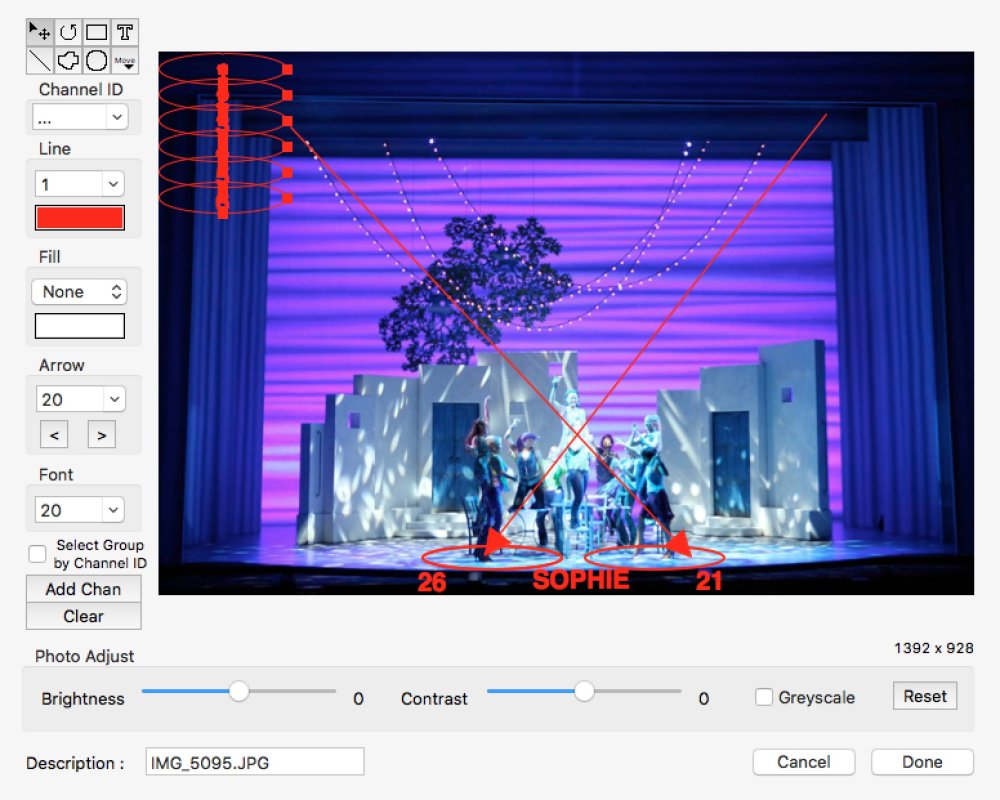
When a preset or cue photograph or image is displayed, clicking on the Edit button below the photograph will open the ‘Photo Edit window’.
Drawing Graphics
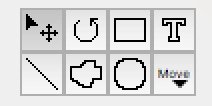
The tools down the left hand side of the ‘Photo Edit window’ provide basic drawing functions:

Rectangle, oval, line and freehand line drawing tools are provided, along with a text insertion tool. Once drawn, the shapes may be moved to different locations, and dragged and rotated in to different shapes as required.
Holding down the Shift key whilst drawing an oval or a rectangle will lock the aspect ratio so that a circle or square will be drawn.
Holding down the Shift key whilst selecting graphics will enable multiple graphics to be selected at once for easy editing.
With a drawn line selected, arrow heads may be added by clicking on the left or right arrow head buttons. The drop-down menu adjusts the arrow head size, and the buttons determine at which ends of the line the arrow head is drawn. Alternatively, with an arrow head button selected, the line drawing tool will automatically include an arrow head.

There are options to adjust the line weight and colour, along with ability to fill shapes with a solid colour. The text size can be changed.
Drawings on top of a photograph are stored in a separate layer and may always be removed by clicking Clear. The photograph itself is not affected.
Channel ID
The ‘Channel ID’ function allows a drawn shape or text to be linked with a particular channel within the selected preset or cue. Select the drawn shape and text to be linked and select the appropriate channel number from the drop-down list. The channels in the drop-down list are the channels used in the selected preset (Preset Documentation view), or channels above zero intensity in a cue (Cue List view).
Linking graphics objects and channels allows the objects to be highlighted when the particular channel is selected and is useful in highlighting the position of particular channels within the overall preset or cue photograph. (Preset Documentation view only. See Hide/Show Photo Annotations.
If the ‘Select Group by Channel ID’ check box is ticked, selecting one object will automatically select all objects with the same Channel ID. This can be useful when moving pools of light, and their respective channel number together.
Add Channels
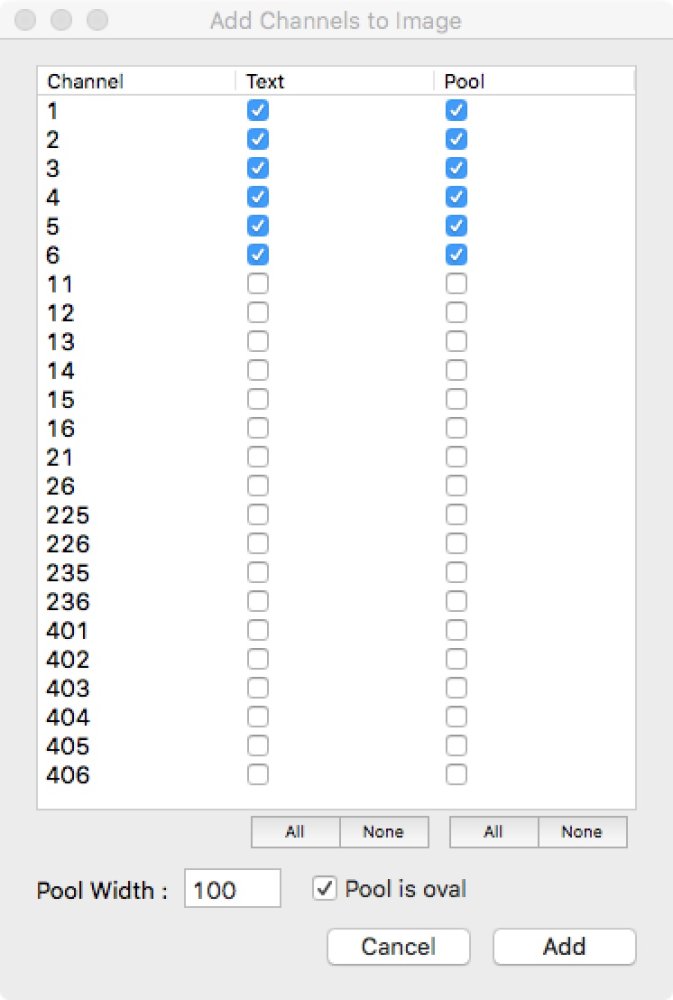
The Add Channel button provides a shortcut method of adding pools and channel numbers, along with automatic channel ID association, to a photograph. Clicking on the Add Chan button will bring up the following window:

From here it is possible to automatically add channel number text and a pool for every channel within the preset (Preset Documentation view) or every channel with intensity above zero in the cue (Cue List view). Alternatively, select just the channel numbers and text and pools you wish to include. By default, the drawn pool will be an oval. If a circle is required, un-check the ‘Pool is oval’ check box. Click Add to continue.
The selected channel text and pools will be drawn, ready to be dragged in to the correct positions.

Deleting Drawn Graphics
Graphics drawn on top of photographs are held on a separate layer to the photograph. The photograph itself is not changed.
Clicking Clear will delete all the graphics on an individual photograph. This action cannot be undone and confirmation is required before the operation proceeds.
Photo Adjust
Along the bottom of the ‘Photo Edit window’ are sliders to adjust the brightness and contrast of the photograph. There is the option to change the photograph to greyscale. All adjustments can be reset if required.
At the very bottom of the ‘Photo Edit window’ there is the option to add descriptive text for each photograph.
Viewing Photographs with Zoom
Images can be zoomed bigger by clicking on the Zoom button, or by pressing Z on the keyboard. A larger version of the photograph will open in a new window. If more than one photograph is available for the preset or cue, they may be stepped through using the left and right arrow buttons at the bottom of the window.
In Preset Documentation view, a reduced Channel List is shown to the right of the photograph. If Highlight or Hide Others is active on the toolbar, selecting a channel from the Channel List will highlight or hide the appropriate graphic.
In Cue List view, the Channel List is not displayed, and the highlight and hide functionality is not present.


