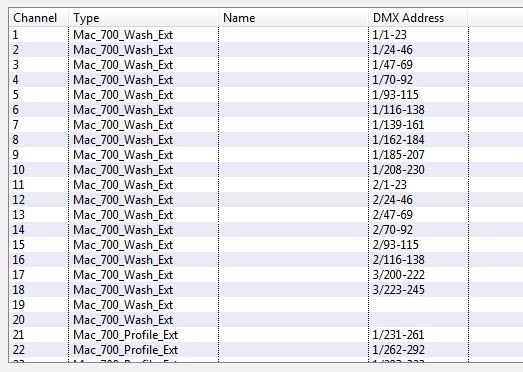
The ‘Patch Data view’ displays all imported patch information, ordered by channel/fixture number. Depending upon the console, different associated data may be also be shown.
The lower section of the screen is where Fixture Profiles for importing patch data in to Rig Data are defined. See ‘Console Fixture Profiles’ below.

It is not possible to display any patch data from Whole Hog 2 console data, as the Whole Hog 2 does not export patch information.
Console Fixture Profiles
Console Fixture Profiles control how imported console patch data is mapped in to Rig Data when the Update From Console Patch feature is used from the Rig Data toolbar.
Console Fixture Profiles are created from the ‘Patch Data view’ within the Console Data view.


Towards the bottom of the screen is displayed a list of existing profiles. Small + and – buttons allow the creation of new profiles, or the deletion of an existing profile, whilst existing profiles can be edited via the Edit button.
Creating a New Console Fixture Profile
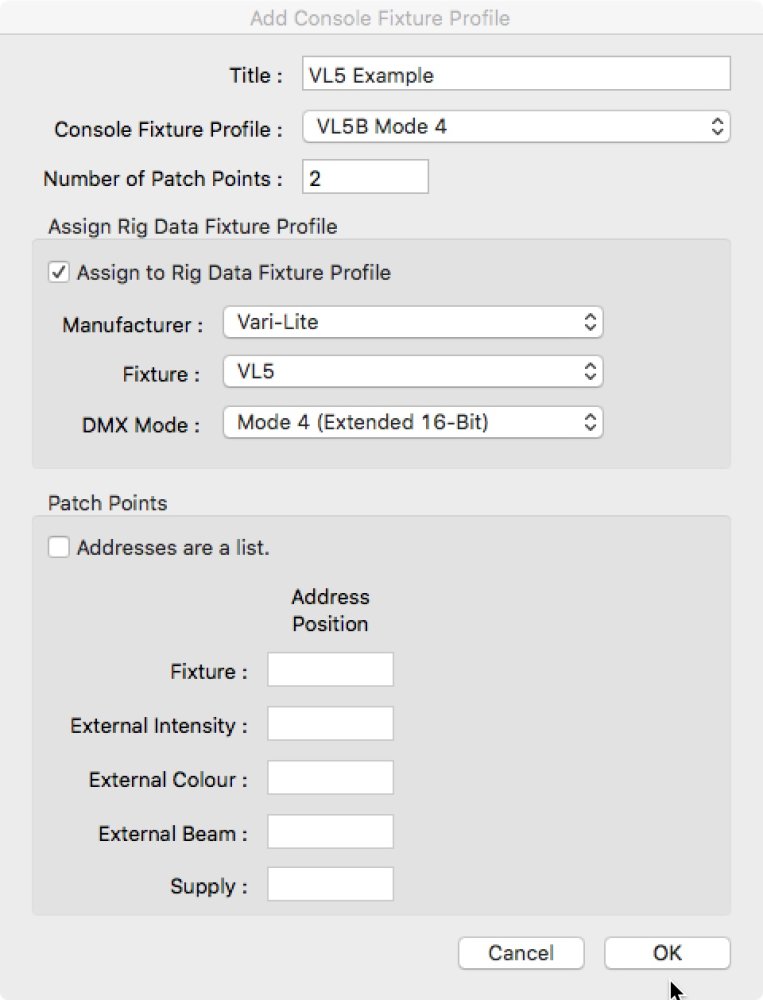
- Click on the + button to create a new Console Fixture Profile.

- Enter a descriptive name for the new profile.
- In the Console Fixture Profile drop-down list, select the fixture to create a profile for. The drop-down list is populated with fixtures derived from the imported console data.
- In the ‘Number of Patch Points’ field, enter the number of DMX parameters (patch points) for that fixture. This can be gathered from examining the console patch data to see how many DMX addresses are patched to that fixture’s channel number.
- In order to link the imported fixture type with the corresponding fixture in the Fixture Library, select the manufacturer, fixture and DMX mode for the fixture from the drop-down lists. Ensure the ‘Assign Rig Data to Fixture Profile’ checkbox is checked.
- Define the different patch points. The order and format in which the DMX addresses appear in the console patch data, will vary depending upon the console used and the fixture profile used for patching.
grandMA Console Data Patch Points

grandMA console patch data is presented as a list of DMX addresses, one after the other. In the example above, VL5s appear with two patch points each. It can be surmised that the first DMX address is the external intensity address, while the second address is the fixture address.
Check the box ‘Addresses are a list’ and enter a 1 in the Intensity field and a 2 in the Fixture field.
EOS Console Data Patch Points

EOS console patch data is presented as separate rows, one row for each DMX addresses.
Check ‘Addresses are a list’ and enter the order in which the patch points appear in the relevant address fields.
In the example above, the first row represents the fixture address, the second row the external dimmer, and the third row the colour address.


