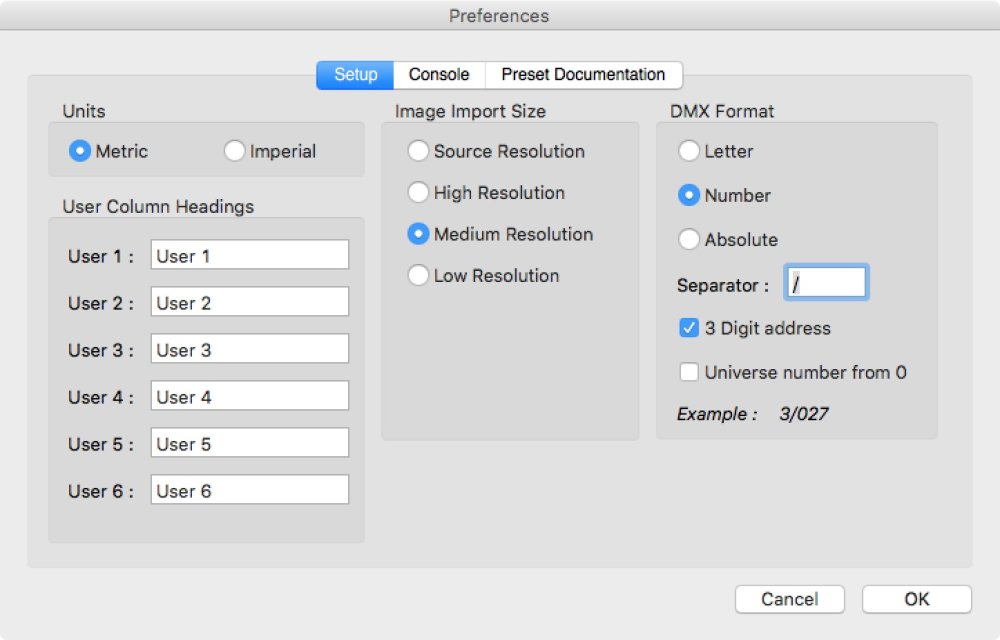
DMX Format
These options allow you to specify the display format for DMX addresses. An example of an address is displayed at the bottom in the format selected by the current options.
Letter
Letters ‘A’ to ‘Z’ ( also ‘a’ to ‘z’ ) can be used to specify the universe. Double letters can also be used allowing a maximum of 702 DMX universes to be specified, ‘A’ to ‘Z’ and ‘AA’ to ‘ZZ’.
Number
The DMX universe number is simply placed before the DMX address. It is best used with the separator character otherwise it will be a little confusing.
Absolute
This is the absolute DMX address, which is a combination of the DMX universe number, multiplied by 512 and added to the DMX address. For example:
DMX Universe = 2
DMX Address = 5
Absolute address = 517
Separator
This is a character (or several characters) used to separate the universe letter or number from the DMX address. Common separators are ‘.’ or ‘/’. This is an optional field. It is recommended that ‘,’ (comma) characters are not used, as this will cause issues with importing/exporting.
3 Digit Address
With this checkbox checked, the DMX address will be forced to three digits padding with ‘0’ characters as required. For example:
| A1 | Letter | No Separator | 2 Digit Address OFF |
| A001 | Letter | No Separator | 3 Digit Address ON |
| A.001 | Letter | ‘.’ Separator | 3 Digit Address ON |
| 5.1 | Number | ‘.’ Separator | 3 Digit Address OFF |
| 5.001 | Number | ‘.’ Separator | 3 Digit Address ON |
Universe number from 0
This option is used to indicate numeric universe identifiers are numbered from zero as opposed to one.
Units
To select how weights and measurements are displayed within the application. Metric will show ‘kg’ and ‘m’, where as Imperial will display ‘lbs’ and ‘ft’. Note that feet are decimal feet, not feet and inches.
User Column Headings
There are six columns in the main rig window that the user can customise. It is possible to set the column headings here for these user fields.
Image Import Size
When adding images to presets or cues, either by importing a file, using ‘Camera Capture’ or though the ‘Image Watch Folder’, the size of the image stored in the database is set here. As images are stored in the database and not a separate file, the bigger the image, the bigger the database will grow. The options are:
- Source Resolution – Images will be imported at the resolution they came in as.
- High Resolution – Images will be scaled to 75% of their original resolution.
- Medium Resolution – Images will be scaled to 50% of their original resolution.
- Low Resolution – Images will be scaled to 25% of their original resolution.


