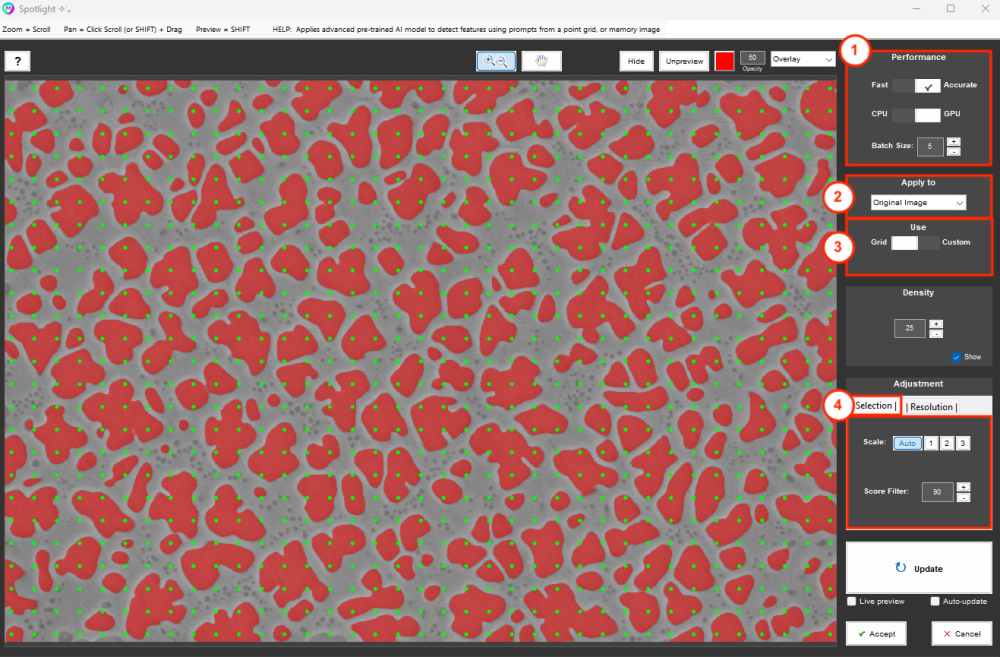
The Spotlight recipe step works like any other MIPAR recipe step. It’s applied on recipe load and interacts with the rest of the recipe like a detection step. Users have full access to the rest of the MIPAR toolkit which enables detection filtering, clean up and assigning Layers and measurements.
Spotlight works with “prompts”. They tell it where to look. Prompts can be fed through 2 different modes, Grid or Custom:
- Grid uses a regular point grid. This is simplest, but requires density is appropriate for the features of interest.
- Custom allows selections from earlier in the recipe to be fed as a Memory Image. This requires additional steps prior to Spotlight but allows for more targeted and efficient prompts.
Layout
1. Performance
- Fast = lightweight model
- Accurate = full size model
Fast will initialize faster, but typically offers lower edge detection precision. Accurate has longer initialization, but offers optimal precision. If you do happen to run Spotlight on the CPU, Fast is the only practical performance mode.
- CPU = run model on CPU
- GPU = run model on GPU
Batch Size controls the number of prompts processed in parallel. Higher batch size will generally increase performance, as long as your system has the RAM headroom. If processing on the GPU, batch sizes from 10-30 tend to be optimal. Batch sizes above 30 saturate the RAM of most GPUs and can actually result in decreased performance. However, if your GPU has 16GB+ RAM, you may be able to increase batch size further with improved performance.
2. Apply to
Choose to apply Spotlight to either the original opened image, or the current image in the recipe.
3. Prompt Mode
Choose to prompt Spotlight with either a regular point grid, or with features from a Memory Image.
4. Selection Adjustment
Scale controls the size-scale of the targeted features.
- 1 = fine resolution
- 2 = mid resolution
- 3 = coarse resolution
- Auto = decide resolution based on quality score
Scale has more significance when using single point prompts (as in Grid or Custom-Centers modes). Imagine pointing to a car window. “1” will select the window. “2” will select the door.”3” will select the entire car.
Score Filter removes selections with poor scores. Higher score (85-95) better for Grid, lower (0-25) better for Custom.
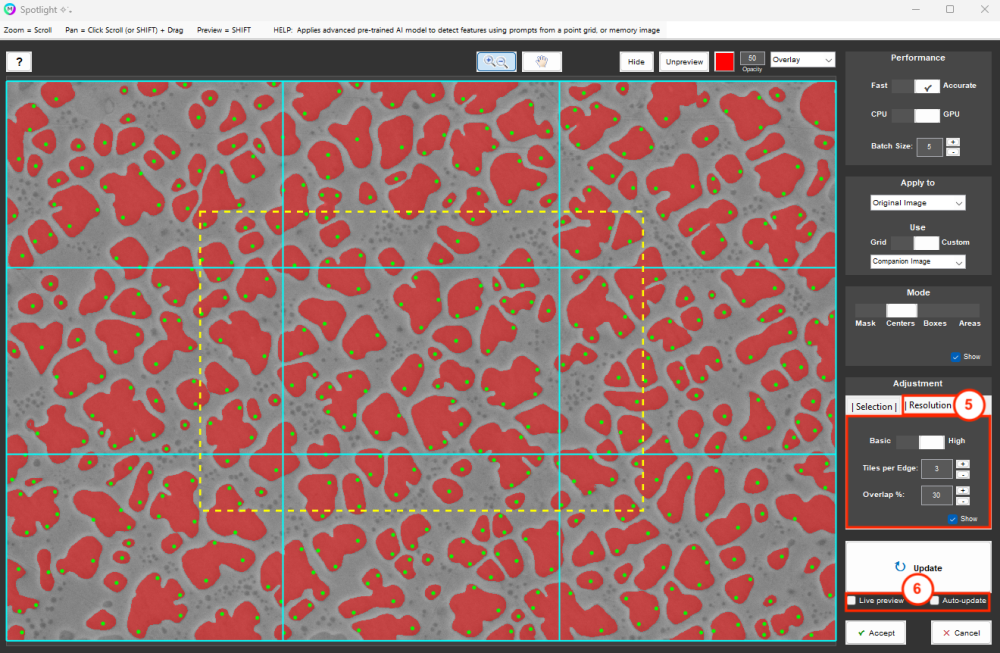
5. Resolution Adjustment
- Basic offers fastest performance.
- High increases edge precision and improves detection of fine features.
Tiles per Edge controls the number of tiles to split image into along each direction. More tiles generally equals higher Spotlight resolution.
Overlap % controls percent overlap between tiles in each direction. More overlap reduces the chance features are missed.
6. Processing Preferences
- Live preview allows you to watch Spotlight as it runs. Useful for understanding prompt impact and to optimize settings without waiting for entire run. Performance will be significantly reduced during live preview.
- Auto-update will automatically re-run Spotlight after every setting change
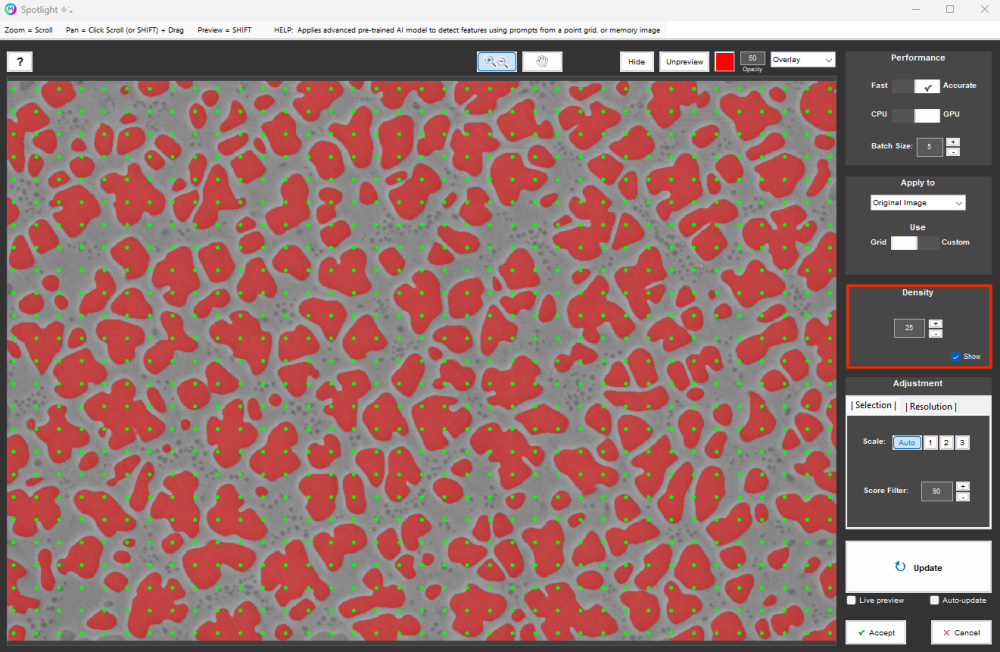
Grid Mode
Density is a setting specific to Grid mode. It controls the number of points per side of the grid.
Custom Mode
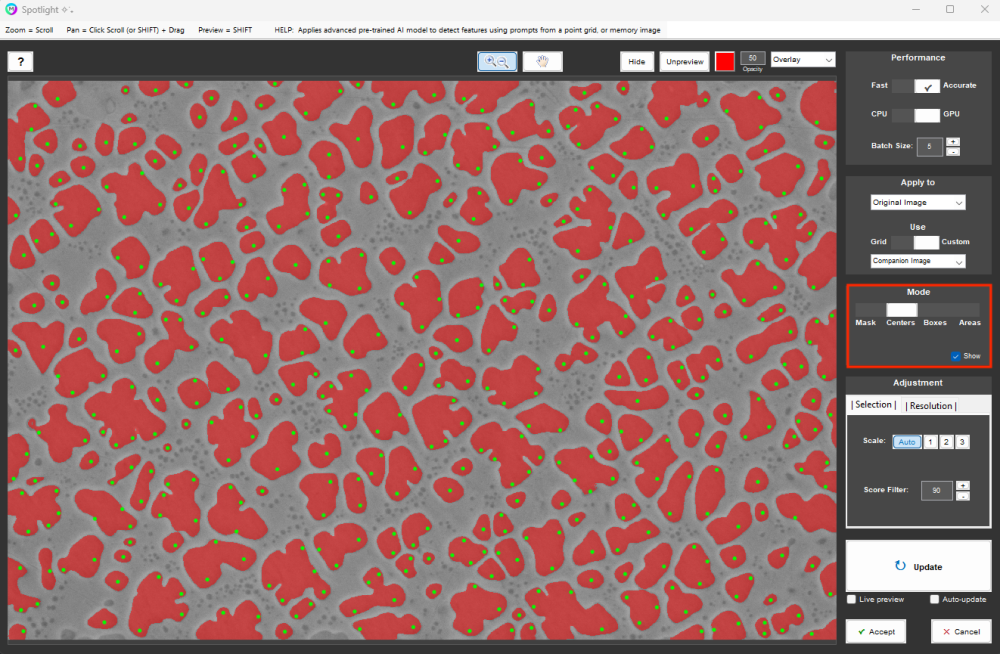
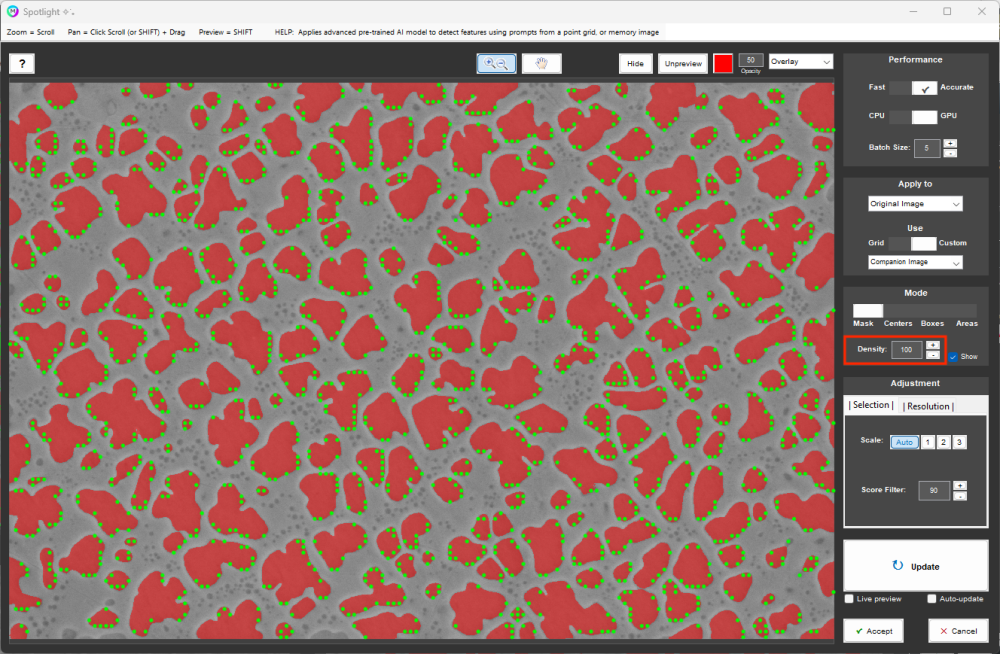
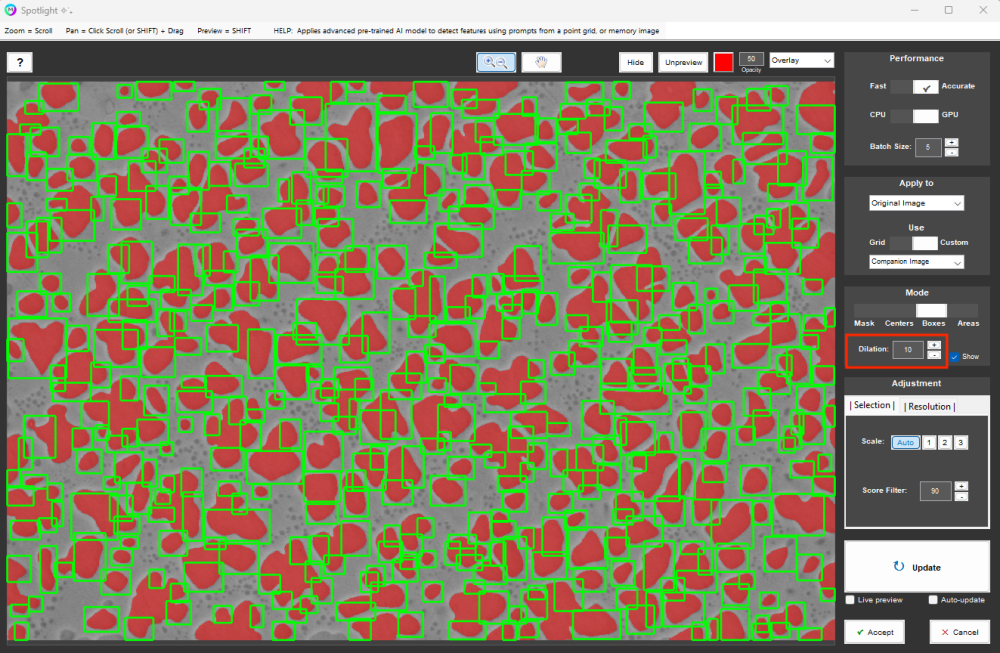
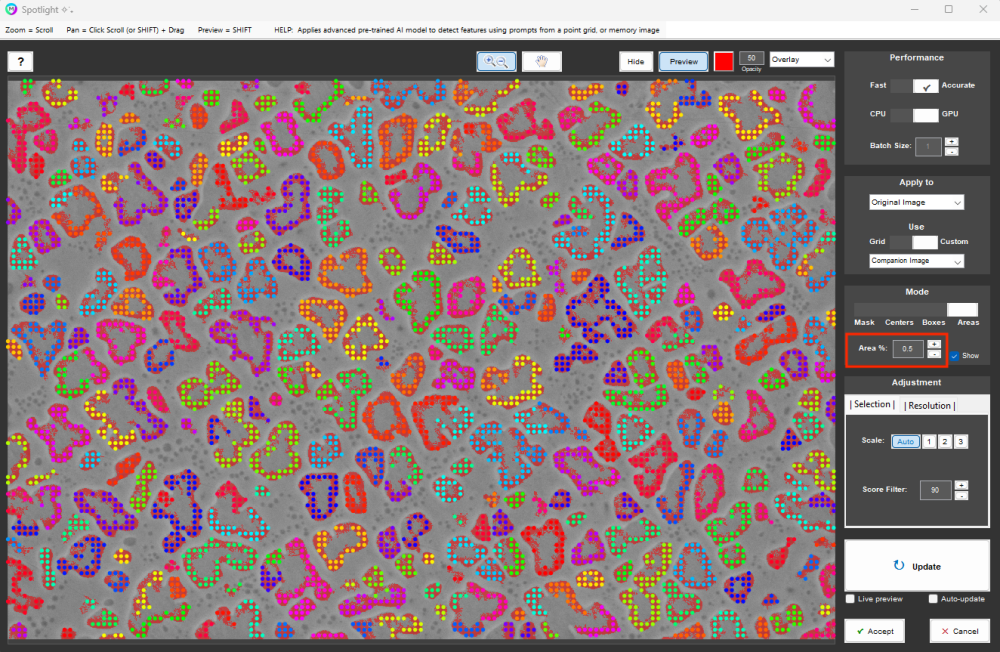
Custom prompt mode can be run in Mask, Centers, Boxes, or Areas mode.
- Mask uses grid points within features as prompts.
- Centers uses feature centroids as prompts.
- Boxes uses feature bounding boxes as prompts.
- Areas uses multiple points per feature. Sampling % an adjustable setting.
Mask
In Mask, Density is an adjustable setting and controls the number of points per side of the grid before masking it with the features in selected Memory Image.
Boxes
In Boxes, Dilation is an adjustable setting and grows seed bounding boxes prior to prompting.
Areas
In Areas, Sampling % is an adjustable setting and controls number points used per feature in selected Memory Image.
Quick Start Videos
Grid Mode Introduction
An introduction to the grid mode in Spotlight. Highlights how contiguous features like grains can be segmented using Spotlight along with an example workflow.
Custom Mode Introduction
An introduction to the custom seed Spotlight mode. Highlights how clusters of features can be separated using Spotlight along with an example workflow.
Need more help with this?
Chat with an expert now ››


