
Starting the application
1. Open the MIPAR Checkpoint Client application
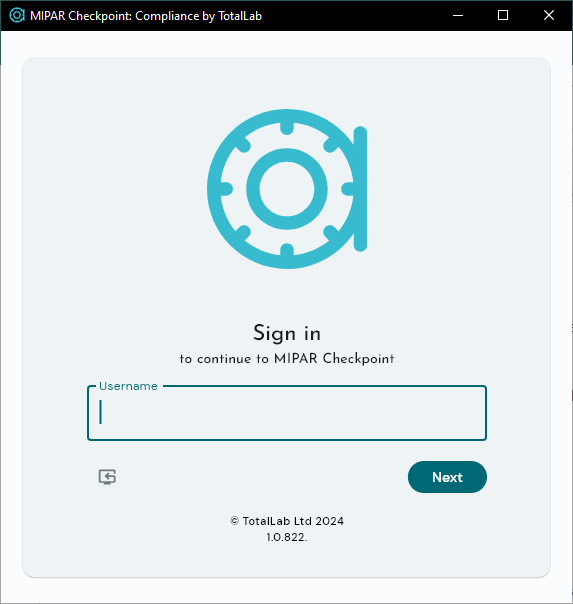
2. If necessary, connect to the Server
3. Enter User Login Information
Opening project

(If your project doesn’t exist yet)
1. Click the Projects dropdown in the upper-left corner
2a. (If your workflow specifies adding the recipe and image files through MIPAR) Click the New Empty Project button
2b. (If your workflow specifies adding the recipe and image files on project creation) Click New Project and add the recipe and image files.
3. Choose a new project name and click “Create Project”
4. Select the project from the project list and click the Check Out button
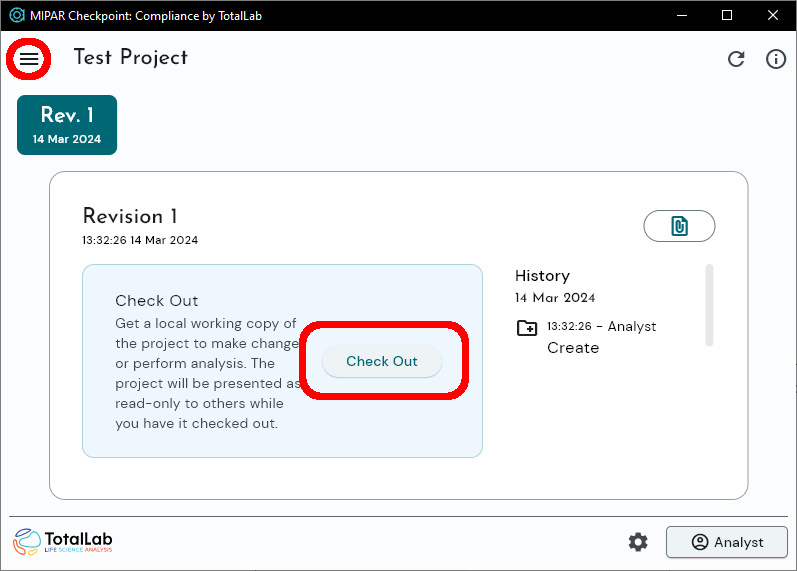
5. Click the MIPAR button
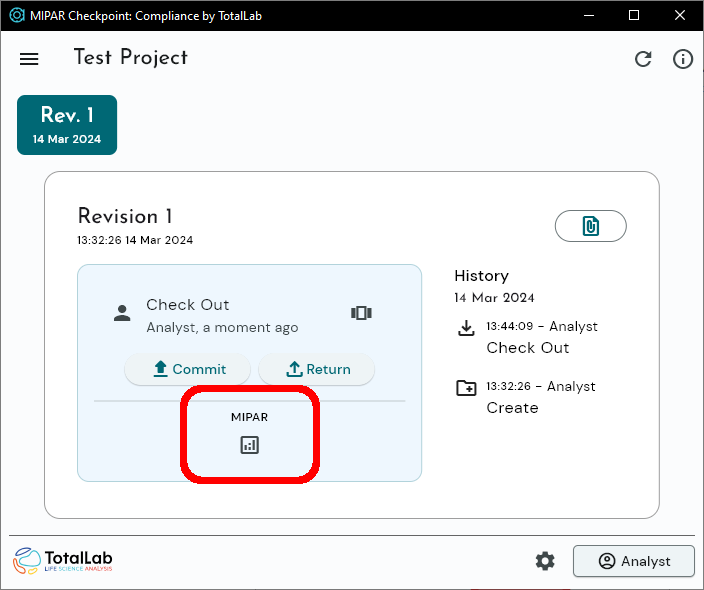
6. MIPAR’s Batch Processor should open
Processing images
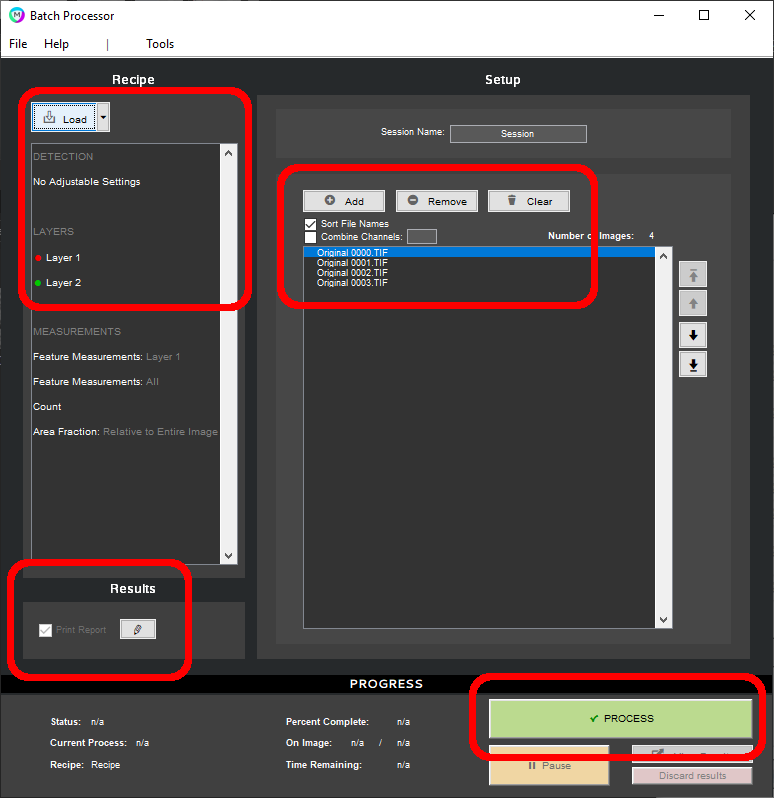
- (First time only, when performing the recipe’s Operator Qualification process) Open the File menu, select the Preferences item, enter any settings specified for the recipe, and click the Accept button.
- (If necessary) Add the recipe and/or images to MIPAR
- In the Results panel, click the settings (pencil) button
- Enter the prescribed Report Information, and click “Ok”
- Click the Process button
- (If desired) Click the View Results button
Finishing the analysis session
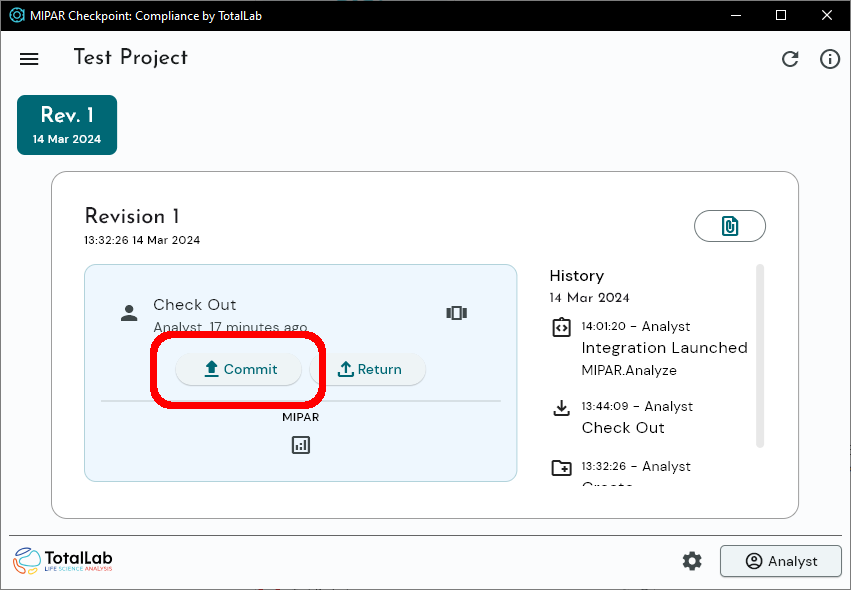
- Close all MIPAR windows to return to MIPAR Checkpoint Client
- Click the Commit button
Need more help with this?
Chat with an expert now ››