
Required materials
- MIPAR Base + Report Generator
- Images to analyze
Building the recipe
1. Using the standard images and the MIPAR Image Processor, develop a recipe to perform the desired analysis
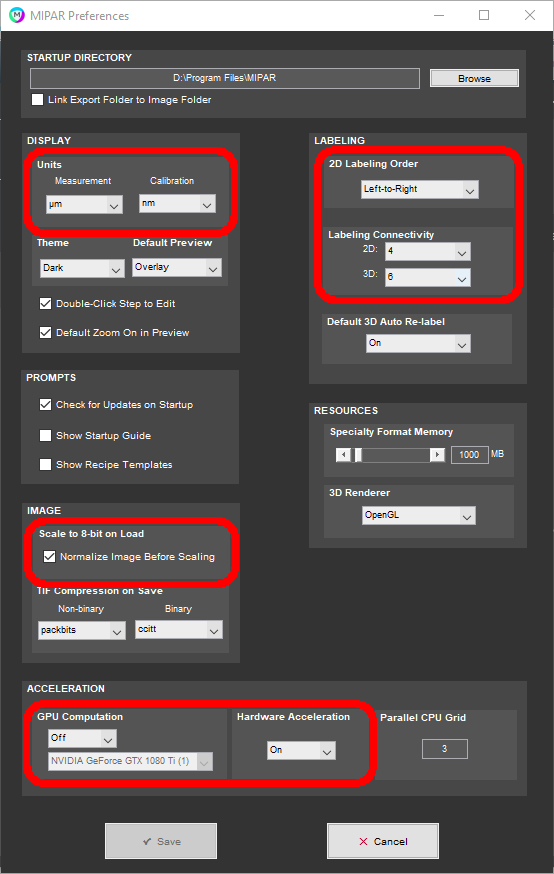
2. Record any Preferences that may impact analysis: Measurement and calibration units, Image -> Scale to 8-bit on Load (if the input images are not 8-bit), Labeling -> 2D Labeling Order, Labeling -> Labeling Connectivity, GPU Computation, and Hardware Acceleration
3. Open the MIPAR Batch Processor
4. Load the developed recipe and images the recipe was built on
5. In the Results panel, choose Print Report
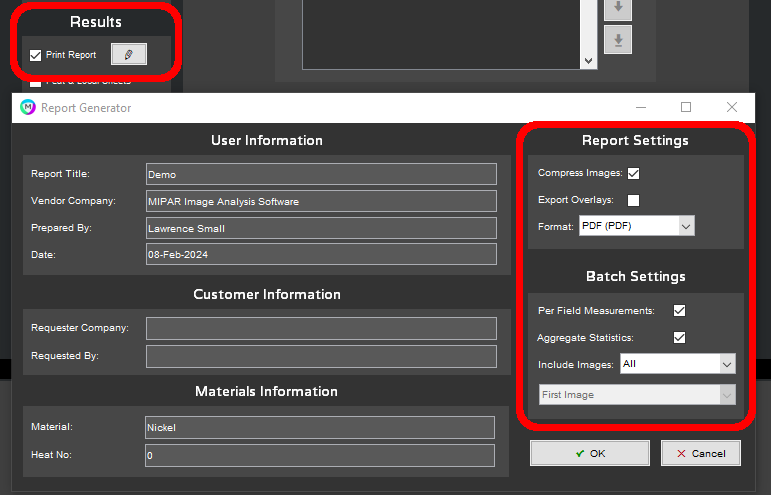
6. Open the report settings window (using the pencil icon next to Print Report)
7. Set the Report Settings -> Format to “PDF”, select Batch Settings -> Per Field Measurements and Batch Settings -> Aggregate Statistics, set Batch Settings -> Include Images to “All”
8. Make note of any operator requirements for User, Customer, and Materials Information
9. Select “OK” to close the Report Generator settings
10. Select Process to generate the expected measurement output
11. In the resulting Session folder, find the “report.pdf” file and “measurements” folder with output *.csv files for use during Operator Qualification.
Deliverables
- Recipe
- Prescription for Report Generator User/Customer/Materials Information
- Preferences (for Operator Qualification)
- .csv and .pdf output files from the Batch Processor (for Operator Qualification)
Need more help with this?
Chat with an expert now ››